Are you tired of getting blurry or pixelated photos from your digital camera? Rastering is a common issue that can greatly affect the quality of your images. It occurs when the camera’s sensor is overwhelmed with light, causing it to capture more information than it can handle. The result is a loss of detail and sharpness in the final image.
But don’t worry, there are several steps you can take to avoid rastering and capture clear, high-quality photos. First and foremost, make sure you’re shooting in the right lighting conditions. Avoid shooting in bright sunlight or under harsh artificial lighting, as this can increase the chances of rastering. Instead, opt for soft, diffused lighting or shoot during the golden hour for optimal results.
Another important factor to consider is the camera’s exposure settings. Overexposing the image can result in blown-out highlights and loss of detail. Similarly, underexposing the image can lead to dark and noisy photos. Experiment with different exposure settings to find the right balance and avoid rastering.
Tips for Avoiding Rastering with Your Digital Camera
When using a digital camera, it is important to take steps to avoid rastering, which can result in poor image quality. Here are some tips to help you get the best possible photos with your camera:
1. Use a High-Quality Lens
The lens is a critical component of any camera, and using a high-quality lens can significantly reduce the chances of rastering. Invest in a lens that is designed for your specific camera model and offers good optical performance.

2. Take Advantage of Natural Light
Using natural light, such as sunlight, can help reduce the chances of rastering. Avoid relying too heavily on artificial lighting, as it can often cause unwanted reflections and artifacts in your photos.
3. Avoid High ISO Settings
High ISO settings can increase the sensitivity of your camera’s sensor and lead to more noise in your photos. To minimize rastering, use the lowest ISO setting possible for the lighting conditions you are shooting in.
4. Shoot in RAW Format
Shooting in RAW format allows you to capture more image data and gives you greater control over post-processing. RAW files contain more information, which can help reduce the chances of rastering in your final images.
5. Keep Your Camera Steady
Camera shake can lead to blurry images and potentially increase the chances of rastering. Use a tripod or stabilize your camera against a solid surface to ensure sharp, high-quality photos.
6. Clean Your Camera’s Sensor
Dust and debris on your camera’s sensor can cause unwanted artifacts and affect image quality. Regularly clean your camera’s sensor using appropriate cleaning tools to maintain optimal performance.

7. Check Your Camera Settings
Ensure that your camera settings, such as white balance and image stabilization, are properly configured for the shooting conditions. Adjusting these settings correctly can help reduce the chances of rastering and improve overall image quality.
By following these tips, you can significantly reduce the chances of rastering and capture high-quality photos with your digital camera.
Understanding Rastering and Its Effects on Digital Camera Images
What is Rastering?
Rastering is a term used to describe the process by which a digital image is converted into a grid of individual pixels. In other words, it is the method used to create a digital representation of an image by breaking it down into small, discrete units.
How Does Rastering Affect Digital Camera Images?

Rastering can have a significant impact on the quality and clarity of digital camera images. When an image is rastered, the level of detail that can be captured is limited by the resolution of the camera. Higher resolution cameras can capture more detail, while lower resolution cameras may result in images that appear blurry or pixelated.
Common Issues Caused by Rastering
One common issue that can occur as a result of rastering is called “noise”. This refers to the random variation in brightness or color that can appear in digital camera images. Noise can be caused by various factors, including low light conditions, high ISO settings, or limitations in the camera’s sensor.
How to Minimize the Effects of Rastering
There are several steps you can take to minimize the effects of rastering on your digital camera images:

1. Use a Higher Resolution Camera
Opting for a camera with a higher resolution can help ensure that more detail is captured in your images, resulting in clearer and sharper photos.
2. Control Lighting Conditions
Good lighting is essential for capturing high-quality images. Properly lighting your subjects can help reduce the appearance of noise and improve overall image quality.
Conclusion
Understanding the process of rastering and its effects on digital camera images is important for any photographer. By choosing a higher resolution camera and controlling lighting conditions, you can minimize the negative impact of rastering and capture stunning, detailed images.
Choosing the Right Camera Settings
When it comes to avoiding rastering in digital cameras, selecting the appropriate camera settings can make a significant difference. Here are some tips on how to choose the right camera settings to capture high-quality images:

1. Image Quality
One of the first settings to consider is the image quality setting. Most digital cameras offer different options, such as JPEG and RAW. Shooting in RAW format will allow you to capture more details and give you greater flexibility during post-processing. However, keep in mind that RAW files consume more storage space compared to JPEG.
2. ISO Sensitivity
ISO sensitivity determines the camera’s ability to capture more light in low-light conditions. However, higher ISO levels can introduce noise or graininess to the image. It is essential to select the lowest ISO setting possible to achieve a clean and noise-free image. Only increase the ISO when necessary, such as when shooting in low-light environments.
3. White Balance
White balance allows you to adjust the color temperature of your images to match the lighting conditions accurately. Using the correct white balance setting will help you avoid unnatural color casts in your photos. You can either set the white balance manually or use the camera’s auto white balance function.
4. Shutter Speed and Aperture
The combination of shutter speed and aperture determines the exposure of your image. A fast shutter speed is ideal for freezing action, while a slow shutter speed can create motion blur. The aperture setting controls the depth of field in your photos. Consider the effect you want to achieve and adjust these settings accordingly.
5. Focus Mode
Choosing the right focus mode is crucial to ensure your subject is sharp and in focus. Most cameras offer options like single focus, continuous focus, or manual focus. The single focus mode is suitable for still subjects, while continuous focus works well for moving subjects. Experiment with different focus modes to find the one that best suits your needs.

By considering these camera settings and making the right choices, you can significantly improve your chances of avoiding rastering in your digital camera and capturing high-quality images.
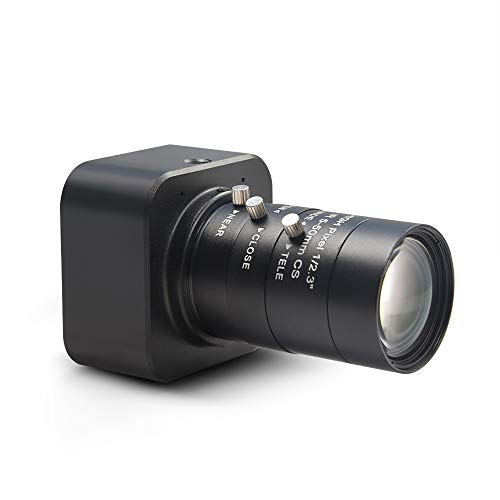
Using a High-Quality Lens
One essential step to avoid rastering in digital camera images is to use a high-quality lens. The lens you use plays a crucial role in the overall image quality and can greatly affect the sharpness, clarity, and detail of your photos.
When choosing a lens for your digital camera, it’s important to consider factors such as the lens’s optical design, aperture range, and image stabilization capabilities. Investing in a high-quality lens will help minimize lens aberrations like chromatic and spherical aberration, which can contribute to rastering.
Additionally, a high-quality lens will have advanced coatings that reduce lens flare and ghosting, which are common issues that can lead to a degraded image quality and potential rastering. These coatings help prevent unwanted reflections and optimize light transmission for better image contrast and sharpness.
Benefits of using a high-quality lens:
- Sharper and clearer images: A high-quality lens will have better resolution capabilities, resulting in sharper and clearer images with more fine details.
- Reduced lens aberrations: High-quality lenses are designed to minimize lens aberrations, such as distortion and chromatic aberration, which can contribute to rastering in digital images.
- Enhanced color accuracy: A good lens can provide accurate color reproduction, ensuring that the colors in your photos are true to life.
- Improved low-light performance: Some high-quality lenses have larger maximum apertures, allowing more light to reach the camera sensor and resulting in better performance in low-light conditions.
It’s important to choose a lens that is compatible with your camera model and offers the focal length and features you need for your photography style. Research different lens options, read reviews, and consider seeking advice from experienced photographers or camera enthusiasts to make an informed decision.
| Key Factors | Effects on Rastering |
|---|---|
| Optical Design | A high-quality lens with advanced optical design reduces lens aberrations, contributing to better image quality and avoiding rastering. |
| Aperture Range | A wider aperture range allows for more control over depth of field and better low-light performance, reducing the risk of rastering in certain lighting conditions. |
| Image Stabilization | Image stabilization technology reduces camera shake, resulting in sharper images and reducing the chance of rastering caused by motion blur. |
| Coatings | Advanced lens coatings minimize lens flare and ghosting, ensuring better image contrast and reducing the risk of rastering. |
Properly Clean Your Camera Sensor
One of the key components of a digital camera is its sensor, which is responsible for capturing light and creating the image. Over time, dust and debris can accumulate on the sensor, resulting in spots and blemishes on your photos. Properly cleaning your camera sensor is crucial to maintaining the overall image quality.
1. Understand the Risks
Cleaning the camera sensor can be intimidating for many photographers, but with the right precautions, it can be a straightforward process. It’s important to note that improper cleaning techniques can permanently damage the sensor, so it’s essential to proceed with caution.
Before cleaning your camera sensor, familiarize yourself with your camera’s specific instructions and consult the manufacturer’s guidelines. Additionally, consider contacting a professional if you’re unsure or uncomfortable performing the cleaning process yourself.
2. Gather the Right Tools
To clean your camera sensor effectively, you’ll need a few essential tools:
- A blower: Use a blower brush to gently remove loose dust and debris from the sensor’s surface.
- A sensor cleaning solution: Choose a cleaning solution specifically designed for camera sensors.
- A sensor cleaning swab: Use a sensor cleaning swab to apply the cleaning solution to the sensor and remove any remaining spots.
- A sensor loupe: A sensor loupe can help you inspect the sensor for remaining dirt or blemishes.
Ensure that these tools are clean and free from any dust or contaminants that could transfer onto the sensor.
Remember, the sensor is a delicate piece of equipment, so always handle it with care and avoid touching its surface directly with any tools or materials.
It’s also important to work in a clean, dust-free environment to minimize the risk of additional debris entering the camera during the cleaning process.
By following these precautions and using the right tools, you can clean your camera sensor safely and effectively, ensuring optimal image quality and preventing any potential damage.
Reduce Camera Movement and Shake
One of the key factors that can cause blurriness in digital camera photos is camera movement and shake. However, there are a few techniques you can use to reduce camera movement and ensure sharper images:
Use a Tripod or Monopod
Using a tripod or monopod is one of the most effective ways to eliminate camera movement. This provides a stable base for your camera and minimizes the chances of blur caused by shaky hands. Make sure to choose a tripod or monopod that suits your camera’s weight and size.
Hold the Camera Properly
How you hold the camera can also affect the amount of shake in your photos. To reduce camera movement, hold it with both hands and bring your elbows close to your body. This helps create a stable stance and minimizes hand movements.
Breathe and Relax
When taking a photo, your body tension can result in unintentional camera shake. Take a deep breath, relax your body, and gently press the shutter release button. Keeping your body relaxed can significantly reduce camera movement and result in sharper images.
Increase the Shutter Speed
Using a faster shutter speed can help freeze motion and prevent blurriness caused by camera shake. Experiment with different shutter speeds to find the optimal setting for your specific shooting conditions.
By employing these techniques, you can minimize camera movement and shake, resulting in sharper and clearer digital camera photos.
Optimize Lighting Conditions
When capturing images with a digital camera, one of the most important factors to consider is the lighting conditions. Poor lighting can lead to blurred or noisy images, so it is essential to optimize the lighting conditions for the best possible results. Here are some tips to help you avoid rastering and enhance the lighting:
- Use natural light: Whenever possible, try to photograph in natural light. Natural light is softer and more even, resulting in better image quality. If shooting indoors, position your subject near a window or use diffused light.
- Avoid harsh shadows: Harsh shadows can create unwanted distractions in your photos. To avoid this, use reflectors or fill lights to soften the shadows and create a more balanced lighting situation.
- Consider the time of day: The quality of natural light varies throughout the day. Early morning and late afternoon are known as the golden hours, when the light is warm and flattering. Midday sun can be harsh, creating strong contrasts and shadows.
- Use a tripod: In low light situations, using a tripod can help you avoid camera shake. It allows you to use slower shutter speeds without blurring the image, resulting in sharper photos.
- Adjust exposure: Most digital cameras allow you to manually adjust the exposure settings. If you find that your images are overexposed or underexposed, experiment with the exposure compensation to achieve the desired results.
- Use a white balance setting: Different lighting conditions can create color casts in your photos. To ensure accurate color reproduction, make use of the white balance settings on your camera. You can choose from preset options like daylight, cloudy, or tungsten, or manually adjust the white balance.
By optimizing the lighting conditions when capturing images with your digital camera, you can minimize the risk of rastering and produce high-quality, visually appealing photographs.
Post-Processing Techniques to Reduce Rastering
When dealing with a digital camera, rastering can often be a frustrating issue that can lead to loss of detail and image quality. However, by applying post-processing techniques, you can significantly reduce or even eliminate rastering in your photographs. Here are some effective methods to achieve this:
| Technique | Description |
|---|---|
| Sharpening | Applying selective sharpening to your images can help enhance fine details and reduce the appearance of rastering artifacts. Use a high-pass filter or a dedicated sharpening tool in your image editing software to selectively sharpen areas that exhibit rastering. |
| Noise Reduction | Noise reduction techniques can be used to reduce the visibility of rastering, especially when it is caused by high ISO settings or low-light conditions. Experiment with different noise reduction algorithms or plugins available in your editing software to find the best settings for your specific images. |
| Resampling | Rastering can sometimes be exacerbated when resizing or resampling images. To minimize this effect, use bicubic or Lanczos resampling algorithms instead of bilinear or nearest neighbor methods. These algorithms provide better interpolation and reduce the appearance of rastering during resizing. |
| Deconvolution | Deconvolution algorithms can help reverse the blurring effect caused by rastering, enhancing the overall sharpness and clarity of your images. Use a deconvolution tool or plugin in your editing software to apply this technique selectively to affected areas. |
| RAW Conversion | If you shoot in RAW format, convert your images using a high-quality RAW converter that provides advanced demosaicing algorithms. These algorithms can help reduce the appearance of rastering by accurately reconstructing the full resolution image. |
Remember, while these techniques can help reduce rastering, it is important to capture your images with proper exposure and focus to minimize the occurrence of rastering in the first place. Practice good shooting techniques and experiment with different post-processing settings to achieve the best results.
Question-answer:
What is rastering in digital cameras?
Rastering in digital cameras refers to a digital noise pattern that can occur in photographs. It is caused by interference or noise in the camera’s image sensor, resulting in a grid-like pattern in the image.
Why does rastering happen in digital cameras?
Rastering can happen in digital cameras due to various reasons such as high ISO settings, long exposure times, high temperature, or a faulty image sensor. It can also occur when shooting in low light conditions.