
When it comes to capturing the perfect shot on your Canon EOS Digital Film Camera, lighting plays a crucial role. The right lighting can enhance the mood, highlight the subject, and create stunning visual effects. Fortunately, adjusting the lighting on your Canon EOS Digital Film Camera is not as complicated as it may seem. In this guide, we will walk you through the steps to help you master the art of lighting adjustment.
Step 1: Understand Your Camera
Before you start adjusting the lighting, it is important to have a good understanding of your Canon EOS Digital Film Camera. Take some time to read the camera manual and familiarize yourself with the different settings and features that your camera offers. This will make it easier for you to navigate through the menu and adjust the lighting settings.
Pro Tip: Experiment with different lighting conditions and settings to get a feel for how your camera responds to different situations.
Step 2: Use the Exposure Compensation

One of the most effective ways to adjust the lighting on your Canon EOS Digital Film Camera is by using the Exposure Compensation feature. This feature allows you to manually override the camera’s automatic exposure settings and adjust the brightness of your photos. To access the Exposure Compensation feature, press the dedicated button on your camera or navigate through the menu.
Pro Tip: Increase the exposure value (+) to brighten the image in low-light situations, or decrease the exposure value (-) to darken the image in bright environments.
Step 3: Master the White Balance
The white balance setting on your Canon EOS Digital Film Camera determines the overall color temperature of your photos. It is crucial for capturing accurate and vibrant colors under different lighting conditions. To adjust the white balance, navigate to the White Balance menu and choose from the preset options like Daylight, Cloudy, Tungsten, or Custom.
Pro Tip: Experiment with different white balance settings to achieve the desired mood and color temperature in your photos.

By following these simple steps, you can easily adjust the lighting on your Canon EOS Digital Film Camera to capture stunning photos in any lighting condition. Remember, practice makes perfect, so keep experimenting and honing your photography skills to achieve the best results.
Adjusting Lighting on Canon EOS Digital Film Camera
If you are using a Canon EOS digital film camera, adjusting the lighting can greatly improve the quality of your photos. Here are some tips for adjusting the lighting on your camera:
| 1. Use the exposure compensation feature | Exposure compensation allows you to manually adjust the exposure setting of your camera to make your photos brighter or darker. This can be useful when you’re shooting in challenging lighting conditions, such as when there is a strong backlight or when the subject is in shadow. |
| 2. Experiment with different white balance settings | White balance is a setting that helps your camera accurately reproduce colors in different lighting conditions. The default setting is auto white balance, but you can also manually select a specific white balance setting based on the lighting conditions you’re shooting in. For example, you can choose tungsten for indoor lighting or shade for shooting in shaded areas. |
| 3. Use the built-in flash or an external flash | If you’re shooting in low light conditions, using a flash can help illuminate your subject. The Canon EOS digital film camera has a built-in flash that you can pop up when needed. Additionally, you can attach an external flash to the hot shoe mount on top of the camera for even more control over your lighting. |
| 4. Try using the camera’s exposure lock feature | Exposure lock allows you to lock in the exposure settings for a specific scene or subject. This can be useful when you want to maintain consistent exposure for multiple shots in the same lighting conditions. To use this feature, simply focus on your subject, press the exposure lock button, and then recompose your shot. |
| 5. Consider using a reflector or diffuser | An external reflector or diffuser can help control the lighting and reduce harsh shadows on your subject. A reflector can bounce light onto your subject, while a diffuser can soften harsh light. These accessories can be particularly useful when shooting outdoors or in bright sunlight. |
Remember, practice makes perfect when it comes to adjusting lighting on your Canon EOS digital film camera. Experiment with different settings and techniques to find the perfect lighting for your photos!
Understanding the Importance of Lighting Adjustments
When it comes to capturing stunning photographs or filming crisp videos with your Canon EOS digital film camera, understanding the importance of lighting adjustments is essential. Lighting plays a crucial role in determining the overall quality, mood, and atmosphere of your shots.
Proper lighting can make even an average composition appear remarkable, while poor lighting can undermine the most carefully crafted setup. It can create shadows, wash out details, and distort colors, resulting in lackluster images or videos.

By making lighting adjustments, you can enhance the visual impact of your shots, improve clarity, and bring out the true colors and textures of your subjects. Whether you are shooting indoors or outdoors, natural or artificial lighting, it’s vital to be able to control and manipulate the lighting in order to achieve the desired effect.
There are several key factors to consider when adjusting the lighting on your Canon EOS digital film camera. First, determine the light source or sources in your environment. Is it natural light coming through a window, or are you using artificial lighting such as lamps or studio lights?
Next, consider the direction of the light. Front lighting, where the light source is directly in front of your subject, can often result in flat and uninspiring images. Experimenting with side lighting or backlighting can create more depth, dimension, and drama in your shots.
Furthermore, understanding how to modify the intensity of the light is crucial. Sometimes you may need to increase the brightness or decrease it depending on the effect you want to achieve. This can be done by adjusting the aperture, ISO, or shutter speed on your camera.
Additionally, the color temperature of the light can significantly impact the atmosphere of your photos or videos. Different light sources emit different color temperatures, ranging from warm (yellowish) to cool (bluish). By adjusting the white balance settings on your camera, you can ensure that the colors in your shots appear accurate and natural.

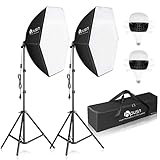
Finally, don’t forget about using additional lighting equipment, such as reflectors, diffusers, or external flashes, to further enhance the lighting in your shots. These tools can help you control the direction and intensity of light even more precisely, resulting in professional-quality images and videos.
In conclusion, understanding the importance of lighting adjustments is essential for capturing striking photographs and videos with your Canon EOS digital film camera. By mastering the techniques of adjusting lighting, you can take your creative vision to new heights and produce stunning visual content.
Setting the ISO for optimal lighting
To adjust the lighting on your Canon EOS digital film camera, it is important to understand and adjust the ISO settings. ISO stands for International Standards Organization and it refers to the sensitivity of your camera’s image sensor to light. By adjusting the ISO, you can control the amount of light that reaches the sensor, thus achieving optimal lighting conditions for your photographs.
The ISO settings on your Canon EOS digital film camera typically range from 100 to 3200, with some models offering even higher ISO values. The lower the ISO number, the less sensitive your camera will be to light. On the other hand, a higher ISO number increases the camera’s sensitivity to light.
When shooting in low-light conditions, you may need to increase the ISO setting to allow more light into the sensor. However, keep in mind that higher ISO values also introduce more digital noise and can reduce the overall image quality. Therefore, it is best to use the lowest ISO setting possible while still achieving the desired exposure.

| ISO Setting | Best Use |
|---|---|
| Low ISO (100-200) | Ideal for well-lit scenes or when using a tripod |
| Medium ISO (400-800) | Good for general shooting conditions |
| High ISO (1600+) | Suitable for low-light situations, but may introduce noise |
Remember, finding the optimal ISO setting may require some experimentation and adjustments based on your specific shooting conditions. Additionally, some Canon EOS models offer noise reduction settings to help mitigate the effects of high ISO values.
By carefully adjusting the ISO settings on your Canon EOS digital film camera, you can achieve the desired lighting conditions and capture stunning photographs with optimal exposure.
Adjusting the Aperture for Better Lighting
When using a Canon EOS digital film camera, adjusting the aperture is crucial for achieving optimal lighting in your photographs. The aperture, also known as the f-stop, controls the amount of light that enters the camera through the lens.
To adjust the aperture on a Canon EOS digital film camera, follow these steps:
- Turn on your camera and set it to the manual shooting mode.
- Locate the dial or button on your camera that controls the aperture. On most Canon EOS models, this can be found near the shutter button or on the back of the camera.
- Press or turn the dial to adjust the aperture value. A lower f-stop number (e.g., f/1.8) allows more light to enter the camera, while a higher f-stop number (e.g., f/16) reduces the amount of light.
- Keep in mind that changing the aperture value also affects the depth of field in your photographs. A lower f-stop number results in a shallow depth of field, where only the subject is in focus and the background is blurred. A higher f-stop number increases the depth of field, allowing more of the scene to be in focus.
- Experiment with different aperture values to find the right balance between lighting and depth of field for your desired shot.
Tips for Adjusting the Aperture:
- For low-light situations, consider using a lower f-stop number to allow more light into the camera.
- If you want a larger depth of field, use a higher f-stop number.
- Keep in mind that using a wider aperture (lower f-stop number) may result in a faster shutter speed, which is useful for freezing action.
Understanding the Exposure Triangle:
Aperture is one component of the exposure triangle, which also includes shutter speed and ISO. These three elements work together to determine the overall exposure of your photograph. By adjusting the aperture, you can control the amount of light that enters the camera and achieve the desired level of exposure.
| Aperture (f-stop) | Depth of Field |
|---|---|
| Lower (e.g., f/1.8) | Shallow depth of field |
| Higher (e.g., f/16) | Greater depth of field |
Remember, adjusting the aperture on your Canon EOS digital film camera allows you to have more control over the lighting and depth of field in your photographs. By understanding how aperture works and testing different values, you can capture stunning images in various lighting conditions.
Using the exposure compensation feature
The Canon EOS digital film camera offers a useful feature called exposure compensation, which allows you to adjust the lighting in your photos. This feature is particularly helpful in situations where the camera’s automatic settings may not produce the desired effect.
To use the exposure compensation feature:
- Turn on your Canon EOS camera and set it to the desired shooting mode.
- Press the “Menu” button on the back of the camera to access the camera’s menu.
- Navigate to the “Exposure Compensation” setting using the arrow keys.
- Press the “Set” button to enter the exposure compensation menu.
- Use the arrow keys to adjust the exposure value. Positive values make the photo brighter, while negative values make it darker.
- Preview the changes on the camera’s LCD screen and adjust the exposure compensation value as needed.
- Press the “Set” button again to confirm the exposure compensation value.
It’s important to note that exposure compensation is a temporary adjustment and will reset to the default setting after you turn off the camera. If you want to use the same exposure compensation value for multiple shots, be sure to adjust it each time you turn on the camera.

By utilizing the exposure compensation feature on your Canon EOS digital film camera, you have greater control over the lighting in your photos, allowing you to achieve the desired effect even in challenging lighting conditions.
Customizing white balance settings
White balance is an important setting that ensures accurate color representation in your photographs. By customizing the white balance settings on your Canon EOS digital film camera, you can achieve better color accuracy in different lighting conditions.
To customize the white balance settings, follow these steps:
- Access the menu: Turn on your Canon EOS digital film camera and press the Menu button to access the menu.
- Select the white balance option: Navigate through the menu using the arrow buttons until you find the white balance option. Press the Set button to enter the white balance settings.
- Choose a white balance mode: You will see different white balance modes, such as Auto, Daylight, Shade, Cloudy, etc. Select the appropriate mode for your shooting conditions. For example, choose Daylight when shooting in sunlight or Cloudy when shooting on a cloudy day.
- Customize the white balance: If the available white balance modes don’t suit your needs, you can create a custom white balance by selecting the Custom mode. In the Custom mode, you will need to take a reference photo of a pure white object under the current lighting conditions. Follow the on-screen instructions to complete the custom white balance setting.
- Save your settings: Once you have selected or customized the white balance settings, press the Set button to save your changes.
By customizing the white balance settings on your Canon EOS digital film camera, you can capture more accurate and vibrant colors in your photographs, regardless of the lighting conditions. Experiment with different white balance modes and don’t hesitate to create a custom white balance when needed.
Utilizing the flash for additional lighting
Adjusting the lighting on your Canon EOS digital film camera is crucial for capturing high-quality photos. In addition to natural or ambient lighting, utilizing the flash can provide extra illumination to ensure optimal brightness and clarity in your images.
When using the flash, it’s important to consider the distance between your subject and the camera. The farther the subject, the stronger the flash should be. Conversely, if the subject is close to the camera, a lower flash intensity may be required to avoid overexposure.
To adjust the flash settings on your Canon EOS camera, follow these simple steps:
| 1. | Turn on your camera and navigate to the menu options. |
| 2. | Select the flash settings option. |
| 3. | Choose the desired flash mode: Auto, On, Off, or Red-Eye reduction. Auto mode allows the camera to determine when to use the flash based on the lighting conditions, while On mode activates the flash for every photo. Off mode disables the flash completely, and Red-Eye reduction mode helps reduce the appearance of red eyes in portraits. |
| 4. | Adjust the flash intensity if necessary. Some cameras allow you to manually control the flash power, while others have preset options like High, Medium, or Low. |
| 5. | Save your settings and start capturing photos with the adjusted flash lighting. |
Experiment with different flash settings and distances to find the optimal balance of lighting for your specific shooting conditions. Remember to review your photos on the camera’s LCD screen to make any necessary adjustments and ensure the desired lighting effect.
By effectively utilizing the flash on your Canon EOS digital film camera, you can enhance the lighting in your photos and achieve professional-looking results.
Creating a well-balanced composition with lighting
When capturing photographs with your Canon EOS digital film camera, understanding how to adjust the lighting can greatly enhance the composition of your images. Properly using lighting can result in a well-balanced and visually appealing photograph.
1. Natural lighting
One of the most important factors in photography is the use of natural lighting. Take advantage of the sun’s position and intensity to create depth, texture, and contrast in your photographs. Experiment with shooting during different times of the day to capture different qualities of light. For example, shooting during the golden hour (an hour after sunrise or before sunset) can provide warm and soft lighting, while shooting on an overcast day can result in diffused and even lighting.
2. Artificial lighting
In addition to natural lighting, you can also use artificial lighting to create the desired effect. Experiment with different types of lighting, such as continuous lighting or flash, to add drama, highlight details, or control shadows. You can use external flashes or diffusers to soften the light and avoid harsh shadows. Position the lights strategically to achieve the desired effect and create a well-balanced composition.
Pro tip: When using artificial lighting, be mindful of color temperature. Different light sources have varying color temperatures that can affect the overall look of your photographs. Consider using white balance settings on your camera or adjusting it in post-processing to ensure accurate colors.
By understanding how to adjust lighting, you can create well-balanced compositions that enhance the subject and convey the desired mood or atmosphere. Experiment with different lighting techniques and continue to refine your skills to master the art of lighting in photography.
Experimenting with different lighting techniques
When it comes to capturing the perfect shot with your Canon EOS digital film camera, understanding different lighting techniques can greatly enhance the quality of your photographs. By experimenting with various lighting setups and settings, you can create stunning effects and bring your subjects to life.
1. Natural lighting:
Utilizing natural light can produce soft and flattering results. Consider shooting outdoors during the golden hours, which are the hours just after sunrise or before sunset. This natural light is warmer and more diffused, which can provide a soothing and ethereal effect to your images.
2. Artificial lighting:
Experimenting with various artificial lighting sources, such as studio lights or flashguns, can give you greater control over the lighting conditions. This allows you to manipulate the direction, intensity, and color of light to create dramatic effects or highlight specific details in your subjects.
3. Backlighting:
Using backlighting can add depth and create a sense of moodiness in your photographs. Position your subject in front of a strong light source, such as the sun or a lamp, and be careful not to place the light directly behind them. This technique can create silhouettes or halo effects, adding an artistic touch to your images.
4. Reflectors and diffusers:
Reflectors and diffusers are useful tools for manipulating lighting conditions. A reflector can bounce light back onto your subject, reducing harsh shadows and creating a more even and flattering light. On the other hand, a diffuser can soften the light by scattering it, resulting in a softer and more pleasing effect. Experiment with different reflector colors and diffuser densities to achieve the desired look.
5. Mixed lighting:
Combining natural and artificial light sources can open up a range of creative possibilities. Experiment with adjusting the ratio between the natural and artificial light to create different moods and atmospheres. This technique can add depth and dimension to your images, making them visually interesting and unique.
Remember, the key to mastering lighting techniques is practice and experimentation. Don’t be afraid to try different setups and settings to find out what works best for your subject and desired outcome. Continuously learning and honing your skills will lead to capturing breathtaking images with your Canon EOS digital film camera.
Understanding the importance of post-processing for lighting
When it comes to photography, lighting is one of the most crucial elements that can make or break a shot. Whether you are shooting indoors or outdoors, understanding how to adjust the lighting is essential to capturing a high-quality image.
While it’s essential to get the lighting right during the photo shoot, post-processing plays a vital role in fine-tuning the lighting to create the desired effect. Post-processing refers to the editing and adjustments made to a photo after it has been taken.
One of the main advantages of post-processing is the ability to correct any lighting issues that may have occurred during the shoot. For example, if a photo was taken in low light and appears too dark, post-processing software allows you to increase the exposure and brighten the image. On the other hand, if a photo was taken in harsh light and appears overexposed, you can adjust the highlights and shadows to balance the lighting.
In addition to correcting lighting issues, post-processing can also enhance the lighting to create a more visually appealing image. You can adjust the contrast, saturation, and color balance to make the lighting more vibrant and balanced. This can help create a mood or evoke a certain emotion in the viewer.
Post-processing is also beneficial for making selective adjustments to the lighting in specific areas of the photo. This can be done using tools like dodge and burn, which allow you to lighten or darken specific areas. By manipulating the lighting in this way, you can draw attention to certain elements or create a more dynamic composition.
Overall, understanding the importance of post-processing for lighting is essential for any photographer. It allows you to correct any lighting issues that may have occurred during the shoot and enhances the lighting to create a visually appealing image. So, don’t overlook the power of post-processing when it comes to achieving the perfect lighting in your photographs!
Question-answer:
How do I adjust the lighting on my Canon EOS digital film camera?
You can adjust the lighting on your Canon EOS digital film camera by using the exposure compensation feature. Simply press the exposure compensation button, usually labeled with a plus and minus symbol, and then adjust the exposure using the main dial. This will allow you to make the image brighter or darker depending on your preference.
What is exposure compensation and how does it work?
Exposure compensation is a feature on your Canon EOS digital film camera that allows you to manually adjust the exposure of your photos. It works by making the image brighter or darker than what the camera’s automatic settings would normally produce. By using the exposure compensation button and dial, you can easily compensate for situations where the camera’s automatic exposure may not be accurate, such as when shooting in bright or low light conditions.
Can I adjust the lighting on my Canon EOS digital film camera while shooting in manual mode?
Yes, you can adjust the lighting on your Canon EOS digital film camera while shooting in manual mode. In manual mode, you have full control over the exposure settings, including the aperture, shutter speed, and ISO. By adjusting these settings, you can effectively control the amount of light that enters the camera and thus adjust the lighting of your photos.
Is there a way to adjust the lighting on my Canon EOS digital film camera without using exposure compensation?
Yes, there are other ways to adjust the lighting on your Canon EOS digital film camera without using exposure compensation. For example, you can use manual mode to directly control the aperture, shutter speed, and ISO settings, which will affect the amount of light that enters the camera. You can also use external lighting equipment, such as a flash or studio lights, to add or decrease light as needed.


