
If you have an old coax cable lying around and want to use it with your digital camera, you’re in luck! Converting a coax cable to work with a digital camera is a relatively simple process that can be done with a few basic tools and materials.
The first thing you’ll need is an adapter. This small device allows you to connect your coax cable to the digital camera without any issues. You can easily find these adapters at your local electronics store or online. Make sure to choose an adapter that is compatible with your specific camera model.
Once you have the adapter, you’ll need to connect it to the coax cable. Start by stripping the end of the coax cable to expose the inner wire. Use a wire stripper or a sharp knife to carefully remove the outer protective layer of the cable, being careful not to damage the inner wire.
Next, you’ll need to connect the inner wire of the coax cable to the adapter. The adapter will have a small connector or pin that needs to be inserted into the center of the coax cable. Align the wire and the pin, and gently push them together until they are securely connected.
Finally, you can connect the other end of the adapter to your digital camera. Most cameras have a specific port or socket for the adapter to plug into. Depending on your camera model, you may need to consult the user manual for the exact location of the port.
Once everything is connected, you can test your setup. Turn on your camera and check if the coax cable is working properly. If you’re not getting a signal, double-check all the connections and make sure everything is securely attached.
Converting a coax cable to use with a digital camera is a convenient and cost-effective way to repurpose old cables. With just a few simple steps, you can enjoy the benefits of using your digital camera with a coax cable. Happy shooting!
Understanding Coax Cables
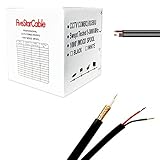
Coax cables, also known as coaxial cables, are a type of electrical cable that is widely used in a variety of applications, including television and internet connections. They are designed to carry high-frequency signals and are known for their excellent shielding capabilities.
A coax cable consists of four main components: an inner conductor, an insulating material, a metal shielding, and an outer insulating layer. The inner conductor carries the electrical signal, while the insulating material, usually made of plastic, prevents the signal from leaking out or interacting with the shielding. The metal shielding protects the signal from electromagnetic interference, which can degrade its quality, and the outer insulating layer provides additional protection and insulation.
Coax cables are characterized by their impedance, which is a measure of how much the cable resists the flow of electrical current. The most common types of coax cables have an impedance of 50 or 75 ohms. It is important to use the correct impedance cable for your specific application to ensure optimal signal transmission.

When connecting coax cables, it is important to use proper connectors to maintain the integrity of the signal. The most common connector is the F-type connector, which is widely used for television and internet connections. Other connectors, such as BNC and RCA, are also used in specific applications.
Coax cables are highly versatile and can be used in a wide range of applications. They are commonly used in home entertainment systems, security cameras, satellite dishes, and computer networks. Understanding the basics of coax cables is essential for properly installing and troubleshooting these systems.
To convert a coax cable for use with a digital camera, you will need a coax to RCA adapter. This adapter will allow you to connect the coaxial cable to the RCA input of the camera. Make sure to choose an adapter that matches the impedance of your coax cable to ensure optimal signal transmission.
NOTE: Before attempting any modifications to a coax cable or its connectors, make sure to consult the user manual or seek professional advice to ensure proper and safe installation.
Types of Coax Cables
There are several different types of coaxial cables that are commonly used for various applications. Each type of coax cable has its own unique characteristics and is designed for specific purposes. Here are some of the most common types of coax cables:
- RG-6: This type of coax cable is commonly used for residential television and satellite installations. It has a thicker conductor and insulation, which allows for longer cable runs without signal loss.
- RG-59: RG-59 is an older type of coax cable that was commonly used for analog video and CCTV systems. It has a smaller conductor and thinner insulation, which makes it less suitable for long cable runs or high-frequency applications.
- RG-11: RG-11 is a thicker and heavier coax cable that is used for high-bandwidth applications. It is commonly used for long cable runs in large-scale video distribution systems or for connecting satellite dishes to receivers.
- Miniature Coax Cable: This type of coax cable is very thin and flexible, making it ideal for applications where space is limited. It is commonly used for connecting antennas, wireless devices, and small electronic systems.
When choosing a coax cable, it is important to consider the specific requirements of your application. Factors such as cable length, frequency range, and signal strength can all influence the choice of coax cable. Consulting with a professional or doing research can help ensure that you select the right type of coaxial cable for your needs.
Coax to RCA Conversion
If you have a coaxial cable and want to connect it to a digital camera that uses RCA connectors, you will need to make a coax to RCA conversion. By following this process, you will be able to transmit the audio and video signals from your digital camera to a device that accepts RCA inputs.
Materials Needed
- Coaxial cable
- RCA connectors
- Soldering iron and solder
- Wire cutter/stripper
- Heat shrink tubing
- Electrical tape
Steps to Convert Coax to RCA
- Start by cutting the coaxial cable to the desired length using a wire cutter.
- Remove about an inch of the outer insulation from the coaxial cable to expose the inner conductor.
- Strip about 1/4 inch of insulation from the inner conductor using a wire stripper.
- Solder the exposed inner conductor to the center pin of an RCA connector.
- Slide a piece of heat shrink tubing over the soldered connection and heat it to shrink and secure the tubing.
- Repeat steps 2-5 for the other end of the coaxial cable, connecting it to another RCA connector.
- Finally, wrap the exposed connections with electrical tape for added protection.
Once the conversion is complete, you can now connect your digital camera to a device that accepts RCA inputs. Make sure to match the video output of your camera to the corresponding RCA input on the device, usually marked with a yellow connector. The audio output can be connected to the RCA inputs marked with red and white connectors.
What is RCA?
RCA stands for Radio Corporation of America, which is a type of connector commonly used for audio and video signals. It is also known as a phono connector or cinch connector. RCA connectors are widely used in consumer electronics, including televisions, DVD players, and stereo systems.
RCA connectors consist of a cylindrical plug with a center pin and a surrounding metal ring, which is connected to the ground. The center pin carries the signal, while the metal ring acts as a shield, helping to reduce interference.

RCA connectors are typically color-coded for easy identification. The most common colors used are red and white for audio signals, and yellow for video signals. However, other colors may also be used. The color-coding helps to ensure that the connectors are correctly matched with the corresponding inputs and outputs on devices.
Advantages of RCA connectors:
- Simple and easy to use.
- Widely available and compatible with many devices.
- Can transmit both audio and video signals.
- Color-coded for easy identification.
- Relatively inexpensive.
Disadvantages of RCA connectors:
- Lower signal quality compared to some other types of connectors.
- Limited bandwidth, which can affect the quality of high-definition video signals.
- Prone to interference and noise, especially over longer cable lengths.
Despite their limitations, RCA connectors are still widely used due to their simplicity, availability, and compatibility with a wide range of devices. They are suitable for many home audio and video applications, including connecting a digital camera to a TV or other display device.
Coax to USB Conversion
If you want to convert a coax cable to use with a digital camera, you will need to go through a coax to USB conversion process. This will allow you to connect your camera to a computer or other devices with USB ports, making it easier to transfer and work with your digital images.
Materials needed:
- Coax to USB converter
- Coax cable
- Digital camera
- Computer or other device with USB port
Step-by-step guide:
- Start by ensuring that your digital camera has a coax output. If it does not, you will need a separate coax adaptor specific to your camera model.
- Connect one end of the coax cable to your camera’s coax output or adaptor.
- Connect the other end of the coax cable to the coax to USB converter.
- Plug the USB end of the coax to USB converter into a USB port on your computer or other device.
- Once the connections are secure, turn on your digital camera.
- Your computer or device should detect the camera as a new device and install any necessary drivers. Follow the on-screen prompts to complete the installation.
- Once the installation is complete, you can access your digital camera’s files through the file explorer on your computer or device.
- You can now transfer, edit, and work with your digital images using various software programs compatible with your camera and computer.
Converting a coax cable to use with a digital camera can provide you with more flexibility and convenience when working with your photos. By following these steps and using the necessary materials, you can easily set up a coax to USB conversion and start enjoying the benefits of a direct connection between your camera and computer.
Benefits of USB Connection
When converting coax cable to use a digital camera, one of the most advantageous options is to utilize a USB connection. USB (Universal Serial Bus) is a widely-used interface that offers several benefits for connecting devices, including digital cameras.

1. Ease of Use
One of the main advantages of using a USB connection is its ease of use. USB cables are common and easily accessible, making it simple to connect a digital camera to a computer or other devices. With a USB connection, you don’t need any specialized cables or adapters, as most modern cameras come with a USB port built-in. This convenience allows for quick and hassle-free connectivity.
2. Fast Data Transfer
USB connections provide high-speed data transfer rates, which is essential when working with digital photographs. Transferring files through a USB connection is significantly faster than other methods, such as using memory cards or wireless connections. This enables you to quickly and efficiently transfer your photos from the camera to your computer or other devices.
3. Versatility
USB connections offer versatility in terms of compatibility with different devices. USB ports are available on a wide range of devices, including computers, laptops, tablets, and even some TVs. This means that you can easily connect your digital camera to various devices without worrying about compatibility issues. Additionally, many USB cables are interchangeable, allowing you to use the same cable for multiple devices.
4. Power Source
Another benefit of USB connections is that they can also serve as a power source for your digital camera. If your camera supports this feature, you can charge its battery or power it directly from the USB port of your computer or other devices. This eliminates the need for separate charging adapters and makes it more convenient to use and charge your camera simultaneously.
In conclusion, using a USB connection when converting coax cable to use a digital camera offers several benefits. These include ease of use, fast data transfer, versatility, and the ability to use USB as a power source. By utilizing a USB connection, you can enhance the efficiency and convenience of working with your digital camera.

Coax to HDMI Conversion
Converting a coax cable to HDMI can be done with the help of a coax to HDMI converter. This converter is a device that allows you to connect your coaxial cable to an HDMI port on your digital camera. With this conversion, you can take advantage of the high-quality video and audio signals that HDMI provides.
Step 1: Purchase a Coax to HDMI Converter
The first step in converting your coax cable to HDMI is to purchase a coax to HDMI converter. These converters can be found at electronics stores or online. Make sure to choose a converter that is compatible with your digital camera and has the necessary input and output ports.
Step 2: Connect the Coax Cable to the Converter
Once you have the coax to HDMI converter, connect one end of your coaxial cable to the input port of the converter. This is usually a coaxial connector that will fit the cable securely. Make sure the connection is tight so that there is no signal loss.
Step 3: Connect the Converter to the Digital Camera
Next, connect the HDMI output port of the converter to the HDMI input port on your digital camera. Both ports are usually standard HDMI connectors, so they should fit together easily. Again, make sure the connection is secure.
Step 4: Check the Settings
Before using the coax to HDMI converter, check the settings on your digital camera. Some cameras may require you to manually select the HDMI input. Refer to the camera’s user manual for specific instructions on how to do this.

Step 5: Test the Connection
Once everything is connected and the settings are correctly configured, turn on your camera and check if the coax to HDMI conversion is successful. You should now be able to see the video and hear the audio from your coax cable on your digital camera’s screen or external display that is connected via HDMI.
Converting coax cable to HDMI opens up new possibilities for using your digital camera with different devices and displays. Whether you want to view your photos on a larger screen or record videos with better audio quality, this conversion can enhance your overall camera experience.
Advantages of HDMI Connection
The HDMI (High-Definition Multimedia Interface) connection offers several advantages over other types of connections, such as coaxial cable, when it comes to connecting a digital camera. Here are some of the key advantages:
1. High-quality digital signal: HDMI provides a high-quality, uncompressed digital signal, which ensures that the image and sound transmitted from the digital camera to another device, such as a TV or monitor, maintain their original quality. This results in sharper images, vibrant colors, and crystal-clear sound.
2. Audio and video in one cable: HDMI cables carry both audio and video signals, eliminating the need for separate cables for each. This simplifies the setup and reduces cable clutter, making it easier to organize and connect devices.
3. Support for high-definition: HDMI supports high-definition (HD) resolutions, such as 1080p, which ensures that the camera’s output is displayed in full HD on compatible displays. This makes HDMI an ideal choice for capturing and viewing high-quality images and videos.
4. Plug and play: HDMI is a plug-and-play connection, meaning that it is easy to set up and requires no additional configuration. Simply connect the HDMI cable from the camera to the device, and it should automatically detect and display the camera’s content.
5. Wide compatibility: HDMI is a widely used standard and is found on many devices, including TVs, monitors, projectors, and laptops. This makes it easy to connect a digital camera to various devices without needing additional adapters or converters.
6. Long cable length: HDMI cables can transmit signals over long distances without any loss in quality. This allows for greater flexibility in how the camera is positioned and connected to other devices, without compromising on the quality of the signal.
In conclusion, using an HDMI connection with a digital camera offers numerous advantages, including high-quality signal transmission, support for high-definition content, easy setup, and wide compatibility. It is an efficient and convenient way to connect a camera to other devices for seamless multimedia viewing.
Coax to WiFi Conversion
If you want to convert your coax cable setup to use a digital camera wirelessly, you can achieve it by converting the coax signal to a WiFi signal. This conversion will allow you to stream the video feed from your camera to a smartphone, tablet, or computer without the need for any physical cables.
Here are the steps to convert your coax cable setup to use WiFi:
- First, you will need a coax to WiFi converter. This device will convert the analog coax signal into a digital WiFi signal that can be transmitted wirelessly.
- Connect the coax cable from your camera to the input port of the coax to WiFi converter.
- Next, connect the output of the coax to WiFi converter to your WiFi router using an Ethernet cable. This will allow the converted WiFi signal to be broadcasted over your existing network.
- Configure the settings on the coax to WiFi converter according to the manufacturer’s instructions. This may involve connecting to a web interface or using a mobile app to set up the WiFi network details and any necessary security settings.
- Once the configuration is complete, you can connect your smartphone, tablet, or computer to the newly created WiFi network. This will enable you to access the video feed from your camera wirelessly.
By converting your coax cable setup to use WiFi, you can enjoy the convenience and flexibility of accessing your camera’s video feed from anywhere within the range of your WiFi network. This conversion eliminates the need for long coax cables and simplifies the installation process.
Keep in mind that the performance of the wireless video feed may depend on factors such as the distance between the coax to WiFi converter and the WiFi router, any obstructions in the signal path, and the overall quality of your WiFi network.
With the proper equipment and setup, you can easily convert your coax cable to use WiFi, allowing you to monitor your camera’s video feed conveniently and wirelessly.
Question-answer:
Can I convert coax cable to use a digital camera?
Yes, you can convert coax cable to use a digital camera. However, you will need to use a coax-to-HDMI converter, as digital cameras typically do not have coax output. The converter will allow you to connect the coax cable to your camera’s HDMI input, allowing you to view the camera’s feed on a digital display.
What do I need to convert coax cable to use a digital camera?
To convert coax cable to use a digital camera, you will need a few things. First, you will need a coax-to-HDMI converter. This device will allow you to connect the coax cable to your camera’s HDMI input. You will also need an HDMI cable to connect the converter to your camera. Finally, you will need a digital display, such as a TV or monitor, with an HDMI input to view the camera’s feed.


