Digital cameras have revolutionized the way we capture moments and memories. With their advanced features and capabilities, they offer convenience and clarity like never before. One important component of a digital camera is the viewfinder.
The viewfinder allows you to see what the camera lens sees, giving you an accurate preview of the scene and helping you compose your shot. It is especially useful in bright lighting conditions where the LCD screen may be difficult to see.
Enabling the viewfinder on your digital camera is a simple process that can enhance your photography experience. Let’s explore how you can enable the viewfinder on your camera.
Preparing Your Digital Camera
Before you can enable the viewfinder on your digital camera, you need to make sure that it is properly prepared. Follow these steps to get your camera ready:
1. Insert the fully charged battery into the camera. Ensure that it is securely in place.

2. Attach the camera strap to your camera for easy handling and added security.
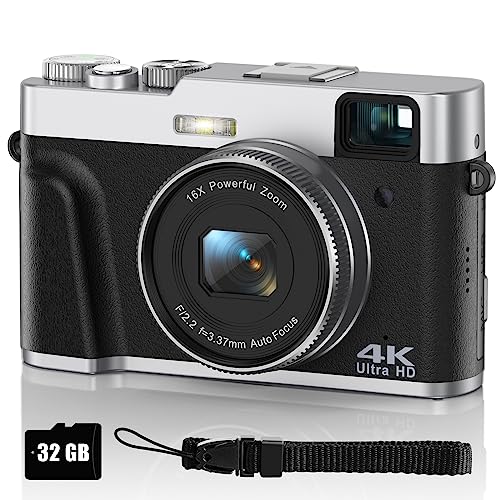
3. Make sure that you have a memory card inserted into the camera. This will allow you to store and transfer your photos.
4. Clean the camera lens with a soft, lint-free cloth to ensure clear and sharp images.
5. Set the date and time on your camera. This information is crucial for organizing your photos.
Once you have completed these preparations, your digital camera will be ready to use. You can now proceed to enable the viewfinder and start capturing stunning photos!

Checking the Camera Settings
Before enabling the viewfinder on your digital camera, it’s important to check the camera settings to ensure everything is correctly configured. Follow the steps below to review the settings:
Step 1: Power on the Camera
Make sure the camera is powered on and ready to use.
Step 2: Access the Menu
Locate the menu button on your camera, usually represented by an icon with three horizontal lines or the word “Menu.” Press this button to access the camera’s settings menu.
Step 3: Navigate to Viewfinder Settings
Within the settings menu, navigate to the section related to viewfinder settings. This may be labeled “Display Options,” “Viewfinder,” or something similar.
Step 4: Enable the Viewfinder
Once you’ve found the viewfinder settings, select the option to enable the viewfinder. This may be labeled as “Enable viewfinder,” “Use viewfinder,” or something similar. Ensure this option is turned on.

Step 5: Adjust Viewfinder Settings (optional)
If desired, you can further customize the viewfinder settings according to your preferences. This may include adjusting the brightness, contrast, or grid lines. Explore the available options and make any necessary adjustments.
Once you’ve completed these steps, you should have successfully enabled the viewfinder on your digital camera. Remember to consult your camera’s manual if you’re having trouble locating specific settings.
Connecting and Setting up Your Viewfinder
Before you can start using your viewfinder with your digital camera, you need to make sure it is properly connected and set up. Here are the steps to follow:
1. Check the Compatibility
Firstly, ensure that your viewfinder is compatible with your digital camera. Refer to the user manual or the manufacturer’s website to determine if they are compatible.
2. Connect the Viewfinder
Once you have confirmed compatibility, connect your viewfinder to your digital camera. Locate the viewfinder port on your camera body and align the pins or connectors on the viewfinder with the port. Gently insert the viewfinder and make sure it is securely attached.

3. Adjust the Settings
Next, turn on your digital camera and navigate to the settings menu. Look for an option related to the viewfinder or external display. Enable this option to activate the viewfinder.
Depending on your camera model, you may also need to adjust some additional settings such as the display brightness or the grid lines. Refer to the user manual for detailed instructions.
4. Test the Viewfinder
Once the settings have been adjusted, test the viewfinder by looking through it. You should see a live preview of the scene in front of your camera. Use the viewfinder to compose your shots and make any necessary adjustments to your camera settings.
Remember to check the viewfinder regularly for dust or smudges and clean it if necessary. Keep in mind that using the viewfinder may affect battery life, so be mindful of your camera’s power levels.
Congratulations! You have successfully connected and set up your viewfinder with your digital camera. Now you can take advantage of its benefits and enjoy a more accurate and convenient way to frame your shots.

Adjusting the Viewfinder Settings
When using a digital camera, it is important to adjust the viewfinder settings to ensure that you have a clear and accurate view of your subject. Here are some steps on how to adjust the viewfinder settings:
- Turn on the camera: Before adjusting the viewfinder settings, make sure that the camera is turned on and ready to use.
- Access the viewfinder menu: Look for the menu button or the settings button on your camera. Press it to access the viewfinder menu options.
- Adjust the brightness: In the viewfinder menu, you should find an option to adjust the brightness. Use the arrow buttons to increase or decrease the brightness until the viewfinder image is clear and easy to see.
- Change the viewfinder display: Some cameras allow you to customize the viewfinder display. You might be able to change the grid lines, the level indicator, or other overlays that appear in the viewfinder. Experiment with these options to find the display that works best for you.
- Enable focus peaking: If your camera has this feature, you can enable focus peaking in the viewfinder settings. Focus peaking highlights the areas of the image that are in focus, making it easier for you to get sharp and crisp shots.
- Lock the viewfinder Diopter: Many cameras have a Diopter adjustment wheel beside the viewfinder. This allows you to adjust the viewfinder focus to your eyesight. Look through the viewfinder and turn the Diopter wheel until the viewfinder image appears sharp and in focus.
By adjusting the viewfinder settings, you can optimize your shooting experience and get better results with your digital camera. Take the time to explore the options available in your camera’s viewfinder menu and find the settings that work best for you.
Troubleshooting Viewfinder Connection Issues
If you are experiencing issues with your viewfinder connection on your digital camera, there are a few troubleshooting steps you can take to try and resolve the problem.
1. Check the cable connections: Ensure that the cable connecting the viewfinder to the camera is securely plugged in. Sometimes, a loose connection can cause issues with the viewfinder display.
2. Clean the connectors: Over time, dirt and dust can accumulate on the connectors, leading to a poor connection. Use a clean, lint-free cloth to gently wipe the connectors on both the viewfinder and the camera. This can help improve the connection and resolve any display issues.

3. Restart the camera: Sometimes, a simple restart can resolve any software-related issues that may be causing problems with the viewfinder. Turn off the camera, remove the battery, wait for a few seconds, then reinsert the battery and turn on the camera again.
4. Update firmware: Check if there are any available firmware updates for your camera. Manufacturers often release firmware updates to address bugs and improve overall performance. Updating the firmware may help resolve any compatibility issues that could be affecting the viewfinder connection.
5. Contact customer support: If the above steps do not resolve the issue, it may be necessary to contact the customer support of your camera manufacturer for further assistance. They can provide you with specific troubleshooting steps or guide you through a repair process if needed.
By following these troubleshooting steps, you should be able to identify and resolve any viewfinder connection issues on your digital camera. Remember to refer to your camera’s user manual for specific instructions or contact customer support for assistance.
Enhancing Your Viewfinder Experience
Using the viewfinder on your digital camera can greatly enhance your photography experience. The viewfinder allows you to accurately compose your shots, making it easier to capture the perfect image. Here are some tips to enhance your viewfinder experience:

1. Adjusting the Diopter
First, ensure that the viewfinder is properly adjusted to your eyesight. Most cameras have a diopter adjustment wheel or slider, usually located near the viewfinder. Adjusting the diopter will help you see the scene clearly and accurately so you can focus on capturing the best shot.
2. Utilize the Gridlines
Many digital cameras offer the option to display gridlines in the viewfinder. This feature can be helpful for aligning your subject and maintaining proper composition. The gridlines can act as a guide, assisting you in positioning your subject within the frame and ensuring that your horizon remains level.
Pro Tip: Experiment with different gridline configurations and find the one that works best for your photography style.
3. Utilize Focus Points
Modern digital cameras often have selectable focus points within the viewfinder. These focus points can help you achieve accurate focus on your desired subject. By manually selecting a focus point, you have more control over what part of the scene should be sharp. This is especially useful when photographing subjects with shallow depth of field.
Pro Tip: Familiarize yourself with your camera’s focus point selection method to quickly and easily adjust the focus as needed.
By following these tips, you can enhance your viewfinder experience and improve your photography skills. Take the time to explore your camera’s viewfinder settings and experiment with different techniques to see what works best for you.
Taking Advantage of Viewfinder Features
Modern digital cameras often come equipped with a viewfinder, which is a small window that allows you to see exactly what your camera lens sees. This feature can be incredibly useful, especially in certain shooting situations. Here are some ways to take full advantage of your camera’s viewfinder:
1. Precision Framing: The viewfinder allows you to precisely frame your shot, ensuring that your subject is in focus and well-composed. By looking through the viewfinder, you can eliminate distractions and focus solely on what you want to capture.
2. Stability: Holding your camera up to your eye and looking through the viewfinder provides a stable shooting position, reducing the chances of camera shake and resulting in sharper images. This is particularly useful when shooting in low light conditions or with a long telephoto lens.
3. Battery Conservation: Using the viewfinder instead of the LCD screen can help conserve battery power. The viewfinder uses less energy compared to the screen, allowing your camera’s battery to last longer, which is especially handy when shooting for extended periods of time or in remote locations.
4. Quick Focusing: When using the viewfinder, your camera’s autofocus system can engage more quickly and accurately, allowing you to capture fast-moving subjects with ease. This is particularly useful in sports and wildlife photography.
5. Expert-Level Composition: By looking through the viewfinder, you can take the time to carefully compose your shot, paying attention to elements such as the rule of thirds, leading lines, and symmetry. This can help you create more visually pleasing and balanced photographs.
Overall, the viewfinder feature on your digital camera offers several advantages for capturing better photos. Make sure to experiment with it and explore the different ways it can enhance your photography skills.
Question-answer:
How can I enable the viewfinder on my digital camera?
To enable the viewfinder on your digital camera, simply locate the viewfinder eyepiece on the back of the camera body. Once you have found it, bring the camera up to your eye and adjust the diopter control (usually located next to the viewfinder) until the image appears clear. Make sure to also enable the viewfinder display option in your camera’s settings menu, as this will activate the viewfinder and allow you to compose your shots using it.
What if my digital camera doesn’t have a viewfinder?
If your digital camera doesn’t have a built-in viewfinder, you may still be able to use an electronic viewfinder (EVF) that can be attached to the camera’s hot shoe or accessory port. The EVF will provide a similar experience to using a traditional optical viewfinder, allowing you to compose your shots more easily. Alternatively, you can rely on the camera’s LCD screen to compose your shots, although this may be more difficult in bright sunlight or other high-contrast situations.
Can I enable the viewfinder on my digital camera and still use the LCD screen?
Yes, most digital cameras allow you to use both the viewfinder and the LCD screen for composing your shots. This can be particularly useful when shooting in different conditions or for different types of photography. To enable both the viewfinder and the LCD screen, you may need to adjust the display settings in your camera’s menu. Some cameras may automatically switch between the two depending on whether the viewfinder is being used, while others may require manual adjustment.


