Photobooths have become increasingly popular in recent years, and for good reason. They offer a fun and interactive way to capture memories at events such as weddings, birthdays, and corporate functions. While renting a commercial photo booth can be expensive, creating your own photo booth with a digital camera is a cost-effective option that allows you to customize the experience to your liking.
To start, you’ll need a few key components. First and foremost, you’ll need a digital camera with a tripod or other stable mount. This will ensure that your photos are steady and in focus. Additionally, you’ll need a backdrop, which can be as simple as a plain sheet or a more elaborate setup with props and decorations. Finally, you’ll need lighting to ensure that your photos are well-lit and flattering.
Once you have your equipment ready, it’s time to set up your photo booth. Find a location with enough space to accommodate your backdrop and any props or furniture you plan to include. Set up your camera on the tripod or mount, making sure it is at a height that is comfortable and flattering for your guests. Position your lighting to eliminate any harsh shadows or unflattering angles.
Now that your physical setup is complete, it’s time to consider the digital aspect of your photo booth. If your camera has built-in software for remote shooting, be sure to familiarize yourself with it so you can wirelessly trigger the camera from a distance. This will allow you to be in control while your guests have fun posing and taking photos. Additionally, you may want to consider using a photo booth software or app that offers features such as custom overlays, filters, and instant sharing on social media.
With your photo booth set up and the digital aspect taken care of, all that’s left is to have fun! Encourage your guests to let loose, strike a pose, and create lasting memories. Don’t forget to provide props and accessories to add an extra element of fun and creativity. By following these steps, you’ll be well on your way to creating a memorable and entertaining photo booth experience with your digital camera.

Choosing the Right Camera for Your Photo Booth
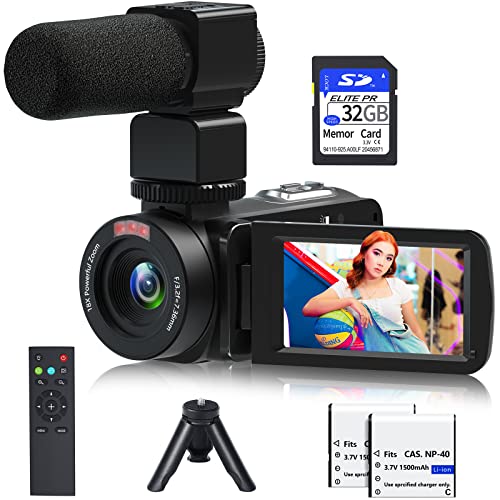
When setting up a photo booth with a digital camera, it is important to choose the right camera that will capture high-quality photos and meet the specific needs of your event. Here are some factors to consider when selecting a camera for your photo booth:
| Factor | Consideration |
|---|---|
| Resolution | Look for a camera with a high resolution to ensure sharp and detailed photos. A minimum resolution of 12 megapixels is usually recommended for good quality prints. |
| Low Light Performance | Events often have varying lighting conditions, so choose a camera with good low light performance. Look for one with a wide aperture lens and a high ISO range to capture clear and bright photos, even in dimly lit environments. |
| Auto-Focus | For quick and accurate focusing, opt for a camera with advanced auto-focus features. This will ensure that your photos are sharp and in focus, even when your subjects are moving or in different positions. |
| Speed | Since photo booths require capturing multiple pictures in quick succession, choose a camera with a fast burst mode. This will allow you to capture a series of photos rapidly, ensuring that no moment is missed. |
| Ease of Use | Consider the user-friendliness of the camera. Look for one with intuitive controls and a user-friendly interface to make it easier for guests to operate the photo booth themselves. |
| Connectivity | If you plan on offering instant photo sharing or printing capabilities, choose a camera with built-in Wi-Fi or Bluetooth connectivity. This will enable you to easily transfer and share photos without needing additional cables or adapters. |
By taking these factors into account, you can select the right camera that will help you create memorable moments and capture them in high-quality photos at your photo booth.
Setting Up the Photo Booth Background
Choosing and setting up the right background for your photo booth is an important aspect of creating a unique and memorable experience for your guests. Here are some steps to help you set up the perfect photo booth background:
Step 1: Selecting the Background
Before you start setting up the photo booth, think about the theme or mood you want to convey. Consider the event’s theme, color scheme, or any specific requests from the client. Once you have a clear idea, choose a suitable background that complements the overall aesthetic.
Step 2: Preparing the Background
Ensure that the chosen background is clean and wrinkle-free. Iron or steam the fabric to remove any creases or wrinkles. If you’re using a printed backdrop, make sure it is properly aligned and secured in place, avoiding any visible seams or folds.

Step 3: Setting Up the Background
Find a suitable location for your photo booth setup. Consider the available space and ensure that the background fits within the designated area. Use clamps, tape, or hooks to secure the background to a wall or stand, making sure it is taut and free from any wrinkles or sagging.
Alternatively, you can experiment with different ways to hang the background, such as using a PVC pipe stand, backdrop support system, or tension rods. By doing so, you can easily adjust the height and width of the background, allowing it to accommodate both individual and group shots.
Step 4: Adding Props and Accessories
To enhance the photo booth experience, consider adding props and accessories that match the theme or mood of the event. These can include hats, masks, signs, or themed decorations. Display them neatly within the booth, making sure they are easily accessible for your guests to use.
Remember, the background and props should work together harmoniously to create a visually appealing and engaging experience for your guests. Take some test shots to ensure that the setup looks great and the background does not create any unwanted glare or shadows in the photos.
Lighting Tips for Your Photo Booth
When setting up a photo booth with a digital camera, it is important to pay attention to the lighting. Good lighting can make a significant difference in the overall quality of the photos. Here are some lighting tips to ensure your photo booth captures amazing pictures:

1. Use Soft Lighting: Soft lighting helps to eliminate harsh shadows and creates a more flattering look. Avoid using direct flash that can create unflattering shadows and wash out facial features. Instead, use diffused lighting sources or softboxes to create a soft and even light.
2. Position the Lights Correctly: Proper positioning of the lights is crucial to achieve the desired effect. Consider using a three-point lighting setup, which involves placing lights at different angles around the subject. This setup helps to highlight facial features, eliminate shadows, and create dimension in the photos.
3. Adjust the Color Temperature: The color temperature of the lighting can greatly affect the mood and overall feel of the photos. If shooting indoors, adjust the white balance of your camera to match the lighting conditions in the room. This will ensure accurate colors and avoid any unwanted color casts.
4. Add Some Background Lighting: To add depth and interest to your photos, consider adding some lighting to the background. This can be done by using spotlights or colored gels to create a different mood or atmosphere. Experiment with different lighting techniques to find the one that best suits your photo booth setup.
5. Test and Adjust: Before the event or photo session, take the time to test your lighting setup and make any necessary adjustments. Take sample shots to ensure that the lighting is even and flattering. Pay attention to any areas that may need additional light or areas that are too bright and adjust accordingly.

By following these lighting tips, you can create a photo booth with a digital camera that produces stunning and professional-looking photos. Remember, lighting is a key element in photography, and getting it right can make all the difference.
Props and Accessories for Your Photo Booth
Adding props and accessories to your photo booth can take your pictures to the next level. Not only do props add an element of fun and creativity, but they also help create memorable and unique photos. Here are some ideas for props and accessories that you can use in your photo booth setup:
Hats and Headwear
One popular category of props is hats and headwear. From funky hats to tiaras and crowns, these accessories can instantly transform your guests into different characters or add a touch of elegance to their pictures. Consider having a variety of options to suit different themes or tastes.
Signs and Speech Bubbles
Signs and speech bubbles can be a great way for your guests to express themselves in a photo. By providing signs with funny phrases or speech bubbles that they can write on, you encourage creativity and add an interactive element to your photo booth experience. Make sure to provide markers or chalk so that guests can personalize their signs.
| Props | Description |
|---|---|
| Masks | Masks can add an air of mystery and excitement to your photos. Whether you go for superhero masks, animal masks, or masquerade masks, they are sure to bring out your guests’ playful side. |
| Wigs | Wigs come in a variety of styles and colors, offering your guests a chance to instantly change their look and transform into someone else. From silly to glamorous, wigs can be a popular choice for adding a touch of pizzazz. |
| Boas and Scarves | Boas, scarves, and other accessories that your guests can drape around their necks or shoulders can add a fun and glamorous touch to their photos. These accessories can be particularly popular for themed parties or events. |
Remember, the key to selecting props and accessories is to offer a range of options that cater to different tastes and themes. This way, your guests can have fun experimenting with different looks and create truly unique and memorable photos. So, get creative, and let your photo booth props do the talking!

Using a Tripod for Stability and Convenience
When setting up your photo booth with a digital camera, using a tripod can greatly enhance stability and convenience. A tripod provides a secure and steady base for your camera, reducing the risk of blurred or shaky photos.
There are various tripod options available, ranging in size, height, and price. Consider the weight and size of your camera when selecting a tripod to ensure it can support the weight and fits your needs.
Using a tripod also offers the advantage of convenience. By securely mounting your camera on a tripod, you can position it at the desired height and angle without needing to hold it. This allows you to have both hands free to interact with your subjects or make adjustments to the photo booth setup.
Additionally, a tripod can be easily adjusted to accommodate different shooting perspectives. Whether you want to capture photos from a low angle, eye level, or above, a tripod can be adjusted accordingly to achieve the desired composition.
By using a tripod in your photo booth setup, you can enhance the overall quality of your photos and create a more enjoyable experience for your guests. It provides stability and convenience, allowing you to focus on capturing memorable moments without worrying about blurry or shaky images.

| Benefits of Using a Tripod: |
| Stability: Reduces the risk of blurred or shaky photos. |
| Convenience: Allows for hands-free operation and adjustments. |
| Versatility: Can be easily adjusted to capture photos from different angles. |
Remote Shutter Releases for Easy Picture Taking
If you want to take pictures in a photo booth setting with a digital camera, using a remote shutter release is a convenient and efficient option. A remote shutter release allows you to trigger the camera’s shutter without physically pressing the button on the camera, giving you more flexibility in capturing the perfect shot.
Types of Remote Shutter Releases
There are various types of remote shutter releases available in the market, each with its own features and compatibility. The most common types include:
1. Wired Remote Shutter Release
A wired remote shutter release connects to your digital camera via a cable. This type of remote usually has a button that replicates the shutter button on your camera. It allows you to trigger the shutter from a distance while maintaining full control over camera settings.
One advantage of a wired remote shutter release is its reliability, as it does not rely on wireless connections. However, the range of operation is limited due to the physical length of the cable.
2. Wireless Remote Shutter Release
A wireless remote shutter release uses radio waves or infrared signals to communicate with your camera. It typically consists of a transmitter and a receiver. The transmitter sends the signal, and the receiver, which is attached to the camera, receives and activates the shutter when prompted.

Wireless remote shutter releases offer the advantage of greater flexibility in terms of range and positioning. You can trigger the camera from a distance, allowing for more creative photo opportunities. However, it is essential to ensure that the remote is compatible with your camera’s make and model.
Some advanced wireless remote shutter releases also offer additional features like interval shooting, bulb mode for long exposures, and timelapse capabilities.
Overall, using a remote shutter release for your digital camera photo booth setup provides convenience, ease of use, and creative freedom. Whether you opt for a wired or wireless remote, it is a valuable tool for capturing memorable moments and ensuring the best possible photos.
Editing and Printing Photos from Your Photo Booth
Once you have taken the photos in your photo booth with your digital camera, it’s time to edit and print them to preserve those fun memories. Here are a few steps to guide you through the process:
1. Transfer the photos: Connect the digital camera to your computer using a USB cable. Open the folder or software where the photos are stored, and copy the images to your computer’s hard drive.
2. Choose an editing software: There are many photo editing software options available, both free and paid. Some popular choices include Adobe Photoshop, Lightroom, and GIMP. Install and open the software on your computer.
3. Enhance the images: Use the editing software to enhance the photos from your photo booth. Adjust the brightness, contrast, and saturation as needed to make the images pop. You can also crop or straighten the pictures if necessary.
4. Add filters and effects: Get creative with your editing by adding filters and effects to your photos. Experiment with different styles and settings to give your pictures a unique look and feel.
5. Save and export the edited photos: Once you are happy with the edits, save the edited images in a high-quality format such as JPEG or PNG. Keep the original photos separate to preserve their untouched state.
6. Print your photos: Now that your photos are edited and saved, it’s time to print them. You can either print them at home using a high-quality printer or use a professional printing service. Make sure to choose the right paper and size for your prints to achieve the desired result.
7. Create a photo album or display: Once you have printed your photos, consider creating a photo album or displaying them in frames or on a bulletin board. This way, you can enjoy your photo booth memories every time you pass by.
Editing and printing photos from your photo booth allows you to preserve and share the fun moments captured during your event. Whether you choose to edit them digitally or print them out, you’ll be able to cherish those memories for years to come.
Sharing Your Photo Booth Images Online
Once you have captured some amazing images with your photo booth, you will want to share them with others. Lucky for you, there are several online platforms that make it easy to showcase and distribute your photos.
1. Social Media
Social media platforms like Facebook, Instagram, and Twitter are great places to share your photo booth images with your friends and followers. You can upload them directly to your profile, add captions, and even tag people in the photos. This way, your images will be visible to a large audience and receive more engagement.
2. Photo Sharing Websites
Photo sharing websites, such as Flickr or 500px, allow you to create an online gallery where you can showcase your photo booth images. These websites often have features that allow users to like, comment, and share your photos, which can increase their exposure and reach.
3. Personal Website or Blog
If you have a personal website or blog, you can create a dedicated page to display your photo booth images. This is a great way to showcase your skills and talent to potential clients or visitors. Make sure to optimize your images for web viewing and provide a brief description or story behind each photo.
When sharing your photo booth images online, it’s important to consider privacy settings and copyright. Make sure to obtain permission from any individuals featured in the photos before sharing them publicly. Additionally, consider adding watermarks or copyright notices to protect your images from unauthorized use.
By utilizing these online platforms, you can easily share your photo booth images and gain recognition for your photography skills. So go ahead and show off your creativity and capture those memorable moments!
Question-answer:
How can I make a photo booth with my digital camera?
To make a photo booth with your digital camera, you will need a few supplies and follow a few steps. First, you will need a backdrop, which can be a plain wall or a fabric sheet. Then, set up a tripod to hold your camera steady. You will also need remote control or a wired trigger to take the photos. Finally, set up some props and a stool or bench for people to sit on. Once everything is in place, instruct the participants on how to operate the camera and let them have fun taking their own photos.
What supplies do I need to make a photo booth?
To make a photo booth, you will need a digital camera, tripod, backdrop, props, remote control or a wired trigger, and a stool or bench for the participants to sit on. Additionally, you may want to consider having some lighting equipment to ensure good lighting conditions for the photos. Overall, the supplies required are relatively simple and can be easily obtained.
Can I use any digital camera to make a photo booth?
Yes, you can use any digital camera to make a photo booth. Whether you have a professional DSLR camera or a compact point-and-shoot camera, it will work just fine. The key is to have a camera that allows you to set it on a tripod and has a remote control or a wired trigger option. The quality of the photos will depend on the capabilities of your camera, but any digital camera should be able to capture fun and memorable moments in a photo booth setting.
What type of backdrop should I use for a photo booth?
The type of backdrop you choose for your photo booth will depend on the theme or style you want to create. If you prefer a simple and clean look, a plain white or solid-colored fabric sheet can work well. For a more festive or themed photo booth, you can use patterned or textured fabric, or even hang up a curtain with a unique design. Ultimately, the choice of backdrop is up to you and should complement the overall aesthetic you want to achieve.
Do I need any special lighting equipment for a photo booth?
While not necessary, having some lighting equipment can greatly improve the quality of the photos taken in a photo booth. Depending on the lighting conditions of the venue, you may want to consider using additional lighting sources, such as external flashes or reflectors, to ensure that the participants are well-lit and the photos turn out clear and vibrant. However, if the venue has sufficient natural or artificial lighting, you may not need any extra equipment. It is always a good idea to test the lighting setup before the event to ensure optimal results.