
If you are a content creator or a streamer, you know the importance of high-quality visuals in your videos or live streams. One way to enhance the visual experience is by using a digital camera as your video source in OBS (Open Broadcaster Software). This allows you to take advantage of your camera’s superior image quality and flexibility, resulting in professional-looking content.
Hooking up a digital camera to OBS might seem daunting at first, but it’s actually a straightforward process. In this article, we will guide you through the necessary steps to connect your camera to OBS and start producing top-notch content.
First and foremost, make sure that your digital camera is compatible with OBS. Most modern cameras have an HDMI output, which is the preferred method for connecting to OBS. Check your camera’s specifications or user manual to confirm if it supports HDMI output.
Once you have confirmed compatibility, you will need an HDMI capture card or an HDMI-to-USB adapter. These devices allow you to connect your camera’s HDMI output to your computer’s USB port, which OBS can then recognize as a video source. Make sure to choose a capture card or adapter that is compatible with your camera and operating system.
Next, connect your camera to your computer using the HDMI capture card or HDMI-to-USB adapter. Plug one end of the HDMI cable into your camera’s HDMI output and the other end into the capture card or adapter. Then, connect the capture card or adapter to an available USB port on your computer.

Once the hardware setup is complete, open OBS on your computer. Click on the “+” button under the “Sources” panel and select “Video Capture Device” from the drop-down menu. A dialog box will appear, prompting you to name your source. Choose a descriptive name that will help you identify your camera.
In the dialog box, select your capture card or adapter from the “Device” drop-down menu. You may need to install drivers for the capture card or adapter if prompted by your operating system. Once you have selected the correct device, click “OK” to add it as a source in OBS.
At this point, your camera should be recognized by OBS as a video source. You can further adjust its settings by clicking on the camera source in the “Sources” panel. From there, you can customize aspects such as resolution, frame rate, and video format according to your preferences.
With your camera successfully connected to OBS, you can now enjoy the benefits of using a high-quality video source for your content creation. Whether you are streaming games, recording tutorials, or hosting virtual meetings, your camera will capture every detail with exceptional clarity, giving your viewers a more immersive experience.
In conclusion, hooking up a digital camera to OBS is a simple process that can greatly elevate the visual quality of your content. By following the steps outlined in this article, you can start impressing your audience with professional-looking videos and live streams. So go ahead and connect your camera to OBS today!
Connecting a Digital Camera to OBS: A Step-by-Step Guide
If you’re looking to level up your live video streaming game, connecting a digital camera to OBS (Open Broadcaster Software) can help you achieve higher quality and more professional-looking streams. In this step-by-step guide, we’ll walk you through the process of setting up your digital camera with OBS so you can start streaming with confidence.
Step 1: Check Camera Compatibility
Before you get started, make sure your digital camera is compatible with OBS. Check the camera’s user manual or manufacturer’s website to see if it supports video output via USB or HDMI. If it does, you’re good to go!
Step 2: Install OBS
If you haven’t already, download and install OBS on your computer. OBS is available for free on Windows, macOS, and Linux, making it accessible to a wide range of users.
Step 3: Connect your Camera to your Computer
Connect your digital camera to your computer using the appropriate cable. If your camera supports USB output, use a USB cable to connect it. If your camera supports HDMI output, you’ll need an HDMI capture card to connect it to your computer.
Step 4: Configure OBS
Launch OBS and go to “Settings” in the main menu. Click on the “Video” tab and select your camera from the “Device” dropdown menu. OBS should detect your camera automatically.

Step 5: Adjust Camera Settings
Once OBS has recognized your camera, you can adjust the camera settings to fine-tune your stream. Click on the camera preview in the OBS interface and access the camera’s settings menu. Here, you can configure options such as resolution, frame rate, exposure, and focus to optimize your video quality.
Step 6: Position and Scale your Camera Source
In the OBS interface, you’ll see a preview of your camera feed. Use the transform controls to adjust the position, size, and rotation of the camera source to fit your stream layout. You can access these controls by right-clicking on the camera preview and selecting “Transform.”
Step 7: Start Streaming
You’re now ready to start streaming with your digital camera in OBS! Select your preferred streaming platform and configure the stream settings within OBS. Once everything is set up, hit the “Start Streaming” button, and your camera feed will be included in your live stream.
By connecting a digital camera to OBS, you can take your live video streaming to the next level. Follow these steps, experiment with different settings, and enjoy the improved video quality and professional look of your streams.
Camera Compatibility
When it comes to hooking up a digital camera to OBS, one of the most important considerations is camera compatibility. Not all cameras are compatible with OBS, so it’s crucial to ensure that your camera is supported before attempting to connect it.
Supported Camera Types
OBS is compatible with a wide range of digital cameras, including DSLR cameras, mirrorless cameras, and webcams. However, it’s important to note that not all models within these camera types are supported. You should always check the OBS website or user forums for a list of officially supported cameras.
DSLR Cameras: Many popular DSLR cameras, such as Canon EOS series and Nikon D series, are compatible with OBS. These cameras typically provide high-quality image and video output, making them a popular choice for content creators.
Mirrorless Cameras: OBS also supports various mirrorless cameras, such as Sony Alpha series and Fujifilm X series. Mirrorless cameras are known for their lightweight design and advanced features, making them a great option for those who prioritize portability.
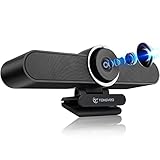
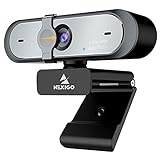
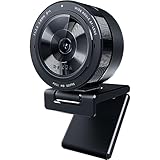
Webcams: If you don’t own a DSLR or mirrorless camera, webcams are the most accessible option for connecting to OBS. You can use popular webcams like Logitech C920 or Microsoft LifeCam HD-3000, which are widely known for their compatibility with OBS.
Connecting Your Camera
Once you’ve confirmed that your camera is compatible with OBS, connecting it is fairly straightforward. Most digital cameras offer an HDMI output or a USB connection, which can be used to connect the camera to your computer.

If your camera has an HDMI output, you’ll need an HDMI capture card or a capture device like Elgato Cam Link to convert the HDMI signal into a format that OBS can recognize. Simply connect one end of the HDMI cable to the camera and the other end to the capture card, then connect the capture card to your computer via USB.
If your camera has a USB connection, you can directly connect it to your computer using a USB cable. OBS should automatically recognize the camera once it’s connected.
Remember to check your camera’s manual or consult the manufacturer’s website for specific instructions on connecting your camera to a computer.
By ensuring camera compatibility and following the appropriate steps for connecting your camera to OBS, you’ll be ready to start capturing high-quality video footage for your live streams or recordings. Happy recording!
USB Connection
To connect your digital camera to OBS, you will need to use a USB cable. This cable is typically included with your camera when you purchase it. The USB connection allows you to transfer the camera’s video feed directly to your computer for streaming or recording purposes.

Step 1: Connect the USB Cable
Start by locating the USB port on your camera. It is usually located on the side or back of the device. Take the USB cable and plug one end into the camera’s USB port.
Next, locate a USB port on your computer. It can usually be found on the side or back of the computer tower, or on the side of a laptop. Plug the other end of the USB cable into the computer’s USB port.
Step 2: Camera Settings
Once the camera is connected to the computer, turn on your digital camera. It may prompt you to select a connection mode on the camera’s screen. Choose the option that allows for data transfer or USB connection.
Some cameras may require you to navigate through the camera’s menu settings to enable data transfer or USB connection. Refer to your camera’s user manual if you are unsure about how to access these settings.
Note: If your camera uses a rechargeable battery, make sure it is fully charged or connected to a power source before starting the connection process.
Step 3: OBS Configuration
Once your camera is connected and turned on, open OBS on your computer. Go to the “Sources” panel and click the “+” button to add a new source.
In the source menu, choose “Video Capture Device” or any similar option that allows you to capture video from an external device. Give the source a name and click “OK.”
In the configuration window that appears, select your digital camera from the drop-down menu for the “Device” or “Camera” option. You may also need to select the camera’s resolution and frame rate.
Tip: If OBS does not recognize your camera, make sure you have installed any necessary drivers or software that came with your camera. You can usually find these on the manufacturer’s website.
Finally, click “OK” to save the settings. You should now see the camera’s video feed appearing in OBS. You can further configure the video settings as needed, such as adjusting the brightness, contrast, or saturation.
Remember to test your setup and make any necessary adjustments to ensure the camera feed is working properly before starting your stream or recording.
Installing Camera Drivers
Before you can hook up your digital camera to OBS, you need to make sure that your camera drivers are properly installed on your computer. Camera drivers allow your computer to recognize and communicate with your camera.
To install camera drivers, follow these steps:
- Connect your digital camera to your computer using a USB cable. Make sure your camera is turned on.
- Depending on your camera model, your computer may automatically detect and install the necessary drivers. If this happens, you can skip to the next step.
- If your camera is not automatically detected, you may need to visit the manufacturer’s website to download and install the drivers manually.
- Once you have downloaded the drivers, double-click on the installation file and follow the on-screen instructions to complete the installation process.
- After the installation is complete, restart your computer to ensure that the drivers are properly loaded.
Once the camera drivers are installed, you should be able to connect your digital camera to OBS and start using it for your live streams or recordings.
Adjusting Camera Settings
Before hooking up your digital camera to OBS, it’s important to adjust the camera settings to ensure optimal video quality. Here are some key settings you should consider:
Resolution and Frame Rate
Make sure to set the resolution and frame rate of your camera to match your desired streaming or recording settings in OBS. Higher resolutions and frame rates will result in larger file sizes and higher processing requirements.
Exposure and White Balance
Adjusting the exposure and white balance settings can greatly improve the overall image quality. Use the camera’s manual controls or automatic modes to find the best exposure level and balance the color temperature for the lighting conditions in your recording environment.
Focus and Depth of Field
Ensure that your camera is properly focused on your subject. Depending on your camera model, you may need to manually focus or use autofocus. Additionally, consider the depth of field you want to achieve – a shallow depth of field can create a blurred background and draw attention to your subject.
Audio Settings
If your camera has a built-in microphone, make sure to adjust the audio settings to capture clear sound. Test the audio levels by recording a sample clip and adjust the microphone sensitivity as needed.
| Setting | Recommendations |
|---|---|
| Resolution | Set to match your desired streaming or recording settings |
| Frame Rate | Choose a frame rate compatible with your streaming or recording setup |
| Exposure | Adjust to achieve optimal brightness and avoid overexposure |
| White Balance | Balance the color temperature according to your lighting conditions |
| Focus | Ensure your subject is properly focused |
| Depth of Field | Consider the desired depth of field and adjust the aperture accordingly |
| Microphone Sensitivity | Adjust the audio levels to capture clear sound without distortion |
By adjusting these camera settings, you can enhance the visual and audio quality of your video recordings or live streams in OBS.
OBS Configuration
Before you can hook up your digital camera to OBS, you’ll need to configure OBS to recognize and capture the camera output. Here’s how you can do it:
Step 1: Open OBS Settings
Launch OBS on your computer and click on the “Settings” button located at the bottom right corner of the screen.
Step 2: Select Video Settings
In the settings menu, click on the “Video” tab on the left side of the screen.
Step 3: Configure Camera Input
Under the “Video” tab, locate the “Video Adapter” dropdown menu. Click on the dropdown and select your digital camera from the list. If your camera is not listed, make sure it is properly connected to your computer and that the necessary drivers are installed.
You can also adjust other camera settings such as resolution, frame rate, and video format, if needed.
Step 4: Apply Changes
Once you have selected your camera and adjusted the settings, click on the “Apply” button at the bottom right corner of the settings menu to save the changes.
Now, your digital camera should be recognized by OBS and ready to use. You can create a new scene in OBS and add your camera as a source to start capturing its output.
Adding Camera as a Video Source
Once you have your digital camera connected to your computer, you can easily add it as a video source in OBS. Follow these steps to get started:
Step 1: Open OBS
Launch OBS on your computer to begin the setup process.
Step 2: Adding a Video Capture Device
In the main OBS window, click on the “+” icon under the “Sources” box to add a new source. From the dropdown menu, select “Video Capture Device” and click on “Add”.
Step 3: Configuring the Video Capture Device
Depending on your camera, OBS may automatically detect your camera or you may need to manually select it from the dropdown menu. Once your camera is selected, click on the “OK” button.
If you want to customize the settings, click on the “Configure” button. Here you can adjust parameters such as resolution, frame rate, and video format according to your preferences. Once you’re done, click on “OK” to continue.
Step 4: Positioning and Sizing
Once added, you can reposition and resize the video source by clicking and dragging on the edges. You can also use the red bounding box to adjust the size and position precisely. Arrange it wherever you want it on your stream or recording.
Note: If you want to add additional filters or effects to your camera feed, right-click on the video source and select “Filters”. From there, you can experiment with different effects like chroma key, color correction, and more.
Remember: Ensure that your camera is properly connected to your computer and turned on before adding it as a video source in OBS.
Now that you have successfully added your camera as a video source, you can start streaming or recording with your digital camera in OBS!
Optimizing Video Quality
When hooking up a digital camera to OBS, it’s important to optimize the video quality to ensure the best possible output. Here are some tips to help you achieve optimal video quality:
1. Check Camera Settings
First, check the settings on your digital camera. Make sure it is set to the highest video quality available. Adjust any other relevant settings, such as brightness, contrast, and white balance, to ensure the best image quality.
2. Use a High-Speed USB Cable
To ensure a stable and high-quality video signal, use a high-speed USB cable to connect your camera to your computer. USB 3.0 cables are recommended for the best performance.
3. Check OBS Settings
Open OBS and go to the “Settings” menu. Under the “Video” tab, make sure that the “Base (Canvas) Resolution” and “Output (Scaled) Resolution” are both set to the optimal resolution for your camera. You can usually find this information in your camera’s user manual or specifications.
4. Adjust Bitrate
In OBS settings, navigate to the “Output” tab and adjust the video bitrate. Higher bitrates generally result in better video quality, but keep in mind that higher bitrates also require more bandwidth and processing power. Find a balance that works for your setup and internet connection.
5. Lighting
Good lighting is essential for high-quality video. Make sure your recording area is well-lit and free from any harsh shadows. Consider using additional lighting equipment, such as a ring light, to improve the overall quality of your video.
By following these tips, you can optimize the video quality when hooking up a digital camera to OBS and ensure professional-looking video output. Experiment with different settings and techniques to find the setup that works best for you.
Troubleshooting
If you are experiencing issues while trying to hook up your digital camera to OBS, try the following troubleshooting steps:
1. Check your camera connection
Make sure your camera is properly connected to your computer using the appropriate USB cable. Ensure that the cable is securely plugged into both the camera and the USB port of your computer.
2. Restart OBS
Sometimes, restarting OBS can help resolve any software glitches or conflicts. Close OBS and then reopen it to see if the camera connection is established correctly.
3. Update camera drivers
Outdated or incompatible camera drivers can cause issues with the camera connection. Check the manufacturer’s website for any available driver updates for your camera model. Download and install the latest drivers, then try connecting your camera to OBS again.
4. Check camera compatibility
Ensure that your camera is compatible with OBS. Some cameras may require specific software or drivers to connect with OBS. Check the camera’s user manual or contact the manufacturer to confirm if your camera is compatible with OBS.
5. Test with a different USB port or cable
It’s possible that the USB port or cable you are using is faulty. Try connecting your camera to a different USB port on your computer or use a different USB cable to see if the issue is resolved.
6. Restart your computer
Sometimes, restarting your computer can help resolve connectivity issues. Try restarting your computer and then reconnect your camera to OBS to see if the problem persists.
If none of these troubleshooting steps resolve the issue, consider reaching out to OBS support or the camera manufacturer for further assistance.
Question-answer:
What is OBS?
OBS stands for Open Broadcaster Software. It is a free and open-source software for video recording and live streaming.
Can I connect a digital camera to OBS?
Yes, you can connect a digital camera to OBS. There are a few different ways to do it depending on your camera and computer setup.
How do I connect my digital camera to OBS?
The process of connecting your digital camera to OBS will vary depending on your camera and computer setup. However, in general, you will need to use a video capture device or a HDMI/USB capture card to connect your camera to your computer. Once connected, you can add the camera as a video source in OBS.
What are the benefits of connecting a digital camera to OBS?
Connecting a digital camera to OBS allows you to use a higher quality camera for your video recordings and live streams. This can result in better image quality and overall production value. It also gives you more control over the camera settings, such as exposure, white balance, and focus.


