If your beloved Canon digital camera has suddenly stopped working or is experiencing technical issues, it can be frustrating and disappointing. However, before you jump to conclusions and consider buying a new camera, there are several potential solutions you can try to repair your Canon digital camera and bring it back to its full functionality.
1. Check the Battery: The first step in troubleshooting your Canon digital camera is to ensure that the battery is charged and properly inserted. Remove the battery from the camera, clean the contacts, and reinsert it. If the camera still doesn’t turn on, try using a different battery or connect the camera directly to a power source.
2. Reset the Camera: Another troubleshooting technique is to perform a factory reset on your Canon digital camera. This will revert all settings back to their default values, which can help resolve software-related issues. Consult the camera’s manual or refer to the manufacturer’s website for instructions on how to perform a reset.
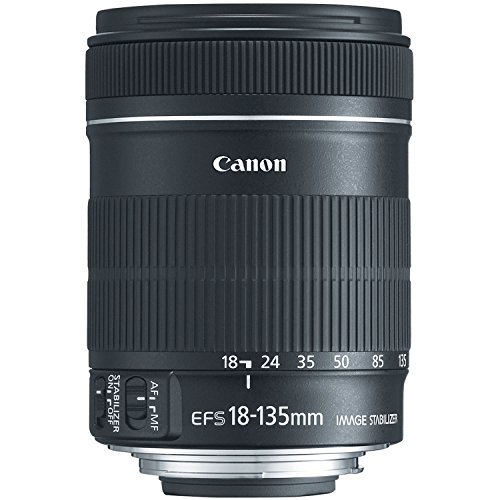
3. Clean or Replace the Lens: If your Canon digital camera is producing blurry or distorted images, the lens may be dirty or damaged. Use a soft, lint-free cloth to clean the lens. If this doesn’t improve the image quality, consider taking the camera to a professional technician for lens replacement.
4. Update Firmware: Canon occasionally releases firmware updates to address software bugs and improve camera performance. Visit the Canon website, locate your camera model, and download the latest firmware. Follow the instructions provided by Canon to update the firmware on your digital camera.

5. Seek Professional Help: If you have tried all the above steps and your Canon digital camera is still not working, it may be time to seek professional assistance. Reach out to Canon’s customer support or bring the camera to an authorized Canon service center for diagnosis and repair.
Remember, repairing a digital camera requires patience and caution. If you are not confident in performing any of the repair steps yourself, it is best to rely on professional help to avoid causing further damage to your Canon digital camera.
Disclaimer: The information provided in this article should be used for general informational purposes only. The author and website disclaim any liability for any damages or issues arising from the use or misuse of the information provided.
Common Camera Issues
Canon digital cameras can encounter several common issues that may require troubleshooting or repair. Some of the most common camera issues include:
1. Camera not turning on or not responding: If your Canon digital camera does not turn on or does not respond when you press the power button, check the battery and make sure it is properly inserted. If the battery is fully charged and inserted correctly, try resetting the camera by removing the battery and memory card for a few minutes.

2. The LCD screen is not working or displaying properly: If the LCD screen on your Canon digital camera is not working or displaying properly, try adjusting the brightness settings or toggling the display button to switch between the LCD screen and the viewfinder. If the issue persists, there may be a problem with the LCD screen itself and it may need to be replaced.
3. Lens error or lens not retracting: If you receive a lens error message or the lens on your Canon digital camera does not retract when you turn it off, try gently pulling or pushing the lens to see if it will realign. If this does not work, try turning the camera on and off again. If the issue persists, there may be a mechanical problem with the lens mechanism that requires professional repair.
4. Blurry or out-of-focus images: If your images are consistently blurry or out of focus, first make sure the camera is in the correct focus mode. Try cleaning the lens with a soft, lint-free cloth and make sure there is no dirt or debris on the lens. If the issue persists, there may be a problem with the autofocus system or lens that requires professional repair.
5. Memory card error: If you receive a memory card error message or your Canon digital camera does not recognize the memory card, try removing and reinserting the memory card. Make sure the memory card is properly formatted and compatible with your camera. If the issue persists, try using a different memory card or consult the camera’s manual for additional troubleshooting steps.
If you encounter any of these common camera issues and the troubleshooting steps do not resolve the problem, it is recommended to contact Canon customer support or a professional camera repair service for further assistance.

Troubleshooting Steps
If you are experiencing issues with your Canon digital camera, try following these troubleshooting steps to fix common problems:
1. Check the battery
Make sure the camera battery is fully charged or replace it with a new one. A low battery can cause various malfunctions or prevent the camera from turning on.
2. Reset the camera
Perform a camera reset by removing the battery and memory card for a few minutes. Then reinsert them and turn on the camera. This can help resolve software glitches or errors.
3. Check the memory card
Ensure the memory card is properly inserted and not full. If the card is damaged or corrupted, try using a different memory card. Back up your photos before formatting the card if necessary.
4. Clean the lens and contacts
Gently clean the lens and metal contacts on the camera body and lens with a soft, lint-free cloth. Dirt or smudges on the lens or contacts can affect image quality or prevent proper communication between the camera and lens.

5. Update camera firmware
Visit Canon’s official website and download the latest firmware for your camera model. Follow the instructions provided to update the camera firmware. Firmware updates can fix bugs and improve camera performance.
6. Test a different lens
If you have multiple lenses, try attaching a different lens to the camera. This will help determine if the issue is with the lens or camera body. If the problem persists with a different lens, it might be a camera-related issue.
If none of the above troubleshooting steps resolve the issue, it may be necessary to contact Canon’s customer support or take your camera to a professional service center for further assistance and repairs.
Cleaning the Camera Lens
The camera lens is one of the most important parts of your Canon digital camera. It allows light to enter the camera and capture clear and sharp images. However, over time, the camera lens can collect dust, smudges, and fingerprints, which can affect the quality of your photos. Cleaning the camera lens regularly is essential to maintain the optimal performance of your camera.
Materials Needed
- Clean microfiber cloth
- Lens cleaning solution
- Blower brush
Steps for Cleaning the Camera Lens
- Turn off your Canon digital camera and remove the lens cap if it is attached.
- Gently blow away any loose dust or debris from the camera lens using a blower brush. This will help prevent any scratches while cleaning.
- Apply a few drops of lens cleaning solution to a clean microfiber cloth. Make sure to use a cleaning solution specifically designed for camera lenses.
- Gently wipe the camera lens in a circular motion, starting from the center and moving outward. Avoid applying too much pressure to prevent any damage to the lens coating.
- If there are stubborn smudges or fingerprints, you can use a lens cleaning pen or a cotton swab moistened with lens cleaning solution. Be very careful not to scratch the lens.
- Once the lens is clean, inspect it under good lighting to ensure there are no streaks or residue left behind.
- If needed, repeat the cleaning process until the lens is completely clean and free of any dirt or smudges.
Remember to always handle the camera lens with care to avoid any damage. Avoid touching the lens directly with your fingers and always use a clean microfiber cloth for cleaning. Regularly cleaning the camera lens will help you capture better and sharper photos with your Canon digital camera.

Replacing Camera Battery
If your Canon digital camera is not turning on or is experiencing power issues, it may be time to replace the camera battery. Follow these steps to safely replace the battery:
- Turn off the camera and remove any memory cards or cables that may be attached.
- Locate the battery compartment on the bottom or side of the camera. It is usually marked with a battery icon.
- Open the battery compartment door using the designated latch or release button.
- Take out the old battery by sliding or lifting it out of the compartment.
- Check the new battery to ensure it is the correct model for your camera.
- Insert the new battery into the compartment, making sure the contacts align properly.
- Close the battery compartment door securely.
- Turn on the camera to test if the battery replacement was successful.
It is recommended to fully charge the new battery before use to ensure maximum performance. Consult your camera’s user manual for specific charging instructions.
If the camera still does not power on after replacing the battery, there may be a different issue at hand. Consider seeking professional assistance or contacting Canon customer support for further troubleshooting.
Repairing Camera Display
If you are experiencing issues with the display on your Canon digital camera, there are a few steps you can take to try and fix it.
1. Check for physical damage: Inspect the display screen for any visible cracks or scratches. If you see any damage, it may be necessary to replace the screen.
2. Clean the display: Sometimes, a dirty or smudged display can cause issues. Use a microfiber cloth or lens cleaning solution to gently wipe the screen clean.
3. Reset the camera: Some display problems can be resolved by performing a factory reset on the camera. Consult your camera’s manual for instructions on how to do this.
4. Update firmware: Outdated firmware can sometimes cause display issues. Visit Canon’s website and download the latest firmware update for your camera model. Follow the instructions provided to install the update.
5. Seek professional help: If none of the above steps solve the problem, it may be time to contact a professional camera repair service or the Canon support team for further assistance.
By following these steps, you may be able to repair the display on your Canon digital camera and get back to capturing those precious moments.

Fixing Camera Buttons
If you are having issues with the buttons on your Canon digital camera not functioning properly, it can be quite frustrating. However, there are a few steps you can take to potentially fix the issue.
1. Clean the Buttons
First, try cleaning the buttons. Sometimes, dirt, dust, or debris can accumulate around the buttons, causing them to stick or not respond properly. Use a clean, lint-free cloth or cotton swab dipped in a mild cleaning solution, such as isopropyl alcohol or water, to gently clean around the buttons. Be careful not to apply too much pressure or allow any liquid to enter the camera.
2. Check for Physical Damage
Inspect the buttons for any signs of physical damage, such as cracks, dents, or loose parts. If you notice any damage, the buttons may need to be replaced. Contact Canon customer support or take your camera to an authorized repair center for assistance.
If there doesn’t appear to be any physical damage, you can try resetting the camera settings to default. This can sometimes resolve button-related issues. Refer to your camera’s user manual for instructions on how to perform a factory reset.
If cleaning the buttons and resetting the camera settings didn’t fix the issue, it’s possible that there may be a software-related problem. In this case, you may need to update the camera’s firmware or reinstall the camera’s software. Visit the Canon website and search for your camera model to find the latest firmware updates or software downloads.
If none of these steps work, it’s advisable to contact Canon customer support or take your camera to an authorized repair center for further assistance. They will be able to diagnose the issue and determine if any repairs are necessary.
Repairing Camera Shutter
If you’re experiencing issues with your Canon digital camera’s shutter, there are a few steps you can take to try and repair it yourself before seeking professional help. Here are some troubleshooting tips:
- Check for any physical obstructions or debris: Inspect the shutter area for any visible objects or dirt that may be blocking the mechanism. Use a gentle brush or air blower to remove any particles.
- Reset the camera settings: Sometimes, a simple reset of the camera settings can resolve shutter issues. Look for the “Reset” option in your camera’s menu and follow the instructions to restore the default settings.
- Update the firmware: Outdated firmware can cause various camera malfunctions, including problems with the shutter. Visit Canon’s official website and download the latest firmware for your camera model. Follow the provided instructions to install the update.
- Check the battery: A low battery level can affect the camera’s functionality, including the shutter. Make sure your battery is fully charged or try using a different one to see if the issue persists.
- Perform a factory reset: If none of the above steps work, performing a factory reset may help. However, keep in mind that this will erase all your camera settings and customizations, so it should be done as a last resort. Consult your camera’s user manual for instructions on how to perform a factory reset.
If you’ve tried all the troubleshooting steps and the camera shutter still doesn’t work properly, it’s recommended to contact a professional camera repair service or Canon customer support for further assistance. Attempting further repairs may void your warranty or cause additional damage.
Question-answer:
What are some common issues with Canon digital cameras?
Some common issues with Canon digital cameras include lens errors, LCD screen malfunctions, battery problems, and software glitches.
Can I repair a cracked LCD screen on my Canon digital camera?
While it is technically possible to repair a cracked LCD screen on a Canon digital camera, it is a delicate and complex process. It is generally recommended to take the camera to a professional repair service to ensure the screen is replaced correctly and avoid further damage.


