
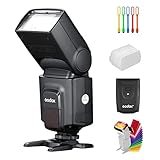
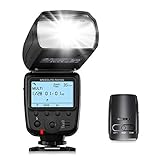
Every photographer knows how crucial a camera flash can be in capturing the perfect shot. It can make a significant difference in low-light conditions or when there is a need for fill-in light. However, just like any other electronic device, camera flashes can encounter problems and require repairs.
One common issue with digital camera flashes is when they stop working altogether. This can be frustrating, especially when you’re in the middle of an important shoot. Before you panic and rush to the nearest camera repair shop, there are a few troubleshooting steps you can try yourself.
Step 1: Check the batteries and connections. Sometimes, a simple battery replacement is all it takes to revive a dead camera flash. Ensure that the batteries are inserted properly and have enough power. Also, check for any loose connections or corroded contacts, as they can prevent the flash from functioning.
Step 2: Clean the flash unit. Over time, dirt and dust can accumulate on the flash unit, affecting its performance. Use a soft, dry cloth to gently wipe the surface of the flash and remove any debris. Be careful not to use any liquid cleaners, as they can damage the internal components.
Step 3: Reset the camera settings. Sometimes, the problem may not lie with the flash itself but with the camera settings. Navigate through the camera menu to find the flash settings and ensure that they are properly configured. Resetting the settings to their default values can also help troubleshoot any software-related issues.

If none of these steps solve the problem, it may be time to seek professional help. Look for authorized camera repair centers or contact the manufacturer for further assistance. Remember, attempting to repair the flash by yourself without proper knowledge can do more harm than good. It is always better to be safe and let the experts handle complex repairs.
In conclusion, a malfunctioning camera flash can be a real headache for photographers. However, by following these troubleshooting steps and knowing when to seek professional help, you can get your flash working again and continue capturing those stunning shots.
Understanding the digital camera flash
The digital camera flash is an essential component of any camera that allows photographers to capture well-lit photos in low-light or challenging lighting conditions. Understanding how the flash works and how to troubleshoot common issues can help you make the most of your camera’s flash functionality.
How does the flash work?
The digital camera flash emits a short burst of intense light to illuminate the subject being photographed. It typically consists of a bright bulb or LEDs and a reflector to distribute the light evenly. The flash can be manually activated or set to automatically go off when the camera detects low-light conditions.
When the flash is triggered, it releases a burst of light that is reflected off the subject and captured by the camera’s image sensor. This additional light helps to eliminate shadows, improve color accuracy, and freeze motion, resulting in well-exposed and sharp images.
Common flash issues
While the digital camera flash is a handy feature, it can sometimes malfunction or produce undesirable results. Some common flash issues include:
1. Red-eye: Red-eye occurs when the flash reflects off the subject’s eyes, resulting in a red-colored glow. This can be reduced by using the camera’s red-eye reduction feature or by having the subject look slightly away from the camera.
2. Overexposure: Overexposure happens when the flash is too powerful for the scene, causing the subjects to appear washed out or excessively bright. This can be mitigated by adjusting the flash output or using diffusers to soften the light.
3. Underexposure: Underexposure occurs when the flash output is too weak, resulting in dark or poorly lit images. This can be resolved by increasing the flash output or moving closer to the subject.
By understanding these common flash issues and their solutions, you can troubleshoot and optimize your camera’s flash performance to achieve better results in various shooting conditions.
Common Issues with Digital Camera Flash
The flash on a digital camera is a crucial component for capturing well-lit photos in low light conditions. However, like any other electronic device, it can encounter issues that may require repair or troubleshooting. Here are some common problems you may encounter with your digital camera flash:
- Flash not working: One of the most common issues is when the camera flash fails to work. This can happen due to various reasons, such as a drained battery, a faulty flash bulb, or a loose connection. It’s important to check these factors and replace or repair any faulty components.
- Overexposure or underexposure: Another common issue is when the flash results in photos that are either too bright or too dark. This can happen due to incorrect flash settings or a malfunctioning light sensor. Adjusting the flash settings or getting the light sensor repaired can help alleviate this problem.
- Red-eye effect: The red-eye effect occurs when the flash reflects off the subject’s retina, resulting in red eyes in the photo. This can be a common issue, especially when using the built-in flash on a point-and-shoot camera. Using red-eye reduction features or an external flash can help mitigate this problem.
- Slow recycling time: The recycling time of a flash refers to the time it takes for the flash to recharge between shots. If the recycling time becomes slower than usual, it may indicate a problem with the flash capacitor or battery. Replacing these components can help improve the recycling time.
- Flash not syncing with the camera: Sometimes, the camera flash may not synchronize properly with the camera shutter, resulting in poorly timed photos. This can occur due to issues with the flash circuitry or camera settings. Troubleshooting the synchronization settings and repairing any faulty circuitry can address this issue.
It’s important to note that attempting to repair a digital camera flash yourself can be challenging and may void any warranty. If you encounter any of these issues, it’s recommended to contact a professional camera repair service or the manufacturer for further assistance.
Tools needed for repair
Here are the essential tools you will need to repair a digital camera flash:
- Screwdriver set: A screwdriver set with various sizes and types of screw heads will be necessary to remove the screws from the camera and flash components.
- Tweezers: Small, precision tweezers will be useful for handling small parts and delicate wires.
- Soldering iron: If you need to replace any electronic components or repair solder joints, a soldering iron will be required.
- Solder wire: High-quality solder wire will be needed for making proper electrical connections.
- Multimeter: A multimeter is an essential tool for checking electrical continuity, voltage, and resistance within the flash circuitry.
- Anti-static mat: An anti-static mat will provide a static-free work surface to prevent damage to sensitive electronic components.
- Anti-static wrist strap: Using an anti-static wrist strap will prevent static electricity from damaging the camera’s delicate internal components.
- Cleaning materials: Soft lint-free cloths, cotton swabs, and isopropyl alcohol will be necessary for cleaning components and removing any dirt or debris.
- Replacement parts: Depending on the issue with your camera flash, you may need to source specific replacement parts such as capacitors, bulbs, or cables.
Make sure you have these tools ready before attempting any repairs to ensure a smooth and successful repair process.
Step-by-step guide for repairing digital camera flash
If your digital camera flash is not working, follow these steps to try and repair it:

-
Inspect the battery: Check if the battery in your camera is charged and correctly installed. If the battery is dead or not properly inserted, the flash may not work. Replace the battery if necessary.
-
Clean the flash contacts: Over time, dirt and grime can accumulate on the flash contacts, preventing them from establishing proper connections. Use a clean, lint-free cloth or a cotton swab dipped in rubbing alcohol to gently clean the contacts. Allow them to dry before testing the flash again.
-
Check the flash settings: Make sure the flash is turned on and set to the appropriate mode. Some cameras have different flash modes like “auto,” “fill flash,” or “red-eye reduction.” Consult your camera’s manual for instructions on selecting the correct flash settings.
-
Reset the camera: Try resetting your camera to its default settings. This can help troubleshoot any software-related issues that may be causing the flash to malfunction. Refer to your camera’s manual for instructions on how to perform a factory reset.
-
Update the firmware: Visit the manufacturer’s website and check if there are any firmware updates available for your camera model. Updating the firmware can sometimes resolve compatibility issues and improve overall camera performance, including the flash functionality.
-
Seek professional repair help: If none of the above steps solve the issue, it is recommended to take your camera to a professional technician or the manufacturer’s service center for further diagnosis and repair. Attempting complex repairs on your own may cause more damage to the camera.
By following these steps, you can troubleshoot and potentially fix the issue with your digital camera flash. However, if the problem persists or if you do not feel confident in performing the repairs yourself, it is always best to seek professional assistance.
Troubleshooting tips for digital camera flash repair
If your digital camera’s flash is not functioning properly, there are a few troubleshooting tips you can try before seeking professional repair. These tips can help you identify and potentially fix common issues with the flash.
1. Check the flash settings
Start by checking the flash settings on your camera. Ensure that the flash is not set to “off” or “disabled”. Depending on your camera model, you may need to access the settings menu to make adjustments.
2. Clean the flash unit
The flash unit can accumulate dirt and dust over time, which can affect its performance. Use a soft, lint-free cloth to carefully clean the flash unit. Make sure to remove any debris or smudges on the flash lens as well.
3. Replace the batteries
Weak or depleted batteries can cause issues with the flash. Replace the batteries with fresh ones and make sure they are properly inserted and have a good connection. Avoid using rechargeable batteries that are near the end of their lifespan.

4. Reset the camera
In some cases, resetting the camera to its factory settings can resolve flash-related problems. Consult your camera’s manual for instructions on how to perform a reset. Keep in mind that resetting may erase your customized settings, so make sure to back up any important data.
5. Update the firmware
Outdated firmware can sometimes result in flash malfunctions. Visit the manufacturer’s website to check for any available firmware updates for your camera model. Follow the instructions provided to download and install the latest firmware version.
These troubleshooting tips should help you address common issues with a digital camera’s flash. If the problem persists after attempting these solutions, it may be necessary to consult a professional camera repair technician.
Important safety precautions
When repairing a digital camera flash, it is important to prioritize safety to prevent any accidents or further damage. Follow these safety precautions:
1. Disconnect the power source: Before starting any repair work, make sure to disconnect the digital camera flash from its power source. This will help avoid electric shock and potential damage to the camera or the flash itself.

2. Use proper tools: Always use the appropriate tools for the repair job. Never use tools that are damaged, as they may cause injury or damage to the camera. Additionally, make sure to handle tools with care and wear protective gear when necessary.
3. Work in a well-ventilated area: Repairing a digital camera flash may involve working with chemicals or solvents. To prevent inhaling harmful fumes and ensure proper air circulation, work in a well-ventilated area or use a fan or extractor.
4. Avoid direct contact with internal components: When working on the flash, avoid touching any internal components or circuitry with bare hands. Oils and dirt on your hands may damage the delicate electronic parts or cause a short circuit.
5. Follow manufacturer instructions: If available, refer to the manufacturer’s instructions or service manual for specific repair guidance. It will provide valuable information on proper disassembly, reassembly, and handling of the digital camera flash.
6. Take necessary precautions with batteries: If the camera flash uses batteries, handle them with care. Avoid short-circuiting the battery terminals and dispose of used batteries correctly according to local regulations.

7. Keep children and pets away: To ensure their safety and avoid any distractions, keep children and pets away from your repair area. Chemicals, small parts, and tools can pose hazards if mishandled or swallowed.
8. Don’t force any parts: If a part is not easily moving or fitting into place, do not force it. Applying excessive pressure may cause damage or further complications. Assess the situation carefully and troubleshoot any issues before proceeding.
By following these safety precautions, you can reduce the risk of accidents and carry out the repair of a digital camera flash effectively.
When to seek professional help
If you have followed the troubleshooting steps mentioned above and are still unable to fix the issue with your digital camera flash, it may be time to seek professional help. Here are a few signs that indicate you need assistance from a professional:
1. Persistent issues
If you have been experiencing problems with your camera flash for a long time and have tried various troubleshooting methods without success, it is a good idea to consult a professional. They have the knowledge and expertise to diagnose and fix complex issues that may be beyond your understanding.
2. Damage or physical issues
If your camera flash is physically damaged, such as a cracked lens or broken circuitry, it is best to let a professional handle the repair. Attempting to fix physical issues yourself can potentially cause more harm to your camera and may void any warranty that you may have.
Remember, repairing physical damage requires specialized tools and skills that professionals possess. They can ensure that the necessary parts are correctly replaced and that your camera is fully functional again.
3. Lack of technical knowledge
If you are not familiar with the technical aspects of cameras and flashes, it is advisable to seek help from a professional. They can guide you through the repair process, explain the issues, and provide you with tips to prevent future problems.
Trying to fix technical issues without proper knowledge can lead to further damage and may cost you more in the long run. It is better to leave the repair work to someone who has the necessary expertise.
Overall, if you are unsure about repairing your digital camera flash or have exhausted all possible troubleshooting methods, it is best to consult a professional. They can save you time, effort, and potentially costly mistakes. Remember to choose a reliable and reputable repair service to ensure quality workmanship and the longevity of your camera flash.
Question-answer:
My camera flash stopped working. How can I repair it?
If your camera flash has stopped working, there are a few steps you can take to try and fix it. First, try cleaning the flash with a soft, lint-free cloth to remove any dirt or debris that may be blocking the flash mechanism. If that doesn’t work, you can try resetting the camera settings to default, as sometimes a software glitch can cause the flash to malfunction. If those steps don’t solve the issue, it’s recommended to take the camera to a professional repair service or contact the manufacturer for further assistance.
Why is my camera flash not turning on?
If your camera flash is not turning on, there could be a few reasons for this. First, check to make sure that the flash is enabled in the camera settings. Sometimes it can accidentally be turned off. If the flash is enabled but still not turning on, try replacing the batteries with fresh ones. If the batteries are weak, they may not have enough power to activate the flash. If these steps don’t solve the issue, there may be a hardware problem with the flash unit itself, and it’s best to consult a professional for repair or contact the manufacturer for assistance.
My camera flash is working intermittently. How can I fix it?
If your camera flash is working intermittently, there may be a loose connection or a faulty wire causing the issue. In this case, it’s recommended to check the flash connections and make sure they are secure. You can also try gently wiggling the flash unit while it’s turned on to see if that triggers a more consistent response. If the issue persists, it’s best to take the camera to a professional repair service or contact the manufacturer for further assistance.


