
Have you ever taken a picture with your digital camera and wished you could immediately share it with your friends or family on your phone?
Well, you’re in luck! With just a few simple steps, you can easily send pictures from your digital camera to your phone and start sharing your memories in no time.
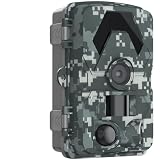
First, you’ll need to check if your digital camera has Wi-Fi capabilities. Many modern digital cameras come equipped with built-in Wi-Fi, which allows you to connect your camera directly to your phone without the need for any additional accessories.
If your digital camera doesn’t have Wi-Fi, don’t worry! You can still transfer your pictures to your phone using a USB cable. Simply connect your camera to your computer using the USB cable provided with your camera, and then transfer the pictures from your camera to your computer.
Once you have your pictures on your computer, you can easily transfer them to your phone using a variety of methods. One of the easiest ways is to use a cloud storage service, such as Google Drive or Dropbox. Simply upload your pictures to the cloud service from your computer, and then download them to your phone using the corresponding app.

Another option is to connect your phone to your computer using a USB cable and transfer the pictures directly. Simply connect your phone to your computer, and then copy and paste the pictures from your computer to your phone’s storage.
Remember to check the file format and size of your pictures before sending them to your phone. Some phones may not support certain file formats, so it’s a good idea to convert your pictures to a compatible format, such as JPEG. Additionally, large picture files may take longer to transfer, so consider resizing your pictures to a smaller size if necessary.
So, whether you have a digital camera with Wi-Fi or not, there are multiple ways to send pictures from your camera to your phone. Start sharing your memories instantly and keep your loved ones updated on your adventures!
Getting Started with Sending Pictures from Digital Camera to Phone
Sending pictures from your digital camera to your phone can be a convenient way to quickly access and share your photos on the go. With the right tools and techniques, you can easily transfer your pictures and preserve those precious memories. Here is a step-by-step guide to help you get started:
Step 1: Check Camera Compatibility
Before attempting to send pictures from your digital camera to your phone, it is important to make sure that your camera is compatible with your phone’s operating system. Some newer digital cameras have built-in Wi-Fi or Bluetooth capabilities that allow for easy wireless transfer, while others may require additional accessories or software.

Step 2: Connect Your Camera to Your Phone
Depending on your camera and phone models, there are different ways to connect your camera to your phone. You can use a USB cable, insert the camera’s memory card into your phone, or connect wirelessly if both devices support it. Refer to the user manuals of your camera and phone for specific instructions.
Step 3: Transfer Pictures
Once your camera is connected to your phone, you can start transferring pictures. If you are using a USB cable or memory card, your phone will automatically detect and import the photos. If you are transferring wirelessly, you may need to select the photos you want to send and choose the option to transfer them to your phone.
It is important to note that transferring large photo files wirelessly may take some time, so be patient and ensure that both your camera and phone are properly charged before starting the transfer process.
Step 4: Organize and Share
After transferring the pictures to your phone, you can organize them into folders or albums for easier access. You can also edit or enhance the photos using various photo editing apps available on your phone. Once you are satisfied with the results, you can easily share your pictures through messaging apps, social media platforms, or email.
Pro Tip: To save storage space on your phone, consider periodically moving your transferred photos to your computer or cloud storage.

By following these steps, you can quickly and easily send pictures from your digital camera to your phone. Remember to check the compatibility of your camera and phone, connect them properly, transfer the pictures, and organize and share your memories with others. Now, go ahead and capture those picture-perfect moments!
Connecting Your Digital Camera to Your Phone
If you want to send pictures from your digital camera to your phone, you’ll first need to connect the two devices. Although this process may vary depending on the type and model of your camera and phone, here are some general steps you can follow:
Step 1: Check Compatibility
Before attempting to connect your camera and phone, ensure that they are compatible. Check the user manuals for both devices to confirm if they can be connected directly or if any additional equipment is required.
Step 2: USB Connection
Most digital cameras come with a USB cable that allows you to connect it to a computer. You can use this same cable to connect your camera to your phone if it supports USB connections. However, keep in mind that not all phones have a USB port, so this method may not be available for all devices.
Step 3: SD Card
If your digital camera uses an SD card to store photos, you can remove the card from the camera and insert it into your phone if it has an SD card slot. Once inserted, you will be able to access the photos on the card directly from your phone’s gallery or file manager.

Step 4: Wireless Connection
Some cameras and phones also support wireless connections such as Wi-Fi or Bluetooth. You can check the settings on both devices to see if this option is available. If it is, follow the instructions to establish a wireless connection between your camera and phone, allowing you to transfer photos without the need for cables or additional equipment.
Remember to consult the user manuals for both your camera and phone for specific instructions on how to connect the two devices. By following these steps, you’ll be able to transfer your favorite pictures from your digital camera to your phone and easily share them with others.
Transferring Pictures via USB Cable
If you want to transfer pictures from your digital camera to your phone, one of the simplest and most efficient ways is by using a USB cable. Here’s a step-by-step guide on how to do it:
Step 1: Connect Your Devices
Start by connecting your camera to your phone using a USB cable. Most digital cameras come with a USB cable that you can use for this purpose. Make sure both devices are powered on and functioning properly before continuing.
Step 2: Access the Camera
Once connected, your phone should detect the camera and prompt you with options on how to proceed. You may need to unlock your phone and check the notifications or go to the settings menu to access the connected devices. Follow the instructions provided by your phone to access the camera.

Step 3: Select Pictures
Once you have accessed the camera on your phone, you should be able to see a list of pictures stored on the camera’s memory card. Browse through the pictures and select the ones you want to transfer to your phone. You can usually tap on the pictures to select or deselect them.
Step 4: Transfer the Pictures
After you have selected the pictures you want to transfer, look for an option to copy or transfer them to your phone. The exact steps may vary depending on the make and model of your phone, but there should be an option somewhere on the screen. Look for buttons or icons that resemble copy, transfer, or download.
Note: Some phones may give you the option to select the destination folder for the transferred pictures. If prompted, choose a suitable folder on your phone’s internal storage or SD card.
Step 5: Wait for the Transfer
Once you initiate the transfer, you’ll need to wait for the process to complete. The time it takes will depend on the size and number of pictures being transferred. Avoid disconnecting the USB cable or turning off your devices during the transfer to prevent any data loss or corruption.
Tip: If the transfer is taking too long or if you encounter any errors, try using a different USB cable or restarting your devices before attempting the transfer again.
By following these steps, you should be able to transfer pictures from your digital camera to your phone using a USB cable. This method allows for a direct and reliable transfer of files, ensuring that your precious memories are safely stored on your phone for easy access and sharing.
Transferring Pictures using Wi-Fi Connection
If your digital camera and phone both have Wi-Fi connectivity capabilities, you can easily transfer pictures from your camera to your phone wirelessly. Here’s how you can do it:
Step 1: Enable Wi-Fi
Ensure that Wi-Fi is enabled on both your camera and phone. Refer to the user manuals for both devices to find out how to turn on Wi-Fi.
Step 2: Connect Camera to Phone
Open the Wi-Fi settings on your phone and look for the Wi-Fi network name of your digital camera. Connect to the camera’s Wi-Fi network by selecting it and entering the password provided in the camera’s settings. Once connected, your phone will display a Wi-Fi icon indicating the connection.
Step 3: Launch Camera App
Open the camera app on your phone. Some cameras have their own dedicated app for connecting and transferring pictures, so make sure to check if your camera has one. If not, you can use the default camera app on your phone.

Step 4: Import Pictures
Once you have established a Wi-Fi connection between your camera and phone, you can now import pictures from your camera to your phone. In the camera app, look for an import option or a dedicated button for transferring pictures. Tap on it to start the import process.
Note that the import process may differ depending on the camera app you are using. Follow the on-screen instructions or refer to the app’s user manual for guidance.
After the import process is complete, you can find the imported pictures in your phone’s gallery or in a specific folder designated by the camera app.
Transferring pictures using a Wi-Fi connection provides a convenient and wireless method to transfer photos from your digital camera to your phone without the need for cables or additional accessories. Enjoy sharing and editing your pictures effortlessly!
Using a Memory Card Reader to Transfer Pictures
In order to transfer pictures from a digital camera to a phone, one convenient method is to use a memory card reader. A memory card reader is a device that allows you to directly access the data on the memory card of your digital camera and transfer it to your phone. Here’s how you can use a memory card reader to transfer pictures:
Step 1: Purchase a Memory Card Reader
The first step is to purchase a memory card reader that is compatible with the memory card of your digital camera. Memory card readers are widely available and can be found at electronic stores or online retailers. Make sure to choose a memory card reader that supports the type of memory card used by your camera.
Step 2: Insert the Memory Card
Once you have obtained a memory card reader, insert the memory card from your digital camera into the appropriate slot on the reader. The memory card reader will typically have slots for different types of memory cards, so make sure to insert the card into the correct slot.
Step 3: Connect the Reader to Your Phone
Next, connect the memory card reader to your phone. Some memory card readers have a USB connector that can be directly plugged into the USB port of your phone. If your phone does not have a USB port, you may need to use an adapter or cable to connect the memory card reader to your phone.
Step 4: Transfer Pictures
Once the memory card reader is connected to your phone, you can begin transferring the pictures. Open the file manager or gallery app on your phone and navigate to the location where you want to save the transferred pictures. Then, find the folder or files on the memory card reader that contain the pictures you want to transfer. Select the pictures and choose the option to copy or move them to the desired location on your phone.
Using a memory card reader to transfer pictures from a digital camera to a phone is a quick and convenient method. It eliminates the need for a computer or internet connection and allows for direct transfer of files. If you frequently transfer pictures from your camera to your phone, investing in a memory card reader can save you time and effort.
Summary
To transfer pictures from a digital camera to a phone using a memory card reader:
- Purchase a compatible memory card reader
- Insert the memory card into the reader
- Connect the reader to your phone
- Transfer the pictures to your phone
By following these steps, you can easily transfer pictures from your digital camera to your phone using a memory card reader.
Installing and Using Photo Transfer Apps
When it comes to sending pictures from a digital camera to a phone, one convenient option is to use a photo transfer app. These apps allow you to quickly and easily transfer photos from your camera to your phone wirelessly.
Step 1: Choose a Photo Transfer App
First, you need to choose a photo transfer app that is compatible with both your digital camera and your phone. Some popular options include:
| App Name | Compatibility |
|---|---|
| Photo Transfer App | Available for iOS and Android |
| Send Anywhere | Available for iOS and Android |
| Feem | Available for iOS, Android, Windows, and Mac |
| Dropbox | Available for iOS and Android |
Do some research and read reviews to determine which app best meets your needs.
Step 2: Install the App
Once you have chosen a photo transfer app, go to your phone’s app store and search for the app by name. Download and install it onto your phone.
Step 3: Connect Your Devices
Make sure both your camera and your phone are connected to the same Wi-Fi network. Open the app on your phone and follow the instructions to connect your camera to the app.
Step 4: Transfer Your Photos
Once your camera and phone are connected, you can start transferring your photos. Use the app’s interface to select the photos you want to send from your camera and choose the option to transfer them to your phone. The app will guide you through the process, and the photos will be transferred wirelessly.
Using a photo transfer app is a convenient and efficient way to send pictures from your digital camera to your phone. Follow these steps to install and use a photo transfer app, and you’ll be able to enjoy your photos on your phone in no time.
Transferring Pictures via Bluetooth
Transferring pictures from your digital camera to your phone can be done wirelessly using Bluetooth technology. Bluetooth allows for a convenient and simple transfer method without the need for cables or internet connectivity.
Step 1: Check Compatibility
Before attempting to transfer pictures via Bluetooth, ensure that both your digital camera and phone have Bluetooth capabilities. Check your devices’ user manuals or settings to confirm Bluetooth compatibility.
Step 2: Enable Bluetooth
On your digital camera, enable Bluetooth by accessing the settings menu. Similarly, enable Bluetooth on your phone by navigating to the settings menu and locating the Bluetooth option.
Step 3: Pair Devices
Once Bluetooth is enabled on both devices, you need to pair them. On your phone, select the option to “pair new device” and wait for your camera to appear on the list of available devices. Select your camera from the list and confirm the pairing on both devices.
Step 4: Select and Send Pictures
Now that your devices are paired, you can select the pictures you want to transfer from your camera. On the camera menu, browse through your photos and select the ones you wish to send. Once selected, choose the option to send via Bluetooth.
Step 5: Accept the Transfer
Your phone will receive a notification asking to accept the incoming Bluetooth transfer. Confirm the transfer and wait for your pictures to be transferred from the camera to your phone. The time taken for the transfer will depend on the number and size of the selected pictures.
After the transfer is complete, you can access the transferred pictures in your phone’s gallery or photo app.
Step 6: Disconnect Devices
After successfully transferring the pictures, remember to disconnect the Bluetooth connection between your camera and phone to ensure optimal battery life.
| Advantages of Bluetooth Transfer | Disadvantages of Bluetooth Transfer |
|---|---|
| Convenient and wireless transfer | Relatively slower transfer speed compared to other methods |
| No need for cables or internet connectivity | Limited range of Bluetooth connectivity |
| Simple pairing process | Compatibility issues between devices |
Troubleshooting Transfer Issues
If you are experiencing issues when trying to transfer pictures from your digital camera to your phone, these troubleshooting steps can help you resolve common problems:
- Check the cable connection: Ensure that the USB cable connecting your camera and phone is securely plugged into both devices. A loose connection can hinder the transfer process.
- Restart both devices: Sometimes, a simple restart can fix transfer issues. Turn off both your camera and phone, wait for a few seconds, and then turn them back on.
- Update software/firmware: Make sure that your camera and phone’s software or firmware is up to date. Manufacturers often release updates to improve compatibility and fix bugs.
- Verify compatibility: Ensure that your camera and phone are compatible for file transfers. Check the user manuals or online support resources to confirm if they support the transfer method you are trying to use.
- Try a different USB port or cable: If the transfer issues persist, try using a different USB port on your computer or a different USB cable. Faulty ports or cables can cause transfer failures.
- Free up storage space: Insufficient storage space on your phone can interrupt file transfers. Delete unnecessary files or apps to create more space.
- Enable USB debugging (Android): On Android devices, enabling USB debugging can help in case of transfer issues. To enable it, go to the “Developer options” in your phone’s settings and toggle on USB debugging.
- Use a memory card reader: If your camera uses a memory card, consider using a memory card reader to transfer pictures to your phone. This method bypasses the need for a USB connection.
- Contact support: If none of the above steps resolve your transfer issues, reach out to the customer support of your camera or phone manufacturer for further assistance.
By following these troubleshooting steps, you should be able to overcome common transfer issues and successfully send pictures from your digital camera to your phone.
Optimizing Picture Formats for Phone Transfer
When transferring pictures from a digital camera to a phone, it is important to optimize the picture formats to ensure they are compatible and can be easily viewed on the phone. Here are some tips to help you optimize the picture formats for phone transfer:
1. Choose the Right File Format
One of the most important considerations when optimizing picture formats for phone transfer is the file format. JPEG is the most widely supported format and is compatible with almost all modern smartphones. It provides good image quality with reasonable file sizes, making it ideal for transferring pictures to your phone.
If you need to preserve image quality or require transparency, consider using PNG format. However, keep in mind that PNG files are larger in size compared to JPEG files.
2. Compress the Image
Compressing the image helps reduce its file size without significant loss of quality. Most digital cameras capture high-resolution images, which may be unnecessary when transferring pictures to a phone. Reduce the image size and resolution to a suitable level for phone viewing to minimize the file size.
There are several online tools and software programs available that can help you compress images without compromising their quality. Experiment with different compression settings to find the optimal balance between file size and image quality.
3. Use a File Compression Format
If you have multiple pictures to transfer, consider using a file compression format like ZIP or RAR. These formats allow you to compress multiple files into a single archive file, reducing the overall file size. This can make the transfer process faster and more efficient.
| File Format | Pros | Cons |
|---|---|---|
| JPEG | – Widely supported – Good image quality – Reasonable file size |
– Lossy compression – Not suitable for transparency |
| PNG | – Good image quality – Supports transparency |
– Larger file size compared to JPEG |
| ZIP | – Compresses multiple files – Reduces file size |
– Requires extraction on the phone |
| RAR | – Efficient compression – Supports large files |
– Requires extraction on the phone – May require third-party software |
By following these tips, you can optimize the picture formats for phone transfer and ensure that the images can be easily viewed and shared on your smartphone.
Safely Removing Your Digital Camera from Your Phone
After successfully transferring your pictures from your digital camera to your phone, it is important to safely remove your camera to prevent any data loss or damage.
Follow these steps to safely remove your digital camera:
- Close any open photo transfer apps or programs on your phone. Before removing your digital camera, make sure that all applications or programs related to the photo transfer process are closed. This will ensure that no data is being actively transferred, and reduce the risk of any errors occurring during the removal process.
- Turn off your digital camera. It is important to turn off your camera before disconnecting it from your phone to prevent any data loss or corruption. Look for the power button or switch on your camera and press or slide it to turn off the device.
- Disconnect the USB cable. Carefully remove the USB cable that connects your digital camera to your phone. Hold the connector firmly and gently pull it out of the port on your phone. Avoid pulling or yanking the cable to prevent any damage to the port or the cable itself.
- Securely store your digital camera. Once the USB cable is disconnected, store your camera in a safe and secure location to protect it from any potential damage. Consider using a camera case or bag to minimize any risks associated with accidental dropping or exposure to environmental factors.
By following these steps, you can ensure the safe removal of your digital camera from your phone, preserving your pictures and preventing any potential data loss or damage. Remember to always handle your camera and its accessories with care to maintain their longevity and functionality.
Question-answer:
What is the easiest way to send pictures from a digital camera to a phone?
The easiest way to send pictures from a digital camera to a phone is by using a Wi-Fi connection or a Bluetooth connection. Most digital cameras nowadays have built-in Wi-Fi or Bluetooth capabilities which allow you to directly send photos to your phone without the need for any cables or additional devices. Simply connect your camera and phone to the same Wi-Fi network or pair them via Bluetooth, and then use the camera’s built-in software or app to transfer the photos.
Can I use a USB cable to transfer pictures from my digital camera to my phone?
Yes, you can use a USB cable to transfer pictures from your digital camera to your phone. To do this, you will need a USB cable that is compatible with your camera and phone. Connect one end of the cable to your camera and the other end to your phone’s USB port. Your phone will prompt you to select a transfer mode (such as “File Transfer” or “PTP”). Once the connection is established, you can access your camera’s storage on your phone and copy the pictures to your device.
Is it possible to send pictures from a digital camera to a phone without an internet connection?
Yes, it is possible to send pictures from a digital camera to a phone without an internet connection. One way to do this is by using a USB cable to connect the camera and the phone. Another way is to use an SD card reader. Many phones have a built-in SD card slot, so you can remove the SD card from your camera, insert it into your phone, and copy the pictures from the card to your device. This method works even if your phone does not have internet access.
What are some popular apps for transferring pictures from a digital camera to a phone?
There are several popular apps for transferring pictures from a digital camera to a phone. One of the most popular apps is called “Camera Connect” by Canon. It is designed specifically for Canon cameras and allows you to transfer photos wirelessly to your phone. Another popular app is “SnapBridge” by Nikon, which is compatible with Nikon cameras. Other apps like “Sony PlayMemories Mobile” and “Fujifilm Camera Remote” are also commonly used for transferring photos. These apps can be downloaded from the app stores on your phone.


