Time lapse photography is a captivating technique that allows you to compress hours, days, or even months into just a few seconds or minutes. It’s a visually stunning way to showcase the passage of time and capture the essence of a long-term event or phenomenon.
If you’re eager to try your hand at time lapse photography, you’re in luck! With today’s digital cameras, taking time lapse photos has never been easier. In this guide, we’ll walk you through the step-by-step process of capturing beautiful time lapse sequences with your digital camera.
Before diving into the technical details, it’s important to understand the concept of time lapse photography. Essentially, it involves taking a series of photos at set intervals and then stitching them together in post-production to create a seamless video. The key to successful time lapse photography lies in careful planning and attention to detail.
First and foremost, you’ll need a digital camera capable of shooting in manual mode and capturing images at regular intervals. Most modern DSLR and mirrorless cameras offer this functionality, so you won’t need any specialized equipment. However, it’s important to invest in a sturdy tripod to keep your camera steady throughout the shooting process.
Why Time Lapse Photography is Popular Today
Time lapse photography has gained immense popularity in recent years, captivating photographers and viewers alike. This unique technique allows us to witness the passing of time in a condensed manner, revealing the subtle changes and movements that occur over extended periods.

One of the main reasons for the popularity of time lapse photography can be attributed to its ability to capture stunning visuals that are otherwise unnoticed by the naked eye. By compressing time, time lapse photography reveals the beauty of slow processes such as plant growth, cloud formation, or the movement of celestial bodies. It allows us to appreciate the intricate details and patterns that might otherwise go unnoticed in our fast-paced lives.
Furthermore, time lapse photography allows us to capture and convey stories in a unique and visually striking way. By condensing hours, days, or even years into a short video or series of images, time lapse photography can tell a story unlike any other medium. It can transport the viewer through changing seasons, dynamic cityscapes, or the construction of monumental structures, creating a sense of awe and fascination.
Time lapse photography also appeals to the adventurer within us. It enables us to experience and document moments that are otherwise fleeting, such as a starry night sky, a bustling city street, or a blooming flower. It allows us to freeze time and explore the beauty and grandeur of our surroundings in a way that traditional photography simply cannot.
Additionally, technological advancements have made time lapse photography more accessible and user-friendly than ever before. Digital cameras now offer built-in intervalometers, which automatically capture images at set intervals, making the process much simpler for photographers. There is also a wide range of software available that simplifies the editing and production of time lapse videos, further enhancing its appeal and popularity.
In conclusion, time lapse photography has become popular today due to its ability to reveal the hidden beauty of slow processes, tell captivating stories, capture fleeting moments, and the accessibility provided by modern technology. Whether capturing the growth of a flower or the vibrant energy of a city, time lapse photography allows us to appreciate and share the world in a visually stunning and unique way.
Tips for Choosing the Right Digital Camera
When it comes to taking time lapse photos, having the right digital camera is essential. Here are a few tips to help you choose the perfect camera for your needs:
1. Consider the Resolution
One of the most important factors to consider when choosing a digital camera for time lapse photography is its resolution. Higher resolution cameras will capture more detail and produce clearer images. Look for a camera with at least 12 megapixels for the best results.
2. Look for Manual Settings
For time lapse photography, it is important to have a camera that allows you to control the manual settings. Look for a camera that has manual exposure, focus, and aperture settings. This will give you greater control over your time lapse shots.
3. Consider the Battery Life
Time lapse photography can be a time-consuming process that drains the camera’s battery quickly. Look for a camera with a long battery life or consider investing in an additional battery or a battery grip to ensure that you don’t run out of power in the middle of a shoot.
4. Evaluate the Lens Options

The lens is an important component of any camera, especially for time lapse photography. Look for a camera that offers a variety of lens options to suit your specific needs. Wide-angle lenses are great for capturing expansive landscapes, while telephoto lenses are ideal for zooming in and capturing specific details.
5. Read Reviews and Comparisons
Before making a final decision, take the time to read reviews and comparisons of different cameras. This will give you a better understanding of the features, strengths, and weaknesses of each camera. Pay attention to reviews from photographers who specialize in time lapse photography.
By considering these tips and taking time to research your options, you can choose the right digital camera for your time lapse photography needs. Remember, the camera is just a tool, so don’t forget to practice and experiment to improve your skills and capture stunning time lapse images.
Setting Up Your Digital Camera for Time Lapse Photography
Time lapse photography allows you to capture long periods of time and condense them into short videos or series of photos. To get started with time lapse photography, you will need to set up your digital camera properly. Here are a few steps to help you get started:
- Choose the right location: Find a location with an interesting subject or scenery that will change over time. This can be anything from a busy street to a blooming flower.
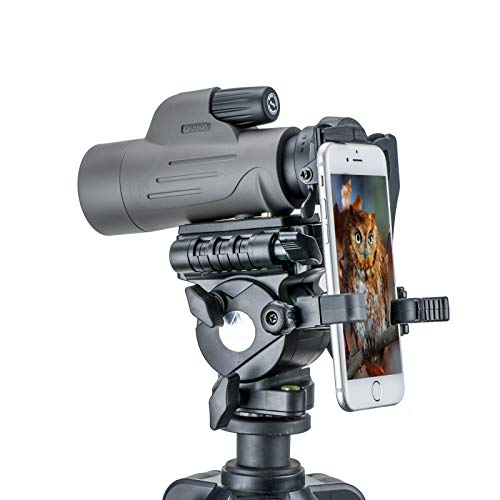
- Set your camera on a stable surface: Use a tripod or any other stable surface to keep your camera steady. This will prevent any unwanted camera movement and ensure smooth time lapse videos.
- Select the appropriate interval: Determine how often you want your camera to take photos. The interval will depend on how fast the subject is changing and the desired length of your final time lapse.
- Adjust exposure settings: Set your camera’s exposure settings to manual mode to maintain consistent lighting throughout the time lapse. This will prevent any exposure changes caused by changes in lighting conditions.
- Use the right battery power: Time lapse photography consumes a lot of battery power. Make sure your camera is fully charged or use an AC adapter to ensure uninterrupted power supply.
- Frame your shot: Compose your shot by considering the subject and the desired framing. It’s a good idea to take a test shot first to make sure everything looks as you want it to.
- Start shooting: Once you have everything set up, start the time lapse by pressing the shutter button. Let your camera capture the sequence of photos for the desired length of time.
- Transfer and edit your photos: After capturing the time lapse sequence, transfer the photos to your computer and use software like Adobe Lightroom or Lapse It Pro to edit and compile them into a time lapse video.
By following these steps and experimenting with different subjects and intervals, you can create captivating time lapse videos with your digital camera.
Choosing the Best Location for Time Lapse Photos
When capturing time lapse photos with your digital camera, choosing the right location is crucial. The right location can make a significant difference in the overall quality and impact of your time lapse sequence. Here are a few factors to consider when selecting a location:
1. Scenic and Engaging Environment
Select a location that offers a visually appealing and engaging environment. Look for interesting landscapes, cityscapes, natural wonders, or any other visually striking element that can enhance the visual interest and story of your time lapse.
2. Unobstructed Views
To avoid any obstructions ruining your time lapse, make sure your chosen location provides unobstructed views of the subject. This will ensure that there are no unwanted objects or people in the frame that can distract from the main focus of your time lapse sequence.
3. Lighting Conditions
Consider the lighting conditions in your chosen location. The quality of light can greatly affect the mood and atmosphere of your time lapse photos. Look for locations with interesting and dynamic lighting, such as sunrise or sunset, golden hour, or dramatic cloud formations.

4. Environmental Factors
Take into account the environmental factors that may impact your time lapse. Consider the weather conditions, such as wind, rain, or snow, and how they may affect the stability of your camera setup or the overall aesthetics of your time lapse sequence.
Furthermore, consider any other elements or factors that may impact your shooting experience, such as accessibility, safety concerns, and legal restrictions.
By considering these factors and carefully choosing the best location for your time lapse photos, you can ensure that your final sequence is visually compelling and tells a captivating story. Experiment with different locations and explore the great potential of time lapse photography.
Recommended Camera Settings for Time Lapse Photography
When it comes to capturing stunning time lapse photos with your digital camera, the right camera settings are crucial. Here are some recommended camera settings to ensure you get the best results:
1. Manual Mode
Switch your camera to Manual mode to have full control over all the settings. This way, you can adjust the aperture, shutter speed, and ISO according to the lighting conditions.

2. Aperture
For time lapse photography, it is recommended to use a narrow aperture, such as f/8 or higher. This helps ensure that all the elements in your frame stay in focus throughout the entire sequence.
3. Shutter Speed
Set a slightly longer shutter speed to capture the motion over an extended period. Choose a speed that suits the subject and the effect you want to achieve; however, it is generally advisable to use shutter speeds of 1 second or longer.
4. ISO
Keep the ISO as low as possible to minimize noise and ensure the highest image quality. Start with an ISO of 100 and increase it if necessary to maintain proper exposure in low light conditions.
5. White Balance
Consider setting the White Balance to Manual or a specific Kelvin temperature to avoid any abrupt changes in color temperature during the time lapse. This will result in a more consistent and professional-looking sequence.
6. Interval
Decide on the interval between each consecutive shot based on the speed of the subject or the desired effect. Longer intervals, such as 5-10 seconds, work best for slow-moving subjects, while shorter intervals, such as 1-3 seconds, are suitable for faster movement.

7. Focus
Switch your camera to Manual Focus to prevent it from refocusing between shots. Take a test shot to ensure everything is sharp and in focus, then lock the focus to maintain consistency throughout the time lapse.
8. Power Source
Make sure your camera has a reliable power source, such as a fully charged battery or an AC adapter. Time lapse photography can quickly drain the battery, so it’s essential to have a backup plan to avoid any interruptions.
| Camera Settings | Recommended Values |
|---|---|
| Mode | Manual |
| Aperture | f/8 or higher |
| Shutter Speed | 1 second or longer |
| ISO | Lowest possible (e.g., ISO 100) |
| White Balance | Manual or specific Kelvin temperature |
| Interval | Subject-dependent (e.g., 5-10 seconds for slow motion) |
| Focus | Manual focus with a locked position |
| Power Source | Fully charged battery or AC adapter |
Using an Intervalometer for Accurate Time Lapse Photography
Time lapse photography allows you to capture a series of photos over a set period of time and then play them back as a video, showing the passage of time in a condensed format. To achieve accuracy and precision in your time lapse photography, using an intervalometer is key.
What is an Intervalometer?
An intervalometer is a device or feature that allows you to automate the process of taking photos at set intervals. It’s essentially a timer for your camera, enabling you to capture images without having to manually press the shutter button each time.
Many modern digital cameras come with built-in intervalometer features, but if your camera doesn’t have one, you can purchase a separate intervalometer device that connects to your camera.
Using an Intervalometer
Using an intervalometer is simple and straightforward. Here’s a step-by-step guide:
| Step | Description |
|---|---|
| 1 | Connect the intervalometer to your camera, following the manufacturer’s instructions. |
| 2 | Set the desired interval between each photo. This can range from seconds to minutes, depending on your specific needs. |
| 3 | Adjust other settings such as exposure, aperture, and focus to ensure the desired outcome of your time lapse. |
| 4 | Start the time lapse by activating the intervalometer. Some intervalometers have a button to start and stop the process, while others can be programmed in advance. |
| 5 | Let the intervalometer and camera do the work! It will automatically take photos at the set intervals until you stop the process. |
Using an intervalometer not only allows for precise time lapse photography, but it also helps minimize camera shake caused by manually pressing the shutter button. This results in smoother and more professional-looking time lapse videos.
So, if you want to take your time lapse photography to the next level, consider using an intervalometer for accurate and effortless shooting.
Essential Accessories for Time Lapse Photography
Time lapse photography requires precision and careful planning to capture stunning sequences of images over an extended period of time. To enhance your time lapse photography experience, consider investing in these essential accessories:
Intervalometer
An intervalometer is a device that allows you to set the timing and interval between shots. It is a crucial accessory for time lapse photography as it ensures consistent and accurate capture of images over extended periods. Intervalometers can be connected to your camera via a cable or operate wirelessly, depending on your camera model.
Sturdy Tripod
A sturdy tripod is essential to keep your camera steady during long exposure shots. Time lapse photography often involves shooting in challenging environments or during unfavorable weather conditions, making a reliable tripod crucial. Look for a tripod that is durable, lightweight, and easily adjustable to different heights.
| Accessory | Description |
|---|---|
| Neutral Density Filters | Neutral density (ND) filters reduce the amount of light entering the lens, allowing for longer exposure times. They are especially useful when shooting time lapse sequences during the daytime or in bright lighting conditions. |
| External Power Source | Using an external power source, such as a battery grip or AC adapter, ensures that your camera remains powered throughout the entire time lapse sequence. This is particularly important for capturing longer sequences that span several hours or even days. |
| Camera Remote | A camera remote enables you to trigger the shutter without physically touching the camera, reducing the risk of camera shake. It is especially useful when shooting time lapse sequences that require long exposure times. |
| Memory Cards | Time lapse photography can generate a large number of images, so it’s important to have sufficient storage capacity. Invest in high-capacity memory cards or consider using an external storage device to ensure that you don’t run out of space during your shoot. |
By equipping yourself with these essential accessories, you can take your time lapse photography to the next level and capture stunning sequences that showcase the passage of time in a visually striking way.
Troubleshooting Common Issues in Time Lapse Photography
Time lapse photography can produce stunning results, but it can also come with its fair share of challenges. Here are some common issues you might encounter when trying to capture time lapse photos with your digital camera and how to troubleshoot them:
1. Shaky footage: One of the biggest challenges in time lapse photography is ensuring stable footage. To avoid shaky shots, use a sturdy tripod and consider using a remote shutter release or a smartphone app to trigger your camera. You can also use a weighted bag or sandbag to add extra stability to your tripod.
2. Flickering or inconsistent exposure: Time lapse photography involves capturing a series of images over a long period of time, which can result in variations in lighting conditions. To avoid flickering or inconsistent exposure, set your camera to manual mode and choose a fixed aperture and shutter speed. You can also use exposure compensation to ensure consistent exposure throughout the entire sequence.
3. Battery drain: Capturing a time lapse sequence can be demanding on your camera’s battery life, especially if you are shooting for a long period of time. To prevent your battery from draining too quickly, keep a spare battery or use an external power source, such as a battery grip or an AC adapter.
4. Memory card capacity: Time lapse photography can generate a large number of images, which requires sufficient memory card capacity. Make sure you have a memory card with enough storage space to accommodate the entire sequence. Consider using a high-capacity memory card or clearing out space on your existing card before starting your time lapse.
5. Unwanted movement in the frame: It’s important to be aware of any objects or elements in your frame that may move during the time lapse. This can include people, animals, or even branches swaying in the wind. Make sure to choose a composition where unwanted movement is minimized or consider using a neutral density filter to reduce the effects of moving elements.
6. Exposure time limitations: Depending on the subject and lighting conditions, you may encounter limitations on the exposure time you can use for your time lapse. This is especially true when shooting in daylight. To overcome this limitation, consider using an ND filter to reduce the amount of light entering your camera or capturing your time lapse during the golden hour when the lighting conditions are more favorable.
By troubleshooting these common issues, you can enhance your time lapse photography skills and achieve the desired results with your digital camera.
Editing and Sharing Your Time Lapse Photos
Once you have captured your time lapse photos, it’s time to edit and share them to create a stunning visual story.
Edit your photos:
Start by importing your photos into a photo editing software like Adobe Lightroom or Photoshop. This will allow you to make small adjustments to the exposure, contrast, and color balance to enhance the overall look of your time lapse.
Combine your photos into a sequence:
Next, you will need to combine your photos into a sequence to create the final time lapse video. There are several software options available for this, such as Adobe Premiere Pro or Windows Movie Maker. Simply import your photos into the software and arrange them in the desired order.
Add music and effects:
To further enhance your time lapse video, consider adding music or sound effects to create a more immersive experience. You can find royalty-free music tracks online or use your own original compositions.
Export and save your time lapse video:
Once you’re satisfied with your editing, it’s time to export and save your time lapse video. Choose the desired file format and resolution that best suits your needs. Save a high-resolution version for archiving, and a compressed version for easy sharing.
Share your time lapse video:
Now that your time lapse video is ready, it’s time to share it with the world. You can upload it to popular video-sharing platforms like YouTube or Vimeo, or share it on social media platforms such as Instagram or Facebook. Consider adding captions or descriptions to provide context and engage your audience.
Remember to credit yourself as the creator and consider adding a watermark to protect your work from unauthorized use.
Question-answer:
What is a time lapse photo?
A time lapse photo is a series of photos taken at regular intervals and then played back at a faster speed to create a video. It is used to capture the passage of time and can create visually stunning effects.
What equipment do I need to take time lapse photos with a digital camera?
To take time lapse photos with a digital camera, you will need a camera that has a built-in intervalometer or an external intervalometer device. You will also need a sturdy tripod to keep the camera stable during the entire time lapse. Additionally, it is recommended to use a wide-angle lens to capture a larger field of view.