
Technology continues to evolve at an unprecedented pace, and this innovation often brings new possibilities that were once unimaginable. One such possibility is the ability to repurpose everyday gadgets for alternative uses. In this article, we will explore how to transform a digital camera into a taser, turning a seemingly harmless device into a self-defense tool.
Using a digital camera as the foundation for a taser provides several advantages. The main advantage is accessibility – digital cameras are widely available and can be found in many households. Additionally, digital cameras are lightweight and portable, making them easy to carry around discreetly. With a few modifications, you can quickly transform this ordinary device into a means of protecting yourself.
Disclaimer: It is crucial to highlight that tampering with electronics can be dangerous and may result in injury or damage. This article is for informational purposes only, and any attempt to convert a digital camera into a taser should be done with extreme caution and responsibility.
Step 1: Preparation
The first step in repurposing a digital camera as a taser is to ensure your safety throughout the process. Use protective gloves and goggles to prevent electrical shocks or injuries. It is also essential to work in a well-ventilated area to avoid inhaling any potentially harmful particles.

Step 1: Understanding the Basics
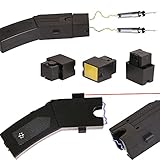
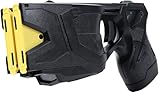
The first step in turning a digital camera into a taser is to familiarize yourself with the basic components of both devices. A digital camera typically consists of an image sensor, a lens, and a circuitry that processes and stores the captured images. On the other hand, a taser is a device that delivers an electric shock to incapacitate or stun an individual.
By understanding the functionality of these components, you can begin to explore how to repurpose the digital camera’s circuitry to deliver an electric shock.
It’s important to note that modifying a digital camera in this manner can be dangerous and potentially illegal. It’s crucial to prioritize safety and ensure compliance with local laws and regulations. Proceed at your own risk and always seek professional guidance if needed.
Step 2: Gather the Necessary Materials
Before you can turn your digital camera into a taser, you will need to gather a few essential materials. The following items are necessary for the transformation process:
1. Digital Camera
You will need a digital camera as the main component for this project. Make sure you choose a camera that you are willing to repurpose for this experiment and that you don’t mind potentially damaging or voiding the warranty.

2. Screwdriver Set
A screwdriver set will be needed to disassemble the digital camera. Make sure you have a variety of screwdriver sizes, including flathead and Phillips-head screwdrivers, as different cameras may require different types of screws to be removed.
3. Needle-Nose Pliers
Needle-nose pliers will be helpful in manipulating small parts during the disassembly and reassembly process. They can also be used to remove any delicate components or wires that may be present inside the camera.
4. Wire Cutters/Strippers
Wire cutters/strippers will be necessary for cutting and stripping wires, which will be used to create the necessary electrical connections for the taser functionality.
5. Soldering Iron
A soldering iron will be required to solder the wires and components together, ensuring a secure and reliable connection. Make sure you have soldering experience or seek guidance from someone who does if you are unfamiliar with soldering.
6. Electrical Tape
Electrical tape will be used to insulate and secure the electrical connections once they are made. It is essential to prevent any accidental shorts or electrical hazards.

7. Safety Equipment
For your safety, it is recommended to wear protective gear such as safety glasses and gloves when working with electronic components, soldering irons, and potentially hazardous materials.
Once you have gathered all these materials, you are ready to move on to the next step of the process.
Step 3: Disassemble the Camera
Before we can start modifying the camera into a taser, we need to disassemble it to access its internal components. Follow the steps below to safely disassemble the camera:
1. Gather the necessary tools
Make sure you have the following tools handy:
- Small screwdriver set
- Plastic pry tool
- Tweezers
2. Power off the camera
Before disassembling the camera, ensure it is powered off to avoid any potential electrical shocks or damage.
3. Remove the battery
Locate the battery compartment on the camera and open it. Take out the battery and set it aside for safety.
4. Remove the screws
Using the small screwdriver, carefully remove all the screws securing the camera’s outer casing. Keep track of the screws and organize them to ease reassembly later.
5. Separate the casing
Once all the screws have been removed, gently pry open the camera’s casing using the plastic pry tool. Take your time and apply even pressure to avoid breaking any components.
6. Access internal components
With the casing removed, you will now have access to the camera’s internal components. Be cautious not to touch any delicate parts or expose them to static electricity.
By following these steps, you should now have successfully disassembled your digital camera and gained access to its internal components.

Step 4: Locate the Flash Capacitor
Once you have opened up your digital camera, you will need to locate the flash capacitor. This is a key component that stores the electrical energy needed to power the camera’s flash. The flash capacitor is typically a small, cylindrical device that is connected to the camera’s flash circuitry.
You can usually find the flash capacitor by following the wires that are connected to the camera’s flash circuit. These wires will lead you to the flash capacitor. It may be located on the circuit board or in a separate compartment within the camera’s housing.
Note: It is important to exercise caution during this step, as the flash capacitor can hold a significant amount of electrical charge even after the camera has been turned off.
Before proceeding, make sure to discharge the flash capacitor to prevent any accidental electric shock.
To discharge the flash capacitor, you can use a resistor or a screwdriver with an insulated handle. Simply touch the metal contacts of the flash capacitor with the resistor or the screwdriver. This will help dissipate any stored electrical charge.
Once you have discharged the flash capacitor and ensured that it is safe to handle, you can proceed to the next step.
Step 5: Modify the Circuit
Before proceeding with this step, ensure that the digital camera is completely powered off and disconnected from any power source.
1. Open up the camera casing using a small screwdriver or any appropriate tool required.
2. Locate the circuit board inside the camera. This is where all the components of the camera are connected.
3. Identify the power source of the camera. It is usually a battery or a set of batteries.
4. Carefully remove the power source by gently disconnecting it from the circuit board.
5. Once the power source is removed, locate the capacitor. This component is responsible for storing electrical energy.
6. Use a soldering iron to carefully desolder the capacitor from the circuit board.
7. Replace the original capacitor with a high voltage capacitor suitable for your taser project.
8. Make sure to connect the capacitor properly to the circuit board. Double-check the polarity and ensure that it is securely attached.
9. Inspect the entire circuit for any loose connections or damaged components. Repair or replace them as needed.
10. Put the camera casing back together, ensuring that all screws are tightened securely.
Keep in mind that modifying the circuit of a digital camera can be risky and may void the camera’s warranty. It is important to be cautious and follow safety precautions to minimize any potential hazards.
Step 6: Reassemble the Camera
After completing the modifications, it’s time to put the camera back together. Follow these steps to reassemble your camera:
- Start by carefully placing the camera lens back into its original position, ensuring that it is properly aligned.
- Slide the camera’s circuit board back into place, making sure all the connections are secure.
- Reattach any screws or clips that were removed during the disassembly process.
- Insert the battery and memory card back into their respective slots.
- Gently close the camera’s casing, making sure it clicks into place.
- Test the camera to ensure that all the functions are working correctly.
It’s important to note that while reassembling the camera, you should exercise caution and follow the original disassembly steps in reverse. Make sure all the components are properly aligned before securing them in place. Additionally, double-check all the connections and screws to ensure they are tightened correctly.
Once you have successfully reassembled the camera, you can now proceed to use it as a taser according to the instructions provided in the previous steps. Always remember to handle the modified camera with care, and ensure that it is used responsibly and within legal boundaries.
Step 7: Test the Taser Functionality
Before finalizing the modifications to your digital camera, it is crucial to test the taser functionality to ensure it operates safely and effectively. Follow the steps below to perform the necessary tests.
Gather the Required Materials
Prior to testing the taser functionality, make sure you have the following materials:
| 1. | A suitable target (such as a foam dummy or a padded surface) |
| 2. | A fully charged battery for the modified camera |
| 3. | Protective gear, including gloves and safety glasses |
Perform the Tests
Follow these steps to test the taser functionality:
- Wear the protective gear to ensure your safety during testing.
- Place the target at a suitable distance, ensuring that there is enough space for the taser to deploy without causing harm.
- Power on the modified camera and activate the taser function according to the instructions provided during the modification process.
- Aim the camera towards the target, ensuring that the taser probes are properly aligned.
- Press the designated button or switch to deploy the taser function.
- Observe the taser’s impact on the target and note any changes in its functioning.
It is essential to evaluate the taser’s effectiveness and reliability during testing. Pay attention to factors such as the distance covered by the taser probes, the strength of the electric shock delivered, and any potential malfunctions or safety concerns.
Please adhere to the following safety precautions:
- Never aim or test the taser functionality on living beings or sensitive equipment.
- Keep a safe distance from the target during the testing process.
- If any issues or malfunctions occur, turn off the taser immediately, remove the battery, and seek professional assistance if necessary.
By conducting thorough testing, you can ensure that your modified digital camera taser operates safely and as intended. Make any required adjustments or refinements before proceeding to use it in any real-life situations.
Step 8: Use the Taser Responsibly
It is important to remember that turning a digital camera into a taser is a potentially dangerous and illegal activity. You should never use a homemade taser on another person without their consent, as it can cause serious harm or even death.
If you choose to build a digital camera taser for self-defense purposes, make sure you are familiar with your local laws and regulations regarding the use of such devices. It is crucial to understand the legal consequences and potential liabilities of using a homemade taser.
Additionally, always exercise caution and responsible behavior when handling a taser, whether homemade or commercially bought. Keep it out of reach from children or anyone who is not trained to use it properly. Store it in a safe and secure location to prevent accidental discharge.
Follow these guidelines for using a digital camera taser:
- Use it only in situations where you genuinely feel threatened and need to protect yourself or others.
- Aim for non-lethal areas of the body, such as the lower abdomen, thighs, or upper arms.
- Never aim for the head, neck, spine, or groin, as these areas can cause severe injury or death.
- Avoid using the taser on anyone who is already incapacitated, as it can lead to additional harm.
- After using the taser, call emergency services immediately and provide them with all necessary information about the incident.
Remember, the primary goal of using a taser is to create a chance to escape from a dangerous situation, not to cause unnecessary harm or take revenge. Always prioritize personal safety and use the taser responsibly.
Safety Precautions:
When working with any type of electrical device, especially one that has been modified to act as a taser, it is important to take certain safety precautions to avoid harm or injury. Here are some important safety tips to keep in mind:
1. Wear Protective Gear:
Always wear the appropriate protective gear when handling the modified camera taser. This may include gloves, safety glasses, and insulated clothing. These protective measures will help reduce the risk of electric shock and other injuries.
2. Keep Away from Children and Pets:
Make sure to store the modified camera taser in a secure place, out of reach of children and pets. This device should only be used by responsible adults who fully understand its potential dangers.
3. Never Point at People:
It is crucial to never point the modified camera taser at another person, even as a joke. The electrical shock produced by the device can cause serious harm or injury, and it should only be used in self-defense situations.
4. Avoid Water and Moisture:
Avoid using the modified camera taser in wet or humid conditions. Water and moisture can conduct electricity and increase the risk of electrical shock. Keep the device away from bodies of water, such as pools or lakes.
5. Store Properly:
Store the modified camera taser in a cool, dry place when not in use. Make sure the device is kept away from any flammable materials or sources of heat. This will help prevent accidents and reduce the risk of fire.
6. Educate Yourself:
Before using the modified camera taser, take the time to thoroughly read and understand the manufacturer’s instructions. Familiarize yourself with the device’s features, functions, and limitations to ensure safe and responsible use.
Remember, the modified camera taser is not a toy and should be treated with caution and respect. By following these safety precautions, you can minimize the risk of accidents and protect yourself and others from harm.
Step 10: Additional Resources
If you are interested in learning more about modifying digital cameras and exploring their potential in unconventional ways, the following resources can provide you with further information and inspiration:
1. Online Communities:
Join online communities and forums dedicated to hacking, modifying, and repurposing electronic devices. These platforms provide an excellent opportunity to connect with like-minded individuals, share ideas, and learn from experienced hobbyists.
– Hackaday: This community-driven platform focuses on DIY projects, hacks, and modifications, including digital cameras. Visit their website (https://hackaday.com) to explore their articles, tutorials, and project ideas.
– DIYPhotography: Although primarily focused on photography, this website (https://www.diyphotography.net) features articles and guides that can help you understand the inner workings of digital cameras and experiment with their capabilities.
2. Electronics and Robotics Books:
Expand your knowledge of electronics, circuits, and robotics by exploring books that delve into these subjects. Some titles to consider include:
– “Make: Electronics” by Charles Platt: This book provides a beginner-friendly introduction to electronics theory and hands-on projects, making it an excellent resource for those interested in tinkering with digital cameras.
– “Practical Electronics for Inventors” by Paul Scherz and Simon Monk: This comprehensive guide covers electronics theory, components, and practical applications, making it a valuable reference for anyone looking to modify electronic devices.
3. Tutorials and YouTube Channels:
Explore online tutorials and YouTube channels that focus on DIY electronics and camera modifications. These resources can provide step-by-step instructions and visual demonstrations to help you better understand and execute your projects.
– YouTube Channels: Check out channels like “DIY Perks” and “The Post-Apocalyptic Inventor” for creative camera modification ideas and tutorials.
– Instructables: This website (https://www.instructables.com) features user-generated tutorials and project guides, including camera modifications, that can help you take your DIY skills to the next level.
Remember, safety should always be your top priority when working with electronic devices. Make sure to take necessary precautions, follow proper guidelines, and use caution at all times.
Question-answer:
Can I really turn a digital camera into a taser?
No, it is not possible to turn a digital camera into a taser. A digital camera is designed for capturing images and videos and does not have the necessary components or circuitry to function as a taser.
Why would someone want to turn a digital camera into a taser?
There is no logical reason for someone to want to turn a digital camera into a taser. Taser devices are classified as weapons and are designed for self-defense or incapacitating individuals. A digital camera, on the other hand, is a device used for capturing images and videos. It would be highly dangerous and irresponsible to modify a camera in such a way.


