
Using a manual lens on a digital camera can be a rewarding experience for any photography enthusiast. Manual lenses allow for a greater level of control and creativity, giving you the opportunity to experiment with different settings and techniques. However, using a manual lens can also be a bit challenging, especially if you’re used to the convenience and automation of modern autofocus lenses. In this article, we will guide you through the process of using a manual lens on your digital camera, from attaching the lens to adjusting the settings.
Step 1: Attach the Manual Lens to Your Camera
The first step in using a manual lens on your digital camera is to physically attach the lens to the camera body. To do this, locate the lens mount on your camera body and line up the lens’ mounting ring with it. Carefully rotate the lens clockwise until you feel it click into place. Make sure that the lens is securely attached and aligned properly with the camera body.
Note: Manual lenses come in various mounts, so make sure to use a lens that is compatible with your camera body. If you’re unsure about the compatibility, consult your camera’s user manual or do some research online.
Step 2: Set Your Camera to Manual Mode

Once the lens is attached, it’s time to set your camera to manual mode. This will allow you to manually adjust the focus, aperture, and other settings to achieve the desired effect. On most cameras, the manual mode is represented by the letter “M” on the mode dial. Switch your camera to manual mode and you’re ready to start shooting with your manual lens.
Tip: Familiarize yourself with the manual controls of your camera, as you will be relying on them to adjust the settings. Take some time to practice using the shutter speed, ISO, and aperture controls to become comfortable with their operation before you start shooting.
Step 3: Focus Manually
Unlike autofocus lenses, manual lenses require you to focus manually. To do this, look through the viewfinder or use the LCD screen on your camera to compose your shot. Rotate the focus ring on the lens until your subject appears sharp and in focus. Be patient and take your time to ensure accurate focus, especially when shooting at wider apertures, where the depth of field is more shallow.
Remember: Manual focus requires practice and precision. Take multiple shots at different focus distances to ensure you capture the shot you envision. Consider using a tripod to maintain stability and prevent camera shake.
By following these steps, you can successfully use a manual lens on your digital camera. Embrace the challenges and opportunities that come with using a manual lens, and let your creativity soar as you experiment with different settings and techniques. Happy shooting!
Why use a manual lens?
Using a manual lens on a digital camera can offer a range of benefits for photographers. Here are a few reasons why you might choose to use a manual lens:
1. Increased control: Manual lenses require you to manually adjust focus, aperture, and other settings, giving you greater control over the final image. This can be particularly useful if you are looking to achieve a specific artistic effect or if you want to experiment with different focusing techniques.
2. Cost-effective: Manual lenses are often more affordable than their autofocus counterparts, making them an attractive option for photographers on a budget. They can also be a great choice for beginner photographers who want to learn the basics of photography without investing in expensive equipment.
3. Unique image quality: Manual lenses often have a distinctive image quality that can be difficult to replicate with modern autofocus lenses. They may produce subtle imperfections, such as vignetting or flare, that can add character and charm to your photos.
4. Versatility: Manual lenses can be used with a wide range of camera systems, including both digital and film cameras. This makes them a versatile tool for photographers who want to work with different camera formats or who want to use vintage lenses on their digital cameras.
5. Developing photography skills: Using a manual lens can help develop your photography skills by forcing you to rely more on your instincts and knowledge of camera settings. It can also encourage you to slow down and be more intentional with your compositions, leading to more thoughtful and creative photographs.
Overall, using a manual lens can offer a unique and rewarding photography experience. Whether you are a beginner or an experienced photographer, incorporating a manual lens into your kit can help you to explore new creative possibilities and improve your photography skills.
Types of manual lenses
When it comes to using a manual lens on a digital camera, there are different types of lenses that you can choose from. Each type has its own characteristics and advantages, allowing you to experiment and achieve different effects in your photography.
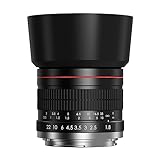
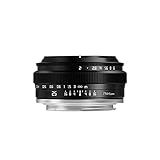
1. Prime lenses
Prime lenses have a fixed focal length, meaning that they cannot zoom in or out. These lenses are known for their sharpness, clarity, and the ability to capture images with a wide aperture. Prime lenses are popular among photographers who prefer a specific focal length and want to achieve a shallow depth of field.
2. Macro lenses
Macro lenses are designed for close-up and detailed photography. These lenses have a high magnification ratio, allowing you to capture small subjects with great clarity and detail. Macro lenses are commonly used for nature photography, product photography, and scientific applications.
3. Wide-angle lenses
Wide-angle lenses have a shorter focal length, allowing you to capture a wider field of view. These lenses are perfect for landscape photography, architecture photography, and any situation where you want to include more of the scene in your frame. Wide-angle lenses can create a sense of depth and add a dramatic effect to your images.
4. Telephoto lenses
Telephoto lenses have a longer focal length, allowing you to zoom in and capture distant subjects. These lenses are ideal for wildlife photography, sports photography, and any situation where you cannot physically get close to your subject. Telephoto lenses compress perspective and create a narrow depth of field, isolating the subject from the background.
5. Vintage lenses
If you enjoy experimenting with different aesthetics and adding a unique character to your photos, vintage lenses can be a great choice. Vintage lenses refer to older manual lenses that were designed for film cameras. These lenses often have distinct optical characteristics, such as vignetting, low contrast, and softness, which can result in a vintage and nostalgic look.
Regardless of the type of manual lens you choose, remember that using a manual lens on a digital camera requires some practice and getting used to. It may take time to adjust the focus manually and accurately, but with patience and experience, you can achieve exceptional results and unlock new creative possibilities in your photography.

Step 1: Choose the right lens for your camera
When using a manual lens on a digital camera, it’s important to choose the right lens that is compatible with your specific camera model. Not all lenses will work with all cameras, so it’s essential to do some research or consult your camera’s manual to determine which lenses are compatible.
One important factor to consider when choosing a lens is its focal length. The focal length determines the field of view and magnification of the lens. Typically, lenses with shorter focal lengths (<50mm) are wide-angle lenses, which are great for landscapes and capturing a wider field of view. Lenses with longer focal lengths (>50mm) are known as telephoto lenses, which are ideal for zooming in on distant objects or for portrait photography.
Another consideration is the lens mount. Different camera manufacturers use different types of lens mounts, so you need to ensure that the lens you choose has the correct mount for your camera. Some common lens mounts include Canon EF, Nikon F, Sony E, and Micro Four Thirds.
Research and Compatibility
Before purchasing a manual lens, it’s important to research and ensure compatibility with your specific camera model. Check the manufacturer’s website or consult your camera’s manual to determine the lens compatibility. Additionally, you can consult online forums or photography communities to get recommendations from other photographers who have used manual lenses on their cameras.
Considerations for Manual Lenses
When using a manual lens on a digital camera, keep in mind that you will need to manually adjust the focus, aperture, and other settings. Your camera’s autofocus and aperture control may not work with manual lenses, so you will need to adjust these settings manually. This can take some practice to get the hang of, but it can also give you more control and creativity in your photography.
It’s also important to note that some manual lenses may not transmit metadata to the camera, so you won’t have information such as the focal length or aperture recorded in your EXIF data. However, you can manually enter this information later if needed.
In conclusion, when using a manual lens on a digital camera, choose a lens that is compatible with your camera model and consider factors such as focal length and lens mount. Research and ensure compatibility before making a purchase, and be prepared to manually adjust settings when using a manual lens. With a bit of practice, using a manual lens can open up new possibilities and creative opportunities in your photography.
Consider the lens mount
When using a manual lens on a digital camera, it’s important to consider the lens mount compatibility. Different camera manufacturers use different lens mount systems, and not all manual lenses will be compatible with every camera.
Before purchasing a manual lens, you should research and ensure that the lens you’re interested in is compatible with your camera’s lens mount. This information can usually be found in the camera’s manual or on the manufacturer’s website.
Types of lens mounts
There are several common types of lens mounts, including:

- Canon EF/EF-S: Used by Canon DSLRs.
- Nikon F-mount: Used by Nikon DSLRs.
- Sony E-Mount: Used by Sony mirrorless cameras.
- Fuji X-Mount: Used by Fujifilm mirrorless cameras.
- Micro Four Thirds (MFT): Used by Panasonic and Olympus mirrorless cameras.
These are just a few examples, and there are many more lens mounts available. It’s essential to check the specific lens mount compatibility for your camera before purchasing a manual lens.
Adapters
If you have a manual lens with a different mount than your camera, you may be able to use an adapter. Adapters allow you to mount a lens with one type of mount onto a camera with a different mount.
Keep in mind that using an adapter may affect the camera’s ability to autofocus, control aperture, or transfer metadata. Manual focusing may be required, and some features of the lens or camera may be limited.
It’s important to do research and choose high-quality adapters that maintain the lens’s optical quality and ensure proper alignment between the lens and camera.
By considering the lens mount compatibility and potentially using adapters, you can successfully use a manual lens on your digital camera and explore the creative possibilities that manual lenses offer.
Check the compatibility
Before using a manual lens on your digital camera, it is important to check the compatibility between the lens and the camera body. Different camera brands and models may have different lens mounts, so it is crucial to ensure that the lens you have is compatible with your camera.
First, you need to identify the lens mount of your camera. This information can usually be found in the camera’s user manual or by doing a quick search online. Once you know the lens mount, you can look for lenses that are designed to fit that specific mount.
It is also important to consider the camera’s functionality when using a manual lens. Some digital cameras have limitations when it comes to using manual lenses, such as lack of autofocus or metering capabilities. Make sure to read the camera’s specifications or consult with the manufacturer to determine if there are any compatibility issues or limitations.
- Check the lens compatibility with your camera’s mount
- Consider any limitations or lack of functionality
By checking the compatibility between your manual lens and digital camera, you can ensure that they are compatible and avoid any potential issues or damage.
Step 2: Attach the lens to your camera
Once you have selected the manual lens you want to use, it’s time to attach it to your digital camera. Here are the steps to follow:
- Locate the lens mount on your camera body. It is usually located on the front of the camera.
- Remove the protective cap from the back of the lens you are using.
- Align the mounting index on the lens with the corresponding index on the camera body.
- Gently insert the lens into the lens mount and rotate it clockwise until you hear a click.
- Make sure the lens is securely attached to the camera body.
- Double-check that the lens is properly aligned and straight.
It’s important to note that manual lenses do not have electronic connections to the camera, so you won’t have autofocus or aperture control. However, you can still adjust the focus and aperture manually on the lens itself. Once the lens is attached, you are ready to start using it to capture amazing photographs with your digital camera.
Remove the lens cap
Before using a manual lens on your digital camera, it is important to remove the lens cap. The lens cap is a protective cover that is placed over the front of the lens to protect it from scratches, dust, and other debris.
To remove the lens cap, locate the cap on the front of the lens and gently grasp it with your fingers. Rotate the cap counterclockwise until it comes off the lens. Be careful not to drop or lose the cap during this process.
Once the lens cap is removed, you will have a clear view through the lens. It is important to keep the cap in a safe place, as you will need it to protect the lens when the camera is not in use.
Remember to always remove the lens cap before attempting to take photos with a manual lens. Failing to do so can result in blurry or obstructed images.
Align the lens with the camera mount
Before attaching the manual lens to your digital camera, it’s important to ensure that it is properly aligned with the camera mount. This will ensure that the lens is securely attached and will function correctly.
To align the lens with the camera mount, follow these steps:
- Turn off your camera and locate the lens mount on the front of the camera body. The lens mount is typically a metal ring that surrounds the camera’s sensor.
- Remove the lens cap from the front of the manual lens, if it is attached.
- Hold the manual lens by the barrel, ensuring that you do not touch the glass elements of the lens.
- Align the white or silver mounting dot or line on the lens barrel with the corresponding dot or line on the camera’s lens mount. Some lenses may have other alignment markers, so consult your lens manual for specific instructions.
- Gently rotate the lens clockwise until it clicks into place. Ensure that the lens is securely attached to the camera.
Once the lens is aligned and attached, you can proceed to use the manual lens on your digital camera. Remember to set your camera to manual mode and adjust the aperture and focus manually for optimal results.
Step 3: Set the camera to manual mode
Once you have attached the manual lens to your digital camera, the next step is to set the camera to manual mode. By doing this, you will have full control over all the settings, including the aperture, shutter speed, and ISO.
To set your camera to manual mode, follow the steps below:
- Turn on your camera and navigate to the shooting mode settings.
- Look for the “M” or “Manual” mode option and select it.
- Once in manual mode, adjust the aperture by rotating the aperture ring on your manual lens. This will control the amount of light entering the camera.
- Next, adjust the shutter speed by using the camera’s control dial. A slower shutter speed allows more light in, while a faster shutter speed freezes motion.
- Finally, set the ISO by selecting the desired sensitivity level. A lower ISO is best for well-lit situations, while a higher ISO is better for low-light conditions.
It’s important to note that when using a manual lens on a digital camera, you won’t have autofocus capabilities. You will need to manually focus your shots by turning the focusing ring on the lens until your subject appears sharp in the viewfinder.
By setting your camera to manual mode, you gain full control over your photography, allowing you to express your creativity and capture unique images with your manual lens.
Switch to manual focus
To use a manual lens on a digital camera, you need to switch from autofocus to manual focus mode. Here’s how you can do it:
1. Locate the AF/MF switch on your camera. This switch is usually found on the side of the lens or on the camera body itself.
2. Turn the switch from AF (autofocus) to MF (manual focus) mode. This will disable the autofocus functionality of your camera and allow you to manually adjust the focus.
3. Once you have switched to manual focus mode, you can manually adjust the focus by rotating the focus ring on the lens. Look through the viewfinder or use the camera’s live view function to see the changes in focus as you rotate the ring.
Tip: When using a manual lens, it can be helpful to use the camera’s focus-assist features, such as focus peaking or magnification. These features can help you achieve accurate focus by highlighting the areas that are in focus.
Note: When shooting with a manual lens, it may take some practice to get used to manually focusing. However, with time and experience, you will be able to achieve precise and creative focus effects that may not be possible with autofocus lenses.
Question-answer:
What is a manual lens?
A manual lens is a type of lens that does not have autofocus capabilities. It requires the user to manually adjust the focus and aperture settings.
Can I use a manual lens on my digital camera?
Yes, you can use a manual lens on a digital camera. However, you will need to set your camera to manual mode and adjust the settings manually.
How do I attach a manual lens to my digital camera?
To attach a manual lens to your digital camera, you need to remove the lens that is currently attached to the camera by pressing the lens release button and twisting it counterclockwise. Then, line up the red dot on the lens mount with the corresponding dot on the manual lens, and twist the lens clockwise until it locks into place.
What are the advantages of using a manual lens?
Using a manual lens allows you to have more control over your photography. You can manually adjust the focus and aperture settings to achieve the desired effect. Manual lenses are also often cheaper than autofocus lenses.
Are there any disadvantages of using a manual lens?
One disadvantage of using a manual lens is that it requires more time and effort to get the desired focus and exposure settings. It may also be challenging to use a manual lens in fast-paced or unpredictable shooting situations.


