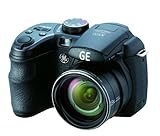
Whether you are a professional photographer or a beginner, the GE X500 Digital Camera is a powerful tool that allows you to capture high-quality images with ease. With its advanced features and user-friendly interface, this camera is perfect for capturing stunning landscapes, beautiful portraits, and everything in between.
One of the key features of the GE X500 Digital Camera is its 16 megapixel sensor, which ensures that every photo you take is sharp, detailed, and vibrant. This camera also has a wide-angle lens with 15x optical zoom, allowing you to capture wide-angle shots and zoom in on distant subjects without compromising image quality.
In addition to its impressive hardware, the GE X500 Digital Camera also offers a range of shooting modes and editing tools that allow you to unleash your creativity. Whether you want to capture a fast-moving subject with the sports mode, create stunning black and white images with the monochrome mode, or experiment with different exposure settings in manual mode, this camera has something to suit every style of photography.
Using the GE X500 Digital Camera is also a breeze thanks to its intuitive interface and ergonomic design. The camera’s large LCD screen provides a clear view of your subject, and the easy-to-use controls make it simple to adjust settings and review your photos. Whether you are a photography enthusiast or a casual user, the GE X500 Digital Camera is the perfect tool to capture and share your memories.
Getting Started
Welcome to the world of photography with the GE X500 digital camera! This guide will help you get started with your new camera and capture beautiful moments.

1. Inserting the Batteries
Before using your camera, make sure to insert the batteries. Open the battery compartment, located on the bottom of the camera, and insert four AA batteries according to the polarity markings. Close the compartment securely.
2. Inserting the Memory Card
To store your photos and videos, you need to insert a memory card. Locate the memory card slot, usually on the side of the camera, and insert the memory card into the slot with the label facing the back of the camera. Make sure it clicks into place.
Note: It is recommended to use an SD or SDHC memory card with a capacity of up to 32GB for optimal performance.
3. Powering On the Camera
To turn on the camera, press and hold the power button, usually located on the top of the camera, until the camera powers on. Once on, the camera will be ready to use.
Pro tip: To conserve battery life, it is recommended to turn off the camera when not in use.

Now that your GE X500 digital camera is powered on and ready to go, you can start exploring its features and capturing amazing photos and videos!
Camera Navigation
Using the GE X500 digital camera is easy once you become familiar with its navigation controls. Here’s a breakdown of how to navigate through the camera’s settings and options:
- Power Button: The power button is located on the top of the camera. Press and hold it to turn the camera on or off.
- Mode Dial: The mode dial allows you to select different shooting modes, such as Auto, Manual, Scene, or Video. Rotate the dial to choose the desired mode.
- Menu Button: The menu button is used to access the camera’s menu system. Press it to view and adjust various settings, including image quality, white balance, ISO, and more.
- Navigation Buttons: These buttons are located on the back of the camera and are used to navigate through menus and settings. Use the up, down, left, and right buttons to scroll and select options.
- OK/Enter Button: The OK or Enter button is located in the center of the navigation buttons. Use it to confirm selections or apply changes to settings.
- Zoom Lever: The zoom lever is positioned around the shutter button. Move the lever up or down to zoom in or out while framing your shots.
- Shutter Button: The shutter button is used to take photos. Press it halfway to focus, and fully press it to capture the image.
- Playback Button: The playback button is used to view and manage the photos and videos you have taken. Press it to enter the playback mode and browse through your media.
- Delete Button: The delete button, often indicated by a trash can icon, allows you to delete unwanted photos or videos. Press it during playback or while in the preview mode to remove selected media.
- Display Button: The display button is used to toggle between different display options on the camera’s LCD screen. Press it to cycle through options like gridlines, histogram, and image information.
By understanding the functions of each control, you’ll be able to navigate through the GE X500 digital camera easily and make the most out of its features.
Basic Settings and Adjustments
When using the GE X500 digital camera, it is important to familiarize yourself with the basic settings and adjustments in order to capture the best quality photos.
1. Power on the camera by pressing the power button located on the top of the camera.

2. Set the date and time by navigating to the settings menu. Use the arrow buttons to adjust the values and the enter button to confirm.
3. Choose the desired photo resolution. Higher resolutions will result in larger file sizes, but also higher image quality. Navigate to the settings menu and select the resolution option to make your selection.
4. Adjust the ISO settings depending on the lighting conditions. Lower ISO values (e.g., 100) are suitable for bright conditions, while higher ISO values (e.g., 800) are better for low-light situations. Use the ISO settings option in the settings menu to adjust the value.
5. Set the white balance to match the lighting conditions. The camera offers different preset white balance options such as daylight, cloudy, fluorescent, and more. Navigate to the settings menu and select the white balance option to make your selection.
6. Enable or disable the flash based on your needs. The flash can be set to auto mode, always on, always off, or red-eye reduction. Use the flash settings option in the settings menu to make your selection.

7. Adjust the exposure compensation if needed. This setting allows you to make the image brighter or darker than the camera’s automatic settings. Navigate to the settings menu and select the exposure compensation option to adjust the value.
8. Explore the various shooting modes available on the camera such as portrait, landscape, sports, and more. These modes are designed to optimize settings for specific shooting scenarios. Use the shooting mode option in the settings menu to make your selection.
By familiarizing yourself with these basic settings and adjustments, you will be able to capture stunning photos with your GE X500 digital camera.
Capturing Photos
Using the GE X500 digital camera to capture stunning photos is easy and straightforward. Follow these simple steps to ensure you get the perfect shot every time:
1. Power on the camera: Press the power button located on the top of the camera. Wait a few seconds for the camera to boot up.

2. Set the shooting mode: Use the mode dial located on the top of the camera to select the desired shooting mode. The available modes include Auto, Program, Scene, and more. Choose the mode that best suits your shooting scenario.
3. Adjust the settings: Use the menu button on the back of the camera to navigate through the settings menu. Adjust the settings such as ISO, white balance, exposure compensation, and flash according to your preferences and shooting conditions.
4. Compose your shot: Look through the viewfinder or use the LCD screen on the back of the camera to frame your shot. Pay attention to the composition, lighting, and subject placement to create visually appealing photos.
5. Focus on the subject: Half-press the shutter button to autofocus on your subject. Make sure the focus indicator is aligned with your desired subject before proceeding to the next step.
6. Capture the photo: Fully press the shutter button to take the photo. Hold the camera steady to avoid blurriness. The camera will save the photo to the memory card.

7. Review and retake if needed: After capturing the photo, review it on the LCD screen. If necessary, retake the photo by pressing the shutter button again.
8. Transfer and share: Connect your camera to a computer using a USB cable or remove the memory card and insert it into a card reader. Transfer the photos to your computer and share them with friends and family.
Remember to practice and experiment with different settings and shooting techniques to improve your photography skills with the GE X500 digital camera.
Advanced Features and Functions
The GE X500 digital camera offers a range of advanced features and functions to enhance your photography experience. Whether you are a beginner or an experienced photographer, these features will help you capture stunning images with ease.
Manual Mode
One of the key advanced features of the GE X500 camera is the manual mode. This mode allows you to take full control over your camera settings, including aperture, shutter speed, and ISO. Manual mode is perfect for experimenting with different creative techniques and achieving the desired effect in your photos.
Advanced Zoom
The GE X500 camera is equipped with an advanced zoom feature that allows you to capture distant subjects without sacrificing image quality. With the camera’s 15x optical zoom and 6x digital zoom, you can get up close to your subject and still maintain sharpness and detail in your photos.
Image Stabilization
To ensure sharp and steady images, the GE X500 camera features image stabilization technology. This feature compensates for camera shake, especially when shooting in low light or at long focal lengths. With image stabilization, you can capture clear and blur-free images even in challenging shooting conditions.
Multiple Shooting Modes
The GE X500 camera offers a variety of shooting modes to suit different photography needs. These include portrait mode, landscape mode, sports mode, and more. Each mode optimizes the camera settings to ensure the best results based on the chosen subject or scene. Experimenting with these modes will help you achieve the desired look and feel in your photos.
HD Video Recording
In addition to capturing high-quality photos, the GE X500 camera also allows you to record HD videos. You can capture memorable moments in stunning 720p HD resolution, ensuring that your videos are as vibrant and detailed as your photos. The camera’s video recording feature is perfect for capturing special occasions and events.
These advanced features and functions of the GE X500 digital camera will take your photography to the next level. Experiment with manual mode, utilize the advanced zoom and image stabilization, explore different shooting modes, and capture HD videos to unleash your creative potential and capture stunning images.
Tips and Tricks for Better Photography
Whether you are a beginner or an experienced photographer, the GE X500 digital camera offers a wide range of features that can help you capture stunning photos. Here are some tips and tricks to help you make the most out of your photography experience:
1. Understand the Basics
Before you start exploring the advanced features of the GE X500 camera, it is important to understand the basics of photography. Learn about concepts such as aperture, shutter speed, ISO, and composition. Understanding these fundamentals will give you a solid foundation to build upon.
2. Experiment with Different Settings
The GE X500 camera offers a variety of settings and modes for different shooting conditions. Take the time to experiment with these settings to see how they affect your photos. Try shooting in manual mode to have complete control over the exposure settings or try the different scene modes to capture specific types of scenes or subjects.
Remember to also explore the different shooting modes such as macro, portrait, landscape, and sports. Each mode is designed to optimize the camera settings for specific shooting scenarios.
3. Master the Art of Composition
Composition is a crucial aspect of photography. It involves arranging the elements within the frame in a visually appealing way. Use the rule of thirds to create balanced and interesting compositions. Experiment with different perspectives and angles to add depth and visual interest to your photos.
Pay attention to the background and foreground elements in your frame. Remove any distractions that may take away from the main subject. Look for leading lines or patterns that can guide the viewer’s eye through the image.
Remember, the key is to practice and experiment. Don’t be afraid to try new things and learn from your mistakes. With time and practice, you will improve your photography skills and capture stunning photos with your GE X500 digital camera.
So, go out there, have fun, and unleash your creativity!
Question-answer:
What is the resolution of the GE X500 digital camera?
The GE X500 digital camera has a maximum resolution of 16 megapixels.
Does the GE X500 digital camera have manual focus control?
No, the GE X500 digital camera does not have manual focus control. It only has autofocus.
How do I change the ISO settings on the GE X500 digital camera?
To change the ISO settings on the GE X500 digital camera, press the Menu button and navigate to the ISO setting option. Use the arrow keys to adjust the ISO value and press the OK button to confirm the changes.
Can I shoot videos with the GE X500 digital camera?
Yes, the GE X500 digital camera can record videos with a resolution of 720p at 30 frames per second.
How many shooting modes does the GE X500 digital camera have?
The GE X500 digital camera has several shooting modes, including Auto, Program, Shutter Priority, Aperture Priority, and Manual. It also has various scene modes for different shooting conditions.