Quadcopter drones have become increasingly popular in recent years, thanks to their ability to capture stunning aerial footage and their impressive maneuverability. However, like any electronic device, drones require regular charging to keep them flying. In this article, we will guide you through the process of charging your quadcopter drone, ensuring that you can get the most out of your flying experience.
Step 1: Read the Manual
Before you begin charging your quadcopter drone, it’s important to familiarize yourself with the manufacturer’s instructions. Every drone model is unique, and the charging process can vary from one model to another. The manual will guide you on the specific charging requirements for your drone, including the type of charger, charging time, and any additional precautions you need to take.
Step 2: Power Off the Drone
Prior to connecting your drone to the charger, make sure it is powered off. This helps to prevent any potential electrical malfunctions and ensures safe and efficient charging. Also, double-check that the battery is securely attached to the drone and that there are no loose connections.

Step 3: Connect the Charger
Using the charger specified in the manual, connect it to a power source. Depending on the drone model, your charger may be USB-based or require a direct wall outlet connection. Make sure the charger is compatible with the voltage of the power source, to avoid damaging the drone or the charger itself.
Step 4: Monitor the Charging Process
It’s important to keep an eye on the charging process to ensure that everything is going smoothly. Most quadcopter drones have an indicator light that will turn on when the drone is charging and turn off once the battery is fully charged. Additionally, some drones may come with a companion app that allows you to monitor the battery level in real-time. This can be a useful tool to have during the charging process.
In conclusion, charging your quadcopter drone is a straightforward process that requires attention to detail and adherence to the manufacturer’s guidelines. By following these steps, you can ensure that your drone is always ready for flight, enabling you to capture breathtaking aerial shots and enjoy your flying experience to the fullest.

Why is it important to charge quadcopter drone correctly?
A properly charged quadcopter drone is essential for optimal performance and safety. Charging the drone correctly ensures that it will have enough power to fly for the desired duration and distance, and helps to prevent damage to the battery.
Here are a few reasons why it is important to charge your quadcopter drone correctly:
|
1. Maximizes Flight Time: |
Charging the drone with the correct charging method and time allows the battery to reach its maximum capacity. This ensures that the drone can fly for a longer period of time before needing to be recharged. |
|
2. Improves Performance: |
A fully charged battery provides the quadcopter drone with the necessary power to perform at its best. This includes stable flight, better maneuverability, and responsiveness to controls. |
|
3. Prevents Battery Overheating: |
Charging the battery correctly helps to prevent it from overheating. Overheating can occur if the battery is overcharged or if it is charged too quickly. This can lead to reduced battery life and even damage to the drone. |
|
4. Ensures Battery Longevity: |
Proper charging practices can extend the lifespan of the quadcopter drone’s battery. Overcharging or undercharging can degrade the battery over time, reducing its overall capacity and flight time. |
|
5. Minimizes Safety Risks: |
By charging the drone correctly, you reduce the risk of accidents or malfunctions caused by insufficient power. A fully charged battery provides the necessary stability and power to fly the drone safely. |
It is important to refer to the user manual or manufacturer’s guidelines for specific instructions on how to charge your quadcopter drone correctly. Following the recommended charging practices will help you get the most out of your drone and ensure its longevity.
What type of charger should you use for quadcopter drone?
Choosing the right type of charger for your quadcopter drone is important to ensure safe and efficient charging. Here are a few factors to consider:
- Voltage and current: Make sure to match the voltage and current requirements specified by the manufacturer of your quadcopter drone. Using a charger with incorrect specifications can result in damage to the battery or even pose safety risks.
- Balance charging: Some quadcopter drones require balance charging, which helps to equalize the charge across all cells in the battery pack. If your drone requires balance charging, ensure that the charger you use supports this feature.
- Connector type: Check the connector type on your quadcopter drone’s battery. There are various types of connectors such as XT60, XT30, JST, and more. Make sure the charger you choose has a compatible connector.
- Charge rates: Consider the charge rates supported by the charger. Higher charge rates can reduce charging time but may also increase the risk of overheating or damaging the battery. It is advisable to follow the manufacturer’s recommendations for the optimal charge rate.
- Safety features: Look for chargers with built-in safety features such as overcharge protection, short circuit protection, and temperature monitoring. These features can help prevent accidents and extend the lifespan of your battery.
When selecting a charger for your quadcopter drone, it is essential to prioritize safety and choose a charger that meets the specifications and requirements of your drone’s battery. Always follow the manufacturer’s guidelines and recommendations for charging your specific quadcopter drone.

Charging preparation
Before charging your quadcopter drone, it is essential to take the necessary precautions to ensure a safe and efficient charging process. Follow these steps to properly prepare for charging:
1. Read the manufacturer’s instructions
Begin by carefully reading and understanding the manufacturer’s instructions for your specific quadcopter drone. This will provide you with important information regarding the recommended charging method and any specific precautions you should take.
2. Check the battery status
Before initiating the charging process, check the battery status of your quadcopter drone. Ensure that the battery is not damaged or malfunctioning in any way. If you notice any signs of damage, do not proceed with charging and consult the manufacturer for further guidance.
3. Choose the appropriate charger
Make sure you have the correct charger that is specifically designed for your quadcopter drone model. Using an incompatible charger can damage the battery or the drone itself.
4. Find a suitable charging location
Select a clean, dry, and well-ventilated area for charging your quadcopter drone. Avoid charging near flammable materials, direct sunlight, or any other potential hazards. Adequate ventilation will help dissipate heat generated during the charging process.

5. Connect the charger
Before connecting the charger to your drone, ensure that the power switch of your quadcopter drone is turned off. Then, connect the charger to the battery port of the drone. Make sure the connection is secure and there are no loose cables.
Note: It is crucial to follow the specific instructions provided by the manufacturer as the charging process may vary depending on the quadcopter drone model.
By following these charging preparation steps, you can minimize the risk of accidents and ensure a reliable charging experience for your quadcopter drone. Take the time to properly prepare before initiating the charging process to prolong the lifespan of your drone’s battery and enhance its overall performance.
How to check battery level before charging?
Before charging your quadcopter drone, it is important to check the battery level to ensure it has enough power to properly charge. Checking the battery level can help prevent any issues or damage that may occur during charging.
To check the battery level, follow these steps:

Step 1: Turn on the quadcopter drone
Make sure your quadcopter drone is turned on and ready for operation.
Step 2: Access the battery information
Depending on the model of your quadcopter drone, you can usually access the battery information through the control panel or an accompanying mobile app. Consult the user manual for specific instructions on how to access the battery information.
Step 3: Check the battery level
Once you have accessed the battery information, you should be able to see the current battery level displayed. It is usually represented as a percentage, indicating how much power is remaining in the battery.
It is recommended to charge your quadcopter drone when the battery level is below 20% to prevent it from running out of power during flight.
By checking the battery level before charging, you can ensure that your quadcopter drone is properly charged and ready for use.

What are the safety precautions for charging a quadcopter drone?
Charging a quadcopter drone is an essential part of drone ownership, but it is important to follow certain safety precautions to avoid accidents and potential damage to the drone or property. Here are some important safety tips to keep in mind:
1. Read and follow the manufacturer’s instructions: Before charging your quadcopter drone, carefully read the instruction manual provided by the manufacturer. Follow the recommended charging methods and safety guidelines specific to your drone model.
2. Use the correct charger and power source: Always use the charger provided by the manufacturer or a compatible charger that matches the specifications recommended for your drone. Use a power source that is compatible with the charger and provides a stable electrical current.
3. Charge in a well-ventilated area: Choose a well-ventilated area for charging your quadcopter drone to prevent overheating. Avoid charging near flammable materials or in enclosed spaces, as it can pose a fire hazard.
4. Ensure a stable and level charging surface: Place the charger and drone on a stable and level surface during charging to prevent accidental falls and damage.
5. Never leave the charging drone unattended: While charging your quadcopter drone, never leave it unattended. Keep a close eye on the charging process and periodically check for any signs of overheating or abnormal behavior.
6. Follow the recommended charging time: Overcharging can be harmful to the battery of your quadcopter drone and may reduce its lifespan. Follow the recommended charging time provided by the manufacturer to avoid overcharging.
7. Keep charging cords away from liquids: Ensure that the charging cords and connectors are kept away from liquids to avoid electrical shorts and damage to the charger or drone.
8. Disconnect the charger after a full charge: Once the quadcopter drone is fully charged, disconnect the charger from the power source and the drone to avoid any potential electrical hazards.
9. Store and transport batteries safely: When storing or transporting your drone batteries, use a fireproof and explosion-proof bag or container specifically designed for lithium-ion batteries. Follow the manufacturer’s recommendations for battery storage and transportation.
By following these safety precautions, you can ensure that the charging process for your quadcopter drone is safe and reliable, minimizing the risk of accidents and maximizing the lifespan of your drone and its batteries.
How to connect the charger to quadcopter drone?
Connecting the charger to a quadcopter drone is a crucial step in the charging process. Follow these steps to ensure a proper connection:
Step 1: Check the charger and drone compatibility
Before connecting the charger, make sure it is compatible with your quadcopter drone. Check the charger’s specifications and compare them with the recommended charging requirements of your drone. Using an incompatible charger may damage your drone’s battery or even cause a fire hazard.
Step 2: Locate the charging port on the drone
Next, locate the charging port on your quadcopter drone. This port may vary depending on the drone model, but it is usually located on the bottom or side of the drone. Refer to your drone’s user manual if you are having trouble finding the charging port.
Step 3: Connect the charging cable
Take the charger cable and connect it to the charging port on the drone. Make sure the connector is properly aligned and insert it gently to avoid damaging the charging port. Ensure a secure connection to prevent any power interruptions during the charging process.
Step 4: Connect the charger to a power source
Once the charging cable is connected to the drone, plug the charger into a power source. This can be a wall socket or a USB port on your computer or laptop. If using a wall socket, ensure it is a stable power source and not prone to voltage fluctuations. Avoid using extension cords or power strips, as they may introduce power stability issues.
Step 5: Monitor the charging process
After connecting the charger to the power source, monitor the charging process closely. Keep an eye on the LED indicators on both the charger and the drone. The LED indicators will typically show the charging status and notify you when the battery is fully charged.
Following these steps will help you properly connect the charger to your quadcopter drone, ensuring a safe and efficient charging process. Remember to always follow the manufacturer’s instructions and safety guidelines when charging your drone to avoid any potential accidents or damage.
Charging process
The charging process for a quadcopter drone is a crucial step in ensuring its optimal performance and longevity. Here, we will guide you through the correct way to charge your drone.
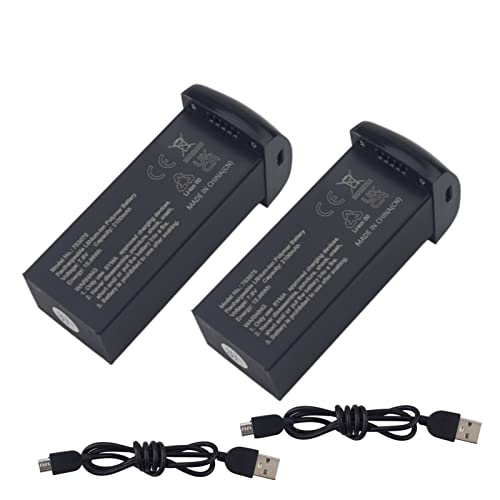
1. Check the battery: Before you start the charging process, always ensure that the drone’s battery is working properly and is not damaged. Inspect the battery for any signs of wear or leakage. If you notice any issues, it is recommended to replace the battery before proceeding with the charging process.
2. Use the correct charger: Each quadcopter drone typically comes with its specific charger. It is essential to use the charger that is designed for your drone model. Using a different charger may result in damage to the battery or even the drone itself. Check the specifications and voltage compatibility to ensure you are using the correct charger.
3. Connect the charger: Connect the charger to a power source, such as a wall outlet or a USB port. Ensure that the charger is plugged in securely and correctly.
4. Attach the battery: Depending on the drone model, you may need to detach the battery from the drone before charging or leave it attached. If the battery can be removed, carefully detach it from the drone and connect it to the charger. If the battery remains attached, connect the charger directly to the drone.
5. Charging status: Once the charger and battery are connected, the charging process will begin. Most chargers have indicators to display the charging status. It is essential to monitor the charging process and ensure that the battery does not overcharge. Overcharging can lead to battery damage or even fire hazards.
6. Charging duration: The charging duration will depend on the battery capacity, charger efficiency, and the remaining battery level. Typically, it takes a few hours to fully charge a quadcopter drone battery. Refer to the drone’s user manual for specific charging time recommendations.
7. Complete the charging: Once the battery is fully charged, disconnect the charger from the power source and detach the battery if necessary. Ensure that all connections are safely and properly disconnected.
Following these steps will help you charge your quadcopter drone safely and efficiently. Always prioritize safety and carefully follow the manufacturer’s instructions for the charging process.
How long does it take to charge quadcopter drone?
Charging the battery of a quadcopter drone is an essential part of owning and operating one. The time it takes to charge a quadcopter drone can vary depending on several factors, including the type of battery, its capacity, and the charger being used.
In general, it can take anywhere from 30 minutes to 2 hours to fully charge a quadcopter drone. However, some high-capacity batteries may take longer to charge. It is important to follow the manufacturer’s instructions and recommendations for charging your specific drone model.
When charging a quadcopter drone, it is crucial to use a charger specifically designed for the drone’s battery. Using the wrong charger can damage the battery or pose a safety risk. It is also recommended to charge the drone’s battery in a well-ventilated area and away from any flammable materials.
Factors that can affect charging time:
1. Battery capacity: A higher capacity battery will typically take longer to charge than a lower capacity one.
2. Charger output: A charger with a higher output will charge the battery faster than a charger with a lower output.
3. Battery condition: The age and condition of the battery can affect its charging efficiency.
4. Battery temperature: Extreme temperatures can affect the charging time and overall performance of the battery.
Charging tips:
1. Always use a charger specifically designed for your quadcopter drone’s battery.
2. Ensure that the battery and charger are compatible and that the connectors match.
3. Avoid overcharging the battery, as this can lead to reduced battery life and potential safety hazards. Follow the manufacturer’s recommended charging time.
4. Check the battery’s voltage after charging to ensure it has reached the desired level.
| Battery Type | Charging Time |
|---|---|
| Lithium Polymer (LiPo) | 30 minutes to 2 hours |
| Lithium-ion (Li-ion) | 1 to 2 hours |
| Nickel-Cadmium (NiCd) | 2 to 4 hours |
| Nickel-Metal Hydride (NiMH) | 2 to 6 hours |
Remember to always prioritize safety when charging your quadcopter drone’s battery. Following the manufacturer’s instructions and taking necessary precautions will help ensure a smooth and efficient charging process.
What are the indicators of a fully charged quadcopter drone?
When charging a quadcopter drone, it is important to know when it is fully charged to avoid overcharging and potential damage to the battery. There are several indicators that can help you determine if your quadcopter drone is fully charged:
Battery LED
Most quadcopter drones come with a battery LED indicator that changes color or flashes to indicate the battery’s charging status. When the battery is fully charged, the LED may turn solid green or blue, or stop flashing.
Battery Voltage
Another way to determine if your quadcopter drone is fully charged is to monitor its battery voltage. Each drone model has a specific voltage range for a fully charged battery. You can use a multimeter or a voltage checker to measure the battery voltage and compare it to the recommended range.
Note: Make sure to disconnect the battery from the charger before measuring the voltage.
Charger Indicator
Some quadcopter drones come with a charger that has its own built-in indicator. The charger indicator may change color or turn off when the battery is fully charged.
It is important to pay attention to these indicators to ensure that your quadcopter drone is not overcharged. Overcharging can lead to a shorter battery lifespan and potentially cause a fire or damage to the drone.
Always follow the manufacturer’s instructions and guidelines for charging your quadcopter drone to ensure a safe and proper charging process.
Question-answer:
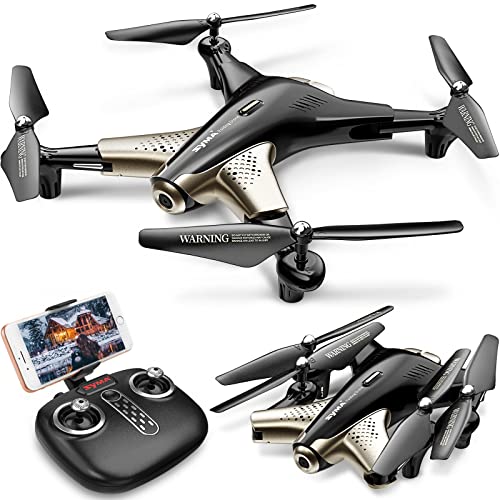
What is a quadcopter drone?
A quadcopter drone is a type of drone that is powered by four rotors or propellers. It is capable of vertical takeoff and landing, as well as hovering in one place.
How long does it take to charge a quadcopter drone?
The charging time of a quadcopter drone depends on the capacity of its battery and the type of charger used. On average, it can take anywhere from 30 minutes to a few hours to fully charge a quadcopter drone.