If you recently purchased a Locke drone and want to take full advantage of its features, one essential step is to connect it to your phone. By connecting your drone to your phone, you can access live video streaming, control the drone remotely, and capture amazing aerial footage. In this guide, we will walk you through the steps of connecting your Locke drone to your phone and getting started with your aerial adventures.
Step 1: Check Compatibility
Before attempting to connect your Locke drone to your phone, it is important to ensure that your phone is compatible. Most modern smartphones are compatible with Locke drones, but it’s always best to check the specifications and requirements provided by the manufacturer. Make sure your phone meets the necessary requirements in terms of operating system, processor, and memory.
Pro Tip: Updating your phone’s operating system to the latest version can often resolve compatibility issues.
Step 2: Install the Locke Drone App
Next, you will need to install the Locke drone app on your phone. This app is essential for establishing a connection between your phone and the drone. Visit the app store on your phone and search for “Locke drone.” Once you find the app, tap on the install button and wait for the installation to complete.
Pro Tip: Make sure to allow the app access to your phone’s camera and microphone for a seamless experience.
Step 3: Connect Your Phone to the Drone
Once the app is installed, turn on your Locke drone and open the app on your phone. You should see a prompt to connect your phone to the drone. Follow the on-screen instructions to establish the connection. This usually involves selecting the drone’s Wi-Fi network and entering the password provided in the drone’s user manual.
Pro Tip: Some drones may require you to press a button on the drone itself to initiate the connection process. Refer to your drone’s user manual for specific instructions.

Step 4: Test the Connection
After successfully establishing the connection, you can now test it by accessing the various features offered by the Locke drone app. Use the remote control functionality to navigate the drone, adjust camera settings, and even capture photos or videos. Take your time to familiarize yourself with the app’s interface and features, ensuring that everything is working as expected.
Pro Tip: It’s always a good idea to perform a short test flight in a safe and open area to ensure that the connection is stable and the drone is responding correctly to your commands.
By following these steps, you can easily connect your Locke drone to your phone and unlock its full potential. Remember to always fly your drone responsibly and adhere to local regulations and safety guidelines. Now, you’re ready to embark on exciting aerial adventures and capture breathtaking footage with your connected Locke drone!
Locke Drone: Connecting to Your Phone
Connecting your Locke Drone to your phone is a simple and straightforward process. By following these steps, you can easily establish a stable connection and control your drone with ease.
Step 1: Install the Locke Drone App
The first step is to download and install the Locke Drone app on your smartphone. You can find the app on both Google Play Store for Android devices and the App Store for iOS devices. This app will serve as the main hub for controlling your drone.
Step 2: Enable Bluetooth and Wi-Fi
Once you have successfully installed the app, ensure that both Bluetooth and Wi-Fi are enabled on your phone. These two features are essential for establishing a connection with your drone.
Step 3: Open the Locke Drone App
Open the Locke Drone app on your phone. You will be prompted to create an account or log in if you already have one. Follow the on-screen instructions to complete this process.
Step 4: Power On Your Drone
Make sure your Locke Drone is powered on and ready for connection. Some models may require you to remove a protective cover or insert a battery to power it up.
Step 5: Connect Your Phone to the Drone
In the Locke Drone app, go to the settings or connection menu and search for available devices. Your drone should appear on the list of available devices. Select your drone to establish a connection.
Step 6: Calibrate Your Drone
After connecting your phone to the drone, it is essential to calibrate it to ensure a smooth flying experience. Follow the instructions provided by the app to calibrate the drone’s sensors and controls.
Step 7: Start Flying!
Once your Locke Drone is successfully connected to your phone and calibrated, you are ready to start flying. Use the joystick controls on the app to maneuver your drone and explore the skies.
Remember to always follow local regulations and guidelines when operating your drone. Enjoy the breathtaking aerial views and capture stunning footage with your Locke Drone!
Step-by-Step Guide: Connecting Locke Drone to Your Phone
1. Check Compatibility
Before connecting your Locke Drone to your phone, it is important to ensure that your device is compatible with the drone. Check the drone’s user manual or the manufacturer’s website for a list of compatible devices. Make sure your phone meets the required specifications before proceeding.
2. Install the App
The next step is to install the Locke Drone app on your phone. Open the app store on your device and search for “Locke Drone.” Once you find the app, tap on it, and then tap on the “Install” button. Wait for the app to download and install on your phone.

3. Power On the Drone
Make sure your Locke Drone is powered on and the battery is fully charged. This will ensure a smooth and uninterrupted connection between the drone and your phone.
4. Enable Wi-Fi and Bluetooth
On your phone, go to the settings menu and enable both Wi-Fi and Bluetooth. This will allow your phone to establish a connection with the Locke Drone.
5. Connect to the Drone’s Wi-Fi
Open the Locke Drone app on your phone and look for the Wi-Fi settings. Tap on the option to connect to a Wi-Fi network and select the network name that corresponds to your Locke Drone. Enter the password if prompted.
6. Establish Bluetooth Connection
Once you are connected to the drone’s Wi-Fi, go back to the Locke Drone app and look for the Bluetooth settings. Tap on the option to pair a new device and select your Locke Drone from the list of available devices. Follow the on-screen instructions to complete the pairing process.
7. Start Flying
After successfully connecting your Locke Drone to your phone, you are ready to start flying! Use the app’s controls to navigate the drone, capture photos and videos, and enjoy the exciting features it has to offer.

By following these step-by-step instructions, you can easily connect your Locke Drone to your phone and take full advantage of all its capabilities. Enjoy your flight!
Preparing Your Phone for the Connection
Before you can connect your Locke drone to your phone, you need to make sure that your phone is properly prepared for the connection. Follow the steps below to ensure a successful connection:
Step 1: Check Compatibility
First, check if your phone is compatible with the Locke drone. Refer to the drone’s instruction manual or visit the manufacturer’s website to see a list of compatible devices. Make sure your phone meets the minimum requirements and has the necessary software installed.
Step 2: Update Software
Next, check for any updates available for your phone’s operating system. Updating your phone to the latest software version is important to ensure compatibility with the Locke drone. Go to your phone’s settings, navigate to the software update section, and check for any available updates. If updates are available, download and install them.
Step 3: Enable Bluetooth and Wi-Fi
To connect your phone to the Locke drone, you need to enable both Bluetooth and Wi-Fi on your phone. Go to your phone’s settings, locate the Bluetooth and Wi-Fi options, and ensure they are turned on. This will allow your phone to establish a wireless connection with the drone.

Step 4: Clear Storage Space
Drone apps and software updates can occupy a significant amount of storage space on your phone. Before connecting the Locke drone, make sure you have enough available storage space. Delete any unnecessary files, such as photos or videos, and uninstall any unused apps to free up space.
By following these steps, you can ensure that your phone is properly prepared for the connection with the Locke drone. Once your phone is ready, you can proceed to connect it to the drone and enjoy your flying experience!
Connecting Locke Drone to Your Phone via Wi-Fi
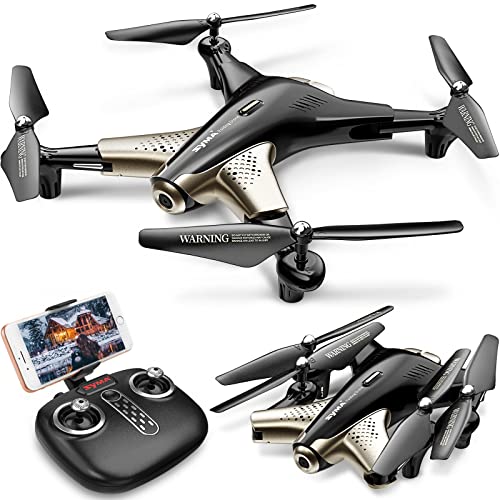
Locke Drone is equipped with built-in Wi-Fi functionality that allows you to connect it to your smartphone. By connecting your phone to the drone’s Wi-Fi network, you can control and view the footage from your drone directly on your phone screen.
Follow these steps to connect your Locke Drone to your phone via Wi-Fi:
- Power on your Locke Drone and ensure that the Wi-Fi module is enabled.
- On your phone, go to the settings and enable Wi-Fi.
- Look for the available Wi-Fi networks and select the network named “Locke Drone”.
- If prompted, enter the password for the Locke Drone Wi-Fi network. The default password is usually mentioned in the user manual or on the drone’s packaging.
- Once connected, open the Locke Drone app on your phone.
- The app will automatically detect the connected drone and display the live video feed on your phone screen.
- You can now control the drone’s movement using the on-screen controls in the app.
Remember, the range of the Wi-Fi signal may vary, so it’s recommended to stay within a reasonable distance from the drone to ensure a stable connection.
Please note that the process of connecting Locke Drone to your phone may vary slightly depending on the model and operating system of your smartphone.
Troubleshooting: Common Connection Issues with Locke Drone
If you are experiencing trouble connecting your Locke Drone to your phone, you are not alone. Many drone enthusiasts have encountered connection issues at some point. Here are some common issues you may encounter and possible solutions:
1. Weak Wi-Fi Signal
If your drone and phone are not connecting, it is worth checking the Wi-Fi signal strength. Make sure your phone is close enough to the drone for a strong signal. Walls, trees, and other obstacles can weaken the signal, so consider moving closer to your drone or relocating to an open area.
2. Incorrect Wi-Fi Password
Double-check the password you entered when connecting to your drone’s Wi-Fi network. Ensure that you entered it correctly, including any capitalization or special characters. If you are uncertain, try reconnecting with the correct password.
3. Interference from Other Devices
Other devices using the same Wi-Fi frequency can interfere with your drone’s connection. If you are experiencing frequent disconnections or poor video quality, try turning off or moving away from other Wi-Fi devices like routers, smartphones, or computers.
4. App Compatibility
Make sure your drone’s app is compatible with your phone’s operating system. Check for any app updates in the Google Play Store or Apple App Store, and install them if available. If the problem persists, contact the drone manufacturer for further assistance.
5. Drone Firmware Update
Outdated drone firmware can sometimes cause connection issues. Go to the drone’s official website and check for any available firmware updates. Follow the instructions provided to update the firmware, and then try connecting again.
6. Restart Drone and Phone
Restarting both your drone and phone can help resolve temporary connection issues. Turn off your drone, disconnect it from your phone, and power off your phone. After a few moments, power on your devices and try reconnecting.
If none of the above solutions solve your connection issues, it is advisable to contact the drone manufacturer’s customer support or seek assistance from a technical professional. Remember to provide them with specific details about the problem you are experiencing for a more effective troubleshooting process.
Tips and Tricks for a Stable Connection
When connecting your Locke Drone to your phone, it’s crucial to ensure a stable connection for an optimal flying experience. Here are some tips and tricks to help you achieve that:
1. Choose the Right Location
When flying your drone, make sure you are in an open area with minimal obstacles. Avoid areas with dense trees or tall buildings as they can interfere with the signals between your drone and phone. Additionally, choose a location with a clear line of sight to maintain a strong connection.
2. Check Your Wi-Fi Signal
Poor Wi-Fi signal can lead to a weak connection between your drone and phone. Before taking off, check your phone’s Wi-Fi signal strength. If it’s weak, consider moving closer to your Wi-Fi router or using a Wi-Fi extender to improve the signal quality.
3. Close Background Apps
Running multiple apps in the background while using the Locke Drone app can impact your phone’s performance and affect the connection stability. To ensure a stable connection, close any unnecessary apps running in the background and free up system resources for smooth operation.
4. Keep Your Phone Updated
Regularly updating your phone’s operating system and the Locke Drone app itself can provide bug fixes and performance improvements that may enhance the connection stability. Check for updates regularly and install them to ensure the best possible flying experience.
Remember, a stable connection is crucial for a smooth and safe flying experience with your Locke Drone. Follow these tips and tricks, and enjoy capturing breathtaking aerial footage!
Enhancing Your Phone’s Wi-Fi Signal for a Better Connection
Having a strong Wi-Fi signal on your phone is crucial for connecting your Locke drone and enjoying a smooth flying experience. Here are some tips to enhance your phone’s Wi-Fi signal:
| Tip | Description |
|---|---|
| 1 | Position your router properly |
| 2 | Keep your phone closer to the router |
| 3 | Reduce interference |
| 4 | Use a wireless range extender |
| 5 | Update your router’s firmware |
| 6 | Remove any physical obstructions |
| 7 | Switch Wi-Fi channels |
| 8 | Restart your router |
By following these tips, you can ensure a stronger Wi-Fi signal on your phone, allowing you to connect your Locke drone without any issues and enjoy an uninterrupted flying experience.
Using Third-Party Apps to Connect Locke Drone to Your Phone
If you want to connect your Locke drone to your phone, there are several third-party apps available that can help you do so. These apps provide additional features and functionalities that may not be available on the official Locke drone app.
One popular app is called “Drone Connect”. It allows you to easily connect your Locke drone to your phone and provides a user-friendly interface to control the drone. With Drone Connect, you can fly your drone, capture photos and videos, and even share them directly from your phone.
Another app worth considering is “Drone Control”. This app offers advanced features for controlling your Locke drone. It includes options for adjusting the drone’s flight settings, setting up waypoints for automated flights, and even creating custom flight paths. Drone Control also provides a live video feed from your drone, allowing you to see the world from a bird’s-eye view.
If you’re looking for a more comprehensive drone app, you might want to try “Drone Master”. This app is compatible with multiple drone models, including the Locke drone. With Drone Master, you can not only connect your Locke drone to your phone but also manage multiple drones from a single app. It offers features such as flight planning, intelligent flight modes, and advanced camera controls.
Before installing any third-party app, make sure to check its compatibility with your phone’s operating system and ensure that it supports the Locke drone model you have. Also, keep in mind that some apps may require additional accessories or subscriptions for full functionality.
Overall, using a third-party app can enhance your experience of flying the Locke drone with your phone. Explore different options, read reviews, and choose the app that best suits your needs and preferences.
Safety Precautions: Connecting Your Phone to Locke Drone
When connecting your phone to the Locke Drone, it is important to follow these safety precautions to ensure a safe and successful connection:
-
Check Compatibility
Before connecting your phone to the Locke Drone, make sure that your phone is compatible with the drone’s software and hardware requirements. Refer to the drone’s user manual or the manufacturer’s website for detailed information about compatibility.
-
Power Off the Drone
Prior to connecting your phone, ensure that the drone is powered off. This will prevent any unforeseen issues or interference during the connection process.
-
Secure the Drone
Place the drone on a stable and flat surface to avoid accidental falls or damage while connecting your phone. Additionally, make sure that the locking mechanism of the drone is engaged to prevent any unwanted movement.
-
Enable Bluetooth and Wi-Fi
On your phone, enable the Bluetooth and Wi-Fi features in the settings menu. This enables the phone to establish a stable wireless connection with the Locke Drone. Ensure that both Bluetooth and Wi-Fi are turned on and functioning correctly before attempting to connect.
-
Verify Phone Battery Level
It is advisable to check the battery level on your phone before connecting it to the Locke Drone. If your phone has a low battery level, consider charging it to ensure uninterrupted connectivity during flight.
-
Connect Following Manufacturer’s Instructions
Each drone model may have specific instructions for connecting the phone. Refer to the drone’s user manual or the manufacturer’s website for step-by-step instructions on how to establish a connection between your phone and the Locke Drone.
-
Keep Phone Firmware Updated
Regularly update your phone’s operating system and firmware to ensure compatibility with the latest changes or updates to the drone’s software. This helps maintain a stable and secure connection.
-
Disconnect Properly
When you have finished using the Locke Drone, disconnect your phone following the manufacturer’s instructions to avoid any potential damage to the drone or loss of data on your phone.
By following these safety precautions, you can safely and effectively connect your phone to the Locke Drone, allowing you to enjoy all the features and functionalities it offers.
Unlocking New Possibilities: Connecting Locke Drone to Other Devices
Locke Drone opens up a world of possibilities for enthusiasts and professionals alike, with its advanced features and capabilities. And what makes it even more exciting is its ability to connect and interact with other devices, allowing users to take their drone experience to new heights.
Connecting your Locke Drone to your phone is a seamless process that unlocks a myriad of benefits. It enables you to control the drone remotely, access its live camera feed, and even share your captures instantly on social media.
Step 1: Download the Locke Drone App
The first step is to download the dedicated Locke Drone app on your phone. The app is available for both iOS and Android devices, ensuring compatibility with a wide range of smartphones.
Step 2: Connect your Phone to the Locke Drone
Once you have the app installed, turn on your Locke Drone and ensure that the drone’s WiFi connection is enabled. Open the Locke Drone app and navigate to the settings menu. From there, select the option to connect to a new device.
On your phone, go to the WiFi settings and search for available networks. You should see the Locke Drone’s network in the list. Select it and establish a connection.
Once connected, return to the Locke Drone app, and you will be prompted to input the drone’s unique pairing code. Follow the on-screen instructions to complete the pairing process.
Step 3: Explore the Possibilities
Once your phone is successfully connected to the Locke Drone, a world of possibilities unfolds before you. Use the app to control the drone’s flight, adjust camera settings, and view the live camera feed in real-time.
The Locke Drone app also provides access to additional features such as intelligent flight modes, automated flight paths, and even virtual reality (VR) compatibility.
By connecting your Locke Drone to your phone, you can unlock new creative opportunities and expand the potential of your drone’s capabilities. Take stunning aerial photographs, record breathtaking videos, and share your adventures with the world in an instant.
Unlock the full potential of your Locke Drone by connecting it to your phone and explore a world of possibilities.
Question-answer:
What is a locke drone?
A locke drone is a type of drone that is known for its advanced features and high performance.
Why would someone want to connect a locke drone to their phone?
Connecting a locke drone to a phone provides several benefits such as accessing real-time video feed, controlling the movement of the drone, and adjusting various settings.
How can I connect my locke drone to my phone?
To connect your locke drone to your phone, first make sure the drone is powered on and within range. Then, download and install the locke drone app on your phone. Open the app, enable the drone’s Wi-Fi, and search for the drone’s network. Once connected, you can control the drone through the app.
Are there any specific requirements for connecting a locke drone to a phone?
Yes, to connect a locke drone to a phone, your phone must meet the minimum system requirements specified by the locke drone manufacturer. These requirements usually include a certain version of operating system, Wi-Fi capability, and screen size.