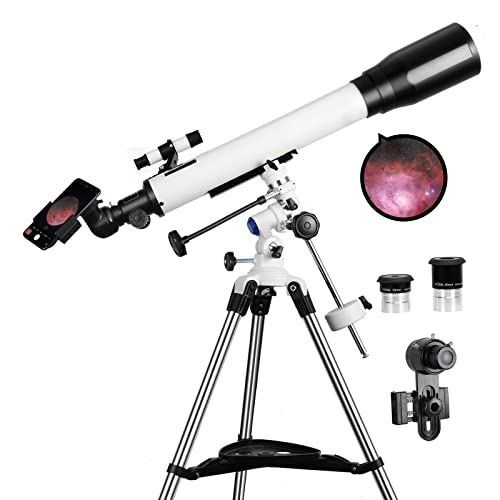
If you are an astrophotography enthusiast, you may want to capture stunning celestial objects using your DSLR camera. One way to achieve this is by using a telescope camera adapter. This adapter allows you to connect your DSLR to a telescope, giving you the ability to capture high-quality images of the night sky.
However, focusing your DSLR with a telescope camera adapter can be a bit challenging, especially if you are new to astrophotography. Unlike traditional photography, where you can simply adjust the focus ring on your lens, focusing through a telescope requires a slightly different approach.
One method to focus your DSLR with a telescope camera adapter is to use live view mode. By activating live view on your camera’s screen, you can see the image in real-time and make adjustments to achieve a sharp focus. This method is particularly useful when photographing planets or other bright objects, as they provide more contrast and detail.
Another technique is to use a Bahtinov mask, which is a device that aids in achieving precise focus. The Bahtinov mask consists of a series of diffraction spikes that intersect at different angles. By adjusting the focus until the spikes align perfectly, you can be confident that your subject is in focus. This method works well for both bright and faint objects in the night sky.
Overall, focusing your DSLR with a telescope camera adapter requires patience and practice. Experiment with different methods and find the one that works best for you. Remember to be mindful of your camera’s settings and the conditions of the night sky to capture breathtaking images of the cosmos.

Importance of Telescope Camera Adapter
A telescope camera adapter is an essential tool for astrophotography enthusiasts who want to capture detailed images of celestial objects using a DSLR camera and a telescope. This adapter serves as a bridge between the camera and the telescope, allowing for proper alignment and focusing of the camera with the telescope’s optics. It plays a crucial role in ensuring optimum image quality and clarity.
1. Alignment and Stability
When connecting a DSLR camera to a telescope, it is important to align the camera’s lens with the telescope’s eyepiece or focuser. A telescope camera adapter provides a secure and stable connection, ensuring that the camera remains aligned throughout the imaging session. This alignment is critical for capturing crisp and focused images.
Additionally, some telescope camera adapters come with built-in T-rings that allow for direct attachment of the camera to the telescope, eliminating the need for additional adapters. This further enhances the stability and alignment of the camera system.
2. Focusing Control
Proper focusing is essential in astrophotography to achieve sharp and detailed images. A telescope camera adapter enables precise focusing by allowing for fine adjustments of the camera’s position in relation to the telescope’s optics. This is especially important when photographing distant celestial objects that may require a long exposure time to capture enough light.
Some telescope camera adapters also include a focus lock mechanism, which helps to maintain the desired focus position even when changing cameras or switching between eyepieces. This feature is particularly useful for astrophotographers who use multiple cameras or eyepieces during their imaging sessions.

Moreover, certain telescope camera adapters have a built-in extension tube that can be adjusted to achieve the correct focal length for the camera. This ensures that the camera’s sensor is properly positioned within the telescope’s focal plane, resulting in accurate focusing and reduced aberrations.
| Benefits of a Telescope Camera Adapter: |
|---|
| – Provides alignment and stability for camera-telescope connections |
| – Enables precise focusing control |
| – Enhances image quality and clarity |
| – Allows for easy attachment and detachment of cameras |
| – Compatible with various camera and telescope combinations |
In conclusion, a telescope camera adapter is an indispensable tool for astrophotographers who wish to capture stunning images of the night sky. It provides the necessary alignment, stability, and focusing control required for obtaining high-quality and detailed photographs. Investing in a reliable and compatible camera adapter can greatly enhance the imaging capabilities of both DSLR cameras and telescopes.
Advantages of using DSLR with Telescope Camera Adapter
Using a DSLR with a telescope camera adapter provides several advantages that can enhance your astrophotography experience:
1. Versatility:
By using a DSLR with a telescope camera adapter, you can take advantage of the interchangeable lens system of your camera. This allows you to use different lenses to capture a variety of shots, from wide-angle views of the night sky to detailed close-ups of celestial objects. The versatility offered by a DSLR can greatly expand your imaging possibilities.
2. Image Quality:
DSLR cameras are known for their high image quality, and when combined with the optics of a telescope, they can produce stunning astrophotography results. The large image sensors and advanced image processing capabilities of DSLRs can capture fine details, vibrant colors, and smooth gradients, allowing you to create professional-looking photographs of celestial objects.

3. Control and Adjustability:
A DSLR camera offers manual control over various settings, such as exposure, ISO, aperture, and shutter speed. This level of control allows you to make precise adjustments to capture the desired amount of light and detail in your astrophotography. Additionally, DSLRs often provide features like long exposure capabilities, which are essential for capturing faint deep-sky objects.
4. Live View and Tethering:
Many DSLR cameras have a live view feature that allows you to preview and frame your shots directly on the camera’s LCD screen. This can be particularly useful when aligning your telescope or composing your images. Some DSLRs also support tethering, which enables you to control the camera and view the live feed on a computer or tablet, providing more convenience and flexibility during your astrophotography session.
5. Cost-Effective Option:
Compared to dedicated astrophotography cameras, DSLR cameras are generally more affordable. If you already own a DSLR, using a telescope camera adapter can allow you to delve into astrophotography without having to invest in an expensive specialized camera. This makes it a cost-effective option for beginners or those on a budget.
| Advantages |
|---|
| Versatility |
| Image Quality |
| Control and Adjustability |
| Live View and Tethering |
| Cost-Effective Option |
Choosing the right Telescope Camera Adapter
When it comes to using a DSLR camera with a telescope, having the right telescope camera adapter is crucial. This adapter allows you to connect your camera to the telescope and capture stunning images of celestial objects. But with so many options available, how do you choose the right one?
1. Compatibility
Before buying a telescope camera adapter, it’s important to ensure compatibility with both your camera and telescope. Different camera models and telescope brands may have specific adapter requirements, so make sure to check the specifications and compatibility list provided by the manufacturer.

2. T-Ring Compatibility
A T-ring is a crucial component of the adapter system, as it connects your camera to the adapter. When choosing a telescope camera adapter, ensure that it is compatible with the T-ring for your specific camera model. T-rings are designed to fit different camera brands, so double-check this compatibility before making a purchase.
3. Focal Length Adjustment
One important feature to consider in a telescope camera adapter is the ability to adjust the focal length. This adjustment allows you to achieve the desired magnification and field of view for your astrophotography needs. Make sure the adapter you choose has a convenient focal length adjustment mechanism that suits your requirements.
4. Durability
Investing in a high-quality and durable telescope camera adapter is essential, as it will ensure a reliable and secure connection between your camera and telescope. Look for adapters made from sturdy materials such as metal or high-quality plastic. Read customer reviews and check the reputation of the manufacturer to ensure you’re getting a reliable product.
5. Ease of Use
Consider how easy it is to use the telescope camera adapter. Look for features like quick-release mechanisms or simple locking mechanisms that allow for easy attachment and removal of your camera. An adapter that is user-friendly will make your astrophotography experience much more enjoyable.
By considering compatibility, T-ring compatibility, focal length adjustment, durability, and ease of use, you can choose the right telescope camera adapter that meets your specific needs. Remember to do thorough research and read customer reviews to ensure you’re making an informed decision.

| Pros | Cons |
|---|---|
| Allows you to capture stunning images of celestial objects | Compatibility requirements for different cameras and telescopes |
| Customizable focal length adjustment | Need to ensure durability for a secure connection |
| Multiple options available based on your specific needs | May require additional components like T-rings |
| Simplified attachment and removal of your camera | Some adapters may be more complex to use |
Steps to focus DSLR with Telescope Camera Adapter
Using a telescope camera adapter allows you to attach your DSLR camera to a telescope and capture stunning astronomical images. However, achieving accurate focus can be a challenge. Follow these steps for a successful DSLR focus with a telescope camera adapter:
Step 1: Set up your equipment
Mount your telescope securely on a stable tripod or a telescope mount. Attach the camera adapter to the telescope’s eyepiece holder, ensuring a secure fit.
Step 2: Turn on live view mode
Switch your DSLR camera to live view mode. This mode allows you to see the image on the camera’s LCD screen in real time, making it easier to focus.

Step 3: Use the camera adapter focusing mechanism
Some telescope camera adapters have a built-in focusing mechanism, while others require manual adjustment. If your adapter has a focusing mechanism, turn it until you notice a sharp image on the camera’s screen. If not, proceed to the next step.
Step 4: Adjust focus using telescope’s focuser
If your camera adapter doesn’t have a built-in focusing mechanism, use the telescope’s focuser to adjust the focus. Slowly turn the focuser until the image appears clear and sharp on the camera’s screen. Take your time and make small adjustments to achieve the desired focus.
Step 5: Zoom in for fine-tuning
After achieving a rough focus, zoom in on a specific area or celestial object for fine-tuning. Use the camera’s zoom function to get a closer look and adjust the focus accordingly. Be patient and make small adjustments until you have a sharp and clear image.
Step 6: Take test shots
Once you are satisfied with the focus, take a few test shots at different exposure settings to ensure the image quality meets your expectations. Review the images on your camera’s LCD screen or transfer them to your computer for a closer inspection.
By following these steps, you can effectively focus your DSLR camera with a telescope camera adapter and capture breathtaking astronomical images.
Tips for getting sharp focus
When using a DSLR with a telescope camera adapter, achieving sharp focus can be a bit challenging. However, with the right techniques and practices, you can capture clear and detailed images. Here are some tips to help you get the sharpest focus possible:
1. Use manual focus: Set your camera to manual focus mode and turn off any autofocus settings. This will allow you to have full control over the focus and make precise adjustments.
2. Start with infinity focus: Begin by setting your focus to infinity. This will give you a good starting point, especially when photographing distant celestial objects.
3. Zoom in on a bright star: Choose a bright star in the sky and zoom in using your telescope or lens. By using live view on your camera, you can fine-tune the focus until the star appears as a small, sharp point of light.
4. Use a bahtinov mask: A bahtinov mask is a helpful tool for achieving precise focus. It consists of a pattern that creates diffraction spikes around a star when out of focus. By adjusting the focus until the spikes intersect at a point, you can achieve optimal focus.
5. Take test shots: Take a few test shots at different focus positions and review them on your camera’s LCD screen. This will allow you to evaluate the sharpness and make any necessary adjustments.
6. Consider using a remote shutter release: Using a remote shutter release can minimize camera shake, resulting in sharper images. It allows you to trigger the shutter without physically touching the camera.
7. Practice and experiment: Achieving perfect focus with a DSLR and telescope setup takes practice and experimentation. Try different methods, settings, and techniques to find what works best for your specific equipment and conditions.
Remember, achieving sharp focus is crucial for capturing detailed and stunning images. Take your time, be patient, and don’t be afraid to experiment until you find the perfect focus.
Common mistakes to avoid
When using a DSLR with a telescope camera adapter, there are some common mistakes that beginners often make. Avoiding these mistakes will help you achieve better focus and improve the overall quality of your astrophotography.
1. Improper alignment
One of the most common mistakes is not properly aligning the camera and telescope. It is important to ensure that the camera is aligned with the telescope’s optical axis. This can be done by using a T-ring and a camera adapter specific to your camera model. Make sure to follow the manufacturer’s instructions for proper alignment.
2. Incorrect focus technique
Another mistake is using the wrong focus technique. When focusing a DSLR with a telescope camera adapter, it is important to use the manual focus mode on your camera. Autofocus may not work well for astrophotography, as it may struggle to find a suitable point of focus in the night sky. Take your time to manually adjust the focus until the subject appears sharp and clear.
3. Rushing the process
Many beginners make the mistake of rushing the focusing process. It is important to take your time and be patient when focusing your DSLR with a telescope camera adapter. The night sky is a challenging subject, and achieving perfect focus can take some time. Allow yourself enough time to refine the focus and make any necessary adjustments.
4. Ignoring the camera settings
Don’t forget to adjust your camera settings accordingly. When using a DSLR with a telescope camera adapter, you may need to make specific camera settings to capture the best images. This may include adjusting the ISO, aperture, and exposure time. Experiment with different settings to find what works best for your specific setup.
5. Neglecting to use a remote shutter release
Using a remote shutter release is highly recommended when using a DSLR with a telescope camera adapter. This will prevent any unwanted camera shake caused by manually pressing the shutter button. A remote shutter release allows you to capture sharp, vibration-free images, especially during long exposure shots.
Avoiding these common mistakes will greatly improve your ability to focus a DSLR with a telescope camera adapter. With practice and patience, you will be able to capture stunning astrophotography images.
Using Manual Focus vs Auto Focus
When it comes to focusing your DSLR camera with a telescope camera adapter, you have the option to use either manual focus or auto focus. Each method has its benefits and drawbacks, so it’s important to understand how they work and when to use them.
Manual Focus
Manual focus allows you to take control of the focus on your camera and make adjustments based on your preferences. This method requires you to turn the focusing ring on your lens until the subject appears sharp and clear in the viewfinder or on the camera’s screen. Manual focus is particularly useful when shooting with a telescope camera adapter because it allows you to fine-tune the focus for celestial objects like stars and planets, which may require small adjustments to achieve maximum clarity.
Using manual focus with a telescope camera adapter does require some skill and practice. It can be challenging to determine the exact focus point, especially if you’re shooting in low light conditions. However, with time and experience, you can become proficient in manual focus and achieve precise results.
Auto Focus
Auto focus is a convenient feature that many photographers rely on for quick and accurate focusing. When using auto focus with a telescope camera adapter, the camera will automatically adjust the focus based on the subject’s distance. This can be useful for capturing fast-moving objects or situations where you need to take photos quickly, such as during wildlife photography or sports events.
However, auto focus may not always be the best choice when using a telescope camera adapter. Depending on the lighting conditions and the distance of the celestial object, the camera’s auto focus system may struggle to achieve proper focus. This can result in blurry or out-of-focus images. Additionally, if you’re shooting in low light or capturing faint objects in the night sky, the camera’s auto focus system may have difficulty detecting the subject.
Overall, the choice between manual focus and auto focus should depend on the specific circumstances and your personal preferences. Manual focus offers more control and precision, but it requires practice and patience. Auto focus is convenient but may not be as reliable in certain situations. Experimenting with both methods will help you determine which one works best for you when focusing your DSLR with a telescope camera adapter.
Question-answer:
What is a DSLR camera adapter?
A DSLR camera adapter is a device that allows you to attach a digital single-lens reflex (DSLR) camera to a telescope. It typically consists of a T-ring that attaches to the camera’s lens mount and a tube that fits into the telescope’s eyepiece holder.
How do I attach a DSLR camera to a telescope?
To attach a DSLR camera to a telescope, you will need a compatible camera adapter. First, remove the eyepiece from the telescope’s focuser. Next, attach the camera adapter to the telescope’s focuser, making sure it is securely tightened. Then, connect the camera to the adapter using a T-ring specific to your camera model. Finally, lock the camera into place by tightening the set screw on the camera adapter.
How do I focus a DSLR with a telescope camera adapter?
Focusing a DSLR with a telescope camera adapter can be a bit different from focusing with a regular camera lens. First, make sure your camera is set to manual focus mode. Then, use the telescope’s focusing knobs to adjust the focus until the image appears sharp and clear in the camera’s viewfinder or live view display. You may need to make small adjustments to achieve perfect focus.


