
Whether you are a professional photographer or an enthusiastic amateur, attaching your Canon DSLR camera to a tripod can greatly enhance the quality of your photos. A tripod provides stability and eliminates camera shake, allowing you to capture sharp, clear images. However, for those who are new to photography, attaching a camera to a tripod may seem like a daunting task. In this article, we will guide you through the step-by-step process of attaching your Canon DSLR camera to a tripod.
Step 1: Choose the Right Tripod Mount
Before you can attach your camera to a tripod, you need to make sure you have the right tripod mount. The tripod mount is typically a small metal plate that screws into the bottom of your camera. It attaches to the tripod head, allowing you to securely mount your camera. Most Canon DSLR cameras come with a tripod mount included in the box. If you don’t have one, you can purchase a tripod mount separately.
Tip: Make sure the tripod mount you choose is compatible with your specific Canon DSLR camera model.
Step 2: Locate the Tripod Socket
Next, you need to locate the tripod socket on your Canon DSLR camera. The tripod socket is a threaded hole usually located on the bottom of the camera. It is where the tripod mount screws into. Look for a small, round hole with a screw thread inside.
Tip: Some Canon DSLR cameras have multiple tripod sockets, allowing you to choose the most convenient position for attaching the tripod.
Step 3: Attach the Tripod Mount
Once you have located the tripod socket, it’s time to attach the tripod mount. Insert the threaded end of the tripod mount into the tripod socket on your Canon DSLR camera. Make sure it is lined up correctly, then begin twisting it clockwise until it is securely attached. Do not overtighten, as this may damage the socket or the mount.
Tip: If you are using a quick release plate system, follow the manufacturer’s instructions for attaching the plate to your camera.

Now that your Canon DSLR camera is securely attached to the tripod, you are ready to start taking amazing photos with the help of the stability provided by the tripod. Remember to adjust the tripod height and angle according to your desired composition, and make use of the tripod’s additional features such as the pan and tilt mechanisms for smooth camera movements. Happy shooting!
Tips for Attaching Canon DSLR Camera to Tripod
Attaching your Canon DSLR camera to a tripod is essential for achieving stable and professional-looking shots. Here are some tips to ensure a secure and steady connection:
1. Choose a Compatible Tripod
Make sure the tripod you select is compatible with your Canon DSLR camera. Check the weight capacity and the type of tripod head to ensure it can support your camera’s size and weight.
2. Locate the Tripod Socket
Locate the tripod socket on the bottom of your Canon DSLR camera. It is usually located near the center of the camera body. Take note of its size and shape to ensure you choose the correct tripod plate or mounting bracket.
3. Attach the Tripod Plate
Attach the tripod plate or mounting bracket to your Canon DSLR camera by aligning it with the tripod socket. Slide it in gently and secure it in place using the locking mechanism or screw provided.

4. Secure the Camera
Ensure the camera is securely attached to the tripod by giving it a gentle tug. Double-check that the locking mechanism or screw is tightened properly to prevent any accidental detachment during use.
5. Adjust the Tripod Height and Position
Adjust the tripod’s height and position according to your desired composition. Use the tripod’s legs to stabilize and level the camera. Take care to avoid any wobbling or instability.
6. Utilize a Remote Shutter Release
To further minimize camera shake, use a remote shutter release or the self-timer function on your Canon DSLR camera. This will allow you to trigger the shutter without physically touching the camera.
Final Thoughts
Attaching your Canon DSLR camera to a tripod is crucial for capturing sharp and steady images. By following these tips, you can ensure a secure and stable connection, allowing you to take your photography to the next level.
Preparing Your Canon DSLR Camera
Before attaching your Canon DSLR camera to a tripod, there are a few steps you need to follow to properly prepare your camera:
- Power off your camera by pressing the power button located on the top or side of the camera body.
- Remove any lens or accessories from the camera to make it lighter and easier to handle.
- Inspect the tripod mount on the bottom of your camera to ensure it is clean and free of any debris.
- Attach the quick release plate to the tripod mount on your camera. The quick release plate provides a secure connection between your camera and the tripod.
- Ensure that the quick release plate is securely tightened by using the attached screw or lever.
- If your tripod has a built-in level, make sure your camera is balanced and level before proceeding.
- Turn on your camera to ensure it is working properly and that all settings are adjusted to your preferences.
- Check the battery level of your camera and replace it if necessary, as using a tripod can drain the battery quicker due to longer exposure times.
By following these steps, you will ensure that your Canon DSLR camera is properly prepared for attachment to a tripod, providing a stable platform for capturing high-quality photos and videos.
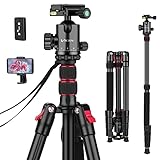
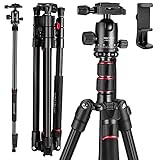
Choosing the Right Tripod for Your Canon DSLR Camera
When it comes to photographing with a Canon DSLR camera, having a stable and reliable tripod is essential. A tripod not only helps you achieve sharper images by eliminating camera shake, but it also allows you to experiment with different angles and compositions. Here are some factors to consider when choosing the right tripod for your Canon DSLR camera.
1. Weight Capacity
One of the most important factors to consider when choosing a tripod is its weight capacity. Your Canon DSLR camera, along with any accessories and lenses, may weigh several pounds. Make sure to choose a tripod that can safely support the weight of your camera equipment.
2. Height and Stability
The height and stability of a tripod are also significant considerations. Look for a tripod that can extend to a comfortable working height and has sturdy legs that can withstand wind and other external factors. Additionally, consider the tripod’s center column and whether it offers additional height adjustments.

3. Material and Durability
Tripods are commonly made from aluminum or carbon fiber. Aluminum tripods are generally more affordable but can be heavier. Carbon fiber tripods, on the other hand, are lighter in weight but often come with a higher price tag. Consider your budget and the level of durability you require when deciding on the tripod’s material.
4. Portability
If you plan on carrying your tripod with you on photo shoots or during travels, portability becomes an important factor. Look for tripods that are lightweight and compact, can be easily folded, and come with a carrying case or bag for convenient transportation.
5. Quick Release Plate
A quick release plate is a handy feature that allows you to quickly attach and detach your Canon DSLR camera from the tripod. This feature saves time and provides added convenience, especially when working in fast-paced shooting situations.
| Criteria | Ideal Tripod |
|---|---|
| Weight Capacity | Supports the weight of your camera equipment |
| Height and Stability | Extends to a comfortable working height and has sturdy legs |
| Material and Durability | Matches your budget and offers the required level of durability |
| Portability | Lightweight, compact, and comes with a carrying case or bag |
| Quick Release Plate | Allows quick attachment and detachment of the camera |
By considering these factors and matching them to your photography needs, you can choose the right tripod for your Canon DSLR camera. Remember, investing in a quality tripod is a wise decision that can greatly enhance your photography experience. Happy shooting!
Understanding the Tripod Mount on Your Canon DSLR Camera
When it comes to using a tripod with your Canon DSLR camera, understanding the tripod mount is essential. The tripod mount is a small metal threaded socket located on the bottom of your camera body. It serves as the connection point between your camera and the tripod.

The tripod mount is compatible with most standard tripods available in the market. The size and thread type may vary depending on the model of your Canon DSLR camera. It is important to ensure that the tripod you are using has a matching thread size to securely attach your camera.
To attach your Canon DSLR camera to a tripod, follow these simple steps:
- Make sure your tripod is set up on a stable surface.
- Locate the tripod mount on the bottom of your camera body.
- Align the threaded socket on the tripod mount with the tripod’s screw.
- Gently twist the camera onto the tripod’s screw in a clockwise direction. Be careful not to overtighten.
- Once the camera is securely attached to the tripod, you can adjust the tripod legs and head to position your camera as desired.
It is important to note that the tripod mount is not only used for attaching your Canon DSLR camera to a tripod. It can also be used to attach other accessories such as camera straps, L-brackets, or external flash brackets. Always check the compatibility and weight capacity of your camera’s tripod mount before attaching any accessories.
By understanding and utilizing the tripod mount on your Canon DSLR camera, you can greatly improve the stability and versatility of your photography. Whether you are shooting landscapes, portraits, or long-exposure shots, a tripod can help you achieve sharper images and explore new creative possibilities.
Remember to always double-check the stability of your camera and tripod setup before leaving your equipment unattended. This will prevent any accidental falls or damage to your camera.

Attaching Your Canon DSLR Camera to the Tripod
Attaching your Canon DSLR camera to a tripod is essential for achieving steady and stable shots. Here is a step-by-step guide on how to do it.
Step 1: Choose the Right Tripod
Before attaching your camera, make sure you have a tripod that is compatible and sturdy enough to support the weight of your Canon DSLR camera. Look for a tripod with a standard mounting plate and a weight capacity that exceeds your camera’s weight.
Step 2: Locate the Tripod Mounting Socket on Your Camera
Next, find the tripod mounting socket on your Canon DSLR camera. It is typically located on the bottom of the camera body. The socket usually has a metal ring surrounding it and is threaded to accept the tripod screw.
Step 3: Align the Tripod Mounting Plate
Take the tripod mounting plate and align it with the tripod socket on your camera. Make sure the plate is properly seated and secure.
Step 4: Attach the Mounting Plate to the Tripod
Once the mounting plate is aligned, attach it to the tripod by tightening the screw clockwise. Ensure that it is securely fastened, but be careful not to overtighten it.
Step 5: Adjust the Tripod Position
Position the tripod at the desired height and adjust the legs to ensure stability. If necessary, use the tripod’s leveling bubble to ensure the camera is perfectly level.
Step 6: Secure the Camera to the Tripod
Finally, attach your Canon DSLR camera to the tripod by sliding the mounting plate with the camera attached into the tripod head. Check that it is secure by giving it a gentle shake.
With your Canon DSLR camera securely attached to the tripod, you are now ready to capture steady and professional-looking photos and videos.
Adjusting the Tripod for Stable Shooting
When attaching your Canon DSLR camera to a tripod, it is vital to adjust the tripod properly to ensure stable shooting and achieve the best results. Here are some steps to help you set up your tripod correctly:
1. Extend the Legs
Start by extending the tripod legs. Most tripods have multiple sections on each leg that can be adjusted to increase the height. Carefully pull each leg section outwards until the desired height is reached.
2. Adjust the Leg Angle
After extending the legs, you might want to adjust the leg angles to provide additional stability. Many tripods have adjustable leg angles, allowing you to choose between different positions, such as a wider stance or a more compact setup. Ensure that each leg is set to the same angle for optimal stability.
3. Secure the Legs
Once you have set the desired height and leg angles, secure the legs by tightening the leg locks. These locks are typically located near the top of each leg and can be twisted or flipped to keep the legs in place. Make sure the locks are tight enough to prevent any accidental movement during shooting.
4. Attach the Camera
With the tripod legs properly adjusted and secured, you can now attach your Canon DSLR camera. Locate the camera mount on the tripod’s center column and align it with the camera’s tripod socket. Slowly rotate the camera in a clockwise direction until it is securely attached to the tripod.
Remember to check that the camera is firmly attached by giving it a gentle tug. If it feels loose, remove the camera and repeat the attaching process. An improperly attached camera could result in unwanted movement and blurry images.
By following these steps and properly adjusting your tripod, you can ensure a stable shooting platform for your Canon DSLR camera. Experiment with different heights and leg angles to find the most comfortable and steady shooting position for your needs.
Using Additional Accessories for Enhanced Stability
Attaching your Canon DSLR camera to a tripod is just the first step in achieving a stable and steady shot. To further enhance stability, you can make use of additional accessories. These accessories can help minimize camera shake, reduce vibration, and improve overall image quality.
1. Tripod Weight Bags: These are specially designed bags that can be attached to the tripod legs. By filling these bags with sand, rocks, or other heavy objects, you can add extra weight to the tripod, making it more stable.
2. Camera L-Brackets: L-brackets are useful accessories that allow you to mount your camera vertically or horizontally on the tripod. This not only provides flexibility in composition but also improves stability by keeping the camera centered over the tripod’s center column.
3. Remote Shutter Release: A remote shutter release allows you to trigger the camera’s shutter without physically touching it. This can help eliminate any possibility of camera shake caused by pressing the shutter button, resulting in sharper images.
4. Anti-vibration Pads: These pads are placed between the camera and the tripod head, reducing vibrations and improving stability. They act as a cushion and absorb any movement or shock, ensuring a steady shot.
5. Leveling Base: A leveling base is a mini tripod head that allows you to easily level the camera when shooting on uneven surfaces. It ensures that the camera remains stable and prevents any tilt or slant in the final image.
By incorporating these additional accessories into your photography setup, you can achieve a higher level of stability and improve the quality of your shots when using a tripod with your Canon DSLR camera.
Tips for Detaching Your Canon DSLR Camera from the Tripod
Detaching your Canon DSLR camera from the tripod may seem like a simple task, but it’s important to do it correctly to avoid any damage to your camera or tripod. Here are some tips to help you detach your camera safely:
- Before detaching the camera, make sure the tripod is stable and secure. Check that all the locks and knobs are tightened properly.
- Turn off the camera and remove any memory cards or cables connected to it.
- Hold the camera firmly with both hands to provide support and stability.
- If your tripod has a quick-release plate, locate the release button or lever and press it down to release the camera. Carefully slide the camera off the plate.
- If your tripod does not have a quick-release plate, you may need to unscrew the camera from the tripod mount. Use caution and take your time to avoid dropping or damaging the camera.
- Once the camera is detached, place it in a secure location or attach it to a camera strap to prevent it from accidentally falling or getting damaged.
- Always handle your camera with care and avoid touching the lens or any other delicate parts.
- After detaching the camera, double-check that the tripod is stable before moving it or folding it for storage.
Following these tips will ensure that you detach your Canon DSLR camera from the tripod safely, protecting both your camera and tripod from any potential accidents or damage.


