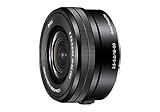
Changing lenses on a DSLR camera can seem intimidating at first, but once you understand the process, it becomes second nature. In this article, we will walk you through the step-by-step process of changing lenses with a DSLR camera Sony A100. Whether you are a beginner or an experienced photographer, this guide will help you master the art of lens changing.
Step 1: Power Off
Before you start, it is important to turn off your camera. This will prevent any accidental damage to the camera or the lens. Make sure the camera is completely powered down before proceeding to the next step.
Step 2: Remove the Lens
Locate the lens release button on your Sony A100 camera. It is usually located on the side of the lens mount. Press and hold the lens release button while rotating the lens counterclockwise. The lens should start to loosen and you can then remove it from the camera body.
Step 3: Prepare the New Lens
After removing the old lens, it’s time to prepare the new one. Remove the lens cap from the new lens and check for any dust or dirt. Use a clean microfiber cloth to gently wipe away any debris. This will ensure that your photos turn out sharp and clear.
Step 4: Attach the New Lens
Align the white dot on the new lens with the matching white dot on the camera body. Insert the lens into the lens mount and rotate it clockwise until you hear a click. This indicates that the lens is securely attached to the camera body.
Step 5: Test and Adjust

Once the new lens is attached, power on your camera and test it out. Make sure the autofocus and zoom functions are working properly. If you encounter any issues, double-check that the lens is properly attached and try again. Additionally, take a few test shots to ensure that the new lens is functioning as expected.
By following these simple steps, you can confidently change lenses with your Sony A100 DSLR camera. Experiment with different lenses to expand your photography skills and capture stunning images.
Understanding DSLR Camera Lenses
DSLR cameras, like the Sony A100, offer photographers the flexibility to change lenses depending on the situation and desired outcome of their photographs. Understanding the different types of lenses and their functions is essential for maximizing the capabilities of your camera.
Types of Lenses
There are various types of lenses available for DSLR cameras, each designed to serve a specific purpose. Some of the most common types include:
- Standard Zoom Lens: This lens covers a range of focal lengths, typically from wide-angle to short telephoto. It is versatile and suitable for everyday photography.
- Wide-Angle Lens: These lenses have a shorter focal length, allowing you to capture more of the scene in your frame. They are ideal for landscape or architectural photography.
- Telephoto Lens: Telephoto lenses have a longer focal length, allowing you to zoom in on distant subjects. They are commonly used in wildlife or sports photography.
- Macro Lens: Macro lenses are designed for close-up photography, allowing you to capture intricate details with high magnification.
Changing Lenses
When changing lenses on your Sony A100 DSLR camera, it is important to handle your equipment with care to avoid any damage or dust getting inside the camera.

Here are the steps to change lenses:
- Power off the camera: Before changing lenses, ensure that your camera is turned off to protect the sensor from any dust or accidental damage.
- Remove the lens: Press the lens release button on your camera body and rotate the lens counterclockwise until it detaches from the camera.
- Attach the new lens: Line up the lens mount on the camera with the corresponding mount on the new lens, then rotate it clockwise until it clicks into place.
- Power on the camera: Once the new lens is securely attached, you can power on your camera and start shooting with the new lens.
Remember to keep your camera and lenses clean and protected when not in use to maintain optimal performance and image quality.
Understanding DSLR camera lenses is crucial for photographers who wish to take full advantage of their camera’s capabilities. By familiarizing yourself with different lens types and learning how to change lenses properly, you can enhance your photography skills and capture stunning images in various situations.
Choosing the Right Lens for Your Sony A100
When it comes to getting the most out of your Sony A100 DSLR camera, choosing the right lens is essential. The lens you use can greatly impact the quality of your photos and the overall shooting experience. Here are some factors to consider when selecting a lens for your Sony A100:
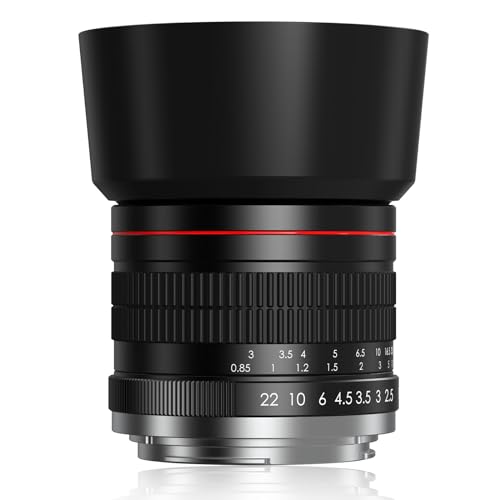
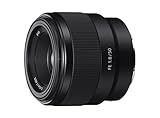
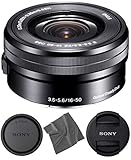
1. Lens Mount Type: The Sony A100 camera uses the Sony Alpha lens mount, so you will need to choose a lens that is compatible with this mount. This allows you to easily attach and remove lenses from your camera without any issues.

2. Aperture: The aperture of a lens determines how much light it allows in. A larger aperture (low f-number) is ideal for low-light conditions and creating a shallow depth of field, while a smaller aperture (high f-number) is better for capturing more detail in well-lit scenes. Consider the type of photography you do most often when selecting the aperture of your lens.
3. Focal Length: The focal length of a lens determines its magnification and field of view. A shorter focal length (wide-angle lens) is great for landscape or architectural photography, while a longer focal length (telephoto lens) is ideal for wildlife or sports photography. Think about the type of subjects you will be shooting to choose the right focal length for your needs.
4. Image Stabilization: Optical image stabilization helps to reduce any blurriness caused by camera shake. This feature can be particularly useful when shooting in low-light conditions or when using a telephoto lens. Consider investing in a lens with built-in image stabilization for sharper and more stable photos.
5. Budget: Lastly, consider your budget when choosing a lens for your Sony A100. There are a wide variety of lenses available, ranging in price from budget-friendly options to high-end professional lenses. Determine your price range and look for lenses that offer the best balance between quality and affordability.
Overall, selecting the right lens for your Sony A100 DSLR camera is crucial for achieving the desired results in your photography. Take into account the lens mount type, aperture, focal length, image stabilization, and your budget to make an informed decision and enhance your photography experience.
Removing the Current Lens
Changing lenses on a DSLR camera like the Sony A100 requires care and attention to avoid damaging both the lens and the camera body. Here is a step-by-step guide on how to safely remove the current lens:
Step 1: Prepare the Camera
Before removing the lens, turn off the camera to prevent any accidental damage. Make sure the camera is securely held with both hands to provide stability.
Step 2: Release the Lens
Locate the lens release button on the camera body. Press and hold this button while turning the lens counterclockwise. This will unlock the lens from the camera body.
Step 3: Remove the Lens
Gently pull the lens away from the camera body while still holding down the release button. Be cautious not to force the lens or apply excessive pressure, as this can lead to damage.
| Caution: | Be mindful of the camera’s sensor and avoid touching it. Dust and debris can cause damage or affect the image quality. |
Step 4: Cap the Lens
Once the lens is removed, immediately attach the lens cap to protect it from dust and scratches. This will also prevent any accidental contact with the rear lens element.
That’s it! You have successfully removed the current lens from your Sony A100 DSLR camera. Now you can proceed with attaching a new lens or safely storing the removed lens. Remember to always handle lenses with care and avoid exposing the camera’s sensor to any potential contaminants.
Preparing the New Lens
When changing lenses with a DSLR camera like the Sony A100, it’s important to properly prepare the new lens before attaching it. Follow these steps to ensure a smooth transition:
| Step 1: | Choose the appropriate lens for your needs. Consider factors such as focal length, aperture, and the type of photography you will be doing. |
| Step 2: | Remove the lens cap from the new lens. Be careful not to touch the glass elements to avoid smudges or damage. |
| Step 3: | Inspect the new lens for any dust or debris. Use a lens cleaning cloth or blower brush to gently remove any particles. |
| Step 4: | Align the white or red dot on the lens barrel with the corresponding dot on the camera body. This ensures proper orientation for attaching the lens. |
| Step 5: | Hold the new lens with one hand and the camera body with the other hand. Keep a firm grip to prevent accidental drops. |
| Step 6: | Bring the lens close to the camera body, making sure the mounting index on the lens aligns with the mounting index on the camera. The lens should fit snugly. |
| Step 7: | Gently rotate the lens clockwise until you hear a click. This indicates that the lens is securely attached. Never force the lens if it doesn’t align properly. |
| Step 8: | Once the lens is attached, replace the lens cap on the old lens and store it in a safe place. Make sure to keep the rear element of the old lens facing downwards to prevent dust from settling on it. |
By following these steps, you can ensure a smooth and successful lens change with your Sony A100 DSLR camera. Remember to always handle lenses with care and keep them clean to maintain optimal image quality.
Mounting the New Lens
Changing the lens on your Sony A100 DSLR camera is a straightforward process. Follow these steps to mount a new lens:
1. Hold the camera firmly with both hands. Avoid touching the camera sensor or lens contacts.
2. Locate the lens release button on the camera body. It is usually located near the lens mount.
3. Press and hold the lens release button while turning the lens counterclockwise. This will detach the current lens from the camera.
4. Remove the old lens from the camera once it is released. Set it aside in a safe place.
5. Take the new lens and remove the rear lens cap. Hold it by the lens barrel, aligning the red dot on the lens with the corresponding dot on the camera mount.
6. Insert the lens into the camera mount and rotate it clockwise until it locks into place. You should hear a clicking sound and feel the lens secure itself.
7. Check that the lens is properly mounted by gently trying to twist it. It should not rotate or come loose.
8. Once the new lens is securely mounted, you can proceed to use it for taking photos. Check the lens settings and adjust as necessary.
Remember to always handle the lens with care and avoid exposing it to dust or moisture. Mounting and changing lenses should be done in a clean and safe environment to prevent any damage to the camera or lens.
Adjusting Lens Settings on the Sony A100
When using the Sony A100 DSLR camera, it is important to understand how to properly adjust the lens settings. These settings can affect the overall image quality and focus of your photographs. Here are some steps to help you adjust the lens settings on the Sony A100:
- Power on your Sony A100 camera and attach the desired lens.
- Make sure the lens is securely attached by twisting it gently until you hear a click.
- Locate the AF/MF switch on the side of the lens. This switch allows you to choose between autofocus (AF) and manual focus (MF) modes.
- If you want to use autofocus, set the switch to AF. The camera will automatically focus on the subject when you half-press the shutter button. You will see the focus points in the viewfinder or on the LCD screen.
- If you prefer to use manual focus, set the switch to MF. You can then adjust the focus manually by rotating the focus ring on the lens. Use the viewfinder or the camera’s focus assist features to ensure accurate focus.
- Some lenses have a zoom ring to adjust the focal length. If you want to zoom in or out, rotate the zoom ring accordingly until you achieve the desired framing.
- Additionally, some lenses have image stabilization (IS) features. If your lens has IS, check if it has an on/off switch or if the camera has a menu option to enable/disable it. Image stabilization helps reduce camera shake, resulting in sharper images.
- Once you have adjusted the desired lens settings, you are ready to start capturing photos with your Sony A100 DSLR camera.
Remember to experiment with different lens settings to find the best options for your specific photography needs. Practice adjusting the lens settings on your Sony A100 to become familiar with the process and achieve optimal results.
Disclaimer: Always refer to the instruction manual that comes with your Sony A100 camera and specific lens model for detailed instructions on adjusting lens settings.
Testing the New Lens
Once you have successfully changed the lenses on your Sony A100 DSLR camera, it’s time to test out the new lens and see how it performs. Here are a few steps you can follow:
1. Set the camera to Manual Mode
Before you start testing the new lens, it’s best to set your camera to manual mode. This will allow you to have full control over the settings and make adjustments as needed.
2. Choose a Subject
Next, select a subject or scene you would like to photograph. It can be anything that interests you – a landscape, a person, or an object.
3. Adjust the Focus
Now, it’s time to adjust the focus on your new lens. Use the autofocus function or manually adjust the focus ring until the subject appears sharp and clear through the camera’s viewfinder.
4. Check the Aperture Settings
Depending on the type of lens you are using, you may have the option to adjust the aperture settings. Experiment with different aperture values (also known as f-stops) to control the depth of field and capture the desired amount of background blur.
5. Test Different Shooting Modes
Try out different shooting modes on your camera, such as aperture priority, shutter priority, or even full manual mode. This will allow you to explore different creative options and see how the new lens performs in various shooting conditions.
6. Review the Results
After taking a few test shots, review the images on your camera’s LCD screen or transfer them to a computer for a closer look. Pay attention to the sharpness, clarity, and overall quality of the images captured with the new lens.
By following these steps, you will be able to test your new lens and evaluate its performance with your Sony A100 DSLR camera. Have fun experimenting and capturing stunning photographs!
Taking Care of Your Lenses
Properly caring for your camera lenses is essential to ensure they remain in optimal condition and provide you with clear, sharp images. Here are some tips to help you take care of your lenses:
1. Keep your lenses clean: Use a clean, lint-free microfiber cloth to gently wipe the lens surface. Avoid using harsh chemicals or abrasive materials that could scratch the lens.
2. Store your lenses properly: When not in use, keep your lenses in a dry and dust-free environment. You can use a lens pouch or a dedicated camera bag with padded compartments to protect them from any damage.
3. Avoid touching the lens directly: Fingerprints and smudges can affect image quality, so it’s best to avoid touching the lens surface directly. If necessary, use a lens cleaning solution and a lens cleaning tissue to remove any stubborn stains.
4. Be cautious when changing lenses: When swapping lenses, try to do it in a clean and dust-free area to minimize the risk of dust or debris getting on the sensor or inside the camera. Also, make sure to turn off the camera before removing or attaching a lens.
5. Protect your lenses from extreme conditions: Avoid exposing your lenses to extreme temperatures and humidity as it can cause condensation or damage. If shooting in challenging environments, consider using lens filters or lens hoods for added protection.
6. Regularly inspect your lenses: Check your lenses for any signs of damage or wear, such as cracks, scratches, or loose parts. If you notice any issues, it’s best to contact a professional camera technician for repairs or maintenance.
By following these tips, you can extend the lifespan of your lenses and ensure they continue to deliver exceptional image quality for years to come.
Question-answer:
Is it possible to change lenses on a Sony A100 DSLR camera while it is turned on?
No, it is not recommended to change lenses on a Sony A100 DSLR camera while it is turned on. It is best to turn off the camera before changing lenses to ensure that the camera’s mirror is in the correct position and to prevent any damage to the lens or camera.
Do I need to remove the lens cap before changing lenses on a Sony A100 DSLR camera?
Yes, it is important to remove the lens cap before changing lenses on a Sony A100 DSLR camera. Failure to do so may result in the lens cap getting stuck or preventing the new lens from properly attaching to the camera.
Can I use lenses from other camera brands on a Sony A100 DSLR camera?
No, the Sony A100 DSLR camera uses a specific lens mount called the “A-mount.” This means that you can only use lenses that are compatible with the A-mount on the Sony A100 DSLR camera. Using lenses from other camera brands may result in the lens not fitting or not functioning properly with the camera.


