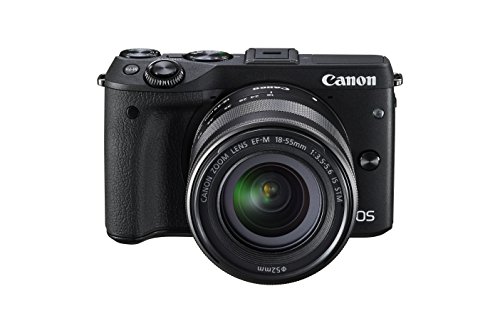
Are you tired of taking mediocre photos with your smartphone? If you want to step up your photography game and capture breathtaking images, it’s time to invest in a DSLR camera. DSLR stands for Digital Single Lens Reflex, and these cameras offer a world of possibilities for photographers of all skill levels. Whether you’re a beginner or a seasoned pro, learning how to use a DSLR camera can help you take your photography to the next level.
But where do you start? With so many buttons, dials, and settings, using a DSLR camera can be overwhelming at first. But don’t worry – with a little bit of practice and some handy tips, you’ll be taking stunning photos in no time.
The first step is to familiarize yourself with your camera’s settings. Take some time to read the instruction manual and learn about the different buttons and functions. Understanding how these settings work will give you more control over your photos and help you achieve the desired effect.
Understanding DSLR Cameras
A DSLR camera, short for Digital Single Lens Reflex camera, is a popular type of camera among professional photographers and photography enthusiasts. It offers a wide range of features and settings that allow for greater creative control over your photos.
How DSLR Cameras Work
DSLR cameras work by using a mirror and prism system to reflect light into the viewfinder, allowing you to see exactly what the lens sees. When you press the shutter button, the mirror flips up, allowing the light to hit the image sensor and capture the photo.

One of the main advantages of DSLR cameras is the ability to change lenses. This allows you to use different focal lengths and apertures, giving you more versatility in your photography.
Key Features of DSLR Cameras
1. Interchangeable Lenses: As mentioned earlier, DSLR cameras allow you to change lenses, which means you can use a wide range of lenses based on your photography needs.
2. Manual Control: DSLR cameras offer full manual control over settings such as shutter speed, aperture, and ISO, giving you complete creative control over your photos. This allows you to achieve the desired exposure and depth of field for your shots.
3. Image Sensor: DSLR cameras typically have larger image sensors compared to compact cameras, which results in better image quality, especially in low-light conditions.
4. Optical Viewfinder: DSLR cameras have an optical viewfinder that allows you to see the scene directly through the lens. This provides a more accurate representation of the final image compared to the digital viewfinders found on compact cameras.

5. Burst Mode: Many DSLR cameras have a burst mode, which allows you to capture a rapid series of photos in quick succession. This is useful for capturing fast-moving subjects.
6. RAW Format: DSLR cameras can capture photos in RAW format, which preserves all the image data captured by the sensor. This gives you more flexibility in post-processing and allows for better image quality.
Understanding how DSLR cameras work and their key features will help you make the most out of your camera and take stunning photos. Whether you’re a beginner or an experienced photographer, a DSLR camera can greatly enhance your photography skills.
Choosing the Right DSLR Camera
When it comes to purchasing a DSLR camera, there are a variety of factors to consider in order to choose the right one for you and your photography needs. Here are some key points to keep in mind:
- Price range: Determine your budget beforehand as DSLR cameras can vary greatly in price. Consider how much you are willing to spend and what features you prioritize.
- Megapixel count: Higher megapixel count allows for more detailed and sharper images. However, keep in mind that higher megapixels also result in larger file sizes.
- Camera body: Consider the size, weight, and ergonomics of the camera body. DSLR cameras come in different sizes and weights, so choose one that feels comfortable and suits your shooting style.
- Brand and lens compatibility: Different camera brands have their own lens mounts, so it’s important to consider the available lens options and compatibility with third-party lenses.
- ISO range: The ISO range determines the camera’s sensitivity to light. Look for a camera with a wide ISO range, as this will allow you to capture high-quality photos in various lighting conditions.
- Autofocus system: A reliable autofocus system is crucial for capturing sharp and well-focused images. Look for a camera with an advanced autofocus system that meets your needs.
- Video capabilities: If you plan to use your DSLR for videography as well, consider the camera’s video capabilities, such as resolution options and frame rates.
- Additional features: Some DSLR cameras offer additional features such as built-in Wi-Fi, touchscreen displays, and weather sealing. Consider if these features are important to you.
Ultimately, the right DSLR camera will depend on your specific needs, preferences, and budget. Take the time to research and compare different models to ensure you make an informed decision and find a camera that will allow you to capture stunning photos.

Mastering Manual Mode
To truly unlock the full potential of your DSLR camera and capture stunning photos, you need to master manual mode. Manual mode gives you complete control over the exposure settings of your camera, allowing you to have full creative freedom.
Here are some steps to help you get started:
1. Understand the Exposure Triangle:
Mastering manual mode requires a good understanding of the exposure triangle, which consists of three key elements: aperture, shutter speed, and ISO. Aperture controls the amount of light that enters the camera, shutter speed determines the duration of the exposure, and ISO affects the camera’s sensitivity to light. Experiment with different combinations of these settings to achieve the desired photographic effect.
2. Use the Light Meter:

Your camera’s light meter is a valuable tool for achieving optimal exposure in manual mode. The light meter provides a visual indication of whether your photo will be overexposed or underexposed. Aim to have the light meter at zero for a well-exposed image. Adjust your exposure settings accordingly until the light meter indicates the desired exposure level.
3. Shoot in RAW Format:
When shooting in manual mode, it’s best to capture your photos in RAW format. RAW files contain unprocessed data captured by the camera’s sensor, allowing for greater flexibility in post-processing. Shooting in RAW gives you more control over the final image and allows you to correct any exposure mistakes during editing.
4. Focus and Depth of Field:
In manual mode, you have full control over focusing and depth of field. Experiment with different apertures (low f-number for a shallow depth of field, high f-number for a greater depth of field) to create different effects and emphasize specific elements in your composition.

5. Take Your Time:
Mastering manual mode takes time and practice. Don’t be afraid to experiment and make mistakes. Take the time to review your photos, analyze the settings you used, and learn from your experiences. As you become more familiar with manual mode, you’ll gain confidence and be able to capture stunning photos with ease.
In conclusion, mastering manual mode is essential for getting stunning photos with your DSLR camera. With practice, patience, and an understanding of the exposure triangle, you’ll be able to unleash your creativity and take your photography to the next level.
Composing Your Shots
Composing your shots effectively is crucial to capturing stunning photos with your DSLR camera. The way you frame your subject and arrange the elements within your frame can make or break the final image. Here are some tips to help you compose your shots like a pro:
1. Rule of Thirds
The rule of thirds is a basic compositional guideline that can add balance and interest to your photos. Imagine dividing your frame into a grid of nine equal rectangles with two horizontal lines and two vertical lines. Place the main subjects or points of interest along these lines or at the intersections, rather than placing them in the center of the frame.

2. Leading Lines
Leading lines are elements within your scene that guide the viewer’s eye towards the main subject. These can be anything from a road or a pathway to a row of trees or a river. By including leading lines in your composition, you can create a more dynamic and engaging photo.
| Examples of Leading Lines: | Photo Examples |
|---|---|
| A winding road leading towards a mountain peak |  |
| A row of trees leading towards a sunset |  |
| A river taking the viewer’s eye into the distance |  |
Remember to experiment with different angles and perspectives to find the most compelling composition.
By keeping these compositional techniques in mind and practicing them regularly, you will be able to capture stunning photos with your DSLR camera that are visually striking and captivating. Happy shooting!
Using Natural Lighting
Natural lighting can make a huge difference in the quality and overall look of your photos. Here are some tips for using natural light to get stunning photos with your DSLR camera:
1. Find the best light: The quality and direction of natural light can vary depending on the time of day and the weather conditions. Look for soft, diffused light early in the morning or during the golden hour – the hour before sunset – for a warm and flattering glow.

2. Use open shade: Direct sunlight can create harsh shadows and unflattering highlights. Instead, look for open shade, such as under a tree or a building, to create softer and more even lighting on your subject.
3. Avoid midday sun: The sun is at its highest point during midday, resulting in strong, overhead lighting. This type of lighting can create harsh shadows and make your subject squint. Try to shoot during the morning or late afternoon when the light is softer and more flattering.
4. Use reflectors: Reflectors can help bounce natural light back onto your subject, filling in shadows and creating a more balanced exposure. Consider using a white or silver reflector for a natural and soft fill light.
5. Embrace backlighting: Backlighting occurs when your subject is between the camera and the light source. This can create a beautiful halo effect or a rim of light around your subject, adding depth and interest to your photos.
6. Experiment with different angles: Natural lighting can create interesting shadows and highlights, so don’t be afraid to experiment with different angles and compositions. Try shooting from different heights or changing your perspective to capture unique and striking images.
7. Pay attention to the weather: The weather can have a significant impact on natural lighting. Cloudy or overcast days can create soft, diffused lighting, while sunny days can create dramatic and high-contrast lighting. Be aware of the weather conditions and use them to your advantage.
By utilizing the power of natural lighting, you can take your DSLR photography to the next level. Remember to always be mindful of the lighting conditions and experiment with different techniques to capture stunning and visually captivating photos.
Exploring Different Angles
One of the keys to taking stunning photos with a DSLR camera is to explore different angles. Changing the perspective can completely transform a photo and make it more visually interesting.
Here are some tips for exploring different angles:
| 1. Get Low: | Try getting down low to the ground and shooting from a low angle. This can make your subject appear more imposing and dramatic. |
| 2. Shoot from Above: | On the other hand, shooting from above can give a different perspective and make your subject appear smaller and more vulnerable. |
| 3. Move Around: | Don’t be afraid to move around and experiment with different vantage points. Walk around your subject and try shooting from different sides. |
| 4. Look for Unique Angles: | Find unique angles that are different from the usual eye-level perspective. This can add a sense of depth and interest to your photos. |
| 5. Use Leading Lines: | Look for leading lines in your environment such as fences, roads, or rivers that can guide the viewer’s eye and create a sense of movement. |
By exploring different angles, you can discover new and creative ways to capture stunning photos with your DSLR camera. Don’t be afraid to experiment and have fun!
Utilizing Depth of Field
Depth of field refers to the range of distance that appears acceptably sharp in a photograph. By understanding and utilizing depth of field, you can add depth and dimension to your photos, making them more visually engaging and stunning.
One way to control depth of field is by adjusting the aperture setting on your DSLR camera. Aperture refers to the size of the opening in the lens through which light passes. A wider aperture (a lower f-number) will result in a smaller depth of field, while a smaller aperture (a higher f-number) will result in a larger depth of field.
To achieve a shallow depth of field, perfect for creating a blurred background and making your subject stand out, use a wide aperture setting. Set your camera to aperture priority mode (marked as “A” or “Av” on the camera dial) and select a low f-number, such as f/2.8 or f/4.0. This will create a narrow plane of focus, keeping your subject sharp while blurring the foreground and background.
On the other hand, if you want to capture a larger depth of field and keep everything in focus, such as in landscape photography, use a small aperture setting. Set your camera to aperture priority mode and select a high f-number, such as f/11 or f/16. This will increase the distance in which objects appear sharp, resulting in a greater depth of field.
Keep in mind that depth of field is also influenced by the distance between your camera and the subject. The closer you are to the subject, the shallower the depth of field will be. Additionally, the focal length of your lens can also affect depth of field. A telephoto lens will naturally have a shallower depth of field compared to a wide-angle lens.
Experimenting with depth of field can greatly enhance your photographs and add a professional touch to your work. So, whether you want to create stunning portraits or capture breathtaking landscapes, make sure to utilize the power of depth of field to create visually striking images.
Editing and Enhancing Your Photos
Once you have taken stunning photos with your DSLR camera, the next step is to edit and enhance them to make them even more impressive. With the right software and techniques, you can transform your photos into true works of art.
Choosing the Right Software
When it comes to editing and enhancing your photos, there are various software options available. Adobe Photoshop is one of the most popular choices and offers a wide range of tools and features for both basic edits and advanced retouching. If you are looking for a more user-friendly option, Adobe Lightroom is a great choice. It offers a simpler interface and is perfect for organizing, editing, and enhancing your photos.
Other popular software options include Capture One, DxO PhotoLab, and ON1 Photo RAW. Each software has its own strengths and weaknesses, so it is important to choose one that suits your needs and preferences.
Basic Editing Techniques
When editing your photos, there are several techniques you can use to improve their overall appearance. Here are some basic editing techniques to get you started:
| Cropping | Cropping allows you to remove any unwanted elements and create a more balanced composition. |
| Adjusting Exposure | You can adjust the brightness and contrast of your photos to improve their overall exposure. |
| Color Correction | Correcting the colors in your photos can make them look more vibrant and lifelike. |
| Sharpening | Sharpening your photos can enhance their details and make them appear crisper. |
Advanced Techniques
If you are looking to take your photo editing skills to the next level, there are several advanced techniques you can learn. These include:
- Retouching: Removing blemishes, smoothing skin, and making other adjustments to improve the appearance of your subjects.
- Selective Editing: Targeting specific areas of your photo for adjustments, such as brightening only the subject’s face.
- Adding Filters: Applying filters to create different moods and effects in your photos.
- Layering and Masking: Using layers and masks to combine multiple photos or selectively apply effects.
Experiment with these techniques and find your own editing style that suits your photos and personal taste. Remember, editing should enhance your photos, not completely change their appearance.
Lastly, don’t forget to save separate copies of your original photos before editing, so you always have the option to go back to the original if needed. Happy editing!
Sharing Your Stunning Photos
Once you have taken some amazing photos with your DSLR camera, it’s natural to want to share them with others. Here are some tips on how to effectively share your stunning photos:
1. Social Media: Social media platforms such as Instagram, Facebook, and Twitter are popular places to share your photos. Create an account or use your existing account to showcase your work. Remember to use relevant hashtags and engage with other users to increase your visibility.
2. Online Portfolio: Consider creating your own online portfolio or website to showcase your best work. This will allow you to have full control over the presentation of your photos and convey your unique style and vision.
3. Photography Communities: Join online photography communities or forums where you can interact with other photographers and receive constructive feedback on your work. These communities can inspire and motivate you to improve your skills.
4. Prints and Exhibitions: If you’re interested in displaying your photos in a physical form, consider printing them and hosting an exhibition. This can be a great way to gain recognition as an artist and sell your work to interested buyers.
5. Collaborations: Seek opportunities to collaborate with other photographers or artists. Participating in photo contests, group projects, or featuring your work in magazines or blogs can help you reach a wider audience and gain exposure.
6. Personal Contacts: Don’t forget about the power of personal connections. Share your photos with friends, family, and colleagues who may appreciate and support your work. Word-of-mouth can be an effective way to expand your audience.
By utilizing these strategies, you can effectively share your stunning photos with the world and build a strong presence as a photographer. Remember to always stay true to your style and vision, and continue to explore new avenues for showcasing your work.
Question-answer:
What is a DSLR camera?
A DSLR camera, or a digital single-lens reflex camera, is a professional-grade camera that uses a digital imaging sensor to capture high-quality photos and videos.
What are the advantages of using a DSLR camera?
There are several advantages of using a DSLR camera. Firstly, DSLR cameras offer better image quality and more control over settings compared to point-and-shoot cameras or smartphones. Secondly, DSLR cameras allow you to use interchangeable lenses, which gives you the flexibility to capture different types of shots. Lastly, DSLR cameras have a faster autofocus system and better low-light performance, making them ideal for various photography genres.
Can I take stunning photos with a beginner-level DSLR camera?
Yes, you can take stunning photos with a beginner-level DSLR camera. While professional-grade DSLR cameras may offer more advanced features and better image quality, modern entry-level DSLR cameras are also capable of capturing impressive photos. The key is to understand your camera’s settings and modes, practice, and experiment with different techniques and compositions. With dedication and creativity, you can achieve stunning results with a beginner-level DSLR camera.