When it comes to capturing that perfect shot, holding your DSLR camera steady is crucial. A shaky hand can lead to blurred images and disappointment. Whether you’re a professional photographer or just starting out, mastering the art of holding your camera steady will greatly improve the quality of your photographs.
1. Use Both Hands: One of the simplest yet most effective ways to stabilize your DSLR camera is to hold it with both hands. By gripping the camera with your right hand and supporting the lens with your left, you create a steady base for capturing sharp and clear images. This technique also allows you to easily access the camera’s buttons and controls.
2. Tuck Your Elbows In: Another important tip is to tuck your elbows into your body. This helps to minimize any unwanted movement and provides additional support to your camera. By creating a solid foundation with your body, you’ll be able to keep your camera steady and avoid shaky shots.
3. Stand with Proper Posture: Maintaining good posture while taking photos can also contribute to holding your DSLR camera steady. Stand with your feet shoulder-width apart and distribute your weight evenly. Avoid slouching or leaning, as this can lead to instability and camera shake. Keep your body relaxed but engaged, ready to capture the perfect moment.
4. Utilize Image Stabilization: Many DSLR cameras come equipped with built-in image stabilization technology. This feature helps to compensate for any small movements or vibrations, resulting in sharper photos. Make sure to check if your camera has this feature and activate it if necessary. It can make a significant difference in the overall stability of your shots.

By following these tips and practicing regularly, you’ll soon become a pro at holding your DSLR camera steady. Remember, a steady hand is the foundation for capturing stunning images that will stand the test of time.
Understanding DSLR Camera Stability
When it comes to capturing sharp and well-focused images with your DSLR camera, stability is key. Holding your camera steady is essential to prevent any unwanted camera shake that can result in blurry or out-of-focus photos. To achieve optimal stability, it’s important to understand and practice a few key techniques.
Hand Positioning:
The way you hold your camera can greatly impact its stability. Hold your camera with both hands, gripping it firmly but not too tightly. Keep your elbows close to your body to provide additional support and stability. By maintaining a steady hand position, you reduce the risk of camera shake.
Body Stance:
Your body posture also plays a vital role in camera stability. Stand with your feet shoulder-width apart and slightly bend your knees. This stable stance helps absorb any body movement that could introduce camera shake. Avoid standing on tiptoes or leaning too far forward, as it may compromise your stability.
Breathing Technique:
Believe it or not, the way you breathe can affect camera stability. Practice taking a deep breath, exhaling slowly, and then pause momentarily before pressing the shutter button. This technique helps you minimize any slight body movements caused by breathing, ensuring a steadier grip on your camera.
Using Camera Straps:
Utilizing camera straps can provide an extra layer of stability. Wear the strap around your neck and keep tension on it while shooting. This technique helps to further stabilize your camera and reduce the risk of accidental drops or slips.
Using Tripods and Accessories:
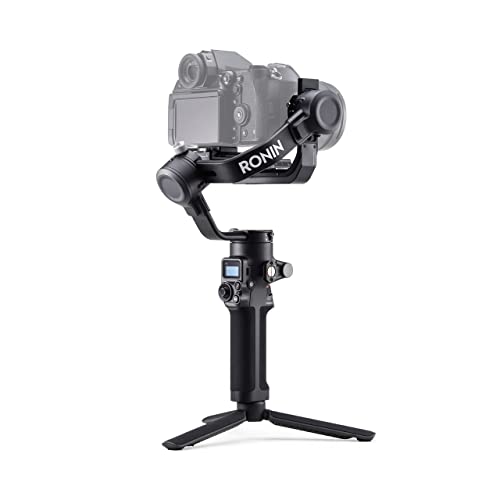
In addition to handheld techniques, utilizing tripods and other accessories can greatly enhance camera stability. Tripods are particularly useful for long exposures, low-light photography, and when using heavy lenses. There are also various stabilizing accessories available, such as gimbals and camera stabilizers, which can help you achieve even greater stability and smooth movements in your shots.
By understanding and practicing these techniques, you’ll be able to achieve better stability when using your DSLR camera, resulting in sharper and more professional-looking photos.
Importance of Holding a DSLR Camera Steady
A DSLR camera (Digital Single-Lens Reflex) is a powerful tool that allows photographers to capture stunning images with exceptional clarity and detail. However, in order to truly exploit the potential of this high-end equipment, it is crucial to understand the importance of holding the camera steady.
1. Sharpness and Clarity:

When shooting with a DSLR camera, any slight movement or shake can result in blurred images. Holding the camera steady is vital to ensure sharpness and clarity in your photographs. Steadiness is particularly crucial when using slower shutter speeds or shooting in low light conditions, as even the tiniest movement can be magnified and impact the overall quality of the image.
2. Focusing Accuracy:
Proper camera stability plays a significant role in achieving accurate and precise focusing. DSLR cameras have sophisticated autofocus systems that rely on stability to establish focus points effectively. By holding the camera steady, you provide a stable foundation, enabling the autofocus system to work optimally. This ensures that your subject is precisely in focus, enhancing the overall composition of the image.
3. Depth of Field Control:
DSLR cameras offer the advantage of having control over the depth of field, allowing photographers to create a beautifully blurred background or keep the entire scene in sharp focus. However, to effectively control the depth of field, it is crucial to hold the camera steady, as any movement can alter the plane of focus. By maintaining stability, you can accurately execute your desired depth of field, enhancing the overall visual impact of your photographs.

4. Composition and Framing:
The way a photograph is composed and framed significantly impacts its overall impact. Proper camera stability allows photographers to carefully compose their shots, ensuring the intended subjects are in the frame and properly aligned. By holding the camera steady, you have more control over the composition, enabling you to capture images with precision and intention.
5. Reducing Post-Processing Efforts:
By holding the camera steady, you can minimize the need for post-processing corrections. Blurred images resulting from camera shake often require extensive editing to sharpen and rescue details. By focusing on holding the camera steady during shooting, you can save time and effort in post-processing, allowing for a more efficient workflow.
Conclusion

Holding a DSLR camera steady is vital to maximize the potential of this powerful tool. By maintaining stability, photographers can ensure sharpness, accuracy, and precise control over composition and focus. So next time you pick up your DSLR camera, remember the importance of holding it steady to capture stunning images with exceptional clarity and detail.
Choosing the Right Camera Grip
When it comes to holding a DSLR camera steady, choosing the right camera grip is crucial. A camera grip is a device that attaches to the camera and provides a more comfortable and secure way to hold it, especially during long shooting sessions or in challenging shooting conditions.
There are several factors to consider when selecting the right camera grip:
1. Ergonomics
One of the key considerations when choosing a camera grip is the ergonomics. Look for a grip that feels comfortable in your hand and allows for a secure grip on the camera. It should have a textured surface or rubberized coating to prevent slipping, even in wet or sweaty conditions. Additionally, consider the shape and size of the grip to ensure it fits well with the size of your hand and the camera.
2. Compatibility
Make sure the camera grip you choose is compatible with your specific DSLR model. Different camera brands and models may have unique designs, so it’s important to find a grip that specifically fits your camera. You can usually find this information in the product specifications or by checking with the manufacturer.

When choosing a camera grip, keep in mind that there are different types available, such as hand grips, battery grips, and wrist straps. Hand grips and battery grips provide a more substantial grip surface and often come with additional functions like extra battery capacity or vertical shutter release buttons. Wrist straps, on the other hand, provide a convenient way to secure the camera to your wrist for added stability.
Overall, selecting the right camera grip can greatly improve your ability to hold a DSLR camera steady and ensure you capture sharp, blur-free images. It’s worth spending some time researching and trying out different grips to find the one that feels comfortable and suits your specific shooting needs.
Using a Tripod
A tripod is an essential accessory for keeping your DSLR camera steady. It provides a stable platform for your camera, helping you capture sharp and clear images. Here are some tips for using a tripod effectively:
1. Choose a sturdy tripod: Look for a tripod that is made of durable materials and has a solid construction. This will ensure that it can support the weight of your camera and lens without any wobbling or vibration.
2. Adjust the height: Set up the tripod at a comfortable height, so that you don’t have to strain your body while looking through the viewfinder or operating the camera controls. Most tripods have adjustable legs that allow you to change the height according to your needs.
3. Use a tripod head: A tripod head allows you to easily adjust and control the position of your camera. There are different types of tripod heads available, such as ball heads and pan-tilt heads. Choose the one that suits your shooting style and needs.
4. Lock the tripod legs: Make sure to lock the tripod legs securely in place once you have set the desired height. This will prevent any accidental movement or collapse of the tripod while you are shooting.
5. Use a remote shutter release: To further minimize camera shake, use a remote shutter release or a self-timer function on your camera. This will allow you to trigger the shutter without touching the camera, reducing the chances of introducing vibration.
6. Avoid windy conditions: If you are shooting outdoors, be cautious of windy conditions. The movement of the wind can cause the tripod to shake, resulting in blurry images. Consider using additional weights or a windproof bag to stabilize the tripod.
7. Check the stability: Before capturing an important shot, check if the tripod is stable. Give it a gentle shake and listen for any creaking or wobbling sounds. If you detect any instability, adjust the tripod or tighten the screws to ensure a secure setup.
8. Practice good technique: While using a tripod, it’s important to adopt good shooting techniques. Avoid bumping the camera or tripod, and use the camera’s mirror lock-up function if available to reduce vibrations caused by the movement of the mirror.
In conclusion, using a tripod is an effective way to hold your DSLR camera steady and capture high-quality images. Follow these tips to maximize the stability and minimize camera shake for professional-looking results.
Optimizing Your Body Position
When it comes to holding a DSLR camera steady, your body position plays a crucial role. By optimizing your body position, you can reduce camera shake and capture sharper images.
Here are a few tips to help you optimize your body position:
1. Stand with your feet shoulder-width apart: Having a stable base is essential for maintaining balance and reducing camera shake. Standing with your feet shoulder-width apart provides a solid foundation.
2. Tuck in your elbows: Keeping your elbows close to your body helps support the weight of the camera and reduces arm fatigue. This stability will also minimize the chances of camera shake.
3. Hold the camera with both hands: Using both hands to hold the camera will allow you to have better control and stability. Place one hand on the grip and the other hand underneath the lens for added support.
4. Take a deep breath and exhale slowly: Controlling your breathing is essential for minimizing camera shake. Take a deep breath, hold it briefly, and then exhale slowly as you press the shutter button.
5. Use a tripod or a monopod: If you need extra stability, consider using a tripod or a monopod. These accessories can help eliminate camera shake, especially in low-light conditions or when using longer lenses.
By implementing these techniques and optimizing your body position, you can greatly enhance the stability of your DSLR camera and capture sharper, more professional-looking photos.
Mastering Handheld Shooting Techniques
When shooting with a DSLR camera, it’s important to understand the proper techniques for holding the camera steady. Mastering handheld shooting techniques can greatly improve the overall quality of your photos and videos. Here are some tips to help you achieve sharper and more stable shots:
1. Find a solid foundation: Before you even start shooting, find a stable surface or object to lean against. This could be a wall, a tree, or even a solid piece of furniture. By using a stable foundation, you can minimize camera shake and improve stability.
2. Use proper hand placement: Place your right hand around the camera grip, with your index finger resting lightly on the shutter button. Support the lens with your left hand, cradling it from underneath. This hand placement helps to distribute the weight of the camera and provides better stability.
3. Maintain good posture: Stand with your feet shoulder-width apart and slightly bend your knees. Keep your elbows close to your body and tuck in your elbows for additional support. This posture helps to minimize body movement and reduces the risk of camera shake.
4. Utilize image stabilization: If your DSLR camera has built-in image stabilization, make sure it is enabled. Image stabilization technology helps to counteract camera shake and can significantly improve the sharpness of your shots, especially in low light situations.
5. Control your breathing: Take a deep breath and hold it for a moment while you’re pressing the shutter button. This technique can help stabilize your body and reduce any breathing-induced camera movement.
6. Practice proper finger pressure: Apply gentle pressure to the shutter button, avoiding any sudden movements or jerking motions. Pressing the button too hard can introduce unnecessary camera shake, while being too light might result in a blurry image from accidental movement.
7. Experiment with different shooting modes: Many DSLR cameras offer various shooting modes, such as shutter priority mode or aperture priority mode. These modes can help you achieve better results in certain shooting conditions, such as fast-moving subjects or low light environments.
8. Take advantage of burst mode: When capturing action shots or fast-moving subjects, use the burst mode feature of your camera. This allows you to capture a series of shots in quick succession, increasing the chances of getting a perfectly sharp image.
Remember, practice makes perfect. Mastering handheld shooting techniques takes time and experimentation. By implementing these tips and consistently practicing, you’ll be able to capture stunning, sharp, and stable photos and videos with your DSLR camera.
Proper Hand Placement
One of the key factors in holding a DSLR camera steadily is ensuring proper hand placement. By positioning your hands correctly, you will have better control over the camera and reduce the risk of camera shake.
Here are some tips for achieving proper hand placement:
| 1. | Hold the camera with both hands |
| 2. | Place your right hand on the grip of the camera |
| 3. | Keep your fingers wrapped around the grip |
| 4. | Position your left hand under the camera body |
| 5. | Make sure your left hand supports the weight of the camera |
| 6. | Avoid placing your fingers in front of the lens |
By following these hand placement techniques, you will be able to hold your DSLR camera steadily and capture sharp, blur-free images. Remember to also maintain a relaxed and steady posture while shooting to further enhance stability.
Controlling your Breath
One of the most important factors in holding a DSLR camera steady is controlling your breath. When you breathe, your body moves slightly, which can introduce camera shake. To minimize this shake, it’s important to practice deep, slow breaths and to time your shots with your exhale.
Before you take a photo, take a moment to consciously exhale completely. This will help steady your body and reduce any potential camera shake. Hold your breath at the end of your exhale just before you press the shutter button. This technique will help you maintain stability and capture sharp images.
It’s also essential to avoid holding your breath for too long, as tension can build up and affect your ability to hold the camera steady. Instead, focus on maintaining a relaxed and balanced posture while incorporating controlled breathing techniques.
Remember, practice makes perfect. By incorporating controlled breath into your photography routine, you’ll develop a steady hand and be able to capture professional-looking images with your DSLR camera.
Utilizing Image Stabilization Features
Image stabilization is a feature built into many DSLR cameras that helps reduce the effects of camera shake, resulting in sharper images. This feature can be extremely useful when trying to hold a camera steady and capture clear shots, especially in low light situations or when using longer focal lengths.
While different camera manufacturers and models may offer various types of image stabilization, the principle behind them is generally the same: to compensate for the movement of the camera by stabilizing the sensor or lens. This allows for a steadier image and reduces the chances of blur caused by shaky hands.
There are usually two main types of image stabilization: optical stabilization and sensor-shift stabilization. Optical stabilization involves using special lenses that can move slightly to counteract any shaking. On the other hand, sensor-shift stabilization works by moving the image sensor itself. Both methods aim to achieve the same result – reducing camera shake and producing clearer images.
To make the most of your camera’s image stabilization features, here are a few tips:
- Activate the image stabilization feature in your camera’s settings. Depending on the model, it may be called different names such as “IS” (Image Stabilization), “VR” (Vibration Reduction), or “OS” (Optical Stabilization). Refer to your camera’s manual for specific instructions.
- When shooting handheld, hold the camera firmly with both hands, keeping your elbows close to your body for added stability. This will help minimize any unintentional movements that could potentially affect image sharpness.
- Experiment with different shooting techniques such as using the camera’s burst mode or continuous shooting mode. This can increase your chances of capturing a sharp image, especially when shooting moving subjects.
- Consider using a tripod or a monopod if you need additional stability, especially in situations where longer exposures are required. These accessories can help eliminate any minor movements that even image stabilization may not be able to fully compensate for.
- Keep in mind that image stabilization can only do so much. It helps minimize camera shake, but it cannot freeze the motion of your subject. If your subject is moving quickly, you may still need to use other techniques such as adjusting your shutter speed or focusing techniques to ensure sharp images.
By utilizing the image stabilization features on your DSLR camera properly, you can significantly improve the stability of your photos and reduce the chances of blurry images caused by camera shake. Experiment with different settings and techniques to find what works best for you and the specific shooting conditions you encounter.