
Are you tired of relying on your smartphone camera for all your photography needs? Do you want to take your photography skills to the next level? Look no further! In this article, we will guide you through the process of setting up your DSLR as your main camera.
Step 1: Familiarize Yourself with Your DSLR
Before setting up your DSLR as your main camera, it’s important to familiarize yourself with its features and functions. Take some time to read the user manual and learn about the various buttons, dials, and settings. Understanding your camera will enable you to make the most of its capabilities.
Pro tip: Experiment with different settings and modes to gain a better understanding of what your DSLR is capable of.
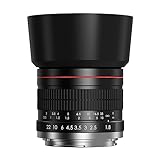
Step 2: Choose the Right Lens

The lens you choose will greatly impact the quality and style of your photographs. Consider the type of photography you are interested in and choose a lens that suits your needs. Whether you’re into landscapes, portraits, or macro photography, there is a lens out there for you.
Pro tip: Invest in a versatile lens, such as a zoom lens, that will allow you to capture a wide range of subjects.
Step 3: Set Up the Camera
Now that you’re familiar with your DSLR and have chosen the right lens, it’s time to set up the camera. Start by inserting a fully charged battery and a memory card. Set the mode dial to “Manual” or “Aperture Priority” mode to have full control over the exposure.
Pro tip: Don’t forget to clean the lens and camera sensor regularly to ensure the best image quality.

Step 4: Learn the Exposure Triangle
Understanding the exposure triangle, which consists of aperture, shutter speed, and ISO, is essential for taking great photos with your DSLR. Take the time to learn how these three elements interact with each other and affect your photographs. Experiment with different combinations to achieve the desired results.
Pro tip: Use a tripod to stabilize your camera and reduce camera shake, especially when using slower shutter speeds.
By following these steps and practicing regularly, you will be well on your way to setting up your DSLR as your main camera and capturing stunning photographs. So, grab your DSLR, go out there, and start shooting!
Why switch to a DSLR
There are several reasons why you should consider switching to a DSLR camera for your photography needs.

Improved image quality
A DSLR (Digital Single-Lens Reflex) camera offers superior image quality compared to a regular point-and-shoot or smartphone. With a larger image sensor and more advanced optics, DSLRs produce sharper and more detailed images, especially in low light conditions.
Greater flexibility and control
DSLRs provide a wide range of manual controls, allowing you to adjust settings such as aperture, shutter speed, ISO, and white balance. This gives you the freedom to exercise creative control over your images and experiment with different effects. Additionally, DSLRs often have interchangeable lenses, allowing you to choose the best lens for each photographic situation.
DSLR cameras also offer the option to shoot in RAW format, which captures more image data and provides greater post-processing flexibility compared to compressed JPEG files.
Improved performance and speed
DSLRs are designed to handle fast-moving subjects and capture action shots with ease. With advanced autofocus systems and high continuous shooting speeds, DSLRs are better equipped to capture decisive moments and freeze fast-paced action.
Additionally, DSLRs have minimal shutter lag, which means there is less delay between pressing the shutter button and capturing the image. This allows you to capture fleeting moments without missing the opportunity.

If you are serious about photography and want to take your skills to the next level, switching to a DSLR camera can significantly enhance your photographic capabilities and artistic expression.
Choosing the right DSLR
When it comes to selecting a DSLR camera, there are several factors to consider to ensure you make the right choice for your needs. Here are some important considerations:
| Megapixels: | Higher megapixels translate to higher resolution images, allowing for more detail. However, unless you plan on printing large format images or cropping heavily, a camera with fewer megapixels will still provide excellent image quality. |
| Image Sensor Size: | The size of the image sensor affects the camera’s ability to capture light. Generally, larger sensors perform better in low-light situations and produce less noise. However, cameras with larger sensors tend to be more expensive. |
| ISO Range: | The ISO range determines the camera’s sensitivity to light. A wider ISO range allows for shooting in different lighting conditions. Look for a camera with a good ISO performance to ensure high-quality images in various settings. |
| Autofocus System: | A robust autofocus system is crucial, especially for fast-moving subjects. Look for a camera with multiple autofocus points and advanced tracking capabilities to ensure accurate and sharp focus. |
| Video Capabilities: | If you plan on using your DSLR for videography, consider cameras with features like 4K recording, microphone input, and manual exposure control. These features will give you more creative control over your videos. |
| Ergonomics and Handling: | Since you’ll be using your DSLR for extended periods, comfort and ease of use are important. Consider the camera’s size, weight, grip, and button placement to ensure it feels natural in your hands. |
| Brand and Lens Compatibility: | Choose a DSLR from a reputable brand that offers a wide range of lenses and accessories. This gives you more options to expand your photography capabilities as you grow and develop your skills. |
By carefully considering these factors, you can find a DSLR camera that suits your needs and allows you to capture stunning images with ease.
Camera Settings
When setting up your DSLR camera as the main camera, it’s important to adjust the camera settings to ensure optimal performance. Here are some key camera settings to consider:
1. Image Quality
Set the image quality to RAW or JPEG format, depending on your preference. RAW files are larger and provide better flexibility for post-processing, while JPEG files are smaller and more easily shareable.

2. ISO Sensitivity
Adjust the ISO sensitivity to control the camera’s sensitivity to light. Higher ISO settings are useful in low light situations, but they can also introduce more noise into the image. Experiment with different ISO settings to find the balance between image quality and noise.
3. White Balance
Set the white balance according to the lighting conditions to ensure accurate color reproduction. You can choose from preset white balance modes such as daylight, cloudy, tungsten, or customize the white balance using a gray card or a white surface.
4. Focus Mode
Select the appropriate focus mode based on your shooting scenario. Single-shot autofocus (AF-S) is ideal for stationary subjects, while continuous autofocus (AF-C) is suitable for moving subjects. If you prefer manual focus, switch the lens to manual mode.
5. Shutter Speed and Aperture
Adjust the shutter speed and aperture settings to control the exposure of your images. Faster shutter speeds freeze motion, while slower shutter speeds create a sense of motion blur. The aperture affects the depth of field, with smaller apertures (higher f-numbers) resulting in a larger depth of field.
By adjusting these camera settings, you can maximize the capabilities of your DSLR camera and capture stunning photographs. Don’t be afraid to experiment and try different settings to create the desired effect.
Basic settings for DSLR
Setting up your DSLR camera correctly is essential for capturing high-quality photos and videos. Here are some basic settings you should consider:
- Image Quality: Choose the highest resolution available on your camera to capture the best possible image quality. This will allow you to print large prints or crop the images without losing too much detail.
- ISO: Adjust the ISO setting to control the camera’s sensitivity to light. A lower ISO is ideal for bright conditions, while a higher ISO is suitable for low light situations. However, keep in mind that increasing the ISO may introduce noise to your photos.
- White Balance: Set the white balance according to the lighting conditions to ensure accurate colors in your photos. You can use the auto white balance option or choose a specific white balance preset, such as daylight, cloudy, or tungsten.
- Exposure Mode: Experiment with different exposure modes to achieve the desired effect. The most common modes include aperture priority (Av), shutter priority (Tv), and manual mode (M). Aperture priority is great for controlling depth of field, while shutter priority allows you to freeze or blur motion. Manual mode gives you full control over all settings.
- Focus Mode: Choose between automatic (AF) and manual focus (MF) depending on your shooting situation. Automatic focus is ideal for most scenarios, but manual focus gives you more control, particularly for macro photography or when shooting in low-light conditions.
- File Format: Select the file format in which your images will be saved. Many DSLRs offer RAW and JPEG options. RAW files retain all the original data captured by the sensor and provide more flexibility for post-processing. JPEG files are smaller and more convenient for sharing directly from the camera.
- Memory Card: Insert a compatible memory card with sufficient storage capacity. Consider using a high-speed card to avoid any lag when saving images or recording videos.
- Battery: Ensure your camera’s battery is fully charged or carry an extra battery to avoid running out of power during a shoot. It’s always a good idea to have a backup plan.
These are just some of the basic settings to get you started with your DSLR camera. Remember to reference your camera’s manual for specific details and additional features your camera may offer.
Advanced Camera Configurations
If you want to optimize your DSLR camera as your main camera, it’s essential to understand and utilize its advanced configurations. These settings allow you to take full control of your camera and ensure that it performs at its best. Here are a few advanced configurations that you should consider:
1. Shoot in RAW Format
One of the biggest advantages of using a DSLR camera is the capability to shoot in RAW format. Unlike JPEG, RAW captures all the data from the camera’s sensor without any compression or processing. This provides you with greater flexibility during post-processing, allowing you to make adjustments without sacrificing image quality. So, be sure to set your camera to save images in RAW format.
2. Manual Mode
In order to have complete control over your camera settings, switch to manual mode. This allows you to manually adjust the aperture, shutter speed, and ISO settings, giving you the freedom to capture the image exactly as you envision it. While it may take some practice to master manual mode, the results will be worth it.

3. Lens Selection
The lens you choose for your DSLR camera can greatly impact the quality and style of your photos. Consider investing in high-quality lenses that offer a wide aperture range for better low-light performance and creative depth of field control. Experiment with different lenses to find the one that suits your needs and style.
Remember to also clean your lenses regularly to ensure optimal image quality.
By understanding and utilizing these advanced camera configurations, you can unlock the full potential of your DSLR camera and capture stunning photos that truly stand out.
Lens Selection
Choosing the right lens is crucial when setting up your DSLR as the main camera. The lens you choose will greatly impact the quality and flexibility of your photographs.
Prime Lens or Zoom Lens?
The first decision you will need to make is whether to use a prime lens or a zoom lens.
Prime lenses have a fixed focal length and typically offer superior image quality and wider maximum aperture. They are great for portraits and low-light photography. However, they require you to physically move closer or further from the subject to change the composition.
Zoom lenses provide a variable focal length and are more versatile as they allow you to zoom in and out without changing lenses. They are great for landscape or sports photography where you may need to quickly adjust the focal length.
Choosing the right focal length
The focal length of the lens determines the field of view and magnification of your images. Here are some common focal lengths and their typical uses:
| Focal Length | Typical Use |
|---|---|
| Wide-angle (24mm – 35mm) | Landscape and architectural photography |
| Standard (50mm – 85mm) | Portrait photography |
| Telephoto (135mm and above) | Wildlife and sports photography |
Consider the type of photography you plan to do and choose a lens with a focal length that best suits your needs.
Additionally, keep in mind other factors like the maximum aperture, optical image stabilization, and compatibility with your DSLR camera model while selecting the lens.
By carefully selecting the lens, you can optimize the image quality and achieve the desired composition for your photography needs.
Understanding different lens types
When it comes to using a DSLR as your main camera, understanding different lens types is crucial. The lens you choose can greatly impact the quality and versatility of your photographs.
Here are a few common lens types that you should be familiar with:
|
Prime lenses |
Prime lenses have a fixed focal length, meaning they can’t zoom in or out. They are known for their sharpness and wide maximum aperture, which allows for better low-light performance. Prime lenses are ideal for portrait photography and capturing images with a shallow depth of field. |
|
Zoom lenses |
Zoom lenses offer variable focal lengths, allowing you to zoom in and out. They are versatile and practical, making them suitable for various photography genres. However, zoom lenses tend to have a narrower maximum aperture, which may impact their low-light capabilities. |
|
Telephoto lenses |
Telephoto lenses have a long focal length, enabling you to capture subjects from a distance. They are commonly used in wildlife, sports, and outdoor photography. Telephoto lenses tend to be larger and heavier compared to other lens types. |
|
Wide-angle lenses |
Wide-angle lenses have a shorter focal length, allowing you to include more of the scene in the frame. They are ideal for landscape and architectural photography, as well as capturing group shots. Wide-angle lenses can create a sense of depth and provide a unique perspective on a subject. |
These are just a few examples of lens types that you can use with your DSLR. As you explore photography, you may come across other specialized lens types, such as macro lenses for close-up photography or fisheye lenses for ultra-wide-angle shots. Each lens type has its own characteristics and purposes, so it’s essential to choose the right one for your specific needs.
Choosing the right lens for your needs
When using a DSLR as your main camera, selecting the right lens is crucial for capturing high-quality photographs. The lens you choose should be based on your specific needs and the type of photography you will be doing. Here are some factors to consider when making your decision:
1. Focal Length
The focal length of a lens determines the angle of view and the magnification of the subject. Shorter focal lengths, such as wide-angle lenses, capture a wider field of view, making them ideal for landscapes and architecture photography. On the other hand, longer focal lengths, like telephoto lenses, have a narrower field of view, allowing for more magnification and making them suitable for wildlife and sports photography.
2. Aperture
The aperture of a lens controls the amount of light that enters the camera. A larger aperture (smaller f-number) allows more light to reach the image sensor, making it ideal for low-light conditions and creating a shallower depth of field. This is important for portrait photography, where you want the subject to stand out from the background. However, lenses with larger apertures tend to be more expensive.
Additionally, consider the lens compatibility with your DSLR camera brand. Different camera brands have different lens mounts, so make sure the lens you choose is compatible with your camera body.
By considering factors such as focal length, aperture, and compatibility, you can choose the right lens for your needs and enhance your photography skills with your DSLR as the main camera.
Composition
Composition is a crucial element in photography that can greatly enhance the visual impact of your images. It involves arranging the various elements within the frame to create a balanced, pleasing, and compelling image. When setting your DSLR as the main camera, understanding composition techniques can help you capture captivating photos.
Rule of Thirds
One of the fundamental composition techniques is the rule of thirds. This guideline divides the frame into a grid of nine equal sections by drawing two horizontal lines and two vertical lines. The main subject or points of interest should be placed along these lines or at the points where the lines intersect. This creates a sense of balance and draws the viewer’s attention to the important elements in the image.
Tip: Most DSLRs have an option to display the rule of thirds grid on the viewfinder or LCD screen, making it easier for you to compose your shots.
Leading Lines
Leading lines are elements in the scene that naturally draw the viewer’s eyes towards the main subject. They can be any lines or shapes, such as roads, fences, or even patterns in nature. Composing your shot in a way that incorporates leading lines can add depth and guide the viewer’s gaze to the focal point of the image.
Tip: Experiment with different angles and positions to find the most effective placement of leading lines in your composition.
Remember, composition is a creative choice and can vary depending on the subject and your personal style. By mastering composition techniques and experimenting with different approaches, you can take your DSLR photography to the next level.
Rule of thirds in DSLR photography
One of the most important principles in DSLR photography is the rule of thirds. This rule is based on dividing the frame into thirds, both horizontally and vertically, creating a grid of nine equal parts.
According to the rule of thirds, the main subject of the photograph should be placed along these gridlines or at the points where the gridlines intersect. This composition technique adds balance and interest to the image, making it visually appealing.
By placing the main subject off-center, the rule of thirds helps to create a sense of movement and depth in the photo. It also allows for the inclusion of other elements in the background or foreground, enhancing the overall composition.
When using a DSLR camera, you can enable the grid overlay feature in the viewfinder or LCD screen to help with framing the shot using the rule of thirds. This feature displays the gridlines on the screen, making it easier to align the subject with the gridlines.
However, it is important to note that the rule of thirds is not a hard and fast rule. It is more of a guideline that can be used to improve composition in photography. There may be instances where breaking the rule of thirds can result in a more compelling and artistic image.
Experimenting with the rule of thirds in DSLR photography can lead to discovering unique and visually striking compositions. So, the next time you are out shooting with your DSLR, remember to keep the rule of thirds in mind and see how it can elevate your photographs to the next level.
Question-answer:
What is a DSLR camera?
A DSLR (digital single-lens reflex) camera is a type of camera that uses a mirror mechanism to direct light from the lens to the viewfinder, allowing the photographer to see exactly what they are capturing. It is a popular choice among professional photographers due to its versatility and high image quality.
How can I set my DSLR camera as the main camera?
To set your DSLR camera as the main camera, you will need to connect it to your computer or device using a USB cable. Once connected, you can select the camera as the primary input device in your camera settings or video conferencing software. Make sure your camera is in “PC” or “transfer” mode to allow the computer to recognize it. Additionally, you may need to install the necessary drivers or software for your specific camera model.


