When it comes to capturing beautiful portraits with your DSLR camera, it’s important to understand how to properly set it up. From adjusting the exposure settings to choosing the right lens, there are several key factors to consider. In this article, we’ll explore the step-by-step process of setting up your DSLR camera for portrait photography.
The first step in setting up your DSLR camera for portraits is selecting the right lens. A prime lens with a focal length between 50mm and 85mm is typically recommended for capturing portraits. These lenses provide a flattering perspective and allow you to create a pleasing depth of field. Additionally, consider using a lens with a wide aperture, such as f/1.8 or f/2.8, to achieve a shallow depth of field and isolate your subject.
Next, you’ll need to adjust the exposure settings on your camera. Start by setting your camera to aperture priority mode (usually indicated by an “A” or “Av” on the mode dial). This mode allows you to control the aperture while the camera adjusts the other settings to maintain a proper exposure. For portraits, you’ll generally want to use a wide aperture (small f-number) to create a blurred background and draw attention to your subject.
In addition to the aperture, you’ll also need to consider the ISO and shutter speed settings. For portrait photography, it’s generally best to keep the ISO as low as possible to minimize image noise. Start by setting it to around 100 or 200 and adjust as necessary for your lighting conditions. As for the shutter speed, aim for a value that is fast enough to avoid camera shake, but not so fast that it darkens your image. A good starting point is around 1/125th of a second, and adjust accordingly based on your subject’s movement.
Lastly, don’t forget to pay attention to the composition and lighting of your portrait. Consider using the rule of thirds to create a balanced composition, and experiment with different angles and perspectives. When it comes to lighting, natural light is often the most flattering for portraits. Look for soft, diffused light or try shooting during golden hour for a warm, glowing effect. Alternatively, you can also use artificial lighting techniques such as using a reflector or off-camera flash to enhance your subject’s features.

By following these steps and experimenting with different settings, lenses, and lighting techniques, you’ll be well on your way to capturing stunning portraits with your DSLR camera. Remember, practice makes perfect, so don’t be afraid to try new things and push the boundaries of your creativity. Happy shooting!
Understanding DSLR Cameras
A DSLR camera, or digital single-lens reflex camera, is a versatile tool used by photographers to capture professional-quality images. Understanding the basics of how a DSLR camera works is essential for mastering portrait photography.
1. Camera Body and Lens
The camera body is the main unit that houses the internal components of a DSLR camera, such as the sensor, processor, and controls. The lens, on the other hand, is responsible for focusing light onto the sensor and plays a critical role in achieving sharp and clear portraits.
When selecting a lens for portraiture, consider using a prime lens with a focal length of around 50mm to 85mm. These lenses offer a natural field of view and produce beautiful background blur, also known as bokeh.
2. Aperture and Depth of Field
Aperture refers to the size of the lens opening, which controls the amount of light entering the camera. It is measured in f-stops, with smaller numbers indicating a wider opening and more light. Adjusting the aperture also affects the depth of field, or the area in the frame that appears in focus.
For portraits with a shallow depth of field and a blurred background, use a wider aperture (smaller f-number) such as f/2.8 or lower. This helps to isolate the subject and create a pleasing separation between the subject and the background.
Pro tip: Experiment with different aperture settings to achieve the desired effect and mood in your portrait photography.
Understanding these fundamental concepts of a DSLR camera will empower you to make informed decisions when setting up your camera for portrait photography. Remember to adjust other settings such as ISO, shutter speed, and white balance according to the lighting conditions and desired artistic effect.
By familiarizing yourself with the workings of a DSLR camera, you can unlock its full potential and capture stunning portraits.
Choosing the Right Lens for Portraits
When it comes to capturing stunning portraits with your DSLR camera, one of the most important considerations is choosing the right lens. The lens you use can greatly impact the overall look and feel of your portraits, so it’s important to select one that suits your needs and creative vision.

1. Prime lenses for shallow depth of field
Prime lenses, also known as fixed focal length lenses, are a popular choice among portrait photographers for their ability to produce a shallow depth of field. This creates a beautiful, creamy background blur that helps to isolate your subject and make them stand out. Common focal lengths for prime lenses used in portraits are 50mm, 85mm, and 135mm.
2. Zoom lenses for flexibility
Zoom lenses are another great option for portraits, as they offer more flexibility in terms of composition. These lenses allow you to zoom in and out, which can be particularly useful when shooting in different environments or when photographing subjects at varying distances. Popular zoom lens focal lengths for portraits include 24-70mm and 70-200mm.
When choosing a zoom lens, it’s important to consider the maximum aperture. A lens with a wider maximum aperture, such as f/2.8, will allow for better low-light performance and more control over depth of field.
3. Macro lenses for close-up detail
If you’re interested in capturing intricate details of your subjects, such as the texture of skin or the details in the eyes, a macro lens can be a great choice. These lenses are designed for close-up photography and offer a high level of magnification. They are particularly useful for capturing fine details in portrait photography, such as in beauty or fashion shoots.
Keep in mind that the best lens for portraits ultimately depends on your personal shooting style and the type of portraits you wish to capture. Experiment with different lenses to find the one that suits your vision and helps you achieve the desired look and feel in your portraits.

In conclusion, choosing the right lens for portraits is crucial in creating stunning images. Whether you opt for a prime lens, a zoom lens, or a macro lens, each type has its own unique advantages. Understanding how each lens type impacts depth of field, composition flexibility, and detail can help you make an informed decision and enhance your portrait photography.
Adjusting Aperture for Portrait Photography
When capturing portraits with a DSLR camera, it is important to adjust the aperture settings properly to achieve the desired effect. The aperture, represented as the f-stop value, controls the depth of field in an image. A wide aperture (low f-stop value) creates a shallow depth of field, resulting in a blurred background and a sharp subject. On the other hand, a narrow aperture (high f-stop value) creates a greater depth of field, bringing both the subject and the background into focus.
1. Choosing the Right f-stop
The choice of f-stop is crucial in portrait photography as it determines the level of background blur and overall sharpness. When shooting close-up portraits, it is often preferable to use a wider aperture (low f-stop value) to create a creamy, out-of-focus background that helps the subject stand out. This technique is known as the “bokeh effect.”
However, when capturing group portraits or environmental portraits, it is necessary to use a narrower aperture (higher f-stop value) to ensure that all the subjects and the background are in focus. This technique is especially important when shooting landscapes or scenes with intricate details.
2. Controlling Depth of Field
To control the depth of field, adjust the aperture value on your DSLR camera. Most cameras have a dedicated dial or button that allows you to easily change the f-stop. As a general guideline, selecting an aperture around f/2.8 to f/4 is suitable for individual portraits, while selecting an aperture around f/8 to f/11 works well for group portraits or environmental portraits.
Keep in mind that the actual depth of field also depends on other factors, such as the focal length of the lens and the distance between the camera and the subject. Experimenting with different aperture settings will help you find the ideal balance between subject sharpness and background blur.
Remember that the aperture setting affects the exposure of your image as well. A wider aperture (low f-stop value) allows more light to enter the camera, requiring faster shutter speeds or lower ISO settings to achieve a properly exposed image. Conversely, a narrower aperture (high f-stop value) restricts the amount of light, so slower shutter speeds or higher ISO settings may be necessary.
By mastering aperture adjustments, you can achieve stunning portraits with the desired focus and background blur, making your subjects truly stand out.
Managing Shutter Speed for Portraits
When it comes to capturing stunning portrait photographs with your DSLR camera, it’s important to consider the shutter speed settings. Shutter speed refers to the length of time the camera’s shutter remains open, allowing light to pass through and hit the camera’s sensor. The right shutter speed can make a significant difference in the final outcome of your portrait shots.
Choosing the Ideal Shutter Speed
An appropriate shutter speed for portraits can depend on various factors, such as the lighting conditions, subject movement, and desired effect. In general, for standard portraits where the subject is stationary, a shutter speed of around 1/125 to 1/250 of a second is often recommended. This ensures that your images are sharp and free from blur.

If you’re working in low-light conditions or using a telephoto lens, it’s advisable to use a slightly slower shutter speed to allow more light to reach the sensor. However, you may need to use a tripod or stabilize your camera to prevent any camera shake that could result in blurry images.
Freezing or Blurring Motion
Sometimes, you may want to freeze or blur motion in your portrait shots to create a specific effect. For freezing motion, a faster shutter speed is required, such as 1/500 of a second or higher. This will capture the subject in sharp detail, even if they are moving quickly.
To intentionally blur motion in portraits, especially when shooting in low light or capturing a sense of movement, a slower shutter speed can be employed. This can create a dynamic and artistic effect, but be cautious to avoid excessive blur or camera shake.
Tip: Experimenting with different shutter speed settings is key to discovering your personal style and achieving the desired effect in your portrait photography.
In conclusion, managing shutter speed is a crucial aspect of capturing stunning portrait photographs with your DSLR camera. By understanding how to select the appropriate shutter speed, you can ensure sharp and captivating images that showcase your subjects beautifully.

Setting ISO for Portraits
ISO is one of the key settings you need to consider when shooting portraits with your DSLR camera. It determines the sensitivity of your camera’s image sensor to light. To achieve the best portrait shots, it’s important to set the ISO correctly.
Here are some tips for setting the ISO for portraits:
| ISO Setting | Scenario | Recommendation |
|---|---|---|
| Low ISO (ISO 100-400) | Outdoor daylight | Choose a lower ISO setting for well-lit scenes. This will result in less noise and better overall image quality. |
| Medium ISO (ISO 400-800) | Indoor/low light | If shooting indoors or in low light conditions, increase the ISO accordingly to capture more light. However, be aware that higher ISO values may introduce more noise into your images. |
| High ISO (ISO 800+) | Low light/no flash | When shooting in extremely low light situations where a flash is not an option, you may need to push the ISO to a high value. Keep in mind that as you increase the ISO, the image may become grainy or noisy. |
It’s important to strike a balance between capturing sufficient light in your portraits and maintaining good image quality. Experiment with different ISO settings to find the optimal level for the lighting conditions you are shooting in.
Remember, in addition to ISO, you should also consider other camera settings such as aperture and shutter speed to achieve the desired depth of field and sharpness in your portraits.
Controlling White Balance for Portrait Shots
When it comes to capturing portraits with your DSLR camera, getting the white balance right is crucial. White balance refers to the color temperature of the light hitting your subject and plays a significant role in determining the overall mood and tone of the image. Fortunately, most DSLR cameras have preset white balance settings that you can choose from, or you can manually adjust the white balance for a more customized look.
To ensure accurate white balance for your portrait shots, consider the following tips:
1. Use the Auto White Balance (AWB) Setting:
In many situations, the Auto White Balance (AWB) setting can accurately determine the correct color temperature for your shot. This setting automatically adjusts the white balance based on the prevailing light conditions. However, keep in mind that AWB might not always be perfect, especially in challenging lighting situations. Therefore, it’s essential to understand other white balance options in your camera.
2. Experiment with Preset White Balance Options:
Most DSLR cameras come equipped with several preset white balance options, such as Daylight, Cloudy, Shade, Fluorescent, and Tungsten. These presets are designed to compensate for different lighting conditions and can help you achieve the desired color temperature. Take the time to experiment with these presets to find the one that best suits the environment in which you are shooting.
3. Use Custom White Balance:
If the available presets don’t match the lighting conditions or if you want to achieve a specific look, you can create a custom white balance setting. To do this, capture an image of a white or neutral gray card under the same lighting conditions as your portrait. Then, in your camera’s menu, select the custom white balance option and use the captured image as the reference. This way, your camera will adjust the white balance accordingly.
4. Shoot in RAW Format:
When shooting portraits, it’s recommended to shoot in RAW format rather than JPEG. RAW files retain more information and allow for greater flexibility during post-processing, including adjusting the white balance. With RAW files, you can easily fine-tune the white balance without losing image quality.
5. Use a Gray Card or Expodisc:
Alternatively, you can use a gray card or an Expodisc to set the white balance manually. These tools provide a neutral reference for your camera to adjust the white balance accurately. Simply hold the gray card or Expodisc in front of your lens and set the custom white balance using the captured image.
Remember, achieving accurate white balance is crucial for capturing portraits that look natural and represent the true colors of your subject. Experiment with different white balance settings and techniques until you achieve the desired effect.
Framing and Composition for Portraits
When it comes to portrait photography, the way you frame and compose your shots can greatly impact the overall look and feel of your images. Here are some tips and techniques to help you achieve the best framing and composition for portrait photography:
| Rule of Thirds | One popular technique in framing and composition is the rule of thirds. Instead of placing your subject directly in the center of the frame, imagine breaking the image into nine equal parts using two horizontal and two vertical lines. Try to position your subject along these lines or at the points where they intersect to create a more visually pleasing composition. |
| Headroom and Negative Space | Be mindful of the headroom in your portraits. Leave some space above your subject’s head to avoid a cramped composition. Additionally, consider incorporating negative space into your composition. Negative space refers to areas in the frame that are empty or devoid of any significant details. This technique can help draw attention to your subject and create a sense of balance in the composition. |
| Foreground and Background Elements | Another aspect to consider in framing and composition is the inclusion of foreground and background elements. By including objects or people in the foreground or background, you can add depth and context to your portraits. Use these elements to frame your subject or enhance the narrative of the image. |
| Leading Lines | Leading lines are a great compositional tool that can help guide the viewer’s gaze and create a sense of visual flow. Look for natural or man-made lines in the environment, such as roads, fences, or architectural features, and use them to lead the viewer’s eye towards your subject. |
| Fill the Frame | Experiment with filling the frame with your subject to create a more intimate and impactful portrait. By eliminating excessive background distractions, you can draw attention to the details and emotions of your subject. However, be cautious not to crop too tightly, as you don’t want to cut off important elements of the image. |
Remember, while these tips can serve as guidelines, don’t be afraid to experiment and break the rules. Ultimately, it’s your creative vision that will make your portraits unique and captivating.
Utilizing Depth of Field for Portraits
When capturing portraits with a DSLR camera, understanding and effectively using depth of field can greatly enhance the overall look and feel of your images. Depth of field refers to the area of sharpness in a photograph, and it plays a crucial role in isolating your subject and adding a sense of depth and dimension to the image.
To achieve a shallow depth of field with a blurred background, you can use a wide aperture (small f-number) such as f/2.8 or lower. This will create a shallow plane of focus, resulting in a sharp subject against a soft, creamy background. It helps in drawing attention to the subject and separating them from the background, making them stand out in the image.
On the other hand, if you want to have a greater depth of field with more of the scene in focus, you can use a narrow aperture (large f-number) such as f/8 or higher. This is useful when you want to capture more details in the background or when shooting group portraits where multiple subjects need to be in focus.
Another factor that affects depth of field is the focal length of the lens. Generally, longer focal lengths (between 85mm to 200mm) tend to have a shallower depth of field, while shorter focal lengths (between 35mm to 50mm) have a greater depth of field. So, if you want to blur the background more, consider using a telephoto lens.
Additionally, the distance between the camera, the subject, and the background also influences depth of field. The closer the subject is to the camera, the shallower the depth of field becomes. In contrast, when the subject is further away, the depth of field increases, resulting in more of the scene being in focus.
Experimenting with different settings and understanding how to manipulate depth of field will allow you to create stunning portraits that effectively convey your desired look and style. So, don’t be afraid to adjust your aperture, focal length, and subject distance to achieve the desired effect!
Making Use of Natural and Artificial Light in Portrait Photography
When it comes to portrait photography, lighting plays a crucial role in capturing stunning images. The ability to control and manipulate light can significantly impact the mood and the overall quality of a portrait. There are two primary sources of light that photographers can employ in their portraits: natural light and artificial light.
Natural light is often considered the most flattering and versatile light source for portrait photography. As a photographer, it’s essential to understand how to use and harness the power of natural light to create compelling portraits.
One of the best ways to utilize natural light is by shooting during the “golden hour.” The golden hour refers to the period shortly after sunrise or before sunset when the sun is lower in the sky, creating soft, warm, and directional light. During this time, the light is diffused and casts a golden glow on the subject, enhancing their features and adding depth to the image.
When shooting outdoors, it’s crucial to position your subject effectively in relation to the light source. Placing the subject with the light hitting them from the side can create beautiful, three-dimensional portraits with gentle shadows that add depth and dimensionality.
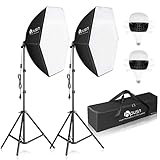
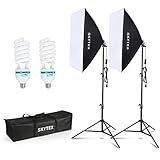
If you prefer to shoot indoors or in a controlled environment, artificial light sources can offer a range of creative possibilities. Studio strobes and continuous lights can be used to create various lighting setups, allowing for complete control over the direction, intensity, and temperature of the light.
When working with artificial light, it’s important to master the basics of lighting techniques. The three-point lighting setup is a popular choice for portrait photography utilizing artificial light. This setup consists of a key light, a fill light, and a backlight. The key light is the main light source, providing the primary illumination on the subject, while the fill light helps to soften shadows and fill in any areas of darkness. The backlight adds depth and separation from the background, creating a three-dimensional effect.
Experimenting with different lighting setups and understanding how light interacts with your subject will ultimately allow you to create impactful and visually captivating portrait photographs. Whether you choose to work with natural light or artificial light, understanding and utilizing these light sources effectively will elevate your portraits to the next level.
| Natural Light | Artificial Light |
|---|---|
| Flattering and versatile | Allows for complete control |
| Golden hour | Three-point lighting setup |
| Position subject effectively | Master lighting techniques |
| Creates depth and dimensionality | Experiment with different setups |
Question-answer:
What is the best DSLR camera for portrait photography?
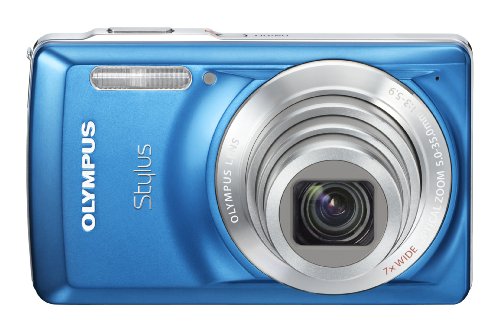
There are many great DSLR cameras for portrait photography, but some popular options include the Canon EOS 5D Mark IV, Nikon D850, and Sony Alpha a7R III. It’s best to choose a camera that fits your specific needs and budget.
What camera settings should I use for portrait photography?
When setting up your DSLR camera for portrait photography, it’s important to use a wide aperture (around f/2.8 to f/5.6) to achieve a shallow depth of field and create a pleasing background blur. Additionally, set the ISO to the lowest value possible to minimize noise, and choose a suitable shutter speed to avoid camera shake.
What lenses are best for portrait photography?
There are several lenses that are well-suited for portrait photography. A popular choice is a prime lens with a focal length of around 85mm, as it provides a flattering perspective and allows for a good working distance between the photographer and the subject. Other options include lenses with focal lengths between 50mm and 135mm.
What lighting setup should I use for portrait photography?
The lighting setup for portrait photography can vary depending on the desired effect and style. One common approach is to use a single key light placed at a 45-degree angle to the subject, along with a reflector or fill light to soften shadows. This setup helps create a classic portrait lighting look. Experimenting with different lighting setups can also lead to unique and interesting results.