
If you’re an avid wildlife photographer or simply want to capture some unique shots of animals in their natural habitat, setting up a DSLR camera trap can be a great way to achieve your goal. A camera trap is a device that remotely captures images or videos of wildlife without being physically present. It allows you to capture candid moments and behaviors of animals without disturbing their natural environment.
In this article, we will guide you through the process of setting up a DSLR camera trap. From choosing the right equipment to finding the perfect location, we will cover everything you need to know to get started.
First and foremost, you will need a DSLR camera with a long telephoto lens. This will ensure that you capture clear and detailed images from a distance. Additionally, you will need a sturdy tripod to mount your camera on and a reliable memory card with ample storage space to store all the photos.
Next, you need to find the ideal location for your camera trap. Look for signs of animal activity, such as tracks, droppings, or freshly grazed vegetation. Set up your camera trap in an area where you believe animals will pass by, such as near a watering hole or along a game trail.
When setting up your camera trap, make sure it is well camouflaged. Use natural materials like leaves and branches to conceal the camera and tripod. You can also purchase camouflage wraps or covers specifically designed for camera traps. This will help the camera blend into its surroundings and increase the chance of capturing animals unaware.

What is a DSLR camera trap?
A DSLR camera trap is a tool used by wildlife photographers and scientists to capture images or videos of wild animals in their natural habitats without disturbing them. It consists of a DSLR camera, a motion sensor, and a set of accessories.
The DSLR camera is the main component, which is typically mounted on a tripod or secured to a tree or other stationary object. It is used to capture high-quality photographs or videos of animals as they pass by the camera’s field of view.
The motion sensor is what triggers the camera to start recording when an animal enters its detection zone. It can detect movement within a specified range and angle, allowing for precise targeting of wildlife activity.
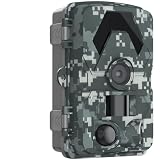
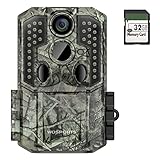
Various accessories can be used in conjunction with a DSLR camera trap to enhance its functionality and increase its chances of capturing unique shots. These may include camouflage covers to blend the camera trap into the natural surroundings, infrared triggers for night time photography, and protective enclosures to shield the camera from the elements.
DSLr camera traps are commonly used in wildlife research and conservation projects to gather data on animal behavior, population dynamics, and habitat usage. They provide an unobtrusive way to monitor wildlife without direct human interference, allowing for more accurate ecosystem assessments and species monitoring.
Overall, a DSLR camera trap is a valuable tool for both professional wildlife photographers and scientists alike. It enables them to document and study animals in their natural habitats with minimal disturbance, resulting in valuable insights and stunning imagery.
Choosing the right equipment
When it comes to setting up a DSLR camera trap, selecting the right equipment is crucial to ensure successful results. Here are some key factors to consider:
1. Camera
The first and most important item you’ll need is a DSLR camera. Look for a camera with a high resolution and a fast shutter speed to capture crisp and clear images. It’s advisable to choose a camera with a wide dynamic range to capture detailed images in different lighting conditions.
2. Lens
Choosing the right lens is equally important. A telephoto lens is typically recommended as it allows you to capture distant subjects without disturbing them. Look for a lens with a wide aperture to enable faster shutter speeds and better low-light performance.
3. Tripod
A sturdy tripod is essential for ensuring stability and minimizing camera shake. Make sure to choose a tripod that can support the weight of your camera and lens and is easily adjustable to different angles and heights.

4. Camera Housing
Since camera traps are often used outdoors and may be exposed to harsh weather conditions, it’s important to protect your camera from dust, moisture, and potential damage. Consider investing in a durable camera housing or enclosure that is specifically designed for outdoor use.
5. Memory Cards
Make sure to have enough storage capacity for your camera trap. Invest in high-quality and high-capacity memory cards that are capable of handling continuous shooting and storing large image files.
6. Batteries
Since camera traps are often left unattended for extended periods, it’s important to have reliable and long-lasting batteries. Consider using rechargeable batteries or an external power source to ensure uninterrupted operation.
By considering these factors and choosing the right equipment for your DSLR camera trap, you’ll greatly increase your chances of capturing stunning wildlife and nature shots.
Selecting a DSLR camera
When setting up a DSLR camera trap, choosing the right camera is crucial to ensure high-quality images and reliable performance. Here are some key factors to consider when selecting a DSLR camera for your camera trap:

1. Image sensor size: The image sensor is one of the most important components of a DSLR camera. Cameras with larger sensors tend to capture better image quality with reduced noise, especially in low light conditions. Full-frame sensors are ideal, but APS-C sensors can also produce great results.
2. Megapixel count: While a higher megapixel count doesn’t always mean better image quality, it can be beneficial if you need to crop or print large images. A camera with at least 12-24 megapixels should be sufficient for most camera trap applications.
3. Autofocus system: Look for a camera with an advanced autofocus system, especially if your camera trap will capture fast-moving subjects. The autofocus should be accurate and responsive to ensure you don’t miss any crucial moments.
4. Durability: Camera traps are typically placed in outdoor environments for extended periods. Therefore, choose a camera that is weather-sealed and durable enough to withstand various weather conditions and potential rough handling.
5. Battery life: Consider the battery life of the camera, as it should be able to last for extended periods without needing frequent battery changes. Look for a camera with good battery life or consider using an external power source.

6. Customizability: It is essential to have control over the camera settings and functions to meet your specific needs. Look for a camera that offers a wide range of customizable options, including the ability to shoot in RAW format.
7. Compatibility: Ensure that the camera is compatible with the necessary accessories and software for setting up a camera trap. Check for compatibility with wireless remote triggers, memory cards, and other accessories you may need.
By considering these factors, you can select a DSLR camera that meets your requirements and helps you capture stunning images with your camera trap.
Choosing the perfect lenses
When setting up a DSLR camera trap, choosing the right lenses is essential to achieve the desired results. The choice of lenses is influenced by several factors, including the intended purpose of the trap and the desired outcome.
Consider the purpose
Before selecting the lenses, it is important to consider the purpose of the camera trap. Are you looking to capture wildlife in action or monitor a specific area? The purpose will help determine the focal length and type of lens needed.
If you are capturing wildlife, a telephoto lens with a longer focal length will allow you to capture sharp images of animals from a safe distance. This is particularly useful when photographing shy or dangerous animals.
On the other hand, if the purpose is to monitor a specific area, a wide-angle lens would be more appropriate. A wide-angle lens offers a broader field of view, allowing you to capture a larger area in a single shot.
Consider the desired outcome
Another factor to consider is the desired outcome of the camera trap. Do you want to capture detailed close-up shots or wider shots that show the animal in its natural habitat?
If you are aiming for close-up shots, a macro lens would be ideal. Macro lenses allow for extreme close-up photography, capturing small details with great clarity and precision.
However, if you want to showcase the animal in its environment, a standard zoom lens can be a good choice. Standard zoom lenses offer a versatile focal length range that allows you to switch between wider shots and closer shots as needed.

Additionally, consider the lighting conditions of the area in which the camera trap will be placed. If the area is poorly lit, a lens with a wider aperture, such as a prime lens, can help capture brighter images in low-light conditions.
Overall, when choosing lenses for your DSLR camera trap, it is important to consider the purpose and desired outcome. By understanding the needs of your project, you can select the perfect lenses to achieve your goals.
Preparing for the set-up
Before setting up your DSLR camera trap, it’s important to take some preparatory steps to ensure everything goes smoothly. Here are some key things to keep in mind:
1. Choose the right location
Selecting the right location for your camera trap is crucial for capturing interesting wildlife activity. Look for areas with high animal traffic, such as game trails or watering holes. Consider the lighting conditions as well; you may want to avoid direct sunlight or areas with heavy shadows.
2. Set up a sturdy tripod
Using a sturdy tripod is essential to keep your camera stable and reduce the risk of blurry photos. Make sure the tripod is firmly planted in the ground and adjust its height to achieve the desired framing for your shots.
3. Check the camera settings
Double-check the settings on your DSLR camera to ensure they are optimized for wildlife photography. Set the camera to continuous shooting mode to capture multiple frames in quick succession and use a fast shutter speed to freeze any fast-moving subjects.
4. Test the triggering system
Test the triggering system of your camera trap to ensure it works properly. This can include using an infrared sensor, motion detection, or a sound-triggered remote release. Make sure the triggering mechanism is sensitive enough to detect wildlife movement without being overly triggered by mundane things like leaves blowing in the wind.
5. Choose the right lens
Selecting the right lens for your camera trap will depend on the type of wildlife you hope to capture and the distance between the camera and the subjects. A telephoto lens with a long focal length is often a good choice for wildlife photography as it allows you to zoom in and capture details from a distance.
By taking these preparatory steps, you’ll be well on your way to setting up a successful DSLR camera trap and capturing stunning wildlife photos.
Selecting the best location
Choosing the right location for your DSLR camera trap is crucial in order to capture the desired wildlife or activity. Here are some factors to consider when selecting the best location:
1. Identify the target species
Before setting up your camera trap, research and identify the species you are interested in capturing. Understand their habitats, behavior patterns, and movement routes. This knowledge will help you determine the most suitable location to increase your chances of capturing the desired wildlife.
2. Look for signs of wildlife activity
Scout the area you plan to set up the camera trap in for signs of wildlife activity. Look for tracks, droppings, scratch marks, or evidence of feeding. These signs will indicate that the area is frequented by wildlife and can help you choose a strategic location.
3. Consider the habitat
Take into account the specific habitat requirements of your target species. Different animals prefer different types of environments, such as forests, grasslands, or wetlands. Ensure that the chosen location matches the habitat preferences of the species you are targeting.
4. Find natural funnels or chokepoints
Identify natural funnels or chokepoints that animals are likely to pass through. These can include narrow paths, trails, or water sources. Placing your camera trap in these locations increases the chances of capturing animals as they navigate through these confined areas.
5. Avoid human interference
Avoid placing your camera trap in areas with high human activity or traffic. The presence of humans can deter wildlife from the area or cause them to alter their behavior. Look for secluded areas or places with minimal human disturbance to ensure undisturbed wildlife activity.
By considering these factors, you can increase the success of your DSLR camera trap by setting it up in the best possible location.
Setting up the camera
Setting up a DSLR camera trap requires careful consideration and planning. Here are the steps to get you started:
| Step 1: | Choose the right location |
| Step 2: | Set up your camera on a stable surface |
| Step 3: | Adjust the camera settings |
| Step 4: | Securely attach your camera to a tripod or mount |
| Step 5: | Connect the camera to a power source |
| Step 6: | Install a memory card in the camera |
| Step 7: | Set up motion detection |
| Step 8: | Test the camera trap |
Before heading out, make sure to fully charge your camera batteries and bring extra memory cards. It’s also a good idea to set up your camera in an area where it will be protected from harsh weather conditions and potential damage.
Following these steps will help ensure that your camera trap is properly set up and ready to capture incredible wildlife moments.
Adjusting the camera settings
Once you have set up your DSLR camera trap, it is important to adjust the settings to ensure you capture the best possible images. Here are some key settings to consider:
- ISO: Set the ISO to a higher value to increase the camera’s sensitivity to light in low-light conditions. However, be cautious as higher ISO values can introduce noise into the images.
- Shutter speed: Adjust the shutter speed based on the subject you are trying to capture. For fast-moving subjects, use a faster shutter speed to freeze the action. Alternatively, for subjects that are not in motion, you can use a longer shutter speed.
- Aperture: The aperture determines the depth of field in your images. A larger aperture (smaller f-number) will create a shallow depth of field, while a smaller aperture (larger f-number) will result in a greater depth of field. Consider the background and subject you want to focus on when adjusting the aperture.
- Focus mode: Choose the appropriate focus mode based on your subject and shooting conditions. For static subjects, use single-shot AF, while continuous AF is more suitable for subjects in motion.
- White balance: Adjust the white balance setting to ensure accurate color representation in your images. Choose a preset white balance option or manually adjust it based on the lighting conditions.
Experiment with these camera settings to find the optimum configuration for your camera trap setup. Remember to review your images regularly and make adjustments as needed to achieve the desired results.
Optimizing exposure settings
Optimizing exposure settings is crucial to ensure that your DSLR camera trap captures clear and well-exposed images. Here are some tips to help you achieve the best results:
1. ISO
ISO determines the sensitivity of your camera’s sensor to light. In low light conditions, you may need to increase the ISO to capture a properly exposed image. However, keep in mind that higher ISO settings can introduce noise or graininess to your photos. Experiment with different ISO settings to find the balance between brightness and image quality.
2. Aperture
Aperture affects the depth of field in your photos, determining how much of the image is in focus. For capturing wildlife with a camera trap, it is generally best to use a smaller aperture (higher f-number) to maximize depth of field and ensure that your subject is sharp from front to back. Keep in mind that smaller apertures allow less light to enter the camera, so you may need to compensate with other exposure settings.
Note: A smaller aperture may require a longer shutter speed or higher ISO to maintain proper exposure.
3. Shutter speed
Shutter speed refers to the amount of time the camera’s sensor is exposed to light. To capture fast-moving wildlife, you will need a faster shutter speed to freeze the action. However, using a fast shutter speed reduces the amount of light reaching the sensor, so you may need to adjust other settings accordingly.
Pro tip: If you want to capture motion blur, such as the movement of a running animal, use a slower shutter speed. This can add a sense of movement and dynamism to your photos.
By experimenting and understanding the relationship between ISO, aperture, and shutter speed, you can optimize the exposure settings of your DSLR camera trap and capture stunning wildlife images.
Question-answer:
What is a DSLR camera trap?
A DSLR camera trap is a setup where a DSLR camera is triggered by an animal’s movement to capture photos or videos of wildlife in their natural habitat.
What equipment do I need to set up a DSLR camera trap?
To set up a DSLR camera trap, you will need a DSLR camera, a motion sensor or infrared trigger, a sturdy tripod or mount, and a camouflage housing or cover to hide the camera.


