
When it comes to photography, Nikon DSLR cameras are known for their exceptional image quality and versatility. However, to truly unleash the full potential of your Nikon DSLR camera, it is essential to learn how to set it manually. By taking control of settings such as aperture, shutter speed, and ISO, you can create stunning images that reflect your unique vision and style.
Step 1: Understand the Exposure Triangle
Before diving into manual settings, it is important to understand the exposure triangle, which consists of aperture, shutter speed, and ISO. Aperture controls the amount of light entering the camera through the lens, shutter speed determines the duration of the exposure, and ISO measures the camera’s sensitivity to light. By balancing these three elements, you can achieve the desired exposure for your photographs.
Step 2: Switch to Manual Mode
To set your Nikon DSLR camera manually, start by switching to manual mode on the camera’s mode dial. This will give you full control over the settings and allow you to override the camera’s automatic settings. Manual mode is represented by an “M” on the mode dial, and once selected, you can adjust the settings according to your preferences.

Note: It is recommended to practice shooting in automatic modes like aperture priority or shutter priority first before switching to manual mode, as it can be overwhelming for beginners.
Step 3: Adjust Aperture, Shutter Speed, and ISO
Now that you’re in manual mode, you can begin adjusting the settings to capture the perfect shot. Start by selecting the desired aperture, which controls the depth of field in your image. A smaller aperture (higher f-number) will result in a larger depth of field, while a larger aperture (lower f-number) will create a shallow depth of field with a blurred background.
Next, set the shutter speed based on the desired effect and the amount of light available. A faster shutter speed will freeze action, while a slower shutter speed can create motion blur. Remember to adjust the ISO to achieve the correct exposure. A lower ISO is ideal for well-lit scenes, while a higher ISO is suitable for low-light situations.
By learning how to set your Nikon DSLR camera manually, you can take your photography skills to new heights. Experiment with different settings, practice in different lighting conditions, and most importantly, don’t be afraid to make mistakes. With time, patience, and practice, you’ll be able to capture breathtaking images that truly showcase your creative vision.

Setting Up Your Nikon DSLR Camera Manually
When it comes to photography, having a good understanding of your camera settings is essential. By setting up your Nikon DSLR camera manually, you will have more control over your images and be able to achieve the exact look you desire.
1. Understanding the Basics
Before you begin setting up your Nikon DSLR camera manually, it’s important to have a basic understanding of the various settings and how they affect your photos. Key settings to familiarize yourself with include:
- Aperture: Controls the amount of light that enters the lens. A lower f-number means a larger aperture and more light.
- Shutter Speed: Determines how long the camera’s shutter remains open. A faster shutter speed is ideal for capturing fast-moving subjects.
- ISO Sensitivity: Adjusts the camera’s sensitivity to light. Higher ISO settings are useful in low-light conditions.
- White Balance: Controls the color temperature of your images. Different lighting conditions require different white balance settings.
2. Shooting Mode
One of the first decisions you need to make when setting up your Nikon DSLR camera manually is which shooting mode to use. The most common options are:
- Manual (M): Gives you full control over all settings.
- Aperture Priority (A or Av): Allows you to set the desired aperture while the camera selects the appropriate shutter speed.
- Shutter Priority (S or Tv): Lets you choose the desired shutter speed while the camera adjusts the aperture accordingly.
- Program (P): Allows you to adjust certain settings while the camera selects the optimal exposure settings.
3. Adjusting Camera Settings
Once you have chosen your shooting mode, you can begin adjusting your camera settings manually. Use the camera’s menu system and external buttons to make the necessary changes. Pay close attention to the desired aperture, shutter speed, ISO sensitivity, and white balance settings based on your shooting conditions.
Don’t be afraid to experiment and try out different settings to understand how they affect your photos. Practice is key to mastering manual mode on your Nikon DSLR camera.

By setting up your Nikon DSLR camera manually, you can unlock its full potential and capture incredible photos in any situation. Take the time to understand the different settings and shooting modes, and don’t be afraid to experiment. With practice, you’ll be able to take your photography to the next level!
Understanding Manual Mode
Manual mode is one of the most powerful features of Nikon DSLR cameras. It allows you to take full control of your camera settings, giving you the ability to create stunning photographs with precision.
In manual mode, you determine both the aperture and the shutter speed, which directly affect the exposure of your image. This gives you complete creative control over how light or dark your photo will be, as well as the depth of field.
To use manual mode on your Nikon DSLR camera, follow these steps:
- Set your camera’s mode dial to “M” for Manual.
- Adjust the shutter speed using the command dial. A faster shutter speed freezes motion, while a slower shutter speed allows for motion blur.
- Set the aperture using the aperture dial. A wider aperture (smaller f-number) creates a shallow depth of field, while a smaller aperture (larger f-number) creates a greater depth of field.
- Adjust the ISO to control the sensitivity to light. A higher ISO increases the camera’s sensitivity, which is useful in low light situations, but also increases the amount of noise in the image.
- Frame your shot and focus using the autofocus or manual focus settings.
- Press the shutter button to take the photo.
By mastering manual mode, you can take your photography to the next level. Experiment with different combinations of shutter speed, aperture, and ISO to achieve the desired look and style in your photographs.

Remember, practice makes perfect, so don’t be afraid to experiment and learn from your mistakes. With time and experience, you’ll become more comfortable and confident in using manual mode on your Nikon DSLR camera.
Gathering the Necessary Equipment
Before you start setting your Nikon DSLR camera manually, it is important to gather all the necessary equipment. These items will ensure that you have everything you need to successfully set up your camera and capture incredible shots.
1. Nikon DSLR Camera: Make sure you have a Nikon DSLR camera that allows manual setting adjustments. This can be any model from the Nikon DSLR range, such as the Nikon D3500, Nikon D5600, or Nikon D750.
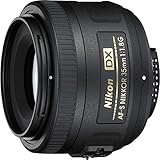
2. Lens: Choose a lens that suits your needs and desired photography style. Consider factors such as the focal length, aperture, and zoom capabilities. Popular lens options include the Nikon AF-S DX Nikkor 35mm f/1.8G and the Nikon AF-S Nikkor 50mm f/1.8G.
3. Batteries: Ensure that you have fully charged batteries for your camera. This will prevent any interruptions during your photo shoot and ensure that you have enough power to adjust settings and capture images.

4. Memory Card: Have a high-capacity memory card with sufficient storage space. This will prevent you from running out of space while taking photos, especially if you shoot in RAW format, which requires more storage space than JPEG.
5. Tripod: Consider using a tripod for better stability, especially when shooting in low light conditions or using longer exposure times. This will help avoid camera shake and result in sharper images.
6. Camera Bag: Finally, make sure you have a camera bag or protective case to store and transport your camera and accessories safely. This will help keep everything organized and protected from dust, dirt, and any potential damage.
By gathering all this equipment, you will be well-prepared to set up your Nikon DSLR camera manually and dive into the exciting world of photography.
Step-by-Step Guide to Manual Settings
When it comes to taking professional-quality photos with your Nikon DSLR camera, understanding and utilizing manual settings is essential. Manual settings give you the utmost control over your camera’s exposure, allowing you to capture the perfect shot in any lighting condition. Here is a step-by-step guide to setting your Nikon DSLR camera manually:

- Set your camera to Manual mode by turning the mode dial to “M”. This allows you to manually control all aspects of your camera’s settings.
- Adjust the ISO settings for optimal image quality. Lower ISO values (e.g., ISO 100) are ideal for well-lit environments, while higher ISO values (e.g., ISO 800 or above) are better for low-light situations. Experiment with different ISO values to find the perfect balance between light sensitivity and image noise.
- Select your desired aperture (f-stop) settings. Aperture determines the depth of field in your photos, affecting how much of the scene is in focus. Lower aperture values (e.g., f/1.8) result in a shallow depth of field, while higher values (e.g., f/16) create a larger depth of field. Consider your subject and the effect you want to achieve when choosing the aperture.
- Adjust the shutter speed according to the amount of light available and to capture motion. Slower shutter speeds (e.g., 1/30s) are suitable for static subjects and low-light conditions, while faster speeds (e.g., 1/1000s) freeze motion and are great for capturing fast-moving subjects.
- Use the camera’s built-in light meter or the histogram to check the exposure. Aim to have the indicator in the center or slightly to the right to ensure a properly exposed image.
- Focus manually or use autofocus. If shooting a still subject, manual focus can give you more control over what you want to be sharp. For moving subjects or situations where speed is crucial, autofocus is recommended.
- Compose your shot by considering the rule of thirds and other composition techniques. Take your time to find the best angle and frame your subject in a visually appealing way.
- Review your photo on the camera’s LCD screen and make any necessary adjustments to the settings to achieve your desired result.
- Experiment and practice with different manual settings to develop your own style and to become more comfortable with your camera’s capabilities.
By mastering manual settings, you can unlock the full potential of your Nikon DSLR camera and elevate your photography skills to new heights. Don’t be afraid to experiment and learn from your results. With practice, patience, and a creative mindset, you’ll be capturing stunning images in no time!
Setting the ISO
The ISO setting on your Nikon DSLR camera determines the sensitivity of the image sensor to light. By manually setting the ISO, you can control how bright or dark your photos will appear. Here’s how you can set the ISO on your Nikon DSLR camera:
- Turn on your camera and navigate to the shooting menu.
- Select the ISO sensitivity settings option.
- Choose a specific ISO setting from the available options. Keep in mind that lower ISO values (e.g. ISO 100) are less sensitive to light and result in less noise, while higher ISO values (e.g. ISO 1600) are more sensitive to light but may introduce more digital noise to your photos.
- Press the “OK” or “Enter” button to confirm your ISO selection.
It’s important to note that the optimal ISO setting will depend on the lighting conditions and the amount of noise you’re willing to accept in your photos. Generally, when shooting in bright daylight, a lower ISO setting is recommended to minimize noise. In low-light situations, however, you may need to increase the ISO to maintain a fast enough shutter speed and prevent motion blur.
Experiment with different ISO settings to find the right balance between brightness and noise in your photos. As you gain more experience, you’ll develop a better understanding of how ISO affects your images and be able to make more informed decisions when setting it manually on your Nikon DSLR camera.
Adjusting the Aperture
The aperture is an important setting on your Nikon DSLR camera that controls the amount of light entering the lens. By adjusting the aperture, you can create depth of field and control the sharpness and blurring of the background in your photos.
Step 1: Switch to Manual Mode
Before adjusting the aperture, switch your Nikon DSLR camera to manual mode. This will give you full control over the camera settings, including the aperture.
Step 2: Locate the Aperture Control
The aperture control is usually located on the lens and is marked with an “A” or an “Av”. It may also be labeled as “Aperture” or “F-stop”.
| Aperture Value | Effect |
|---|---|
| Low f-number (e.g. f/1.8) | Creates a shallow depth of field, resulting in a blurred background. Ideal for portraits or isolating a subject. |
| Medium f-number (e.g. f/5.6) | Provides a balanced depth of field, keeping both the subject and background in focus. |
| High f-number (e.g. f/16) | Creates a deep depth of field, ensuring that both the subject and background are sharp and in focus. Suitable for landscapes and architecture. |
Step 3: Adjust the Aperture Value
To adjust the aperture value, turn the aperture ring on the lens or use the camera’s control wheel or buttons. Refer to your camera’s manual for specific instructions on adjusting the aperture.
Remember, the lower the f-number, the larger the aperture and the more light enters the lens. The higher the f-number, the smaller the aperture and the less light enters the lens.
Experiment with different aperture values to achieve the desired effect in your photos. Combine the aperture setting with other camera settings, such as shutter speed and ISO, to capture the perfect shot.
Controlling the Shutter Speed
When using a Nikon DSLR camera in manual mode, one important aspect to consider is the shutter speed. The shutter speed determines the duration of time that the camera’s shutter remains open while taking a photograph. This setting plays a crucial role in capturing motion, as well as controlling the amount of light that enters the camera.
Here are the steps to manually set the shutter speed on a Nikon DSLR camera:
- Turn on the camera and set it to manual mode by rotating the mode dial to “M”.
- Look at the top display or the rear LCD screen to view the current shutter speed setting.
- Rotate the main command dial (located near the shutter button) to increase or decrease the shutter speed.
- As you adjust the shutter speed, pay attention to the corresponding exposure meter in the viewfinder or on the rear LCD screen. The meter indicates whether the image will be overexposed or underexposed based on the current settings.
- If you want to freeze fast-moving subjects, choose a faster shutter speed (e.g., 1/1000 or higher). This will allow you to capture sharp images without motion blur.
- To create a blurred effect, such as capturing flowing water or light trails, select a slower shutter speed (e.g., 1/30 or slower). In this case, using a tripod is highly recommended to avoid camera shake.
- Continue experimenting with different shutter speed settings to achieve the desired effect in your photographs.
Remember, mastering the control of the shutter speed in manual mode gives you the freedom to capture images with precision and creativity. It allows you to freeze time or to create stunning effects by manipulating the exposure time. So don’t be afraid to experiment and discover the power of controlling the shutter speed on your Nikon DSLR camera.
Focusing Manually
When setting the Nikon DSLR camera manually, you may sometimes want to focus manually to achieve better control over the sharpness of your images. Here’s how you can focus manually on your Nikon DSLR camera:
1. Switch to Manual Focus Mode
Firstly, make sure your camera is set to manual focus mode. On most Nikon DSLR cameras, you can find the AF/M switch located on the side of the lens barrel. Slide the switch from “AF” (Auto Focus) to “M” (Manual Focus).
2. Use the Focus Ring
Once you have switched to manual focus mode, you can adjust the focus manually using the focus ring on your lens. The focus ring is usually located towards the front of the lens barrel. Rotate the focus ring back and forth to achieve the desired focus.
Tip: To assist you in achieving accurate focus manually, you can activate the camera’s focus assist feature, which provides a zoomed-in view of the scene on the camera’s LCD screen. Refer to your camera’s manual to learn how to activate this feature.
Additionally, you can also use the camera’s focus indicator in the viewfinder to determine whether your subject is in focus. Look for the focus points displayed in the viewfinder and ensure that they align with your desired focus point.
By focusing manually, you have greater control over the focus point and can adjust it to your specific needs. This can be particularly useful in situations where the autofocus system may struggle, such as low light conditions or scenes with low contrast.
Using Manual White Balance
White balance is an important camera setting that determines the color temperature of the images you capture. It ensures that the colors in your photos appear natural and accurate. While many Nikon DSLR cameras offer automatic white balance settings, it can be beneficial to manually set the white balance in certain situations.
To set the white balance manually on your Nikon DSLR camera, follow these steps:
- Select the white balance setting: Access the menu on your camera and navigate to the white balance settings. Choose the manual white balance option.
- Find a reference object: Look for a neutral-colored object in the scene you are photographing. This could be a white piece of paper or a gray card.
- Set the white balance: Point your camera towards the reference object, filling the frame with it. Press the shutter button halfway to focus, then press the WB (White Balance) button on your camera. The camera will measure the color temperature and set it accordingly.
- Confirm the white balance: Review the image on your camera’s LCD screen to ensure the colors appear balanced and accurate. If necessary, repeat the process to refine the white balance setting.
Keep in mind that manual white balance might be useful in situations with challenging lighting conditions, such as mixed light sources or unusual color temperatures. Experimenting with different white balance settings can result in more creative and visually appealing photographs.
By manually setting the white balance on your Nikon DSLR camera, you have control over the color temperature and can achieve the desired look for your images.
Reviewing and Adjusting Your Manual Settings
Once you have set your Nikon DSLR camera to manual mode, it is important to carefully review and adjust your manual settings to achieve the desired results in your photographs. Here are a few steps to help you review and adjust your manual settings effectively.
1. Assess the Lighting Conditions
Before making any adjustments to your manual settings, it is crucial to assess the lighting conditions of your shooting environment. Pay attention to the intensity and direction of the light, as this will determine your exposure settings.
2. Check Your ISO
ISO refers to the sensitivity of your camera’s image sensor to light. If you are shooting in bright conditions, consider using a lower ISO to reduce the noise in your images. Conversely, in low-light situations, you may need to increase your ISO to capture enough light. Always aim for the lowest ISO possible to maintain the highest image quality.
3. Adjust the Aperture
The aperture controls the amount of light that enters the camera through the lens. It also affects the depth of field, or the range of sharpness in your image. To achieve a shallow depth of field, with the subject in focus and the background blurred, choose a wider aperture (smaller f-number). If you want everything in your frame to be in focus, use a narrower aperture (larger f-number).
4. Set the Shutter Speed
The shutter speed determines the length of time the camera’s image sensor is exposed to light. A faster shutter speed freezes motion, making it ideal for capturing action or fast-moving subjects. Slower shutter speeds, on the other hand, allow for longer exposures and are suitable for low-light situations or creative effects like light trails or long exposure photography.
5. Experiment and Review
After adjusting your manual settings, it is important to experiment with different combinations to achieve your desired results. Take test shots and review them on your camera’s LCD screen to evaluate if any further adjustments are needed. Pay attention to aspects like exposure, sharpness, and composition to ensure you are capturing the images you envisioned.
Remember, mastering manual settings takes practice, so don’t be afraid to experiment and make mistakes. Over time, you will develop a better understanding of how each setting affects your photographs and be able to capture stunning images using your Nikon DSLR camera.
Question-answer:
What are the advantages of setting a Nikon DSLR camera manually?
Setting a Nikon DSLR camera manually allows you to have more control over the camera settings, resulting in better image quality and the ability to achieve specific creative effects. It also helps you to understand the technical aspects of photography and improve your overall photography skills.
How do I switch to manual mode on my Nikon DSLR camera?
To switch to manual mode on your Nikon DSLR camera, you need to turn the mode dial to the “M” position. This will allow you to manually adjust the shutter speed, aperture, and ISO settings according to your preferences.
What is the purpose of adjusting the shutter speed manually?
Adjusting the shutter speed manually on a Nikon DSLR camera allows you to control the amount of time the camera sensor is exposed to light. A faster shutter speed freezes motion, while a slower shutter speed creates motion blur. It is useful for capturing action shots, long exposures, or controlling the amount of light entering the camera.
How can I adjust the aperture manually on my Nikon DSLR camera?
To adjust the aperture manually on your Nikon DSLR camera, you need to use the command dial or a dedicated aperture control button. By changing the aperture value, you can control the depth of field in your photographs. A wider aperture (smaller f-number) will result in a shallow depth of field, while a narrower aperture (larger f-number) will create a greater depth of field.
What are the recommended settings for ISO in manual mode on a Nikon DSLR camera?
The recommended ISO settings in manual mode on a Nikon DSLR camera depend on the lighting conditions and the desired effect. In well-lit situations, using the lowest ISO value (e.g., ISO 100 or 200) can help reduce image noise. In low-light scenarios, you may need to increase the ISO to maintain a proper exposure. However, higher ISO values may introduce more noise into the image. It is advisable to experiment with different ISO settings to find the optimal balance between exposure and noise.


