
Whether you’re a beginner or an amateur photographer, mastering the art of taking good pictures with a DSLR camera can be a game-changer. Unlike smartphones and point-and-shoot cameras, DSLRs offer a wide range of manual settings that allow you to have more control over your photos, resulting in better quality images. However, navigating all the buttons and options can be quite overwhelming at first. Don’t worry, though! In this article, we will guide you through some basic tips and tricks to help you capture stunning photographs with your DSLR camera.
1. Understand the Exposure Triangle: One of the fundamental concepts in photography is the exposure triangle, which consists of three elements: aperture, shutter speed, and ISO. Aperture controls the amount of light that enters the camera through the lens, shutter speed determines the duration of time the camera sensor is exposed to light, and ISO measures the sensor’s sensitivity to light. Learning how these three factors work together will empower you to take control of the exposure and achieve the desired lighting in your photos.
2. Play with Depth of Field: One of the advantages of using a DSLR camera is the ability to control the depth of field. Depth of field refers to the range of distance in your photo that appears sharp and in focus. You can create a shallow depth of field (blurry background) by using a wide aperture (small f-number) or a deep depth of field (everything in focus) by using a small aperture (large f-number). Experimenting with different depths of field can add depth and dimension to your images.
3. Master the Rule of Thirds: Composition is key to creating visually appealing photos. The rule of thirds is a simple guideline that can help you achieve a balanced composition. Imagine your frame divided into a 3×3 grid by two equally spaced horizontal and vertical lines. The four intersections of these lines are called the power points. Placing your subject, horizon line, or other important elements along these lines or at the power points can create a more dynamic and visually interesting composition.
Choosing the Right DSLR Camera
Choosing the right DSLR camera is an important decision for anyone interested in photography. With so many options available, it’s essential to consider your needs, budget, and skill level before making a purchase.

Things to Consider
1. Skill Level: Before buying a DSLR camera, assess your photography skills. Are you a beginner or an experienced photographer? Different cameras have varying features and complexity levels.
2. Budget: Determine your budget for a DSLR camera. Prices vary greatly depending on the brand, model, and additional features.
3. Camera Type: Consider whether you want a full-frame or crop-sensor DSLR camera. Full-frame cameras provide better image quality but are more expensive.
Features to Look For
1. Megapixels: Higher megapixel count improves image resolution and allows for larger prints or cropping.
2. ISO Range: Look for a wide ISO range for better low-light performance and the ability to shoot in various lighting conditions.

3. Autofocus System: A reliable autofocus system helps capture sharp, in-focus images quickly.
4. Burst Mode: This feature enables continuous shooting, helpful for capturing fast-moving subjects.
5. Video Capability: If you plan to shoot videos, choose a DSLR camera with good video recording capabilities.
6. Connectivity Options: Consider whether you need Wi-Fi or Bluetooth connectivity to transfer photos wirelessly.
7. Lens Compatibility: Check the lens options available for the camera model you are considering.

By carefully considering these factors, you can choose a DSLR camera that suits your needs and helps you take basic good pictures. Remember to do thorough research, read online reviews, and visit camera stores to get hands-on experience before making a final decision.
Understanding Camera Settings
Understanding the different settings on your DSLR camera is essential to taking basic good pictures. Here are some key settings to be aware of:
1. Shutter Speed: Shutter speed determines how long the camera’s shutter remains open when taking a photo. A faster shutter speed freezes motion, while a slower speed creates motion blur. Experiment with different shutter speeds to capture the desired effect.

2. Aperture: Aperture refers to the size of the camera’s lens opening. It affects the depth of field in your photos, determining how much of the image is in focus. A smaller aperture (higher f-number) will result in a wider depth of field, while a larger aperture (lower f-number) will create a shallow depth of field.
3. ISO: ISO measures the sensitivity of the camera’s image sensor. A higher ISO is useful in low-light conditions, but it can also introduce grain or noise to your photos. Use a lower ISO in well-lit environments to maintain image quality.
4. White Balance: White balance adjusts the color temperature of your photos to match the ambient light conditions. Different light sources have different color temperatures, and setting the white balance correctly ensures accurate color reproduction.

5. Exposure Compensation: Exposure compensation allows you to manually adjust the brightness or darkness of your photos. This is useful when the camera’s metering system doesn’t correctly expose the image. Use positive compensation (+) to brighten the photo and negative compensation (-) to darken it.
6. Focus Mode: Focus mode determines how the camera focuses on the subject. In automatic mode, the camera chooses the focus point. In manual mode, you have full control over the focus. Experiment with different focus modes to achieve the desired sharpness in your photos.

7. Shooting Mode: The shooting mode determines how the camera captures the image. In automatic mode, the camera handles all settings. In manual mode, you have control over all aspects of the exposure. Use the appropriate shooting mode based on your shooting conditions and desired level of control.
Understanding and mastering these camera settings will help you take basic good pictures with your DSLR camera. Experiment with different settings and practice to improve your photography skills.
Mastering Exposure
One of the most important aspects of taking good pictures with a DSLR camera is understanding and mastering exposure. Exposure refers to the amount of light that reaches the camera’s image sensor and determines how bright or dark the resulting image will be.
To achieve proper exposure, you need to control three key elements: aperture, shutter speed, and ISO. Aperture refers to the size of the camera’s lens opening, which affects the amount of light that enters the camera. Shutter speed refers to the length of time the camera’s shutter remains open, allowing light to reach the image sensor. ISO measures the camera’s sensitivity to light.
To achieve a balanced exposure, you need to find the right combination of these three elements. A wider aperture lets in more light but results in a shallower depth of field. A slower shutter speed allows more light into the camera but can result in motion blur if the subject or the camera is moving. A higher ISO setting increases the camera’s sensitivity to light but can introduce noise or graininess in the image.
By adjusting the aperture, shutter speed, and ISO, you can control the exposure and capture well-exposed images. Understanding the relationship between these elements takes practice, but experimenting with different settings in different lighting conditions will help you get a better grasp of exposure.
Additionally, it’s important to know how to use the camera’s light meter to measure the exposure. The camera’s light meter measures the amount of light in the scene and provides an indication of whether the exposure is too bright or too dark. By using the camera’s exposure compensation feature, you can adjust the exposure to make it brighter or darker based on the light meter reading.
Mastering exposure is essential for achieving well-lit and properly exposed images with your DSLR camera. Taking the time to understand and practice exposure techniques will greatly improve your photography skills and allow you to capture stunning photos in any lighting situation.
Using the Rule of Thirds
One of the most basic and effective composition techniques in photography is the rule of thirds. It is a guideline that helps you to create well-balanced and visually interesting images. By dividing your image into nine equal parts using two horizontal and two vertical lines, the rule of thirds suggests that you should position the important elements of your photo along these lines or at the points where they intersect.
Placing your subject at one of the intersection points or along one of the lines can create more visual tension and lead the viewer’s eyes into the frame. It helps to create a sense of balance and harmony, making your photos more aesthetically pleasing.
To apply the rule of thirds, most DSLR cameras and smartphones have the option to display a grid with these lines on your viewfinder or LCD screen. This feature can help you to visualize and compose your image according to the rule of thirds.
However, keep in mind that the rule of thirds is not a hard and fast rule. It is a guideline that can be broken or modified depending on your creative vision and the desired effect. Experimenting with different compositions can lead to unique and memorable photographs.
So next time you pick up your DSLR camera, remember to use the rule of thirds to enhance your composition and create visually appealing images.
Composition Techniques
When taking pictures with your DSLR camera, understanding and applying composition techniques can greatly enhance the visual appeal of your photographs. Composition refers to how the different elements in your photo are arranged and organized. Here are some key composition techniques to consider:
Rule of Thirds
The rule of thirds is a popular composition technique that involves dividing your image into nine equal sections by imagining two vertical and two horizontal lines. The principle suggests placing key elements along these lines or at their intersecting points, rather than centering them. This can create more visually interesting and balanced compositions.
Leading Lines
Leading lines are lines within your photo that lead the viewer’s eye to a certain point of interest. These lines can be actual objects like paths or roads, or they can be implied lines created by the arrangement of objects. By incorporating leading lines into your composition, you can guide the viewer’s gaze and create a sense of depth and movement in your photographs.
Foreground, Middle ground, and Background
Another important aspect of composition is creating layers within your photograph by utilizing the foreground, middle ground, and background. By including interesting elements in each of these layers, you can add depth and dimension to your images. Experiment with having a main subject in the foreground while incorporating additional elements in the middle and background for a more dynamic composition.
Frame within a Frame
Using elements within your scene to frame your subject can help draw attention to the main focal point. This technique adds visual interest and can create a sense of depth by providing a visual border around the subject. Look for natural frames like windows, archways, or tree branches to create this effect.
By incorporating these composition techniques into your photography, you can take basic good pictures with your DSLR camera to the next level and capture more visually appealing images.
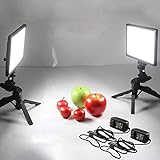
Using Natural Lighting
When it comes to taking good pictures with a DSLR camera, one of the most important factors to consider is lighting. While there are many artificial lighting options available, natural lighting can often produce the best results. Here are some tips on how to utilize natural light to capture great photos.
1. Use Golden Hour
Golden hour refers to the period shortly after sunrise or before sunset when the sun is low in the sky and casts a warm, golden light. This is widely considered the best time of day to shoot photos as the light is soft, diffused, and creates a beautiful glow. Make sure to plan your photo sessions during these times to take advantage of the flattering natural light.
2. Avoid Harsh Shadows
While natural light can be beautiful, it can also create harsh shadows if not used correctly. To avoid this, try to position your subject in open shade. This can be under a tree canopy, behind a building, or in the shadow of a large object. This will help to diffuse the light, resulting in a more even and flattering photograph.
If you cannot find open shade, you can use a reflector to bounce light onto the subject and fill in the shadows. Reflectors are inexpensive and come in various colors to create different effects. They can help to soften the light and add a natural glow to your photos.
By using natural lighting effectively, you can elevate the quality of your photos and capture stunning images with your DSLR camera. Experiment with different lighting conditions and techniques to find the best natural light setups for your desired shots.
Editing and Post-Processing
Once you have captured your photos with your DSLR camera, the next step is to edit and post-process them to enhance their overall quality and appeal. Editing and post-processing can help fix any issues with exposure, color balance, and composition, and allow you to unleash your creativity.
1. Choosing the Right Software
To edit your photos, you will need to use photo editing software. There are many options available, ranging from free software like GIMP and Pixlr to more advanced programs like Adobe Photoshop and Lightroom. Choose the software that fits your needs and budget.
2. Organizing Your Photos
Before you begin editing, it’s important to organize your photos. Create folders or albums to categorize your images based on subject, location, or date. This will make it easier to find and manage your photos during the editing process.
3. Basic Adjustments
Start by making basic adjustments to your photos, such as adjusting the exposure, brightness, and contrast. You can also tweak the white balance to ensure accurate colors. Don’t be afraid to experiment and play with these settings to achieve the desired look.
| Adjustment | Description |
|---|---|
| Exposure | Controls the overall brightness of the image. |
| Brightness | Alters the brightness of the midtones. |
| Contrast | Adjusts the difference between light and dark areas. |
| White Balance | Corrects the color temperature of the image. |
4. Crop and Straighten
Cropping and straightening your photos can help improve composition and remove any distractions. Use the cropping tool to remove unwanted elements and create a more balanced composition. Straighten tilted horizons or lines to make your photos appear more professional.
5. Enhance Details
Use sharpening tools to enhance the details and make your photos appear crisper. However, be careful not to oversharpen, as it can introduce noise and artifacts. You can also apply noise reduction to reduce any noise that may be present in the image.
6. Apply Filters and Effects
For a creative touch, you can apply filters and effects to your photos. Experiment with different presets and settings to achieve a desired mood or style. Be cautious not to overdo it, as excessive filters can result in an unrealistic look.
Remember, editing and post-processing should enhance your photos, not completely alter them. Aim for a natural and balanced final result that represents your original vision.
Question-answer:
What is a DSLR camera?
A DSLR camera, short for digital single-lens reflex camera, is a type of camera that uses a mirror mechanism to direct light from the lens to an optical viewfinder on the back of the camera.
What are the advantages of using a DSLR camera?
There are several advantages of using a DSLR camera. Firstly, DSLRs offer better image quality and larger image sensors compared to other types of cameras. They also provide greater control over settings and allow for interchangeable lenses, enabling photographers to achieve a wide range of creative effects. Additionally, DSLRs usually have faster autofocus capabilities and offer the ability to capture images in RAW format for better post-processing flexibility.


