If you are passionate about photography and have recently purchased a DSLR camera, then you may be wondering how to take height size in your photographs. Well, you’re in luck! In this article, we will guide you through the process of capturing stunning images with the correct height size using your DSLR camera.
Step 1: Understand Your Camera
Before you can take height size in your photographs, it’s important to familiarize yourself with the settings and features of your DSLR camera. Take the time to read the camera’s manual and learn about its different modes, functions, and buttons. Understanding your camera will empower you to make the necessary adjustments and capture the best possible shots.
Step 2: Adjust the Aspect Ratio
The aspect ratio of your camera determines the width and height ratio of your photographs. Most DSLR cameras offer different aspect ratio options, such as 3:2 or 4:3. To take height size in your photos, select an aspect ratio that emphasizes vertical composition. This will help you capture subjects with a sense of height and make your images visually appealing.

Step 3: Compose with Vertical Lines
When taking photos with height size in mind, look for vertical lines in your frame and incorporate them into your composition. These lines can be tall buildings, trees, or any other vertical elements that add a sense of height to your image. Position them strategically within your frame to create a visually pleasing and balanced composition.
Step 4: Experiment with Depth of Field
Depth of field refers to the range of focus in an image. By experimenting with your camera’s aperture settings, you can control the depth of field and emphasize the height in your photographs. Use a wide aperture (small f-stop number) to create a shallow depth of field, which will blur the background and make your subject stand out, enhancing the sense of height in your image.
Step 5: Try Different Perspectives

Don’t be afraid to get creative and experiment with different perspectives to enhance the height size in your photographs. Try shooting from a low or high angle to change the viewer’s perception of height. You can also use leading lines or framing techniques to guide the viewer’s eye towards the height in your image. Keep exploring and pushing the boundaries of your creativity!
By following these steps and practicing regularly, you will soon master the art of taking height size in your DSLR camera. Remember, it’s all about understanding your equipment, adjusting your settings, and exploring different techniques to capture stunning images that showcase the height in your subject matter.
Now grab your DSLR camera and start capturing breathtaking photos with an impressive height size!
The Basics of DSLR Camera Height Size
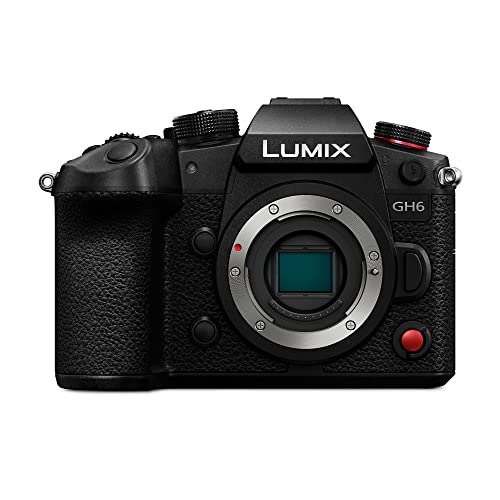
When it comes to photography, understanding the height size of your DSLR camera is essential to capture the perfect shot. The height size refers to the physical dimensions of the camera body. In this article, we will explore the basics of DSLR camera height size and its importance in photography.
1. Understanding DSLR Camera Height Size
The height size of a DSLR camera refers to its vertical dimension. It is typically measured from the bottom of the camera body to the top, including any protruding parts. DSLR cameras come in various height sizes, ranging from compact models to larger, professional-grade cameras.

When selecting a camera, it is important to consider the height size in relation to your shooting preferences. Smaller cameras are more portable and easier to handle, making them ideal for on-the-go photography. On the other hand, larger cameras provide better stability and often offer more features and controls, making them suitable for professional photographers.
2. Factors to Consider in DSLR Camera Height Size
Several factors should be considered when determining the ideal height size for your DSLR camera:
- 1. Shooting Style: Consider the type of photography you enjoy. If you primarily shoot landscapes or travel photography, a compact camera may be more suitable. For portrait or studio photography, a larger camera with additional controls might be preferred.
- 2. Handling Comfort: Hold different cameras in your hand to determine which height size feels comfortable and ergonomic. Consider the weight and balance of the camera as well.
- 3. Portability: If you frequently travel or shoot in various locations, a smaller camera may be more convenient to carry around.
- 4. Budget: Camera height size often correlates with price, so consider your budget when selecting a camera.
3. Testing and Evaluating
Before making a purchase, it is advisable to visit a camera store and try out different camera models. Get a feel for their height size, weight, and overall ergonomics. Consider how the camera fits in your hand and whether you can easily access the necessary controls.
Additionally, research and read reviews from other photographers who have used the camera models you are considering. Their insights and experiences can help you make an informed decision about which camera height size is best suited for your needs.
In conclusion, understanding the height size of a DSLR camera is important for choosing the right camera for your photography needs. Consider factors such as shooting style, handling comfort, portability, and budget when evaluating different camera models. By taking the time to test and evaluate cameras, you can ensure that you select a camera with the ideal height size that will enhance your photography experience.

Understanding the Importance of Height Size in DSLR Cameras
When it comes to DSLR cameras, one of the key elements to consider is the height size. This refers to the dimensions of the image sensor in the camera, which plays a crucial role in determining the quality and resolution of the photographs.
The height size of a DSLR camera directly impacts the level of detail and clarity that can be captured in an image. A larger height size means that more pixels can be packed into the sensor, resulting in higher resolution photos. This, in turn, allows for more intricate details to be captured, making images appear sharper and more vibrant.
Another important aspect to consider when it comes to height size is the ability to capture better low-light images. A larger height size means that each pixel on the sensor can be larger, which results in a better signal-to-noise ratio. This ultimately reduces the amount of noise in images taken in low-light conditions, resulting in cleaner and more professional-looking photographs.
In addition to resolution and low-light performance, the height size of a DSLR camera also affects the depth of field. A larger height size can provide a shallower depth of field, allowing for more creative control over blurring backgrounds and emphasizing the subject of the photograph. This can be especially beneficial for portrait photography, as it helps to create a beautiful bokeh effect.
It’s important to note that height size is just one factor to consider when choosing a DSLR camera. Other factors such as the lens quality, ISO range, and autofocus capabilities also play a significant role in overall image quality. However, understanding the importance of height size can help photographers make more informed decisions when it comes to selecting the right camera for their needs.

| Benefits of a Larger Height Size | Benefits of a Smaller Height Size |
|---|---|
|
|
How to Measure Height Size in DSLR Cameras
DSLR cameras are a popular choice among professional photographers and enthusiasts alike due to their superior image quality and advanced features. One important aspect of these cameras is their height size, as it helps determine the ergonomics and compatibility with other camera equipment. In this article, we will guide you on how to accurately measure the height size of a DSLR camera.
Measuring the Camera Body Height
To measure the height of a DSLR camera body, follow these steps:
- Place the camera on a flat surface with the lens facing up.
- Adjust the camera so that it is stable and does not wobble.
- Using a ruler or measuring tape, align it vertically along the side of the camera body.
- Read the measurement where the top of the camera body ends.
Make sure to take the measurement in millimeters for accuracy. This will give you the height of the camera body.
Measuring the Total Height
If you want to measure the total height of the camera, including any attached lenses or accessories, you can follow these additional steps:
- Attach the lens or accessories to the camera.
- Place the camera with the attached equipment on a flat surface.
- Follow the same steps as mentioned earlier to measure the total height of the camera.
It is important to note that the total height measurement may vary depending on the lens or accessory attached to the camera. Therefore, it is recommended to measure the height with different combinations of equipment to ensure accuracy.
Using the Height Measurement
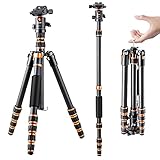
Once you have measured the height size of your DSLR camera, you can use this information for various purposes. It can help you determine the compatibility of the camera with different camera bags, backpacks, or cases. Additionally, knowing the height size can assist in selecting the right tripod or other camera support equipment.
Moreover, if you are planning to use the camera for studio photography, knowing the exact height size can be helpful in setting up lighting equipment and accessories.
| DSLR Camera Model | Camera Body Height (mm) | Total Height with Lens (mm) |
|---|---|---|
| Nikon D850 | 146 | 203 |
| Canon EOS 5D Mark IV | 116 | 169 |
| Sony Alpha a7 III | 96 | 146 |
Using the table as a reference, you can compare the height size of different DSLR camera models to make an informed decision when purchasing camera accessories or planning your photography setups.
In conclusion, measuring the height size of a DSLR camera can provide valuable information for photographers. By following the steps outlined in this article, you can accurately measure the camera body height and total height with attached lenses or accessories. Use this information to ensure compatibility and optimize your photography setup.
Factors Affecting Height Size in DSLR Cameras
When it comes to DSLR cameras, the height size of the images captured can vary depending on several factors. Understanding these factors can help photographers achieve their desired image dimensions and optimize their photography workflow. Here are some key factors that affect the height size in DSLR cameras:
1. Image Sensor Size
The size of the image sensor in a DSLR camera plays a significant role in determining the height size of the images captured. Cameras with larger sensors tend to produce images with greater height size, as they can capture more detail and information.
2. Aspect Ratio
The aspect ratio of a DSLR camera refers to the proportional relationship between the width and height of an image. Common aspect ratios include 3:2 and 16:9. The chosen aspect ratio can affect the height size of the images, with a wider aspect ratio resulting in shorter height size.
It’s important to note that the aspect ratio can be adjusted manually or set based on the camera’s default settings.
3. Lens Focal Length
The focal length of the lens used in a DSLR camera can also impact the height size of the captured images. A lens with a shorter focal length tends to produce wider field of view and can result in taller height size. On the other hand, lenses with longer focal lengths may narrow the field of view and result in a shorter height size.
It’s worth experimenting with different lenses and focal lengths to achieve the desired height size for specific photography purposes.
4. Image Resolution
The image resolution settings on a DSLR camera can affect the height size of the captured images. Higher resolution settings generally result in larger height sizes, as more pixels are captured and utilized.
Bear in mind that higher resolution images may occupy more storage space on memory cards and require more processing power when editing or sharing.
By considering these factors and adjusting the necessary camera settings, photographers can effectively control the height size of their images captured using DSLR cameras.
Lens Selection and Height Size in DSLR Cameras
When it comes to choosing the right lens for your DSLR camera, there are a few considerations to keep in mind. One important factor is the height size of the subjects you plan to photograph. Understanding how the lens selection and height size work together can help you capture the best possible images.
Understanding Lens Focal Length
Lens focal length determines the magnification and angle of view of the subjects you are photographing. It is important to select a lens with an appropriate focal length to capture the height size of your subjects accurately. A lens with a shorter focal length will capture a wider angle of view, making the subjects appear smaller in the frame. On the other hand, a lens with a longer focal length will capture a narrower angle of view, magnifying the height size of the subjects.
Finding the Right Lens for Different Height Sizes
Depending on the height size of your subjects, you will need to choose different lenses to achieve the desired effect. For capturing subjects with a smaller height size, such as flowers or small objects, a macro lens with a close focusing distance can be a great option. This will allow you to capture fine details and magnify the height size of the subjects.
For taller subjects, such as people or buildings, a lens with a longer focal length, such as a telephoto lens, can help you capture their height size accurately. This type of lens will allow you to zoom in and fill the frame with the subject, emphasizing their height.
It is also important to consider the distance between you and the subject when choosing a lens. If you are shooting from a distance, a lens with a longer focal length will help you capture the height size of the subjects without having to physically move closer. On the other hand, if you are shooting up close, a wider-angle lens can help capture the entire height size of the subject without cropping it out of the frame.
In conclusion, when selecting a lens for your DSLR camera, it is essential to consider the height size of the subjects you plan to photograph. Understanding how lens focal length affects the angle of view and magnification will allow you to choose the right lens to capture the height size accurately. Whether you are photographing small objects or tall buildings, the right lens selection can make a significant difference in the final result of your images.
Sensor Size and its Influence on Height Size in DSLR Cameras
In DSLR cameras, the sensor size plays a crucial role in determining the height size of the captured images. The sensor, which is a light-sensitive device, is responsible for converting the incoming light into digital signals to create the final image. The dimensions of the sensor can vary between different camera models and brands.
The height size of the images captured by a DSLR camera depends on the dimensions of the sensor. A larger sensor usually results in a higher height size of the captured image. This is because a larger sensor is capable of capturing more light and detail, which results in a higher-resolution image with greater clarity and depth.
On the other hand, a smaller sensor tends to capture less light and detail, leading to a lower height size of the image. This doesn’t necessarily mean that a smaller sensor produces lower quality images, but it can limit the maximum height size that can be achieved without sacrificing image quality. Smaller sensors are often found in entry-level DSLR cameras or compact cameras, where portability and affordability are prioritized over the absolute highest image quality.
It’s important to note that the height size of the image is not the only factor to consider when evaluating the performance of a DSLR camera. Other factors such as lens quality, image processor, and pixel density also contribute to the overall image quality. However, the sensor size remains a key factor in determining the potential height size and level of detail that can be achieved in the captured images.
When comparing different DSLR cameras, it’s essential to consider the sensor size as a crucial aspect. The size of the sensor can often be found in the camera’s specifications, usually expressed in millimeters or as a ratio such as “APS-C” or “Full Frame.” Understanding the relationship between sensor size and height size will help photographers choose the camera that best suits their needs and desired image quality.
Different Techniques to Optimize Height Size in DSLR Cameras
DSLR cameras are widely used by photographers and enthusiasts due to their ability to capture high-quality images. One key aspect that photographers often pay attention to is the height size of the images taken with their DSLR cameras. The height size determines the aspect ratio and the overall quality of the image.
1. Adjusting the Resolution Settings
One of the most effective ways to optimize the height size in DSLR cameras is by adjusting the resolution settings. By increasing the resolution, you can capture images with higher height sizes. However, it’s important to note that increasing the resolution will also result in larger file sizes. Therefore, you should consider the storage capacity and requirements of your camera and choose the resolution accordingly.
On the other hand, if you are looking to reduce the height size of the images for specific purposes such as web sharing or faster processing, you can decrease the resolution. This will result in smaller file sizes and quicker transfer and editing processes.
2. Using Cropping Techniques
Cropping is another useful technique to optimize the height size in DSLR cameras. It involves removing unwanted portions of the image and focusing on the desired subject. By cropping the image, you can control the height size and eliminate any unnecessary elements that may detract from the composition.
When using the cropping technique, it’s important to maintain the overall balance and composition of the image. You should consider the rule of thirds and ensure that the subject remains the main focal point even after cropping.
Pro tip: The rule of thirds suggests placing the main subject or points of interest along the imaginary lines that divide the image into thirds horizontally and vertically. This creates a more balanced and visually appealing composition.
3. Utilizing Image Compression
Image compression is a technique used to reduce the file size of images without significantly affecting their quality. By compressing the image, you can optimize the height size while maintaining the overall clarity and detail. There are various image compression algorithms available that can be applied during the post-processing stage.
Note: It’s important to strike a balance between compression and image quality. Excessive compression can lead to loss of details and artifacts, while minimal compression may result in larger file sizes.
These different techniques can help you optimize the height size in DSLR cameras according to your specific requirements. Whether you want to capture high-resolution images or reduce file sizes for efficient sharing, understanding these techniques will allow you to make the most out of your DSLR camera.
Adjusting Camera Settings for Desired Height Size
To capture your desired height size in a DSLR camera, you will need to adjust a few camera settings. Follow these steps to achieve the best results:
- Choose the appropriate shooting mode: Set your camera to either Manual (M) mode or Aperture Priority (A/Av) mode. These modes allow you to have full control over the camera’s settings and achieve the desired height size.
- Adjust the aperture: The aperture controls the amount of light that enters the camera. To increase the depth of field and ensure sharp focus throughout the image, choose a higher aperture value (e.g. f/8 or higher). Keep in mind that a higher aperture value also decreases the amount of light entering the camera, so you may need to compensate by adjusting other settings.
- Manage the shutter speed: The shutter speed determines the time the camera’s sensor is exposed to light. To avoid camera shake and capture sharp images, use a faster shutter speed (e.g. 1/250 sec or faster) when photographing moving subjects or handheld shots. For static subjects or tripod-mounted shots, you can use a slower shutter speed for a longer exposure.
- Set the ISO: ISO controls the camera’s sensitivity to light. For well-lit situations, use a lower ISO setting (e.g. ISO 100-400) to achieve sharper images with less noise. In low-light conditions, you may need to increase the ISO (e.g. ISO 800-3200), but be aware that higher ISO values can introduce more noise into the image.
- Consider using a tripod: To maintain stability and prevent camera shake, especially when using slower shutter speeds or higher aperture values, it is recommended to use a tripod. This will help ensure your images are sharp and free from unwanted blurring.
- Experiment and review: Take a few test shots and review them on your camera’s LCD screen to determine if the height size of your subject is to your liking. If not, make adjustments to your camera settings until you achieve the desired result.
By adjusting your DSLR camera settings properly, you can achieve the desired height size in your photographs. Practice and experimentation will help you become more comfortable with these settings and allow you to capture stunning images that meet your specific requirements.
Question-answer:
What is the importance of height size in a DSLR camera?
The height size in a DSLR camera is important because it determines the aspect ratio and resolution of the images. A larger height size will result in higher quality photos with more detail.
How can I change the height size in my DSLR camera?
You can change the height size in your DSLR camera by going into the settings menu and selecting the resolution or aspect ratio option. From there, you can choose the desired height size for your photos.
What height size should I use for landscape photography?
For landscape photography, it is recommended to use a larger height size in order to capture more detail and provide a wider view. A height size of at least 3000 pixels or more would be ideal for landscape shots.
Can I change the height size of a photo after it has been taken?
No, once a photo has been taken, you cannot change the height size. The height size is determined at the time of capture and cannot be altered afterwards.
Do all DSLR cameras have the same height size options?
No, not all DSLR cameras have the same height size options. The available options may vary depending on the camera model and manufacturer. It is important to check the specifications of your specific camera to see what height sizes are available.