
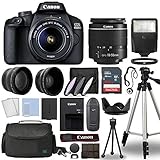
Welcome to our beginner’s guide on how to use a DSLR camera! If you’ve recently purchased a DSLR camera or are thinking about getting one, you may be feeling a bit overwhelmed with all the buttons, dials, and settings. But fear not! With a little bit of practice and guidance, you’ll be capturing stunning photos and videos in no time.
First, let’s start with the basics. DSLR stands for Digital Single Lens Reflex, which basically means that the camera uses a mirror and prism system to reflect light from the lens to the viewfinder. This allows you to see a real-time preview of what your image will look like before you take the shot. It’s a great way to ensure that you’re getting the composition and focus right.
When you first pick up a DSLR camera, it’s important to familiarize yourself with the different parts and controls. On most DSLRs, you’ll find a mode dial on the top of the camera that allows you to select different shooting modes such as Auto, Manual, Aperture Priority, and Shutter Priority. We recommend starting with the Auto mode, which will let the camera make all the settings for you. As you gain more experience, you can gradually switch to manual mode and take control over the camera settings.
Another important aspect of using a DSLR camera is understanding the exposure triangle – aperture, shutter speed, and ISO. These three elements work together to determine the overall exposure of your image. Aperture controls the amount of light entering the camera, shutter speed determines how long the shutter stays open, and ISO affects the sensitivity of the camera’s sensor to light. By adjusting these settings, you can have more creative control over your photos.
Now that you have a basic understanding of how a DSLR camera works, it’s time to put your knowledge into practice. We recommend starting with simple subjects and scenes, experimenting with different shooting modes and settings. Don’t be afraid to make mistakes – it’s all part of the learning process. And remember, the more you practice, the better you’ll become at using your DSLR camera.

So, whether you’re an aspiring photographer or someone who simply wants to take better photos, learning how to use a DSLR camera is a valuable skill. By following this beginner’s guide and dedicating some time to practice, you’ll be on your way to capturing professional-looking photos and videos. So pick up your DSLR camera and start exploring the world of photography! Happy shooting!
Understanding the Basic Functions
When you first start using a DSLR camera, it can seem overwhelming with all the buttons and functions available. However, understanding the basic functions is essential to capturing great photos. In this section, we will cover some of the most important functions to get started.
1. Aperture
The aperture is the opening in the lens through which light enters the camera. It is represented by an f-number, such as f/2.8 or f/16. The lower the number, the wider the aperture and the more light enters the camera. Understanding aperture is crucial for controlling the depth of field in your photos, meaning how much of the image is in focus.
2. Shutter Speed
The shutter speed determines how long the camera’s sensor is exposed to light. It is measured in fractions of a second, such as 1/100 or 1/1000. Faster shutter speeds freeze action, while slower speeds create motion blur. Experimenting with different shutter speeds allows you to capture dynamic or still images as you desire.
Pro tip: Use a faster shutter speed for sports or moving subjects, and slower speeds for low light conditions or creative effects.

3. ISO
The ISO setting determines the camera’s sensitivity to light. Higher ISO numbers result in more sensitivity and are useful in low light situations. However, higher ISO values also introduce “noise” or graininess to the image. Understanding how to balance ISO with aperture and shutter speed is crucial for achieving well-exposed photos.
In addition to these three functions, it is important to familiarize yourself with other settings such as white balance, autofocus modes, and exposure compensation. Learning and experimenting with these functions will help you gain more control over your DSLR camera and improve your photography skills.
Choosing the Right DSLR Camera
When starting out in photography, one of the most important decisions you will have to make is choosing the right DSLR camera. With so many options available in the market, it can be overwhelming to make a decision. In this guide, we will discuss some key factors to consider when choosing a DSLR camera for beginners.
1. Budget
One of the first things you should determine is your budget for purchasing a DSLR camera. DSLR cameras come in a wide range of prices, from entry-level models to professional-grade ones. It’s important to set a realistic budget that aligns with your needs and overall photography goals.
2. Megapixel Count
Another important factor to consider is the megapixel count of the camera. Megapixels determine the resolution of the images you will be able to capture. Higher megapixel count allows you to print larger images without losing details. However, it’s worth noting that a higher megapixel count doesn’t necessarily translate to better image quality, as other factors such as sensor size and image processing also play a role.

3. Sensor Size
The size of the camera’s sensor is another crucial aspect to consider. Generally, larger sensors tend to produce better image quality, especially in low-light conditions. Full-frame sensors are the largest and offer the best image quality, but they also come with a higher price tag. APS-C sensors are smaller but still deliver impressive performance and are commonly found in entry-level and mid-range DSLR cameras.
4. Lens Compatibility
Consider the lens options available for the DSLR camera you are interested in. The ability to interchange lenses is one of the main advantages of DSLR cameras. Look for a camera that has a wide range of compatible lenses, as this will allow you to expand your creative possibilities and experiment with different focal lengths and shooting styles.
5. Ergonomics
Finally, take into account the ergonomics of the camera. A comfortable and intuitive camera body will make it easier for you to handle and use the camera for extended periods. Consider factors such as the grip, button layout, and menu navigation. It’s always best to try out different camera models in person to see which one feels most natural and comfortable to you.
| Factors to Consider | Summary |
|---|---|
| Budget | Set a realistic budget that aligns with your needs and goals. |
| Megapixel Count | Higher megapixels allow for larger prints, but it’s not the sole determinant of image quality. |
| Sensor Size | Larger sensors generally produce better image quality, but also come with a higher price. |
| Lens Compatibility | Look for a camera that offers a wide range of compatible lenses for more creative options. |
| Ergonomics | Choose a camera with a comfortable and intuitive design for ease of use. |
By considering these factors, you can make an informed decision and choose the right DSLR camera that suits your needs as a beginner photographer.
Setting Up Your DSLR Camera
When starting out with a DSLR camera, it’s important to set it up properly to ensure optimal performance and capture high-quality photos. Here are some essential steps to get you started:

1. Inserting the Battery:
Before using your camera, make sure to insert a fully charged battery. Open the battery compartment on the bottom of the camera, align the battery correctly, and push it in until it clicks into place.
2. Attaching the Lens:
Next, attach the lens to your camera body. Remove the rear lens cap and align the lens mounting index on the lens with the corresponding one on the camera body. Rotate the lens clockwise until it locks into place.
3. Memory Card:

Ensure that a memory card is inserted in the camera. Open the memory card slot cover, align the card with the slot, and gently push it in until it clicks. Make sure the card is properly inserted to avoid any data loss.
4. Setting the Mode Dial:
The mode dial is usually located on the top of the camera and allows you to select different shooting modes. Turn the mode dial to “Auto” mode or “Program” mode if you’re a beginner. These modes will help you get started without worrying too much about advanced settings.
5. Adjusting the Display and Focus:
Turn on your camera and adjust the display settings according to your preference. Some cameras have a live view option that allows you to see the scene through the LCD screen. Additionally, set the focus mode to “Auto” for easy focusing, especially when you’re starting out.
6. ISO and White Balance:
ISO determines how sensitive your camera’s sensor is to light, while white balance ensures accurate colors in different lighting conditions. Set your ISO to a lower value (e.g. 100 or 200) for outdoor shots and increase it for low-light situations. Experiment with different white balance settings to find the one that suits your environment best.
With these basic setup steps, you’ll be ready to start using your DSLR camera and explore the world of photography. Remember to keep practicing and experimenting with different settings to improve your skills and capture stunning images.
Installing the Battery and Memory Card
Before you can start using your DSLR camera, you need to properly install the battery and memory card for it to function.
Battery:

1. Locate the battery compartment on the bottom of your camera. It is usually labeled with an icon.
2. Slide the battery compartment cover open.
3. Insert the battery with the correct orientation. There is usually a guide inside the compartment to help you align it properly.
4. Close the battery compartment cover securely.
Memory Card:
1. Find the memory card slot on your camera. It is typically located on the side of the camera.
2. Push the memory card into the slot until it clicks into place. Ensure that the label on the memory card is facing the correct way.
3. To remove the memory card, gently push it in until you hear a click, and then release it. The card will pop out slightly, allowing you to pull it out.
4. Make sure to use a compatible memory card for your camera. Check your camera’s manual for the specific types and capacities that are supported.
Remember to always properly charge your camera’s battery before using it and use a memory card with enough capacity to store your photos and videos.
Following these steps will ensure that you have a fully functional DSLR camera ready to capture your memories.
Attaching the Lens and Adjusting Settings
When using a DSLR camera, one of the first steps is to attach the lens to the camera body. To do this, follow these simple steps:
- Remove the protective cap from the front of the camera body by twisting it counter-clockwise.
- Making sure the camera is switched off, locate the lens mount on the front of the camera body.
- Align the lens with the camera body’s lens mount, ensuring that the white guide dots or lines on both the lens and the camera body are aligned.
- Gently rotate the lens clockwise until you hear a click, indicating that it is securely attached.
- If the lens has a zoom ring, hold the camera firmly with one hand and use the other hand to adjust the zoom ring to the desired focal length.
Once the lens is attached, you can proceed to adjust the camera settings. Here are some important settings to consider:
1. Mode Selection
Most DSLR cameras provide different shooting modes, such as Manual, Aperture Priority, Shutter Priority, and Program. Choose a mode based on your shooting preferences and the lighting conditions.
2. ISO Sensitivity
ISO determines the camera’s sensitivity to light. A higher ISO setting is ideal for low-light conditions, but it can introduce more noise into the image. Experiment with different ISO values to find the right balance for your situation.
3. White Balance
White balance affects the color temperature of your images. Choose a white balance setting that matches the lighting conditions, such as daylight, cloudy, or incandescent.
4. Focus Mode
Depending on the subject and shooting scenario, you can select between autofocus (AF) and manual focus (MF) modes. AF is suitable for most situations, but MF allows for precise manual focusing.
5. Shooting Format
You can choose between shooting in JPEG or RAW format. JPEG files are smaller and more convenient for sharing, while RAW files retain more image information and provide greater flexibility for post-processing.
By properly attaching the lens and adjusting the camera settings, you are now ready to start capturing stunning photographs with your DSLR camera.
Taking Photos with Your DSLR Camera
Once you have familiarized yourself with the basic functions and controls of your DSLR camera, you are ready to start taking photos. Here are some tips to help you get started:
1. Adjusting the settings:
Before you begin, make sure your camera’s settings are appropriate for the situation. Check the ISO, aperture, and shutter speed settings to ensure they are suitable for the lighting conditions and the effect you want to achieve.
2. Composing your shot:
Take your time to carefully compose your shot. Consider the rule of thirds and balance your subject within the frame. Pay attention to the background and make sure it complements your main subject.
3. Using manual focus:
Experiment with manual focus to gain control over the sharpness of your photos. Adjust the focus ring until your subject appears clear and crisp.
4. Experimenting with different angles:
Try shooting from different angles to add depth and creativity to your photos. Get low to the ground or find a vantage point from above to capture unique perspectives.
5. Utilizing natural light:
Make the most of natural light by shooting outdoors or near a window. Avoid using the camera’s built-in flash whenever possible as it can create harsh lighting and unflattering shadows.
6. Working with the exposure triangle:
Understand the relationship between ISO, aperture, and shutter speed to control the exposure of your photos. Adjusting these settings can help you achieve the desired level of brightness and sharpness.
7. Reviewing and editing:
After taking your photos, take the time to review and edit them. Use photo editing software to make small adjustments to enhance the colors, contrast, and sharpness.
Remember, practice makes perfect. The more you use your DSLR camera and experiment with different techniques, the better your photos will become. Don’t be afraid to take risks and try new things. Happy shooting!
Adjusting Exposure and Focus
When using a DSLR camera, it is important to understand how to adjust exposure and focus to capture the best possible photos. This section will guide you through the steps to adjust both settings.
Adjusting Exposure:
To adjust the exposure of your photos, you need to understand the three elements that control it: aperture, shutter speed, and ISO. Aperture refers to the size of the lens opening, which determines how much light enters the camera. Shutter speed refers to the amount of time the shutter remains open, allowing light to reach the camera’s sensor. ISO determines the sensitivity of the camera’s sensor to light.
With DSLR cameras, you can adjust these settings manually or use the camera’s automatic modes. To manually adjust exposure, start by setting your camera to Manual (M) mode. Then, use the camera’s metering system, which measures the light in the scene, to determine the appropriate settings. Adjust the aperture, shutter speed, and ISO until the camera’s light meter indicates that the exposure is correct.
Adjusting Focus:
Correct focus is crucial for capturing sharp and clear photos. DSLR cameras offer various focus modes, including manual and autofocus. To use autofocus, set the camera to AF mode and choose your desired autofocus points, which are small squares that indicate where the camera will focus.
When using autofocus, half-press the shutter button to allow the camera to focus on the subject. You can also use the camera’s autofocus lock, which allows you to focus on one subject and then recompose the shot without losing focus.
If you prefer more control, you can switch to manual focus mode. In manual mode, you need to turn the focus ring on the lens to adjust the focus manually. This mode is useful when shooting subjects that are constantly moving or in low-light conditions.
Remember, practice is key when it comes to adjusting exposure and focus with a DSLR camera. Experiment with different settings and techniques to improve your photography skills.
Using Different Shooting Modes
One of the key features of a DSLR camera is its ability to offer different shooting modes, which allow you to control various aspects of your photographs. Understanding and using these modes correctly can greatly enhance your photography skills. Here are some common shooting modes and how to use them:
1. Auto mode: In auto mode, the camera makes all the decisions for you, including the aperture, shutter speed, and ISO settings. It is recommended for beginners who are just starting out and want to capture good quality photos without worrying about technical details.
2. Program mode: Program mode is similar to auto mode, but it allows you to have some control over certain settings. You can adjust the ISO, exposure compensation, and white balance while the camera handles the rest. It is a step up from auto mode and gives you a little more creative flexibility.
3. Aperture priority mode: Aperture priority mode (often denoted as A or Av on the camera dial) gives you control over the aperture setting, while the camera selects the appropriate shutter speed and ISO. This mode is great for controlling depth of field and is often used for portrait or landscape photography.
4. Shutter priority mode: Shutter priority mode (often denoted as S or Tv on the camera dial) allows you to control the shutter speed, while the camera decides the aperture and ISO. This mode is useful for capturing fast-moving subjects or creating long exposures.
5. Manual mode: Manual mode gives you full control over all the camera settings, including aperture, shutter speed, and ISO. It requires more knowledge and experience, but allows for maximum creative control. It is recommended for advanced users who are comfortable with adjusting multiple settings.
6. Scene modes: Many DSLR cameras offer a range of scene modes, such as portrait, landscape, sports, night, and macro. These modes optimize the camera settings based on the chosen scene, making it easier to capture the desired results in specific shooting conditions. They are useful for beginners who want to experiment with different scenarios.
By familiarizing yourself with these shooting modes and experimenting with them, you can expand your photographic capabilities and achieve better results with your DSLR camera.
Question-answer:
What is a DSLR camera?
A DSLR camera stands for Digital Single-Lens Reflex camera. It is a type of camera that uses mirrors and a movable lens to capture high-quality photographs. It offers more advanced features and settings compared to compact cameras and is popular among professional photographers.
Can I use a DSLR camera for video recording?
Yes, DSLR cameras are capable of recording high-quality videos. You can use a DSLR camera for video recording by adjusting the settings to the desired resolution, frame rate, and focus mode. Additionally, some DSLR cameras offer manual controls for exposure and audio, allowing you to have more control over your video recording.


