
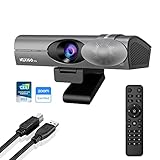
If you’re tired of the mediocre video quality of your laptop’s built-in webcam or you want to take your video conferencing and streaming to the next level, you’ll be happy to know that you can use your DSLR camera as a webcam. DSLR cameras are known for their exceptional image quality and versatility, and by connecting it to your computer, you can transform it into a high-quality webcam.
Using a DSLR camera as a webcam can greatly enhance the quality of your video calls, online meetings, and live streams. You’ll be able to enjoy crystal-clear images, vibrant colors, and better overall video quality. Whether you’re a content creator, a professional working from home, or someone who simply wants to appear their best on video, this guide will help you get started.
To get started, you’ll need a few things: a compatible DSLR camera, a USB cable to connect it to your computer, and software that allows you to use your camera as a webcam. The specific requirements and software needed may vary depending on your camera brand and model, so make sure to check the official website of your camera manufacturer for information and instructions.
Once you have everything you need, the process is relatively simple. Connect your DSLR camera to your computer using the USB cable, install the required software, and configure the camera settings to use it as a webcam. You may need to adjust the exposure, focus, and other settings to optimize the image quality for video calls or live streaming.
Using a DSLR camera as a webcam not only enhances the image quality but also opens up a world of creative possibilities. You can experiment with different lenses, depth of field effects, and lighting techniques to further improve the visual appeal of your videos. Whether you’re attending virtual meetings, streaming games, or hosting webinars, your DSLR camera can help you stand out from the crowd and make a lasting impression.

Preparing your DSLR Camera
Before using your DSLR camera as a webcam, you need to make sure it is ready for the task. Follow these steps to prepare your camera:
1. Check camera compatibility
Not all DSLR cameras can be used as webcams. Visit the manufacturer’s website or consult the camera’s user manual to determine if your camera can be used for this purpose. Look for any specific requirements or limitations.
2. Update firmware
Ensure that your camera’s firmware is up to date. Manufacturers often release firmware updates that add new features or fix bugs. Check the manufacturer’s website for the latest firmware version and follow the instructions to update your camera.
3. Clean the camera
Before connecting your DSLR camera to your computer, it is essential to clean it thoroughly. Use a soft, lint-free cloth or lens cleaning kit to remove any dust, smudges, or fingerprints from the lens, LCD screen, and body. This will ensure that your camera delivers clear and sharp video.
4. Fully charge the battery
Using your DSLR camera as a webcam can drain its battery quickly. To avoid interruptions during your webcam sessions, make sure your camera’s battery is fully charged before starting. You may also consider using an AC adapter or external power supply if your camera supports it.

5. Set up a stable tripod or mount
To achieve a steady and professional-looking webcam feed, mount your DSLR camera on a stable tripod or attach it securely to a camera mount. This will help minimize camera shake and keep the camera in position throughout your webcam session.
6. Adjust camera settings
Access your camera’s settings menu and make the necessary adjustments for webcam use. Set the camera to “Manual” or “Aperture Priority” mode for better control over exposure and focus. Disable any settings that could affect the video quality, such as image stabilization.
Now that your DSLR camera is prepared, you can proceed to connect it to your computer and start using it as a high-quality webcam.
Connecting your DSLR Camera to your Computer
Using your DSLR camera as a webcam can greatly improve the quality of your video calls or live streaming. To connect your DSLR camera to your computer, you will need to follow a few simple steps:
1. Check camera compatibility
Before getting started, make sure your DSLR camera is compatible with being used as a webcam. Some camera models might require specific software or drivers to be installed on your computer. Check the manufacturer’s website or user manual for more information on compatibility.
2. Gather the necessary equipment
In addition to your DSLR camera, you will need a USB cable that is compatible with your camera and computer. Make sure the cable is securely connected and in good condition to ensure a stable connection.
3. Install any required software or drivers
If your camera requires specific software or drivers to be installed on your computer, follow the manufacturer’s instructions to do so. This software will help your computer recognize your camera as a webcam.
4. Configure your camera settings
Once your camera is connected to your computer, access the camera settings to configure it for use as a webcam. This may involve enabling a specific mode or selecting the webcam option in the settings menu. Consult your camera’s user manual for detailed instructions.
5. Adjust video and audio settings
After configuring your camera settings, you may also need to adjust the video and audio settings in your preferred video conferencing or streaming software. This can include selecting your camera as the video input and configuring the audio settings to use the camera’s microphone.
6. Test the connection
Before starting your video call or live stream, it’s important to test the connection to ensure everything is working properly. Open your video conferencing or streaming software and check if your camera feed is being displayed correctly. Make any necessary adjustments to the settings if needed.

By following these steps, you can successfully connect your DSLR camera to your computer and use it as a high-quality webcam for your video calls or live streaming sessions.
Configuring your DSLR Camera Settings
Before you can use your DSLR camera as a webcam, you need to configure the camera settings to ensure optimal performance and compatibility. Follow the steps below to set up your camera correctly:
1. USB Connection Mode
Firstly, check if your DSLR camera supports USB connectivity and set it to the appropriate USB connection mode. This mode may vary depending on the camera model, but it is typically labeled as “USB Streaming” or “PC Remote.” Refer to your camera’s user manual for specific instructions on locating and selecting the correct mode.
2. Live View Mode
Next, enable the Live View mode on your camera. Live View allows you to see the camera’s feed on the camera’s LCD screen or computer screen when connected via USB. To activate this mode, navigate to the camera’s menu, find the Live View settings, and turn it on.
3. Disable Auto Power Off
Most DSLR cameras have an auto power off feature that turns off the camera after a certain period of inactivity. To prevent your camera from turning off during use, disable this feature. Access your camera’s menu and locate the power settings. Look for an option to disable auto power off or set it to a longer duration.

4. Set Camera Exposure
Adjust the exposure settings on your camera to ensure proper lighting conditions for your video feed. You can set the aperture, shutter speed, and ISO manually or choose an automatic mode depending on your preferences. Experiment with different settings to find the ideal balance between brightness and image quality.
5. Sound and Focus Settings
Configuring the sound and focus settings on your camera is important for a smooth webcam experience. Disable any focus beep sounds or autofocus settings that may interfere with your streaming. Additionally, set the focus to manual mode to avoid the camera automatically adjusting focus during your video feed.
| Setting | Recommended Value |
|---|---|
| Resolution | Full HD (1920×1080) or higher |
| Frame Rate | 30 frames per second |
| White Balance | Auto |
| Picture Profile | Standard or Neutral |
| Audio Input | External microphone (if applicable) |
Once you have configured these settings on your DSLR camera, you can proceed to connect your camera to your computer and start using it as a webcam. Refer to the specific software or application you’re using for further instructions on setting up the camera as a webcam.
Installing Required Software or Drivers
To use your DSLR camera as a webcam, you will typically need to install software or drivers on your computer. This software or drivers help establish a connection between your camera and your computer, allowing you to use your camera as a webcam.

Before installing any software or drivers, it is important to check the manufacturer’s website for the latest updates and compatibility information. Different camera brands may have different software options available, so be sure to download the correct one for your camera model.
Once you have downloaded the necessary software or drivers, follow the installation instructions provided. This may involve running an installer file and following the on-screen prompts. Make sure to read and understand any license agreements before proceeding with the installation.
After the software or drivers are installed, you may need to restart your computer for the changes to take effect. Once your computer has restarted, connect your DSLR camera to your computer using a USB cable. Your camera should now be recognized as a webcam by your computer.
If your camera is not recognized or if you encounter any issues during the installation process, check the manufacturer’s website for troubleshooting guides or contact their customer support for assistance.
Overall, installing the required software or drivers is an important step in using your DSLR camera as a webcam. With the right software, you can unlock the full potential of your camera and enjoy high-quality video streaming and recording capabilities.
Setting up your Webcam Software
Before you can start using your DSLR camera as a webcam, you will need to install and configure the appropriate webcam software. Follow these steps to ensure a smooth setup process:
| Step 1: | Check your camera’s compatibility: Ensure that your DSLR camera is compatible with your computer and has the necessary firmware installed to support webcam functionality. |
| Step 2: | Install the software on your computer: Visit the manufacturer’s website or the camera’s product page to download and install the webcam software. Make sure to choose the version that is compatible with your operating system. |
| Step 3: | Connect your camera to your computer: Use a USB cable to connect your DSLR camera to your computer. Ensure that the camera is powered on and in the appropriate mode for webcam use. |
| Step 4: | Configure the software settings: Open the installed webcam software and navigate to the settings or preferences menu. From there, you may need to select your camera model and adjust settings such as resolution, frame rate, and audio input. |
| Step 5: | Test and adjust the camera output: Once the software settings are configured, test your camera by opening a video conferencing application or a webcam testing website. Check the video and audio quality, and make any necessary adjustments in the software settings to optimize the output. |
By following these steps, you will be able to properly set up your DSLR camera as a webcam and enjoy high-quality video and audio during your online meetings, live streaming sessions, or video chats.
Troubleshooting Common Issues
Using your DSLR camera as a webcam can sometimes present challenges. Here are some common issues you might encounter and how to troubleshoot them:
No video signal
If you’re not getting any video signal when you connect your DSLR camera to your computer, the first thing to check is the connection. Make sure the USB cable is securely plugged into both the camera and the computer. You may also want to try a different USB cable to see if that solves the problem.
Another potential issue could be the camera’s settings. Check the camera menu and make sure it is set to “PC” or “PTP” mode. Some cameras have a Live View option that needs to be enabled in order for the video signal to be transmitted.
Poor video quality
If the video quality from your DSLR camera is not up to par, there are a few things you can check. Firstly, make sure that your camera is set to the highest resolution and quality settings. This can usually be adjusted in the camera menu.
It’s also important to have good lighting conditions. Ensure that you are in a well-lit environment, as poor lighting can result in grainy or dark video footage. Consider using additional lighting sources or adjusting the camera’s ISO settings to improve the image quality.
Audio not working
If you’re having trouble with the audio while using your DSLR camera as a webcam, there are a few things to troubleshoot. First, ensure that the microphone on your camera is enabled and not muted. Check the camera menu for any audio settings that may need adjustment.
If you are using an external microphone, make sure it is securely connected to your camera. You may also want to check the audio settings on your computer to ensure that the correct microphone is selected as the input device.
If these troubleshooting steps don’t resolve the issue, you may want to consult the camera’s user manual or reach out to the camera manufacturer’s support team for further assistance.
Question-answer:
What is DSLR camera?
A DSLR camera, also known as a digital single-lens reflex camera, is a high-quality camera that uses a mirror and prism system to reflect light from the lens to the optical viewfinder. It allows you to have full manual control over your photography settings and produces high-resolution images.
Why would I want to use my DSLR camera as a webcam?
Using your DSLR camera as a webcam can greatly improve the video quality for online meetings, live streaming, or content creation. DSLR cameras often have better image sensors, larger lenses, and more manual control settings compared to traditional webcams, resulting in sharper and more professional-looking videos.
Can I use any DSLR camera as a webcam?
In most cases, you can use any DSLR camera as a webcam. However, not all camera models have built-in webcam functionality. You may need to check if your camera brand and model supports this feature. Additionally, you will need a compatible USB cable to connect your camera to your computer.
How do I use my DSLR camera as a webcam?
To use your DSLR camera as a webcam, you will need to install the necessary drivers and software specific to your camera brand and model. This software will usually allow your computer to recognize your camera as a webcam. You will also need to connect your camera to your computer using a USB cable. Once connected, you can select your camera as the video input device in your preferred video conference or streaming software.


