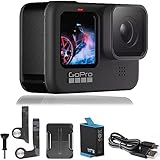
If you are a proud owner of a GoPro camera, you know how thrilling it is to capture breathtaking moments. As you continue to explore, your memory card is bound to get filled with numerous photos. However, deleting unwanted photos from your GoPro camera is just as important as capturing them. In this guide, we will walk you through the simple steps to delete photos from your GoPro camera, allowing you to free up space for new adventures.
The first step in deleting photos from your GoPro camera is to power it on and access the main menu. Once you have done that, navigate to the “Playback” option by using the arrow buttons on the camera.
Once you are in the “Playback” menu, you will see a list of your recorded media files, including both photos and videos. Use the arrow buttons to select the specific photo you want to delete. When the desired photo is highlighted, press the “Delete” button, usually represented by a trash can icon on the camera.
After you press the “Delete” button, a prompt will appear asking you to confirm whether you want to delete the selected photo. Use the arrow buttons to select “Yes” and then press the “Select” or “Enter” button to confirm the deletion. Your GoPro camera will then delete the photo and return you to the “Playback” menu, where you can continue to browse and delete other photos if desired.
Once you have successfully deleted unwanted photos from your GoPro camera, you can rest assured knowing that you have ample space for new captures. Remember to regularly review and delete unnecessary photos to keep your camera organized and ready for your next adventure. Happy shooting!

What is GoPro Camera
GoPro Camera is a compact and versatile camera that is specially designed for capturing high-quality photos and videos in action-packed situations. It is known for its rugged build and excellent image stabilization capabilities, making it a reliable choice for outdoor adventures and extreme sports.
With its small size and lightweight design, the GoPro camera can be easily attached to helmets, bikes, drones, or even held by hand. It allows users to record their experiences from unique angles and perspectives, making their footage more immersive and captivating.
The GoPro camera is equipped with advanced features such as waterproofing, voice control, and GPS, making it suitable for use in various environments and conditions. It can withstand water submersion, extreme temperatures, and other challenging elements, ensuring that users can capture their moments without worry.
Furthermore, the GoPro camera offers a wide range of shooting modes and settings, such as time-lapse, burst mode, and slow-motion, allowing users to unleash their creativity and capture stunning visuals. It also supports wireless connectivity, enabling users to transfer their photos and videos to other devices easily.
In summary, the GoPro camera is a powerful and reliable tool for capturing action-packed moments. Its compact size, durability, and advanced features make it a popular choice among adrenaline junkies, sports enthusiasts, and anyone looking to document their adventures in style.

Importance of Deleting Photos
Deleting photos from your GoPro camera is an important task that should not be overlooked. Here are a few reasons why it is important to regularly delete photos from your camera:
1. Free Up Storage Space
One of the main reasons to delete photos is to free up storage space on your GoPro camera. As you take more and more photos, your camera’s memory card can fill up quickly, leaving you with limited space to capture new moments. By deleting unwanted photos, you can create more space for new memories.
2. Organize Your Photos
Deleting photos allows you to organize your photo collection effectively. You can delete duplicates, blurry or low-quality images, or photos that are no longer relevant. This helps you keep your photo library neat and easy to navigate, making it simpler to find and enjoy your favorite moments.
In conclusion, deleting photos from your GoPro camera is not only important to free up storage space but also to organize your photo collection better. By regularly deleting photos, you can ensure that your camera is always ready for new memories and that your photo library remains tidy and well-organized.
How to Delete Photos from GoPro Camera
Deleting photos from your GoPro camera is a straightforward process. Here are the steps to follow:
- Turn on your GoPro camera by pressing the power button. Wait for it to start up.
- Access the Photos mode by pressing the mode button on the side of the camera until you see the camera icon with a wrench below it.
- Browse through the photos by using the front or back button on the camera to navigate between them.
- Select the photo you want to delete by pressing the shutter button on the top of the camera. The selected photo will have a red checkmark icon on it.
- Delete the selected photo by pressing the mode button once. The camera will display a confirmation message asking if you want to delete the photo.
- Confirm the deletion by pressing the shutter button. The selected photo will be deleted from your GoPro camera.
- Repeat steps 3 to 6 for any additional photos you want to delete.
Note: Deleted photos cannot be recovered, so make sure to double-check your selection before confirming the deletion.
By following these simple steps, you can easily delete photos from your GoPro camera and free up storage space for new captures.
Step 1: Accessing the Camera Menu
Before deleting photos from your GoPro camera, you will need to navigate to the camera menu. Accessing the camera menu is the first step towards managing your photos.
To access the camera menu, follow these steps:
| 1. | Power on your GoPro camera by pressing the power/mode button located on the front or side of the camera. The camera will start up and display the main screen. |
| 2. | Once the main screen is displayed, press the mode button repeatedly until you see the settings icon (a cogwheel) on the screen. The settings icon indicates that you have entered the camera menu. |
| 3. | Press the shutter button (the large button on the top or front of the camera) to enter the camera menu. |
After following these steps, you should now be in the camera menu, where you can navigate through different options, including the option to delete photos from your GoPro camera.
Step 2: Selecting the Photos to Delete
After connecting your GoPro camera to your computer, navigate to the folder where the photos are stored. In most cases, this folder is labeled “DCIM” or “GoPro” and can be found in the internal storage or memory card of your camera.
Once you’ve located the correct folder, open it to view the photos. You can typically browse through the photos by either double-clicking on the folder or using a photo viewing software on your computer.
Next, select the photos that you want to delete. This can be done by clicking on each photo individually or by using keyboard shortcuts to select multiple photos at once. On a Windows computer, you can hold down the “Ctrl” key while clicking on each photo to select multiple. On a Mac, you can hold down the “Cmd” key instead.
Alternatively, if you want to delete all the photos in the folder, you can press “Ctrl + A” (Windows) or “Cmd + A” (Mac) to select all the photos.
Once you have selected the photos to delete, right-click on any of the selected photos and choose the “Delete” or “Move to Trash” option from the drop-down menu. Confirm the delete action if prompted.

Keep in mind that deleting photos from your GoPro camera permanently removes them from the device, so make sure you have backed up any important photos before proceeding with the delete action.
Step 3: Confirming the Deletion
After selecting the photos or videos you want to delete, you need to confirm the deletion to remove them permanently from your GoPro camera.
1. Press the delete button
On your GoPro camera, locate the delete button, which is usually marked with a trash can icon. Press this button to open the delete confirmation screen.
2. Confirm the deletion
On the delete confirmation screen, you will see the selected files along with an option to confirm or cancel the deletion. Use the navigation buttons on your GoPro camera to select the “confirm” option.
Keep in mind that once you confirm the deletion, the selected files will be permanently removed from your GoPro camera and cannot be recovered.

Step 4: Checking for Deleted Photos
After deleting photos from your GoPro camera, it is always a good idea to double-check if the files have been successfully removed.
To check for deleted photos, follow these steps:
- Connect your GoPro camera to your computer using the USB cable.
- Open the file explorer on your computer and navigate to the “DCIM” folder on your GoPro’s storage.
- Within the “DCIM” folder, you will find multiple folders that contain your photos and videos. Open the folder that corresponds to the storage location on your GoPro (e.g., SD card).
- Verify that the photos you deleted are no longer present in the folder. You can do this by comparing the file names or checking the file properties.
If you no longer see the deleted photos in the folder, congratulations! You have successfully deleted them from your GoPro camera.
Remember to empty your computer’s recycle bin or trash to permanently delete the files and free up storage space on your computer.
| Note: | It is essential to have a backup of your photos before deleting them from your GoPro camera to prevent data loss. |
Tips for Deleting Photos
When it comes to deleting photos from your GoPro camera, it’s important to follow some basic tips to ensure a smooth and efficient process. Here are some things to keep in mind:

1. Double-check before deleting
Before you start deleting photos from your GoPro camera, make sure to double-check and ensure that you have transferred all the photos you want to keep to a safe location, such as your computer or cloud storage. Once you delete them from your camera, they may be gone forever.
2. Use the delete function on your camera
GoPro cameras typically have a built-in function to delete photos. This function is usually accessed through the camera’s menu system. Use this function, rather than formatting the entire memory card, as it allows you to select and delete individual photos or batches of photos.
3. Be selective
Instead of deleting all the photos at once, take your time to go through each photo and select the ones you want to delete. This way, you can avoid accidentally deleting any important or memorable shots.
4. Format your memory card periodically
Formatting your memory card periodically can help improve the overall performance and lifespan of your card. However, make sure to do this only after you have transferred all the photos you want to keep. Formatting will delete all the photos on the card, so it’s important to have them backed up first.
5. Use caution with third-party software
While there are third-party software available that claim to help delete photos from your GoPro camera, it’s important to use caution when using them. Some software may be unreliable or even damage your camera or memory card. Stick to the built-in delete function or the official GoPro software for the best and safest results.
By following these tips, you can confidently delete photos from your GoPro camera without any hassle or risk of losing important memories. Remember to always back up your photos before deleting them, and use caution when using any external software. Happy shooting!
Backup Your Photos
It is always a good idea to back up your photos before deleting them from your GoPro camera. This ensures that you have a copy of your photos in case anything goes wrong during the deletion process or if you accidentally delete a photo that you didn’t mean to.
There are different ways you can back up your photos:
1. Use a Computer
You can connect your GoPro camera to your computer using a USB cable and transfer the photos to your computer’s hard drive. This will create a copy of your photos on your computer, which you can then back up to an external hard drive or cloud storage.
2. Use an External Hard Drive
If you have an external hard drive, you can transfer your photos directly from your GoPro camera to the external hard drive. This is a great option if you have a large number of photos or if you prefer to keep your photos stored separately from your computer.
3. Use Cloud Storage
Cloud storage services like Google Drive, Dropbox, or iCloud offer convenient and secure ways to back up your photos. You can upload your photos to the cloud storage service using your computer or a mobile app, and access them from any device with internet access.
Whichever method you choose, make sure to check that your photos have been successfully transferred or uploaded before deleting them from your GoPro camera. It’s always better to be safe than sorry!
| Pros | Cons |
|---|---|
| Creates a copy of your photos on your computer | Requires a computer |
| Allows for easy organization and access to your photos | Requires an external hard drive |
| Provides convenient and secure storage options | Requires an internet connection for cloud storage |
Question-answer:
Can I recover the photos I accidentally deleted from my GoPro camera?
Unfortunately, once you delete photos from your GoPro camera, they are permanently removed and cannot be recovered directly from the camera itself. However, if you had previously backed up your photos to a computer, cloud storage, or another device, you may be able to recover them from there. It’s always a good practice to regularly back up your important photos to prevent permanent loss in case of accidental deletion or camera malfunction.