
Do you love photography and enjoy experimenting with different techniques? Have you ever tried using a pinhole camera? Pinhole cameras are simple yet fascinating devices that can capture unique and dreamy images. And the best part is, you can easily make one yourself! In this article, we will guide you through the process of creating your own pinhole camera using instant film.
What is a pinhole camera?
A pinhole camera is a basic camera without a lens that uses a tiny aperture instead. The concept dates back to ancient times, but today, many photographers still use pinhole cameras to create artistic and lo-fi photographs.
Gather your materials
To create your own pinhole camera, you will need a few simple materials:

- A lightproof container (such as a shoebox or tin can)
- Black paint or tape to make the inside of the container lightproof
- Aluminum foil
- A sewing needle or pin
- A ruler or measuring tape
- Instant film (such as Polaroid or Fuji Instax)
With these materials in hand, you are ready to start building your pinhole camera! Follow the steps below to create your own unique photography tool.
Step 1: Prepare the container
The first step is to ensure that your container is lightproof. Use black paint or tape to cover the inside of the container completely. This will prevent any unwanted light from entering and ruining your photos.
Step 2: Create the pinhole
Using a sewing needle or pin, carefully make a tiny hole in the center of one end of the container. You can use a ruler or measuring tape to ensure that the hole is approximately 0.2 mm in diameter. This small hole will act as your camera’s aperture.
Note: The size of the pinhole will affect the sharpness and exposure of your photos. Experiment with different sizes to achieve the desired effect.
Step 3: Attach the aluminum foil
Cut a small piece of aluminum foil that is slightly larger than the pinhole. Place the foil over the pinhole and secure it tightly with tape. Make sure it is smooth and free of wrinkles to allow for optimal light transmission.
Step 4: Load the film
Open the back of your instant film pack and carefully load a sheet of film into the container. Close the back of the container, ensuring that it is lightproof.

Step 5: Capture your photos
Find a suitable subject and point your pinhole camera towards it. Keep in mind that pinhole cameras have a long exposure time, so it’s best to use a tripod or stabilize the camera on a steady surface. Press the shutter release and wait for the exposure to complete.
Note: Experiment with different exposure times and compositions to create unique and artistic photographs.
So, why not give pinhole photography a try? With just a few materials and some instant film, you can create your own unique pinhole camera and capture stunning images in a truly analog fashion. Enjoy the process and let your creativity soar!
What is a pinhole camera?
A pinhole camera is a simple camera that uses a small hole instead of a lens to create an image. It works on the principle of light passing through a small opening and projecting an inverted image onto the film or image sensor. The pinhole acts as the aperture, allowing light to enter the camera and expose the film or sensor.

Pinhole cameras are a great way to experiment with photography and understand the fundamentals of how a camera works. They have been around for centuries and were used by early photographers before the invention of modern lenses.
The basic components of a pinhole camera include a light-tight box or container, a small hole or aperture, and a film or image sensor to capture the image. The size of the hole affects the sharpness and clarity of the image, with smaller holes producing sharper images but requiring longer exposure times.
One of the advantages of a pinhole camera is its simplicity and the ability to create unique, artistic images. The lack of a lens gives the images a distinct look, with a wide depth of field and a dream-like quality.
Pinhole cameras can be made using everyday materials and are a fun project for photography enthusiasts of all ages. They can be used with instant film, allowing you to see the results immediately, or with traditional film that needs to be developed before viewing.
Overall, pinhole cameras are a great way to learn about photography and experiment with different techniques. They offer a unique and creative approach to image creation, and can produce stunning photographs with a unique aesthetic. So why not give it a try and make your own pinhole camera?
Why use instant film?
Instant film photography offers a unique and tangible experience that captures the essence of the moment. There are several compelling reasons to use instant film in your pinhole camera:
- Immediate Results: With instant film, you can see the result of your photograph right away. There is no need to wait for the film to be developed or processed.
- Tactile enjoyment: Holding a physical print in your hands provides a different level of appreciation and enjoyment compared to just viewing digital images on a screen.
- Authentic vintage aesthetics: Instant film can add a nostalgic and vintage feel to your photographs, reminiscent of the old Polaroid cameras.
- One-of-a-kind prints: Each instant film print is unique and cannot be duplicated exactly. This adds a special charm and exclusivity to your photos.
- No technical skills required: Instant film photography is straightforward and does not require any technical knowledge or post-processing skills.
- Social sharing: Instant film prints can be easily shared with friends and family, whether as physical prints or scanned and shared digitally.
Overall, instant film allows you to capture a moment and have a physical print to hold and share, creating a memorable and personal experience that digital photography cannot replicate.
Materials Needed
Before you start making your pinhole camera with instant film, make sure you have the following materials:
- An empty shoebox or a similar sturdy box
- Black duct tape or electrical tape
- A piece of aluminum foil
- A sewing needle or a small pin
- Instant film pack
- Scissors
- A ruler
- A marker or a pen
- A dark room or a changing bag
- A tripod (optional but recommended)
These materials are essential for creating your pinhole camera and capturing images with instant film. Make sure you gather all the necessary items before you begin the process.
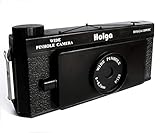
Camera Body
The camera body is the main structure of the pinhole camera. It holds all the components together and provides stability. In order to make a pinhole camera, you will need to find a suitable container to use as the camera body.

Material: You can use a variety of materials to create the camera body. Some popular options include cardboard boxes, tin cans, shoeboxes, or even wooden boxes.
Size: The size of the camera body will depend on your personal preference and the size of the film you plan to use. If you are using instant film, make sure the camera body is large enough to accommodate the film.
Lightproof: It is important to ensure that the camera body is completely lightproof. Any light leaks can ruin your images. You can achieve this by painting the inside of the camera body with black paint or using black tape to cover any potential gaps.
Assembly: Once you have chosen a suitable container, you will need to assemble the camera body. Cut any excess material, such as flaps or lids, and make sure the container is clean and free from any debris. Use strong glue or tape to secure all the edges and corners.
Optional Features: You can also consider adding additional features to your camera body, such as a viewfinder or a tripod mount. These features can enhance your shooting experience and make it easier to compose your shots.
Black tape
Black tape is an essential component when making a pinhole camera with instant film. It serves as a light barrier that prevents unwanted light from entering the camera and ruining the exposure.
When constructing the pinhole camera, it’s important to choose a tape that is thick enough to block out any light. Black electrical tape is often a popular choice due to its adhesive properties and opacity. The tape should be placed over any gaps or seams in the camera to create a light-tight seal.
Note: It’s crucial to carefully apply the black tape to ensure it doesn’t obstruct the pinhole or cover any necessary openings. The goal is to have a precisely controlled pinhole for sharp images.
Before loading the instant film into the camera, double-check that all edges and seams are securely taped to prevent light leaks. Always keep extra black tape on hand in case repairs are needed.
Remember, the success of your pinhole camera project relies on the proper use of black tape to maintain a light-tight environment. Take your time and be meticulous in its application to achieve the desired results.
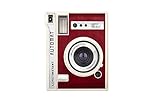
Instant film
Instant film, also known as Polaroid film, is a type of photographic film that can produce a developed image within minutes of capturing a photo. This type of film is often used with vintage and instant cameras, and it is popular among photography enthusiasts for its unique and quick development process.
How instant film works
Instant film consists of several layers that work together to capture and develop an image. When a photo is taken, the light passes through the lens of the camera and exposes the film. The exposed film is then processed inside the camera by a chemical mixture, which creates a negative image.
Next, the negative image is transported to a second layer of the film called the developer layer. This layer contains chemicals that react to the light and heat, causing the negative image to dissolve and develop into a positive image. The image is then visible on the film surface, and it continues to develop over time.
Advantages of instant film
There are several advantages to using instant film. Firstly, it provides instant gratification as the photo develops within minutes, allowing photographers to see their captured images almost immediately.
Instant film also creates a unique vintage look with its distinct color palettes and texture. This aesthetic is often sought after for artistic purposes and is a favorite among creative photographers.
Additionally, instant film is a tangible medium that produces physical prints, unlike digital photography which often remains in the digital realm. This tangible aspect of instant film allows for a more personal and interactive experience, as photographers have a physical representation of their art that they can hold and share with others.
Overall, instant film offers a nostalgic and artistic approach to photography, making it a popular choice among both amateurs and professionals.
Building the Camera
To build your pinhole camera, you will need the following materials:
- A sturdy cardboard box with a removable lid
- A small piece of aluminum foil
- A needle or pin
- A ruler
- A pencil
- Scissors
- Tape
- Black construction paper
- Instant film
1. Start by measuring and marking the center of one of the shorter sides of the box with a pencil.
2. Use the needle or pin to poke a small hole in the center of the marked spot. Make sure the hole is smooth and does not have any rough edges.
3. Cut a square piece of aluminum foil that is slightly larger than the hole you just created. Tape the foil over the hole, making sure it is flat and secure.
4. On the longer side of the box, measure and mark a rectangle that is slightly larger than the instant film you will be using. Cut out the rectangle, leaving a frame of cardboard around the edge.
5. Inside the box, line the sides and bottom with black construction paper to prevent unwanted light from entering the camera.
6. Attach the lid of the box securely using tape. Make sure it fits tightly to keep out light leaks.
7. Your pinhole camera is now ready to use! Load the instant film into the frame you created and close the lid. To take a photo, remove the tape covering the pinhole, aim the camera at your subject, and replace the tape to cover the pinhole again.
Remember, building a pinhole camera requires precision and patience. Take your time and enjoy the process of creating your own unique camera!
Create the camera body
To make a pinhole camera with instant film, you will need a lightproof box to house the film and create a controlled exposure. You can easily create a camera body using materials that are readily available.
Materials:
- A small cardboard box
- Black duct tape or black paint
- A ruler
- A pencil
- A pin or needle
Instructions:
- Choose a small cardboard box that is large enough to fit your instant film.
- Use a ruler to measure and mark the dimensions of your instant film on one side of the box.
- Cut out the marked area using a sharp knife or scissors.
- Apply black duct tape or paint the inside of the box with black paint to make it lightproof.
- On the side opposite to the film opening, make a small pinhole using a pin or needle. This will act as the camera’s lens.
- Ensure that the pinhole is small and precise to achieve a sharper image.
- Cover the pinhole with a small piece of aluminum foil and secure it with tape.
- Your camera body is now complete and ready for use!
Note: Ensure that your camera body is completely lightproof to prevent any unwanted light from entering and ruining your photos. Test your camera by illuminating the pinhole side with a bright light source. If you see any light leaks, cover them with additional black tape or paint.
Make the pinhole
Once you have gathered all the necessary materials, it’s time to make the pinhole for your camera. The pinhole is what allows light to enter the camera and create the image. Here is how you can make your own pinhole:
Step 1: Prepare the materials
Before you begin, make sure you have the following materials:
- A piece of thick aluminum foil
- A small needle or pin
- A small piece of sandpaper
- A tape
Step 2: Create the pinhole
- Take the piece of aluminum foil and cut a small square, around 2×2 centimeters.
- Use the sandpaper to gently sand one side of the aluminum foil square. This will make it smoother and easier to work with.
- Once sanded, tape the aluminum foil square to a flat surface, with the sanded side facing up.
- Take the needle or pin and carefully poke a tiny hole in the center of the aluminum foil. This will be your pinhole.
- Make sure the hole is round and clean. You can use the needle or pin to gently shape it if needed.
- Remove the tape from the aluminum foil square and carefully peel it off the flat surface.
- Your pinhole is now ready to be used in your pinhole camera.
Remember to handle the aluminum foil with care to avoid bending or damaging the pinhole. Now that you have made the pinhole, you can proceed to the next steps of assembling and using your pinhole camera with instant film.
Question-answer:
What materials do I need to make a pinhole camera with instant film?
To make a pinhole camera with instant film, you will need a cardboard box or any light-tight container, instant film, aluminum foil or a thin piece of metal, a pin, tape or glue, and a darkroom or a dark bag.
Can I use any type of instant film for the pinhole camera?
Yes, you can use any type of instant film for your pinhole camera. However, make sure the film size matches the size of your pinhole camera and that it is compatible with the camera’s film holder.


