Photography has always been a fascinating form of art. It allows us to capture moments, freeze time, and share our unique perspective with the world. In the digital age, where everyone has a smartphone with a camera, instant photography stands out as a retro and charming way to capture memories. If you’re a fan of vintage aesthetics and want to experiment with instant photography, the Lomo Instant Camera is the perfect choice.
The Lomo Instant Camera is a throwback to the days of film photography. It combines the thrill of instant gratification with the unpredictability of analog cameras. With its compact size and easy-to-use features, it’s a great companion for both seasoned photographers and beginners looking to explore the world of instant photography.
So, how can you make the most out of your Lomo Instant Camera? The first step is to understand its unique features and functions. This camera allows you to adjust the aperture, shutter speed, and exposure settings, which gives you full control over the outcome of your photos. It also offers multiple shooting modes such as long exposure and multiple exposures, allowing you to experiment and create stunning images.
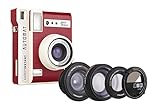
One of the key features of the Lomo Instant Camera is its ability to add creative effects to your photos. It comes with color gel filters that you can attach to the flash to create different lighting effects. Additionally, you can use the lens attachments to switch between wide-angle, fisheye, and close-up shots, adding variety to your instant photography adventures.
Whether you’re capturing a portrait, a landscape, or an everyday moment, the Lomo Instant Camera allows you to express your creativity and individuality. So grab your camera, load it with some instant film, and start capturing memories in a unique and nostalgic way. Embrace the imperfections, embrace the surprises, and let the Lomo Instant Camera take you on a journey of artistic self-expression.
Understanding the Lomo Instant Camera
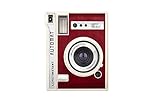
The Lomo Instant Camera is a unique piece of equipment that allows you to capture instant photographs with a distinctive and nostalgic look. It is inspired by the original Lomo cameras that gained popularity in the 1990s and aims to bring back the joy and surprise of instant photography.
Here are some key features and characteristics of the Lomo Instant Camera that you should be aware of:
- Three Shooting Modes: The camera offers three different shooting modes – auto mode for quick and easy shooting, bulb mode for long-exposure shots, and split mode for multiple exposures in a single frame.
- Built-in Wide-Angle Lens: The Lomo Instant Camera comes with a built-in wide-angle lens, allowing you to capture more in each frame and create a unique perspective.
- Multiple Exposure Capability: With the Lomo Instant Camera, you can easily create multiple exposure photos by simply pressing the MX button and capturing different shots on the same frame.
- Color Gel Filters: The camera includes color gel filters that you can use to add a creative twist to your photos. These filters can be easily attached to the camera’s flash and create vibrant and unique color effects.
- Instant Film: The Lomo Instant Camera uses Fujifilm Instax Mini film, which is widely available and produces credit-card-sized prints in just a few minutes. The film is easy to load and provides instant gratification.
- Manual Control: While the camera offers automatic shooting modes, it also allows for manual control, giving you the freedom to adjust the exposure, flash, and focus settings according to your preferences.
By understanding these features and characteristics of the Lomo Instant Camera, you will be able to make the most out of this unique device and capture stunning instant photographs with a touch of nostalgia.
Choosing the Right Film for Your Lomo Instant Camera
Choosing the right film for your Lomo Instant Camera is an important step in achieving the perfect shot. Different types of film can create different effects and enhance the overall mood and aesthetic of your photos. Here are a few key factors to consider when selecting the film for your Lomo Instant Camera:
- Film Speed: Film speed refers to the film’s sensitivity to light. Higher film speeds, such as ISO 400 or higher, are ideal for low-light conditions or when you want to capture fast-moving subjects. Lower film speeds, like ISO 100, are better suited for brightly lit environments with slower subjects.
- Color or Black and White: Decide whether you want to shoot in color or black and white. Color film can add a vibrant and playful touch to your photos, while black and white film creates a classic and timeless feel. Consider the mood and subject of your photos when making this decision.
- Contrast: Different films have varying levels of contrast. Some films produce high contrast images with bold colors and strong shadows, while others create softer, more muted tones. Consider the desired aesthetic and mood of your photos when selecting a film with the right level of contrast.
- Special Effects: Lomo Instant Cameras offer a variety of special films that can add unique effects to your photos. From psychedelic colors to vintage-style sepia tones, these films allow you to experiment and get creative with your shots. Consider trying out different special effect films to add a touch of artistic flair to your photographs.
Remember, experimenting with different films is part of the fun when using a Lomo Instant Camera. Don’t be afraid to try out different combinations and see which film works best for your desired aesthetic. Happy shooting!

Mastering the Exposure Settings
The Lomo Instant Camera allows you to manually adjust the exposure settings to capture the perfect shot. Here are some tips to help you master the exposure settings:
1. Understanding Exposure
Exposure refers to the amount of light that reaches the film or sensor in your camera. It determines the brightness or darkness of your photo. A well-exposed photo has a balanced combination of highlights, midtones, and shadows.
2. Adjusting the Exposure Settings
The Lomo Instant Camera offers three exposure settings: +2, 0, and -2. These settings allow you to control the amount of light that enters the camera. Here’s what each setting means:
- +2: This setting lets in more light, making your photo brighter. It is ideal for outdoor shots or well-lit environments
- 0: This setting is the default exposure. It captures the scene as it is, without any adjustments.
- -2: This setting reduces the amount of light, resulting in a darker photo. It is suitable for low-light situations or when you want to create a moody atmosphere.
Experiment with each exposure setting to see how it affects your photos. You can switch between the settings by rotating the exposure dial located on the front of the camera.
Remember, the exposure settings are not the only factor that affects the final result. Other factors like the film type, distance to the subject, and lighting conditions also play a role. Therefore, it’s important to practice and experiment to find the perfect combination for each situation.

Getting Creative with Multiple Exposures
Taking pictures with the Lomo Instant camera is all about embracing experimentation and creativity. One of the most exciting features of this camera is the ability to create multiple exposures in a single frame.
A multiple exposure is created when you take two or more pictures on the same frame without advancing the film. This technique allows you to combine different images to create unique and surreal effects.
To create a multiple exposure with the Lomo Instant camera, follow these steps:
- Select a subject or scene that you want to capture in your first exposure.
- Compose your shot and press the shutter button to take the first picture.
- Without advancing the film, select a different subject or scene for your second exposure.
- Compose your shot and press the shutter button again to take the second picture.
- Repeat these steps if you want to add more exposures.
- Once you’ve finished capturing all the desired exposures, advance the film to the next frame.
When combining multiple exposures, keep in mind that the final result will be a combination of all the images. Experiment with different subjects, angles, and compositions to create interesting and unexpected combinations.
Another technique you can try with multiple exposures is to create a “ghost” effect. This effect is achieved by capturing a moving subject in one exposure and a stationary subject in another. The moving subject will appear translucent in the final image, creating a ghostly effect.

Remember, the key to successful multiple exposures is to embrace experimentation. Don’t be afraid to try different things and have fun with your Lomo Instant camera!
| Tip | Description |
|---|---|
| Try different compositions | Experiment with overlapping subjects or create unique patterns. |
| Use different exposure settings | Play with the camera’s exposure controls to achieve different effects. |
| Combine different types of subjects | Mix landscapes, portraits, and still life to create interesting contrasts. |
| Adjust the aperture | Experiment with different aperture settings to control the depth of field in your multiple exposures. |
Taking Stunning Close-Up Shots
One of the great features of the Lomo Instant camera is its ability to capture stunning close-up shots. Whether you want to capture the intricate details of a flower or the expressions on someone’s face, close-up shots can add depth and interest to your photos.
Here are a few tips for taking stunning close-up shots with your Lomo Instant camera:
- Get up close: To capture the details, make sure to get as close to your subject as possible. The Lomo Instant camera has a close-up lens attachment that allows you to get within 0.3m of your subject, so take advantage of it!
- Focus carefully: With close-up shots, it’s important to have the right focus. Use the focusing distance settings on your Lomo Instant camera to ensure that your subject is sharp and clear.
- Pay attention to lighting: Lighting can make or break a close-up shot. Experiment with different angles and natural light sources to find the right lighting that showcases the details and textures of your subject.
- Experiment with composition: Play around with different angles, perspectives, and framing to create interesting compositions. Don’t be afraid to get creative and try different approaches to capture the essence of your subject.
- Take multiple shots: Close-up shots can be unpredictable, so take multiple shots to increase your chances of getting the perfect one. Experiment with different settings, angles, and compositions to capture a variety of shots.
By following these tips, you’ll be able to capture stunning close-up shots with your Lomo Instant camera. Remember to experiment and have fun while exploring the world of close-up photography!
Using the Lomo Instant Camera’s Built-In Filters
The Lomo Instant Camera is equipped with built-in filters that allow you to add various effects to your photos. These filters can help you create unique and artistic shots with a vintage feel. Here are some tips on how to use the filters effectively:
1. Familiarize yourself with the filters
Before you start taking pictures, take some time to understand the different filters available on your Lomo Instant Camera. Each filter has its own characteristics and can dramatically change the look and feel of your photos. The most common filters include black and white, sepia, and vibrant colors. Experiment with each filter to see how it affects your shots.
2. Consider the lighting conditions
The Lomo Instant Camera’s filters can have a significant impact on how your photos turn out, especially when it comes to lighting conditions. Some filters work better in natural light, while others are more suitable for indoor or low-light situations. Take note of the lighting conditions and choose a filter that complements the scene for the best results.
3. Use the filters creatively
Don’t be afraid to get creative with the Lomo Instant Camera’s filters. Experiment with different combinations and techniques to achieve unique effects. For example, try double exposures with different filters to create a dreamy and surreal look. Play around with the exposure settings and make use of the camera’s multiple exposure feature to capture stunning and unconventional shots.
Remember, the beauty of the Lomo Instant Camera’s filters is that they allow you to add a personal touch to your photos. Embrace the imperfections and unpredictable nature of instant photography, and let your creativity shine through.
Capturing Unique Perspectives and Angles
One of the key features of the Lomo Instant camera is its ability to capture unique and interesting perspectives and angles. To make the most of this feature, try experimenting with different angles and positions to create one-of-a-kind shots.

Here are some tips to help you capture unique perspectives and angles with your Lomo Instant camera:
- Get down low: Try shooting from a low angle to give your photos a unique and dramatic perspective. This technique works particularly well when shooting subjects such as landscapes or buildings.
- Look up: Look for interesting objects or patterns above you and shoot from below. This can create a sense of depth and make your photos more visually engaging.
- Try a different point of view: Instead of shooting from eye-level, try crouching down or standing on a higher surface to change the perspective. This can lend a fresh and unexpected look to your photos.
- Experiment with framing: Play around with framing your subject in unusual ways to add visual interest to your photos. For example, you can use architectural elements or natural objects such as trees or branches to frame your subject.
- Move around your subject: Instead of just shooting your subject head-on, try moving around it to find a more interesting angle. By changing your position, you can discover new perspectives and create more dynamic photos.
- Use reflections: Look out for reflective surfaces such as glass windows or puddles and capture reflections of your subject. This can add depth and a unique touch to your photos.
- Get close: Experiment with getting up close to your subject to capture details and textures that may go unnoticed from a distance. This can bring a new level of intimacy and focus to your photos.
- Shoot through objects: Look for objects such as fences, curtains, or foliage that you can shoot through to add depth and layers to your photos. This technique can create a dreamy or surreal effect.
Remember, the beauty of using a Lomo Instant camera is the freedom to experiment and embrace imperfections. Don’t be afraid to try new angles and perspectives to create truly unique and captivating photos.
Experimenting with Different Lighting Conditions
One of the fascinating aspects of the Lomo Instant camera is its versatility in capturing unique and creative photos in various lighting conditions. By experimenting with different lighting conditions, you can create stunning and artistic images that truly stand out.
1. Natural Lighting
When taking pictures with the Lomo Instant camera in natural lighting, such as outdoor landscapes or sunny days, you can expect vibrant and vivid colors. Natural light can create dynamic shadows, enhance textures, and bring out the details in your subjects. Try shooting during the golden hour, which occurs just after sunrise or before sunset, for soft and warm lighting that adds a magical touch to your photos.
2. Indoor Lighting
Indoor lighting provides a different set of challenges and opportunities when using the Lomo Instant camera. Experiment with different types of indoor lighting, such as incandescent, fluorescent, or candlelight, to create different moods and effects. Playing with shadows and highlights can add drama and depth to your photos. Additionally, you can use practical lighting techniques, such as bouncing light off walls or using diffusers, to create softer and more flattering lighting.

Remember, the Lomo Instant camera is designed to embrace imperfections and unique characteristics, so don’t be afraid to experiment and push the boundaries. Whether it’s low light conditions or intense artificial lighting, each scenario offers a chance to create something truly extraordinary.
Tips and Tricks for Framing your Shots
Framing your shots is crucial when using a Lomo Instant Camera to ensure you capture the desired scene effectively. Here are some tips and tricks to consider:
- Rule of Thirds: Divide your frame into thirds horizontally and vertically. Position your subject or point of interest where the lines intersect, creating a more balanced and visually appealing composition.
- Foreground Interest: Include an interesting element in the foreground to add depth and create a sense of perspective in your photo. This could be a tree branch, a landmark, or any object that complements your subject.
- Leading Lines: Utilize natural or man-made lines to lead the viewer’s eye through the photo. This could be a road, a river, or a row of buildings. Leading lines add depth and guide the viewer’s attention to the main subject.
- Frame within a Frame: Look for natural frames within your environment, such as an archway, a window, or tree branches. Framing your subject within these elements can create a unique and visually interesting composition.
- Experiment with Angles: Don’t be afraid to try different angles and perspectives. Capture your subject from below, above, or from unconventional angles to add visual interest and alter the viewer’s perception of the scene.
- Negative Space: Consider using negative space to emphasize your subject and create a minimalist composition. Leave empty space around your subject to draw attention to it and evoke a sense of simplicity.
Remember, photography is an art form, and with practice, you can develop your own style and unique way of framing shots. Explore different techniques, have fun, and let your creativity shine through your Lomo Instant Camera!
Developing and Sharing your Lomo Instant Camera Photos
After capturing stunning moments with your Lomo Instant Camera, it’s time to bring your photos to life by developing and sharing them. Follow these steps to enhance your Lomo experience:
1. Get Your Films Developed
Once your film roll is complete, it’s time to have it developed. You can develop your Lomo Instant Camera photos at your local photo lab or opt for online services that offer film developing. Remember to choose a service that specializes in analogue photography to ensure the best results.
2. Digitize Your Photos
To share your Lomo Instant Camera photos online, you’ll need to digitize them. There are several ways to do this:
- Scan your developed prints using a flatbed scanner. Adjust the settings to a high resolution for the best image quality.
- Use a dedicated film scanner to scan your developed negatives directly. This method allows for better control and higher quality results.
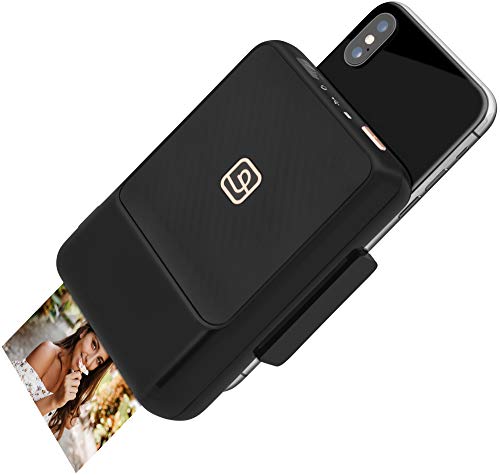
- Invest in a smartphone film scanner. These portable devices allow you to digitize your photos directly from your smartphone, making it convenient and easy to share your Lomo shots on social media.
3. Edit and Enhance
Once your Lomo Instant Camera photos are digitized, you can edit and enhance them to achieve the desired look. Use photo editing software like Adobe Photoshop or Lightroom to adjust the exposure, contrast, saturation, and other parameters. Experiment with different filters and effects to add a unique touch to your Lomo shots.
4. Share on Social Media
Now that your Lomo Instant Camera photos are developed and edited, it’s time to share them with the world. Create an account on popular social media platforms like Instagram, Flickr, or 500px to showcase your Lomo skills. Add relevant hashtags and engage with the photography community to gain exposure and feedback on your work.
Remember, the joy of Lomo photography lies in its experimental and unconventional nature. Embrace imperfections, unusual colors, and unexpected results as they are part of the Lomo charm. Now go out and capture more captivating moments with your Lomo Instant Camera!
Question-answer:
What is a lomo instant camera?
A lomo instant camera is a type of instant camera that is designed to capture creative and artistic photographs with a unique and retro effect.
How does a lomo instant camera work?
A lomo instant camera works by using instant film to capture an image. When you press the shutter button, the camera exposes the film to light, causing a chemical reaction that develops the image instantly.