
If you are a photography enthusiast or simply want to capture moments in a unique way, a mini 8 instant film camera is the perfect tool for you. This compact and portable camera allows you to instantly print photos and hold them in your hands, bringing back the nostalgic feeling of polaroid photography. Whether you are a beginner or an experienced photographer, learning how to use a mini 8 instant film camera is simple and enjoyable.
First, you need to load the film into the camera. Open the back of the camera by sliding the latch on the side and insert the film cartridge. Make sure the yellow mark on the film aligns with the yellow mark inside the camera. Close the back of the camera and adjust the brightness dial on the lens to the recommended setting according to the lighting conditions.
Once your film is loaded and your camera is ready, look through the viewfinder to frame your shot. The mini 8 instant film camera has a built-in automatic exposure measurement feature, so it will suggest the optimal aperture setting by lighting up one of the four indicators (indoors, cloudy, sunny, very sunny). Adjust the dial accordingly or use the manual setting if you prefer more control over your exposure.
When you are ready to take a picture, press the shutter button located on the front of the camera. The photo will automatically be ejected from the top of the camera, and you will need to wait a few seconds for it to develop. Avoid shaking or touching the photo during this process to ensure the best quality print. Once the photo is fully developed, you can enjoy your instant print and share it with others.
Using a mini 8 instant film camera is a fun and creative way to capture memories. Experiment with different settings and techniques to achieve your desired results. Remember to always carry extra film cartridges with you, as the instant film can run out quickly. So grab your mini 8 instant film camera and start capturing moments that will last a lifetime!

Choosing the Right Mini 8 Instant Film Camera
When it comes to instant film cameras, the Mini 8 is a popular choice. With its compact size and easy-to-use features, it’s perfect for capturing memories on the go. However, before purchasing a Mini 8 instant film camera, there are a few factors to consider to ensure you choose the right one for your needs.
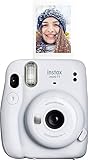
- Available Colors: The Mini 8 instant film camera comes in a variety of fun colors, such as pink, blue, yellow, and white. Consider choosing a color that reflects your personal style and preferences.
- Camera Features: While the Mini 8 camera is relatively simple to use, it still offers some features that can enhance your photography experience. For example, some models may include a built-in selfie mirror or a high-key mode for brighter, softer photos. Review the different features available and choose the ones that are important to you.
- Film Compatibility: The Mini 8 instant film camera uses Fujifilm Instax Mini film, but it’s important to note that there are different film formats available. Make sure to check if the camera you’re interested in is compatible with the specific film format you prefer. Additionally, consider the availability and cost of film in your area.
- Price: Instant film cameras can vary in price, with the Mini 8 being a more budget-friendly option compared to higher-end models. Set a budget for yourself and choose a camera that fits within your price range.
- Reviews and Ratings: Before making a final decision, it’s always a good idea to read reviews and check the ratings of the Mini 8 instant film camera. This can give you insight into the experiences of other users and help you determine if the camera meets your expectations.
By considering these factors, you can ensure you choose the right Mini 8 instant film camera for your needs. Whether you’re a beginner looking to explore instant photography or a seasoned enthusiast, the Mini 8 is a versatile and fun camera that can capture memories in an instant.
Tips for Properly Loading Instant Film into the Camera
Using a Mini 8 instant film camera can be a fun and exciting way to capture and share special moments. To ensure the best results, it’s important to properly load the instant film into the camera. Here are some tips to help you get started:
1. Choose a clean and dry environment: It’s essential to load the instant film in a clean and dry area to prevent dust or moisture from damaging the film.
2. Remove the camera back cover: Open the camera back by sliding the lock switch and gently lifting the cover. Make sure to handle the camera and film with clean, dry hands to avoid smudges or fingerprints.

3. Insert the film pack: Take the film pack and align the yellow marks on the film pack and camera. Slowly and carefully insert the film pack into the camera until it clicks into place.
4. Pull out the film cover: Once the film pack is in place, pull out the protective film cover from the camera. Ensure that the cover comes out smoothly and completely.
5. Close the camera back: Gently press the camera back cover down until it locks into place. Make sure it is securely closed to prevent light leaks.
6. Prepare the first shot: After loading the film, advance the film counter by rotating the lens until it reaches “1”. This will activate the first exposure for capturing your instant photo.
7. Avoid exposure to light: Throughout the film loading process, it’s important to avoid exposing the film to direct sunlight or bright lights. This can result in overexposed or damaged photos.

8. Test shot: Consider taking a test shot before capturing important moments to ensure the camera is functioning correctly and the film is loaded properly.
By following these tips, you can confidently load instant film into your Mini 8 camera and start creating beautiful memories with ease.
Adjusting the Settings for the Perfect Shot
When using a mini 8 instant film camera, getting the perfect shot requires adjusting the settings properly. Here are some tips to help you achieve the best results:
1. Light Adjustments
The mini 8 camera is equipped with different light settings to ensure the right exposure for your photos. It has a built-in light meter that measures the available light and suggests the appropriate setting. The camera has four main settings: Indoors, Cloudy, Sunny, and Very Sunny. Choose the setting that matches the lighting conditions in your environment for optimal results.
2. Focus Adjustments
Getting a sharp and focused image is crucial for a great shot. The mini 8 camera has a fixed focus lens that is set to capture subjects between 2 feet to infinity. To ensure your subject is in focus, make sure it falls within this range. If you’re taking a close-up shot, keep the subject at least 2 feet away to avoid blurriness.

3. Selfie Mode
If you’re taking a selfie or a close-up shot, the mini 8 camera has a special mode for that. Simply pull out the lens barrel until the “Selfie” mark appears and adjust your composition accordingly. This mode helps you capture stunning self-portraits and close-up shots with ease.
4. Flash Adjustments
The mini 8 camera comes with a built-in flash that automatically adjusts to the lighting conditions. However, sometimes you may want to control the flash manually. You can do this by using the flash adjustment button located next to the lens. Pressing the button once will activate the flash, while pressing it twice will deactivate it. Experiment with different flash settings to achieve the desired lighting effect for your photos.
Remember, practice makes perfect. Familiarize yourself with the mini 8 camera and its settings, and don’t be afraid to experiment. With time, you’ll develop your own style and capture breathtaking instant photos.
Understanding the Different Modes on the Mini 8
The Mini 8 instant film camera offers several different modes to help you capture the perfect shot in any situation. Understanding these modes can help you achieve the best results and make the most out of your camera.
1. Indoor Mode:

This mode is designed to enhance your photos when shooting indoors or in low-light conditions. It adjusts the flash and exposure settings to help capture clear and well-lit images. This mode is indicated by a small house icon.
2. Cloudy Mode:
When shooting on a cloudy or overcast day, the Cloudy mode is your best option. It compensates for the lack of natural light and helps to create more vibrant and well-exposed photos. This mode is indicated by a cloud icon.
3. Sunny Mode:
For sunny outdoor locations, the Sunny mode produces crisp and clear photos with a balanced exposure. It is the default mode when shooting under normal lighting conditions, and it is indicated by a sun icon.
4. Hi-Key Mode:
If you want to add a soft and bright look to your images, the Hi-Key mode is perfect. It creates a high-key effect by intentionally overexposing the photo slightly, resulting in a dreamy and ethereal look. This mode is indicated by a high-key icon.
5. Selfie Mode:
This mode is specifically designed for taking selfies. It adjusts the focal length and exposure settings to help you capture flattering and well-lit self-portraits. To activate this mode, you need to attach the mini mirror to the front of the camera. The selfie mode is indicated by a small person icon.
6. Macro Mode:

If you want to take close-up shots, the Macro mode is the one to choose. It allows you to focus on subjects that are as close as 30-60 cm away from the camera, resulting in detailed and sharp close-up images. This mode is indicated by a small flower icon.
By understanding and utilizing these different modes, you can take full advantage of the mini 8 instant film camera and capture stunning photos in all kinds of scenarios. Experiment with each mode to discover the unique effects they can produce and have fun with your photography!
Framing Your Subjects with the Mini 8
One of the key aspects of capturing great photos with the Mini 8 instant film camera is framing your subjects properly. The framing of your photos can greatly impact the overall composition and aesthetic of your images, so it’s important to pay attention to this aspect of photography.
When using the Mini 8, you can make use of the viewfinder to help frame your subjects. The viewfinder is located on the camera and allows you to see what the camera will capture. However, it’s important to note that the viewfinder on the Mini 8 does not exactly match the final image captured on the film. Therefore, it’s important to keep this in mind and adjust your framing accordingly.
To ensure proper framing, consider the following tips:
1. Use the Rule of Thirds
The rule of thirds is a commonly used composition technique in photography. It involves dividing the frame into a grid of nine equal parts by drawing two horizontal lines and two vertical lines. The main subjects or points of interest in your photo should then be placed along these lines or at the intersection points. This can create a more balanced and visually pleasing composition.
2. Pay Attention to the Background
A great photo is not just about the subject, but also about the background. Make sure to pay attention to the background and ensure that it does not detract from your subject. Look for a clean and uncluttered background that helps to emphasize your subject and adds to the overall aesthetic of the photo.
By paying attention to framing and following these tips, you can capture beautiful photos with the Mini 8 instant film camera that are visually appealing and well-composed.
Mastering the Art of Close-up Photography
One of the most exciting features of the Mini 8 instant film camera is its ability to take stunning close-up shots. Whether you’re capturing the delicate details of a flower or the intricate patterns of a butterfly’s wings, close-up photography allows you to explore a whole new world of creativity.
Here are a few tips to help you master the art of close-up photography with your Mini 8:
1. Get close to your subject: The Mini 8 has a fixed focal length, so you’ll need to get physically close to your subject in order to capture it in sharp detail. Experiment with different angles and distances to find the perfect composition.
2. Use natural light: Close-up photography is all about capturing the details, so make sure you have plenty of natural light to highlight those intricate features. Avoid using the flash unless necessary, as it can sometimes wash out the details.
3. Select the right settings: The Mini 8 has a few settings you can adjust to optimize your close-up shots. Choose the “Close-up” mode by rotating the lens ring to the flower icon. This setting will help you focus on objects that are 1-2 feet away.
4. Experiment with composition: Close-up photography offers endless possibilities for creative composition. Play around with different angles, perspectives, and framing to capture unique and interesting shots.
5. Pay attention to depth of field: When photographing close-up subjects, depth of field becomes even more important. Experiment with different aperture settings to control the depth of field and create a pleasing background blur.
6. Keep it steady: Close-up photography requires precision and stability. Use a tripod or find a stable surface to keep your camera steady and minimize any blur caused by camera shake.
7. Practice patience: Close-up photography requires time and patience. Don’t rush the process and take your time to observe and capture the intricate details of your subject.
By following these tips and experimenting with the unique capabilities of your Mini 8 instant film camera, you’ll soon be mastering the art of close-up photography and capturing stunning, detailed shots you can cherish forever.
Troubleshooting Common Issues with the Mini 8 Camera
Using an instant film camera like the Mini 8 can be a fun and exciting way to capture memories. However, like any electronic device, it may encounter some common issues. Here are a few troubleshooting tips to help you fix common problems with your Mini 8 camera:
No Power or Camera Won’t Turn On
If your Mini 8 camera won’t turn on or has no power, the first thing to check is the batteries. Make sure they are inserted correctly and that they are not exhausted. Replace the batteries with new ones if needed. Additionally, check for any visible damage to the battery compartment or the battery contacts. If they are dirty or corroded, gently clean them with a soft cloth or cotton swab and some rubbing alcohol.
No Flash or Flash Not Working
If you are experiencing issues with the flash on your Mini 8 camera, start by checking the flash settings. Make sure the flash is turned on and not set to “OFF” or “HI-KEY.” You can find the flash settings on the lens barrel of the camera. If the flash setting is correct and the flash still doesn’t work, check if the flashbulb is burnt out or damaged. If so, you will need to replace it. You can find replacement flashbulbs online or from your local camera store.
Another common cause of flash issues is low battery power. Ensure that your camera has fresh batteries, as mentioned in the previous section.
Blurred or Dark Photos
If your photos from the Mini 8 camera are coming out blurred or too dark, there are a few possible causes. Firstly, check your camera settings. Make sure the exposure dial is set correctly according to the lighting conditions. The Mini 8 has suggested exposure settings for different scenarios, such as sunny, cloudy, or indoors. Adjusting the exposure dial will help you get properly exposed photos.
Additionally, ensure that you hold the camera steady while taking the picture to avoid blurriness. Remember that the Mini 8 doesn’t have image stabilization, so holding it steady is crucial for sharp images.
If your photos are consistently coming out too dark, you can try using the flash or using a higher ISO film for better low-light performance.
By troubleshooting these common issues, you can ensure that your Mini 8 instant film camera continues to capture beautiful memories. If the problems persist, consider contacting the camera manufacturer or seeking professional assistance.
Keeping Your Mini 8 Camera in Good Condition
Properly caring for your Mini 8 camera can help ensure its longevity and the quality of your instant film photos. Here are some tips to keep your camera in good condition:
1. Cleaning the Lens
Regularly cleaning the lens of your Mini 8 camera is essential to maintain image clarity. Use a soft microfiber cloth or lens cleaning solution to gently wipe away any dust or smudges. Avoid using rough materials or applying excessive pressure, as this could damage the lens.
2. Protecting from Dust and Moisture
Dust and moisture can be harmful to your camera’s internal components. When not in use, store your Mini 8 camera in a protective case or pouch to shield it from these elements. Additionally, avoid using the camera in excessively humid or wet environments to prevent moisture damage.
3. Handling with Care
Always handle your Mini 8 camera with care to avoid accidental drops or impacts. Avoid placing heavy objects on top of the camera and store it in a secure place when not in use. Remember to use the camera’s strap to secure it around your wrist while taking photos to minimize the risk of dropping it.
4. Proper Storage
When storing your Mini 8 camera for an extended period, remove the batteries to prevent any corrosion damage. Additionally, store the camera in a cool, dry place away from direct sunlight, extreme temperatures, and magnetic fields that could affect its functionality.
5. Battery Replacement
Keep an eye on your camera’s battery life and replace the batteries when necessary. Using expired or low-quality batteries can lead to poor performance and potential damage to the camera. Always follow the manufacturer’s instructions when replacing the batteries.
By following these tips, you can keep your Mini 8 camera in excellent condition and enjoy capturing beautiful instant film photos for years to come.
| Tip | Description |
|---|---|
| Cleaning the Lens | Regularly clean the lens with a soft cloth or lens cleaning solution to maintain image clarity. |
| Protecting from Dust and Moisture | Store the camera in a protective case or pouch when not in use to shield it from dust and moisture. |
| Handling with Care | Handle the camera with care to prevent accidental drops or impacts. |
| Proper Storage | Store the camera in a cool, dry place away from direct sunlight and extreme temperatures. |
| Battery Replacement | Replace the batteries when needed and always use high-quality ones. |
Exploring Creative Techniques with the Mini 8
The Mini 8 instant film camera is not only a fun and convenient way to capture memories, but it also offers a variety of creative techniques that can take your photography to the next level. Here are a few tips and tricks to explore:
1. Double Exposure
One of the most intriguing features of the Mini 8 is its ability to take double exposures. This means that you can capture two different images on the same instant film frame, resulting in unique and artistic photographs. To do this, simply take your first shot, then without advancing the film, take a second shot. The two images will blend together, offering an ethereal and dreamlike effect.
2. Close-Up Shots
The Mini 8 is equipped with a close-up lens attachment that allows you to capture detailed shots of subjects from as close as 35cm away. This is perfect for capturing intricate textures, patterns, or small objects. Experiment with different angles and perspectives to create visually stunning close-up shots.
Pro Tip: To achieve optimal sharpness and clarity in your close-up shots, make sure to hold the camera steady and use natural lighting whenever possible.
3. Color Filters
The Mini 8 comes with built-in color filters that can add a creative twist to your photographs. The camera has four different settings: normal, cloudy, sunny, and high-key. Switching between these settings can alter the color saturation and produce interesting effects. For example, the high-key mode creates a soft and bright look, while the cloudy mode enhances warm tones.
Pro Tip: Experiment with different lighting conditions and color filters to achieve the desired effect in your photographs.
With its unique features and creative possibilities, the Mini 8 instant film camera allows you to explore your artistic side and capture moments in a truly distinct way. Whether you’re experimenting with double exposures, capturing close-up shots, or playing with color filters, the Mini 8 offers endless opportunities for creativity. So grab your camera and start discovering the world of instant film photography!
Sharing and Preserving Your Mini 8 Instant Prints
Once you’ve taken some great photos with your Mini 8 Instant Film Camera, it’s time to share and preserve those prints. Here are some tips on how to make the most of your instant prints:
1. Displaying Your Prints
Show off your favorite instant prints by displaying them in creative ways. You can use frames or photo stands to showcase your prints on a desk or mantelpiece. Another option is to create a photo wall where you can arrange your prints in a visually appealing way. Get creative and have fun with it!
2. Creating a Photo Album
If you prefer a more traditional approach to preserving your prints, consider creating a photo album. You can buy albums specifically designed for instant prints, or use a regular photo album with adhesive pages. Arrange your prints chronologically or by theme to tell a story through your photos.
3. Sharing on Social Media
Share your instant prints with friends and family by posting them on social media. Take a photo of your instant print using your smartphone, then edit and enhance it if needed before sharing. Use hashtags and captions to add context to your photos and engage with your friends and followers.
Remember to respect the privacy of others and obtain their permission before sharing any photos that include them.
4. Giving Prints as Gifts
Instant prints make thoughtful and personal gifts. You can give them as they are or get creative and turn them into DIY projects. For example, you can make a personalized greeting card or create a collage using multiple prints. The options are endless, and the recipient will appreciate the effort you put into creating a unique gift.
5. Storing Your Prints Properly
To preserve the quality of your instant prints, store them in a cool and dry place away from direct sunlight. Avoid exposing them to extreme temperature or humidity, as this can cause the prints to deteriorate over time. Keep them in a protective sleeve or album to prevent scratches and damage.
| Tip: | Consider making duplicates of your favorite prints to avoid losing cherished memories due to damage or loss. |
|---|
Question-answer:
What is a mini 8 instant film camera?
A mini 8 instant film camera is a compact camera that allows you to take photos and instantly print them on small, credit card-sized films.
How do I load film into a mini 8 instant film camera?
To load film into a mini 8 instant film camera, open the film compartment on the back of the camera, insert the film pack with the yellow side facing up, and close the compartment. The camera will automatically eject a protective cover sheet, and you’re ready to start taking photos.
Can I adjust the exposure settings on a mini 8 instant film camera?
Yes, you can adjust the exposure settings on a mini 8 instant film camera by twisting the dial on the lens to the recommended setting for the lighting conditions. The camera has four different settings: Indoors, Cloudy, Sunny, and Very Sunny.
How do I take a photo with a mini 8 instant film camera?
To take a photo with a mini 8 instant film camera, simply look through the viewfinder to compose your shot, press the shutter button located on the front of the camera, and wait for the photo to be automatically printed. Make sure to keep the camera steady while the photo is being printed.
What should I do if the photo doesn’t come out well with a mini 8 instant film camera?
If the photo doesn’t come out well with a mini 8 instant film camera, you can adjust the exposure settings to a different setting based on the lighting conditions. Additionally, make sure to hold the camera steady and avoid taking photos in extremely bright or low light environments.


