
Bokeh is a photography technique that is often used to create stunning and artistic images. It refers to the aesthetic quality of the out-of-focus areas in a photograph, which can be achieved by using a shallow depth of field. Many professional cameras have the ability to create bokeh naturally, but did you know that you can also achieve bokeh effects using your iPhone camera?
With the advancements in smartphone camera technology, iPhones now have the capability to produce impressive bokeh. Whether you want to capture portraits, close-ups of flowers, or breathtaking landscapes, learning how to get bokeh on your iPhone camera can take your photography skills to the next level.
To achieve bokeh on your iPhone camera, you need to have a basic understanding of how depth of field works. The depth of field refers to the range of distance in a photograph that appears acceptably sharp. By adjusting the aperture or the virtual aperture on your iPhone camera, you can control the depth of field and create the desired bokeh effect.
There are several techniques you can try to get bokeh on your iPhone camera. One way is to use the Portrait mode, which is available on newer iPhone models. This mode uses the dual-lens system and advanced algorithms to create a bokeh effect, blurring the background and making the subject stand out. Another technique is to get closer to your subject and ensure there is a significant distance between the subject and the background. This will help create a shallow depth of field and achieve the desired bokeh effect.
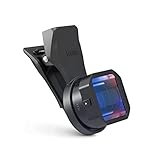
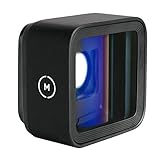
Experimenting with different lighting conditions and using accessories such as external lenses can also enhance the bokeh effect on your iPhone camera. By following these tips and techniques, you can unlock the full potential of your iPhone camera and capture stunning bokeh-filled images that will impress your friends and family.
Understanding Bokeh
Bokeh refers to the aesthetic quality of the out-of-focus areas in a photograph. It is usually achieved by using a shallow depth of field, which results in a blurred background while keeping the subject in sharp focus.
Bokeh is not just about having a blurred background, but it is also about the quality of that blur. Good bokeh is characterized by smooth and creamy background blur, with no visible distractions or harsh edges. It can greatly enhance the overall look and feel of a photograph, making the subject stand out and creating a sense of depth.
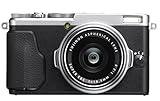
The type of lens you use can greatly affect the bokeh in your photos. Generally, lenses with larger apertures, such as f/1.4 or f/1.8, are better at producing a shallow depth of field and creamy bokeh. These lenses allow more light to enter the camera, giving you more control over the depth of field and background blur.
When using the iPhone camera to achieve bokeh, you can use the Portrait mode, which is available on newer iPhone models. This mode uses depth mapping technology to artificially blur the background while keeping the subject in focus. It can produce decent bokeh-like effects, but it may not always match the quality of bokeh produced by high-end cameras and lenses.
In conclusion, understanding bokeh is essential for creating visually pleasing photographs. It is about achieving a smooth and pleasing background blur that helps draw attention to the subject. By using the right techniques and equipment, you can capture stunning bokeh even with an iPhone camera.
Choosing the Right iPhone Camera
When it comes to getting bokeh effect in your photos, the iPhone camera can be a great tool. However, not all iPhone models have the same camera capabilities. If you want to achieve stunning bokeh in your photos, it’s important to choose the right iPhone camera. Here are a few factors to consider:
1. iPhone Model
First and foremost, you need to make sure you have an iPhone model that supports the Portrait mode. This mode is essential for capturing photos with a bokeh effect. The iPhone 7 Plus and later models have dual-camera systems that are specifically designed to create bokeh.
2. Lens Aperture
The iPhone camera’s lens aperture also plays a crucial role in achieving bokeh. A wider aperture allows more light to enter the camera, creating a shallow depth of field and a beautiful blurring effect. The iPhone XS and later models have wide apertures ranging from ƒ/1.8 to ƒ/1.4, making them great choices for bokeh photography.
Additionally, it’s worth noting that the telephoto lens on iPhone models with dual cameras usually has a narrower aperture compared to the wide-angle lens. So, if bokeh is your top priority, consider using the wide-angle lens for better results.
Pro Tip: To adjust the bokeh effect on newer iPhones, you can use the Depth Control feature. This allows you to change the amount of background blur after taking the photo, giving you more control over the final result.

In conclusion, while the iPhone camera can produce stunning bokeh effects, it’s important to choose the right iPhone model and take advantage of its features. By considering the iPhone’s camera capabilities, lens aperture, and using additional control features, you can capture professional-looking photos with beautiful bokeh.
Adjusting Camera Settings
One of the key factors in capturing bokeh on an iPhone camera is the ability to control and adjust the camera settings. By adjusting these settings, you can enhance the blur effect and create a more pronounced bokeh effect in your photos.
1. Portrait Mode
To begin, make sure to utilize the Portrait Mode feature on your iPhone camera. This mode is specifically designed to create a shallow depth of field and blur the background, which is ideal for achieving bokeh. Simply open the Camera app, swipe to select the Portrait Mode, and frame your subject.
2. Adjusting the Depth Effect
While in Portrait Mode, you can further adjust the depth effect to control the intensity of the bokeh effect. After taking a photo, tap “Edit” and use the Depth slider to adjust the amount of background blur. Moving the slider to the right will increase the blur, while moving it to the left will decrease it.
Alternatively, you can also adjust the depth effect before taking a photo. In the Camera app, tap the yellow “Portrait” icon at the top of the screen. This will allow you to adjust the depth effect in real-time, giving you a preview of how the bokeh will appear in your photo.

3. Lighting Conditions
The lighting conditions in your environment can also greatly impact the bokeh effect. When shooting in low light or dimly lit settings, the camera automatically adjusts the aperture to let in more light, resulting in a greater depth of field. This can help in achieving a more pronounced and pleasing bokeh effect.
On the other hand, when shooting in bright or well-lit conditions, you may need to use a wider aperture to create a shallower depth of field. One way to achieve this is by adjusting the exposure settings. In the Camera app, tap to focus on the subject, and then swipe up or down on the screen to adjust the exposure. Increasing the exposure will open up the aperture, allowing for a more pronounced bokeh effect.
| Setting | Action |
|---|---|
| Portrait Mode | Select Portrait Mode in the Camera app. |
| Adjust Depth Effect | Tap “Edit” after taking a photo and adjust the Depth slider. |
| Real-Time Adjustment | Tap the yellow “Portrait” icon in the Camera app to adjust depth effect in real-time. |
| Low Light Conditions | Shoot in low light conditions for a greater depth of field. |
| Bright Conditions | Adjust exposure settings to create a shallower depth of field. |
Using Portrait Mode
If you want to achieve bokeh effects on your iPhone camera, one of the easiest ways is to use the Portrait mode. This mode is available on iPhone models that have dual-camera systems and simulates depth-of-field by blurring the background while keeping the subject in focus.
Step 1: Open the Camera App
Launch the Camera app on your iPhone by tapping on the camera icon on your home screen or swiping left from the lock screen.
Step 2: Enable Portrait Mode
Once the Camera app is open, swipe to the right on the camera modes at the bottom of the screen until you see the “Portrait” option. Tap on it to enable Portrait mode.
Step 3: Frame the Subject
Now, frame your subject in the camera viewfinder. The camera will analyze the scene and prompt you if there are any issues, such as insufficient light or the subject being too close or far away.
Step 4: Adjust the Depth Effect
On some iPhone models, you can adjust the amount of background blur, or bokeh, by using the depth effect slider. To access the depth effect slider, tap on the “f” icon at the top right corner of the screen and adjust the slider to your liking.
Step 5: Take the Photo
When you’re ready, press the shutter button to take the photo. Make sure to keep the camera steady to avoid any blurriness in the image.
Note: Portrait mode works best when the subject is relatively close to the camera and there is a clear distinction between the subject and the background. Experiment with different lighting conditions and distances to get the desired bokeh effect.
Experimenting with Lighting
Lighting plays a crucial role in capturing stunning bokeh effects on an iPhone camera. By experimenting with different lighting conditions, you can add depth and dimension to your photos.

1. Natural Light
Using natural light can produce beautiful bokeh effects. Position your subject in front of a background that is well-lit by sunlight. This will create a stark contrast between the subject and the background, resulting in a pleasing bokeh effect.
2. Artificial Light
Artificial light sources, such as street lamps, Christmas lights, or fairy lights, can be used to create unique bokeh effects. Place the lights at varying distances from your subject and experiment with different angles to get the desired bokeh effect.
Remember to adjust the exposure on your iPhone camera to achieve the perfect amount of light. Too much light can wash out the bokeh effect, while too little light can make the background appear too dark.
Editing Photos for Bokeh Effects
Once you’ve captured a photo with the bokeh effect using your iPhone camera, you can enhance it further by editing it in various ways. Here are some tips to help you achieve stunning bokeh effects:
1. Adjust the Depth of Field: Use photo editing apps to adjust the depth of field in your photo. This will help you blur the background even more, making the bokeh effect more pronounced. Experiment with different amounts of blur to achieve the desired effect.

2. Enhance Bokeh Lights: To make the bokeh lights stand out more, you can use editing tools to increase their brightness and saturation. This will make them appear more vibrant and give your photo a dreamy look.
3. Add Bokeh Overlays: Some editing apps offer bokeh overlays that you can add to your photo. These overlays can enhance the bokeh effect by adding more bokeh lights and textures. Experiment with different overlays to find the one that complements your photo the best.
4. Adjust Contrast and Highlights: Tweaking the contrast and highlights in your photo can help bring out the bokeh effect. Increasing the contrast will make the blurred background appear darker, while adjusting the highlights can make the bokeh lights pop even more.
5. Use Color Grading: Applying a color grading effect to your photo can further enhance the bokeh effect. Experiment with different color tones to create a unique and captivating look.
Remember, editing is a creative process, so don’t be afraid to experiment and try out different techniques to achieve the desired bokeh effect. With the right edits, you can turn a simple bokeh photo into a mesmerizing visual masterpiece.
Sharing and Showcasing Your Bokeh Photos
Once you have captured stunning bokeh photos using your iPhone camera, it’s time to share and showcase your beautiful creations with the world. Here are a few ways to do that:
1. Social Media Platforms: Share your bokeh photos on popular social media platforms like Instagram, Facebook, and Twitter. Use relevant hashtags to increase the visibility of your photos and attract like-minded photographers and enthusiasts.
2. Photography Communities: Join online photography communities and forums where you can share your bokeh photos and receive feedback from fellow photographers. Websites like 500px, Flickr, and Reddit’s /r/photography are great platforms to showcase your work to a wider audience.
3. Personal Portfolio: Create a personal portfolio website or blog to display your bokeh photos. This will not only allow you to have complete control over how your photos are presented but also give you a chance to write about your photography journey and share insights.
4. Exhibitions and Contests: Participate in local photography exhibitions or contests where you can display your bokeh photos alongside other talented photographers. This can provide valuable exposure and recognition for your work.
5. Collaborations: Collaborate with other photographers or artists to create unique projects using bokeh photography. This can help you expand your network, learn from others, and create stunning collaborative works.
Remember, when sharing and showcasing your bokeh photos, always give credit to the original creators of any resources or techniques you may have used. Respect copyright laws and be mindful of the privacy and consent of the subjects in your photos.
FAQ
What is bokeh and how can I achieve it on my iPhone camera?
Bokeh refers to the aesthetic quality of the out-of-focus areas in a photograph. To achieve bokeh on your iPhone camera, you can use Portrait mode, which is available on certain iPhone models. Portrait mode uses depth mapping technology to create a depth-of-field effect and blur the background, resulting in a bokeh effect. Simply open the Camera app and select Portrait mode to take photos with bokeh.
Can I get bokeh on my iPhone camera if I don’t have Portrait mode?
If your iPhone doesn’t have Portrait mode, you can still try to achieve a bokeh effect by manually adjusting the focus and positioning your subject against a distant, blurry background. Tap and hold on your subject to lock the focus, then move your iPhone closer or farther away to adjust the depth-of-field. This method may not give the same precise and consistent results as Portrait mode, but it can still produce a pleasing bokeh effect in some situations.
Do I need any special equipment to capture bokeh on my iPhone camera?
No, you don’t need any special equipment to capture bokeh on your iPhone camera. The built-in Portrait mode, available on select iPhone models, is designed to create a bokeh effect. However, if you want to enhance your bokeh photos, you can consider using external lenses specifically designed for iPhones. These lenses can help you achieve a shallower depth-of-field, resulting in a more pronounced bokeh effect.


