
With the increasing popularity of video conferencing and online meetings, having a high-quality webcam has become essential. However, you don’t need to invest in an expensive webcam if you own an iPhone. In fact, you can easily set up your iPhone camera as a webcam and enjoy the superior image and video quality it offers.
Setting up your iPhone camera as a webcam is a simple process that requires a few easy steps. First, you will need to download a third-party app that allows you to use your iPhone camera as a webcam. There are several apps available for both iOS and Windows operating systems, such as EpocCam, iCam, and NDI HX Camera. These apps offer various features and compatibility options, so make sure to choose the one that suits your needs.
Once you have downloaded the app, you will need to install it on your iPhone and also on your computer. Make sure that both devices are connected to the same Wi-Fi network. Open the app on your iPhone and follow the on-screen instructions to connect it to your computer. You may need to install additional drivers or software on your computer, depending on the app you are using.
Once the connection is established, you can select your iPhone camera as the video source in your preferred video conferencing or streaming application. Whether you are using Zoom, Skype, or OBS, you will be able to choose your iPhone camera as the default webcam. Adjust the settings according to your preferences, and you are ready to go!
Using iPhone Camera as Webcam
If you are looking to use your iPhone camera as a webcam for your computer, you are in luck! With the help of some third-party apps and software, you can easily turn your iPhone into a high-quality webcam. In this guide, we will walk you through the steps to set up and use your iPhone camera as a webcam.
Step 1: Install a Webcam App on Your iPhone
The first step is to install a webcam app on your iPhone. There are several apps available on the App Store that allow you to use your iPhone camera as a webcam. Some popular options include EpocCam, iVCam, and iWebcam. You can download and install any of these apps depending on your preferences.
Step 2: Install Webcam Software on Your Computer
After installing a webcam app on your iPhone, you will need to install webcam software on your computer. The webcam software acts as an intermediary between your iPhone camera and your computer. Some popular webcam software options include EpocCam, iVCam, and iCamSource. Make sure to download and install the corresponding software for the app you installed on your iPhone.
Step 3: Connect Your iPhone to Your Computer
Once you have installed the webcam app and software, the next step is to connect your iPhone to your computer. You can do this using a USB cable or through your Wi-Fi network. If you choose to connect via USB, simply connect your iPhone to your computer using the USB cable. If you prefer to connect via Wi-Fi, make sure both your iPhone and computer are on the same Wi-Fi network.
Step 4: Configure the Webcam App and Software
After successfully connecting your iPhone to your computer, you will need to configure the webcam app and software. Open the webcam app on your iPhone and follow the on-screen instructions to set up the connection. On your computer, open the webcam software and select your iPhone camera as the video source. You may also need to adjust some settings, such as video resolution and frame rate, to optimize the webcam experience.
Note: Make sure to grant necessary permissions on your iPhone and computer for the webcam app and software to access your camera and microphone.

Step 5: Start Using Your iPhone Camera as a Webcam
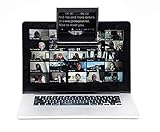
Once you have completed the setup process, you are ready to start using your iPhone camera as a webcam. Open the video conferencing or streaming application you want to use and select your iPhone camera as the video input source. Your iPhone camera will now function as a webcam, allowing you to participate in video calls, virtual meetings, or stream your content with high-quality video.
With the steps outlined in this guide, you can easily set up and use your iPhone camera as a webcam. Enjoy the enhanced video quality and flexibility that using your iPhone camera as a webcam brings!
Benefits of Setting Up iPhone Camera as Webcam
Using your iPhone camera as a webcam can provide a range of benefits. Here are a few reasons why you should consider setting up your iPhone camera as a webcam:
- High-quality video: The camera on your iPhone is capable of capturing high-resolution videos. By using it as a webcam, you can upgrade the video quality of your video conferences or live streams.
- Portability: Your iPhone is a portable device that you can easily carry with you. Setting up the iPhone camera as a webcam allows you to have a reliable and portable solution for all your video communication needs.
- Flexibility: With your iPhone camera as a webcam, you can position it anywhere you want for the best angle and framing. This flexibility gives you more control over how you present yourself during meetings or live broadcasts.
- Easy setup: The process of setting up your iPhone camera as a webcam is straightforward. With a few simple steps, you can quickly transform your iPhone into a webcam without the need for extra equipment.
- Cost-effective solution: Instead of investing in a dedicated webcam, using your iPhone camera can save you money. It eliminates the need for purchasing additional hardware and offers a practical solution using the equipment you already have.
- Integration with apps: Many video conferencing and streaming applications have built-in support for using the iPhone camera as a webcam. This integration allows for seamless compatibility and enhances your overall user experience.
By setting up your iPhone camera as a webcam, you can enjoy all these benefits and elevate your video communication and broadcasting capabilities.
Requirements for Setting Up iPhone Camera as Webcam
Before you can use your iPhone camera as a webcam, you need to ensure that you have the following requirements:

- An iPhone with iOS 13 or later installed
- A Mac or Windows computer
- A Wi-Fi network or a lightning cable
- A webcam app such as EpocCam or iVCam
Make sure your iPhone is running on at least iOS 13, as older versions may not have the necessary features to allow the camera to be used as a webcam.
You will need to have a Mac or Windows computer to connect your iPhone camera to. Both Mac and Windows computers have different software and applications that allow you to use your iPhone as a webcam.
If you are using a Wi-Fi network, make sure that both your iPhone and your computer are connected to the same network. This will ensure a stable and seamless connection between the two devices.
If you prefer to use a lightning cable connection instead of Wi-Fi, make sure you have a lightning cable available to connect your iPhone to your computer. This will provide a more reliable and faster connection.
Lastly, you will need to download and install a webcam app on your iPhone. There are various webcam apps available in the App Store, such as EpocCam and iVCam. These apps allow you to use your iPhone camera as a webcam on your computer.
Once you have all these requirements fulfilled, you can proceed with setting up your iPhone camera as a webcam.
Steps to Set Up iPhone Camera as Webcam
Using your iPhone as a webcam can be a convenient and cost-effective way to improve the quality of your video calls or streaming. Here are the steps to set up your iPhone camera as a webcam:
- Install a webcam app on your iPhone: There are several webcam apps available on the App Store, such as EpocCam, iCam, and iVCam. Choose one that suits your needs and install it on your iPhone.
- Download and install the webcam software on your computer: To use your iPhone as a webcam, you’ll need to download and install the corresponding webcam software on your computer. Most webcam apps will provide a link to download the software on their website.
- Connect your iPhone to your computer: Use a USB cable to connect your iPhone to your computer. Make sure to unlock your iPhone and trust the computer when prompted.
- Open the webcam app on your iPhone: Launch the webcam app on your iPhone and follow the instructions to connect it to your computer. You may need to enter a verification code or make some settings adjustments.
- Open the webcam software on your computer: Once your iPhone is connected, open the webcam software on your computer. You should see your iPhone listed as an available camera option.
- Select your iPhone as the webcam: From the camera options in the webcam software, select your iPhone as the webcam device. Make sure the app is using the rear camera of your iPhone for better video quality.
- Adjust the settings: In the webcam software, you can usually adjust settings like video resolution, frame rate, and audio input. Make any necessary adjustments to optimize the video and audio quality.
- Start using your iPhone as a webcam: Once everything is set up, you can start using your iPhone as a webcam. Open any video calling or streaming app on your computer, and your iPhone’s camera will be used as the webcam.
Remember to position your iPhone in a stable position and at an appropriate distance for the best video quality. Enjoy the enhanced video calling and streaming experience with your iPhone camera!
Troubleshooting
If you are experiencing any issues while setting up your iPhone camera as a webcam, you can try the following troubleshooting steps:
-
Check Compatibility
Make sure that your iPhone is compatible with the software or application you are using to set up the webcam. Check the system requirements and ensure that your iPhone meets them.
-
Restart Devices
Try restarting both your iPhone and your computer. Sometimes a simple restart can resolve any temporary glitches.
-
Update Software
Ensure that you have the latest software or app version installed on both your iPhone and your computer.
-
Check Connection
Verify that your iPhone is connected to your computer via a stable and reliable connection. Use a USB cable or connect both devices to the same Wi-Fi network.
-
Restart Application
If you are using a specific application to set up the iPhone camera as a webcam, try closing and reopening the app. This can help to refresh any settings or configurations that may be causing issues.
-
Check Camera Permissions
Make sure that the app or software you are using has permission to access your iPhone’s camera. You can check the privacy settings on your iPhone to grant the necessary permissions.
-
Update Drivers
If you are using your iPhone as a webcam on a Windows computer, ensure that you have the latest drivers installed. You can visit the manufacturer’s website to download and install the necessary drivers.
If you have tried these troubleshooting steps and are still experiencing issues, it may be helpful to consult the support documentation or contact the customer support of the specific software or app you are using for further assistance.

Alternatives to Setting Up iPhone Camera as Webcam
If you are unable to set up your iPhone camera as a webcam or prefer not to, there are alternative options available. These alternatives offer similar functionality and can be used for video conferencing, online meetings, and live streaming.
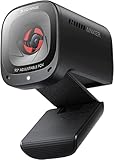
1. USB Webcams
One alternative is to use a USB webcam. USB webcams are easy to set up and connect to your computer via a USB port. They offer high-quality video and audio and often come with additional features such as built-in microphones and adjustable lenses. Simply plug in the USB webcam, install any necessary drivers, and you’re ready to go.
2. External Cameras
If you prefer using a dedicated camera for video conferencing or streaming, you can consider using an external camera. External cameras, such as DSLR or mirrorless cameras, offer superior image quality and customizable settings. To use an external camera as a webcam, you will need a capture card or an HDMI-to-USB converter to connect it to your computer.
3. Built-in Laptop/Webcam
If you have a laptop or a desktop computer with a built-in webcam, you can use that as an alternative to setting up your iPhone camera. Most laptops and webcams offer decent video quality and can be easily used for video conferences or online meetings. Ensure that the webcam is properly configured and compatible with your preferred video conferencing software.
4. Software Solutions
Another alternative is to use software solutions that allow you to turn your smartphone screen into a webcam. These apps work by wirelessly mirroring your smartphone screen to your computer, effectively turning it into a webcam. Some popular options include EpocCam, iCam, and DroidCam. Install the app on your smartphone and the accompanying software on your computer to begin using it as a webcam.

While setting up your iPhone camera as a webcam is a convenient option, these alternatives provide effective solutions if you encounter any issues or prefer different options for your video conferencing or live streaming needs. Choose the alternative that suits your requirements and enjoy a smooth and efficient online experience.
FAQ
What are the steps to set up an iPhone camera as a webcam?
To set up your iPhone camera as a webcam, you need to download a third-party app like EpocCam or iCam. Once you have the app installed on both your iPhone and computer, make sure both devices are connected to the same Wi-Fi network. Open the app on your iPhone and computer, and they should automatically detect each other. You can then select your iPhone camera as the webcam input in your preferred video chat or streaming software.
Which apps are recommended for setting up an iPhone camera as a webcam?
There are several apps available for setting up an iPhone camera as a webcam, but two popular options are EpocCam and iCam. EpocCam offers both a free and paid version, with the paid version providing higher video quality and additional features. iCam is a paid app, but it offers a simple setup process and works seamlessly with popular video chat and streaming software. Both apps are compatible with both Mac and Windows computers.


