Looking to take your iPhone photography to the next level? The camera quality on the iPhone has come a long way since its introduction, but there are still ways to enhance and upgrade the camera capabilities of your device. Whether you’re a professional photographer or just a casual shutterbug, there are several tips and tricks you can use to improve the image quality and overall performance of your iPhone’s camera.
One of the easiest ways to upgrade camera quality on your iPhone is to keep your lens clean and free from smudges or dirt. Your camera lens is susceptible to smudges and fingerprints, which can affect the quality of your photos. Simply use a microfiber cloth or lens cleaning solution to keep your lens clean before capturing those important moments.
Another tip to enhance your iPhone camera quality is to adjust your camera settings. By accessing the camera settings, you can adjust the exposure, focus, and white balance to improve the overall image quality. Experiment with these settings to find what works best for different lighting conditions and subjects. Additionally, enabling the HDR (High Dynamic Range) mode can help you capture more details in high contrast scenes.
Investing in external lenses and accessories can also significantly upgrade the camera capabilities of your iPhone. There are a variety of lenses available, including telephoto, wide-angle, and macro lenses, that can attach to your iPhone. These lenses can help you capture different perspectives and enhance the overall image quality. Furthermore, accessories like tripods and stabilizers can improve the stability of your shots and prevent blurry images.
Finally, mastering the use of editing apps can greatly enhance your iPhone camera quality. There are numerous photo editing apps available for iPhone users, such as Snapseed, VSCO, and Adobe Lightroom. These apps offer a variety of tools and filters to enhance your photos, from adjusting brightness and contrast to applying creative effects. Take the time to learn and experiment with different editing techniques to get the most out of your iPhone camera.

With these tips and tricks, you can upgrade the camera quality on your iPhone and take stunning photos like a pro. From keeping your lens clean to experimenting with settings and investing in external accessories, there are numerous ways to enhance the capabilities of your iPhone’s camera. So, grab your iPhone and start capturing those beautiful moments in style!
Optimizing Camera Settings
When it comes to upgrading the camera quality on your iPhone, optimizing the camera settings can make a significant difference in the quality of your photos. Here are some tips to help you get the most out of your iPhone camera:
| Settings | Description |
|---|---|
| Enable HDR | High Dynamic Range (HDR) mode allows your camera to capture a wider range of colors and tones, resulting in more detailed and vibrant photos. It’s especially useful in high-contrast situations or when capturing landscapes. |
| Adjust Exposure | The exposure controls on your iPhone camera allow you to adjust the brightness of your photos. Slide your finger up or down on the screen to increase or decrease the exposure, depending on the lighting conditions. |
| Use Gridlines | Enabling gridlines on your camera settings can help you compose your photos more effectively. The gridlines follow the rule of thirds, which is a basic principle of photography composition. |
| Lock Focus and Exposure | Tap and hold on the screen to lock the focus and exposure on a specific subject. This is especially useful when you want to take multiple photos of the same subject with consistent focus and exposure settings. |
| Use Portrait Mode | If you have an iPhone model that supports Portrait mode, take advantage of this feature for stunning portrait photos. Portrait mode uses depth-of-field effect to blur the background and make your subject stand out. |
| Experiment with Filters | Your iPhone camera comes with a variety of filters that can add different looks and styles to your photos. Try out different filters to enhance the mood or atmosphere of your images. |
By experimenting with these camera settings and features on your iPhone, you can significantly improve the quality of your photos and take your photography skills to the next level.
Cleaning the Camera Lens
One of the simplest ways to improve the camera quality on your iPhone is to clean the camera lens. Over time, the lens can accumulate smudges, fingerprints, and dust, which can degrade the image quality. Cleaning the lens will help remove these impurities and ensure that you get clear and sharp photos.
To clean the camera lens, follow these steps:

- Turn off your iPhone: Before you start cleaning, make sure to turn off your iPhone to avoid any accidental damage.
- Locate the camera lens: The camera lens is usually located on the back of your iPhone. It’s a small, circular glass element.
- Use a microfiber cloth: Take a clean microfiber cloth and gently wipe the camera lens in a circular motion. Avoid using any harsh materials or abrasive substances, as they can scratch the lens.
- Check for smudges: After wiping the lens, check for any remaining smudges or fingerprints. If you notice any, repeat the cleaning process until the lens is completely clean.
- Double-check before taking photos: Once you’ve cleaned the lens, double-check for any remaining dirt or smudges before taking photos.
Note: It’s a good idea to clean the lens regularly and especially before important events or trips. This will help ensure that your iPhone camera produces the best possible image quality.
Updating iPhone Software
One of the ways to improve the camera quality on your iPhone is by updating its software. Apple regularly releases software updates that include improvements to the camera functionality. Here’s how you can update your iPhone’s software:
Step 1: Connect your iPhone to a stable Wi-Fi network. It’s recommended to connect your device to a power source to prevent any interruptions during the update process.

Step 2: Go to the “Settings” app on your iPhone’s home screen.
Step 3: Scroll down and tap on “General”.
Step 4: In the “General” menu, tap on “Software Update”.

Step 5: Your iPhone will then check for available software updates. If an update is available, tap on “Download and Install”.
Step 6: You may be asked to enter your device’s passcode or agree to the terms and conditions. Follow the on-screen instructions to proceed.

Step 7: Wait for the update to download and install on your iPhone. This process may take some time, so ensure that your device is connected to a stable Wi-Fi network and power source.
Step 8: Once the update is installed, your iPhone will restart. After it restarts, the camera software should be updated, improving its performance and picture quality.
By regularly updating your iPhone’s software, you can ensure that you have the latest camera improvements and features available. Remember to check for software updates periodically to take advantage of the latest enhancements.
Using Third-Party Camera Apps
If you’re looking to upgrade the camera quality on your iPhone, one option to consider is using third-party camera apps. These apps can provide additional features and functionality beyond what the built-in camera app offers. Here are a few third-party camera apps to explore:
1. ProCamera: ProCamera offers advanced controls and settings, allowing you to have more control over exposure, ISO, and focus. It also offers features like manual focus assist and a night camera mode for low-light photography.
2. Halide: Halide is a powerful camera app with intuitive controls and a focus on manual photography. It enables you to adjust settings like shutter speed and ISO, giving you greater control over your shots. It also offers RAW capture and depth mapping for advanced editing possibilities.
3. Camera+: Camera+ is another popular third-party camera app that offers a range of features like manual controls, image stabilization, and a variety of shooting modes. It also includes editing tools and filters to enhance your photos.
4. ProCam 7: ProCam 7 is a versatile camera app that offers advanced features like manual control of exposure, focus, and white balance. It also provides features such as burst mode, slow-motion video, and time-lapse photography.
5. VSCO: While not primarily a camera app, VSCO offers a powerful camera function with manual controls and different shooting modes. It also comes with a wide range of editing tools and filters to enhance your photos.

These third-party camera apps can help you take your iPhone photography to the next level by providing additional features and controls. Explore these options to find the app that best suits your needs and start capturing stunning photos with your iPhone.
Adjusting Exposure and Focus
One of the key factors in improving camera quality on your iPhone is adjusting the exposure and focus settings. These settings help in capturing well-lit and sharp images.
To adjust the exposure and focus, follow these steps:
- Launch the Camera app on your iPhone.
- Tap on the area of the screen where you want to adjust the focus.
- A yellow box will appear indicating the focus area.
- Next, you can adjust the exposure by tapping and holding the screen until a yellow slider appears.
- Slide your finger up or down on the yellow slider to increase or decrease the exposure level.
- You can also use the exposure lock to fix the exposure level while composing your shot. To use the exposure lock, tap and hold the screen at the desired focus point, then swipe up or down to adjust the exposure.
By adjusting the exposure and focus, you can enhance the quality of your photos and videos on your iPhone.
Utilizing HDR Mode
HDR stands for High Dynamic Range, and it is a feature available on most recent iPhone models that can significantly improve the camera quality. When HDR mode is enabled, the iPhone takes multiple photos at different exposures and then combines them to create a single photo with balanced exposure and enhanced details.
Enabling HDR Mode
To enable HDR mode on your iPhone, follow these steps:
- Open the Camera app on your iPhone.
- Tap on “HDR” located at the top of the screen.
- Select “On” or “Auto” depending on your preference.
When you choose “On,” HDR mode will be enabled for every photo you take. When you choose “Auto,” the iPhone will automatically determine whether HDR should be used based on the lighting conditions.
Benefits of HDR Mode
Utilizing HDR mode on your iPhone can have several benefits:
- Improved Exposure: HDR mode helps to balance the exposure in your photos, ensuring that both the highlights and shadows are properly captured.
- Enhanced Details: By capturing multiple exposures and combining them, HDR mode can bring out more details in your photos, particularly in high-contrast scenes.
- Reduced Noise: HDR mode can help reduce noise in your photos, resulting in cleaner and sharper images, especially in low-light conditions.
However, it’s important to note that HDR mode may not be suitable for all situations. In scenes with fast-moving subjects or when capturing photos in low-light conditions without a stable base, HDR mode may lead to blurred images.
In conclusion, utilizing HDR mode can be a great way to upgrade the camera quality on your iPhone. It can help improve exposure, enhance details, and reduce noise in your photos, giving you better results. Experiment with HDR mode in different lighting conditions to see how it can elevate your photography.
Shooting in RAW Format
To enhance the camera quality on your iPhone, one important technique to consider is shooting in RAW format. RAW files contain unprocessed image data captured by the camera’s image sensor, which gives you greater control over the final image during post-processing.
By default, iPhones capture images in the JPEG format, which applies various adjustments and compressions to the image before it is saved. While JPEG files are convenient and widely supported, they do not retain as much detail and flexibility as RAW files.
When shooting in RAW format, you can make adjustments to the exposure, white balance, sharpness, and other settings after capturing the image. This flexibility allows you to fine-tune the settings to achieve the desired look and ensure optimal image quality.
How to shoot in RAW format on an iPhone:
1. Install a third-party camera app that supports RAW capture, such as Adobe Lightroom, ProCamera, or Halide.
2. Open the camera app and navigate to the settings to enable RAW capture.
3. Adjust the desired camera settings, such as exposure and white balance, before capturing the image.
4. Capture the image as you normally would.
Post-processing RAW files:
To take full advantage of shooting in RAW format, you will need to process the captured images using specialized software, such as Adobe Lightroom, Snapseed, or VSCO.
1. Import the RAW file into the post-processing software of your choice.
2. Make adjustments to exposure, contrast, saturation, and other settings to enhance the image.
3. Export the edited image as a high-quality JPEG or another desired file format.
Remember, shooting in RAW format may require more storage space on your iPhone due to the larger file sizes. Ensure that you have enough available storage or consider transferring the files to a computer or external storage device for processing.
Note: RAW files are powerful tools for enhancing image quality, but they can also be challenging to work with if you’re new to post-processing. It may take some practice to achieve your desired results, but the increased control and image quality is often worth the effort.
By shooting in RAW format and utilizing the capabilities of third-party camera apps and post-processing software, you can significantly improve the camera quality on your iPhone and take your photography to the next level.
Adding Lens Attachments
If you want to take your iPhone camera quality to the next level, adding lens attachments is a great option. These attachments can help you capture stunning photos and videos with enhanced clarity and different perspectives. Here are a few popular lens attachments to consider:
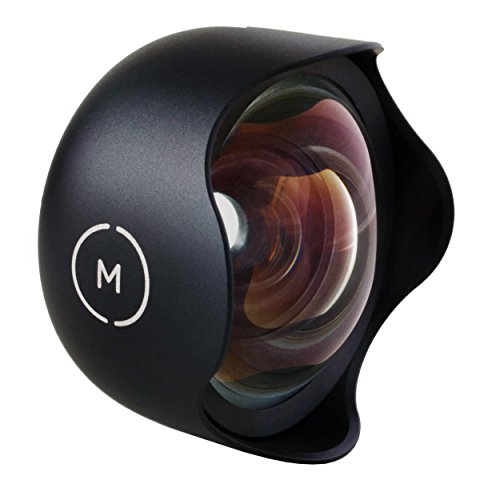
1. Wide Angle Lens
A wide-angle lens attachment expands the field of view and allows you to capture more in a single frame. This lens is great for landscape photography or group shots where you want to include everyone in the frame. It can also be useful for capturing architectural details or interior shots.
2. Telephoto Lens
A telephoto lens attachment brings distant subjects closer and allows you to capture clear and detailed shots from a distance. This lens is ideal for wildlife photography, sports events, or any situation where you can’t physically get closer to your subject. It can also be used for portrait photography, creating a shallow depth of field effect.
When choosing lens attachments, make sure to check compatibility with your iPhone model. Some lens attachments come in a clip-on design, while others require a dedicated case or mount for installation. Do some research and read reviews to find the best lens attachments for your specific needs.
Once you have your lens attachment, simply attach it over your iPhone camera lens. Most lens attachments are easy to install and can be carried around conveniently. Experiment with different lenses and settings to unleash your creativity and achieve professional-looking results.
Note: It’s important to keep in mind that lens attachments can add extra weight and bulk to your iPhone. Use them sparingly and consider removing them when not in use to avoid any strain on your device.
Remember to clean the lens attachments regularly to maintain optimal image quality. Dust and smudges can affect the sharpness and clarity of your photos.
Editing Photos with Image Editing Apps
After you’ve taken the perfect shot with your upgraded iPhone camera, you may want to enhance it further using image editing apps. With these apps, you can take your photos to the next level and make them truly stand out.
One popular image editing app is Adobe Lightroom. This app offers advanced editing tools and presets that allow you to adjust the exposure, contrast, saturation, and other aspects of your photo. You can also crop and straighten your image, apply filters, and even remove unwanted objects or blemishes.
Another great option is Snapseed, which is known for its user-friendly interface and powerful editing capabilities. With Snapseed, you can easily enhance the colors and tones of your photo, add creative effects, sharpen or blur specific areas, and make precise adjustments using selective editing tools.
If you’re looking for a more artistic approach, VSCO might be the perfect app for you. This app offers a wide range of vintage and film-inspired filters that can give your photos a unique look and feel. You can also adjust the intensity of the filters and make additional adjustments to exposure, contrast, and other settings.
In addition to these apps, there are numerous other image editing apps available on the App Store that cater to different styles and preferences. Whether you’re a beginner or an experienced photographer, these apps will allow you to transform your photos into stunning works of art.
FAQ
1. How can I improve the camera quality on my iPhone?
There are several ways to improve the camera quality on your iPhone. You can try cleaning the lens, updating your iPhone’s software, adjusting the camera settings, using third-party camera apps, or investing in external lenses.
2. Is it possible to upgrade the camera hardware on an iPhone?
No, it is not possible to upgrade the camera hardware on an iPhone. The camera hardware is built into the phone and cannot be replaced or upgraded separately.
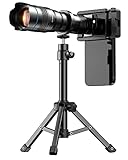
3. Can using a tripod improve the camera quality on an iPhone?
Using a tripod can definitely improve the camera quality on an iPhone. It helps to stabilize the phone, resulting in sharper and clearer photos. Additionally, it allows you to take long exposure shots or capture time-lapse videos with more stability.
4. Are there any specific camera settings I should adjust to improve the quality of my iPhone photos?
Yes, there are a few camera settings you can adjust to improve the quality of your iPhone photos. You can try adjusting the exposure, enabling HDR mode, using the grid for better composition, or experimenting with different shooting modes like Portrait or Pano.
5. What are some recommended third-party camera apps for iPhone?
There are several recommended third-party camera apps for iPhone that can help improve the camera quality. Some popular options include ProCamera, Halide, Camera+, and Adobe Lightroom. These apps often offer additional features and manual controls, allowing you to have more control over your photos.


