
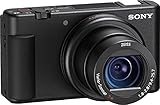
Are you a photography enthusiast who loves capturing stunning moments with your Sony camera? Do you find it inconvenient to transfer your photos from the camera to your iPhone for editing or sharing? If so, you’re in the right place! In this article, we will provide you with a step-by-step guide on how to upload photos from your Sony camera to your iPhone, ensuring that you can easily access and share your beautiful shots with just a few simple clicks.
Step 1: Ensure Compatibility
Before proceeding, it’s vital to confirm that your Sony camera and iPhone are compatible with each other and can establish a wireless connection. Most newer Sony cameras come equipped with built-in Wi-Fi capabilities, allowing you to easily connect them to your iPhone. Additionally, ensure that your iPhone’s operating system is updated to the latest version, as this will help facilitate a smooth and seamless transfer process.
Step 2: Connect Your Sony Camera to Your iPhone
The next step is to establish a wireless connection between your Sony camera and iPhone. To do this, turn on your camera’s Wi-Fi function and navigate to the settings menu. Locate the Wi-Fi settings and select the option to connect to a mobile device. On your iPhone, go to the settings menu, tap on Wi-Fi, and select your camera from the list of available networks. Once connected, the camera’s screen should display a confirmation message.

Step 3: Transfer Photos to Your iPhone
Now that your camera and iPhone are connected, it’s time to transfer your photos. Open the PlayMemories Mobile app on your iPhone, which can be downloaded from the App Store. Once the app is open, select the option to connect to your camera. You should now see a live view of your camera’s display on your iPhone. Navigate to the photos you want to transfer and select them. Finally, tap on the download button to initiate the transfer process. Depending on the size and quantity of the photos, this process may take a few moments.
In conclusion, by following these simple steps, you can easily upload photos from your Sony camera to your iPhone. This allows you to quickly access and share your beautiful moments, whether it be for editing, social media, or simply cherishing memories with your loved ones. Don’t let the hassle of file transfers hold you back from unleashing your creativity – embrace the power of technology and effortlessly combine the versatility of your Sony camera with the convenience of your iPhone.
Connect Sony camera to iPhone
If you want to upload photos from your Sony camera to your iPhone, you can easily do so by following these steps:
Step 1: Check Compatibility
Make sure that your Sony camera and your iPhone are compatible for a direct connection. Some Sony cameras have built-in Wi-Fi or NFC capabilities, which can make the connection process easier.
Step 2: Enable Wi-Fi or NFC
If your Sony camera supports Wi-Fi or NFC, go to the camera’s settings menu and enable the corresponding feature. For Wi-Fi, you may need to enter a password or set up a wireless network connection. NFC should be enabled on your iPhone as well.
Step 3: Download Sony PlayMemories Mobile App
On your iPhone, go to the App Store and search for “Sony PlayMemories Mobile”. Download and install the app on your device. This app will allow you to transfer photos from your Sony camera to your iPhone.
Step 4: Connect Camera to iPhone
Open the Sony PlayMemories Mobile app on your iPhone. On your Sony camera, navigate to the Wi-Fi or NFC settings and select the option to connect to a smartphone. Follow the on-screen instructions to establish a connection between your camera and iPhone.
Step 5: Transfer Photos
Once the camera and iPhone are connected, you can select the photos you want to transfer from your camera to your phone using the PlayMemories Mobile app. Follow the prompts on the app to complete the transfer process.
That’s it! You have now successfully connected your Sony camera to your iPhone and transferred photos from the camera to your device. Enjoy sharing and editing your pictures on your iPhone!

Install Sony camera app on iPhone
If you want to upload photos from your Sony camera to your iPhone, one of the best ways to do it is by installing the Sony camera app on your iPhone. The Sony camera app allows you to connect your iPhone to your camera and transfer photos wirelessly. Here’s how you can install the app on your iPhone:
Step 1:
First, open the App Store on your iPhone.
Step 2:
Tap on the search icon located at the bottom right corner of the screen.

Step 3:
Search for “Sony camera” in the search bar at the top of the screen.
Step 4:
From the search results, tap on the Sony camera app.
Step 5:

Tap on the “Get” button to download and install the app on your iPhone.
Step 6:
Once the app is installed, open it and follow the on-screen instructions to connect your Sony camera to your iPhone.
Step 7:
After you have successfully connected your iPhone to your camera, you can easily transfer your photos to your iPhone using the Sony camera app.
Note:
Make sure your Sony camera is compatible with the Sony camera app before you install it on your iPhone. Also, ensure that both your camera and iPhone are connected to the same Wi-Fi network for a seamless transfer of photos.
Open Sony camera app on iPhone
To upload photos from your Sony camera to your iPhone, you will need to use the Sony Camera Remote app. Follow the steps below to open the Sony camera app on your iPhone:
- Make sure your Sony camera and iPhone are connected via Wi-Fi or Bluetooth.
- On your iPhone, go to the home screen and tap on the Sony Camera Remote app.
- If you haven’t installed the app, you can download it from the App Store.
- Once the app is open, it will automatically search for your Sony camera.
- Select your camera from the list of available devices.
- If prompted, enter the password or security code for your camera.
- The Sony camera app will now open, giving you access to various features and settings.
Now that you have successfully opened the Sony camera app on your iPhone, you can proceed to upload photos from your camera to your iPhone using the app’s built-in functionality.
Access photo transfer settings on Sony camera
To transfer photos from your Sony camera to your iPhone, make sure to set up the photo transfer settings on your camera properly. By doing so, you will be able to easily connect your camera to your iPhone and transfer your photos seamlessly. Follow the steps below to access the photo transfer settings on your Sony camera:

| Step 1: | Turn on your Sony camera and navigate to the menu. |
| Step 2: | Scroll through the menu options and look for the “Settings” or “Setup” option. |
| Step 3: | Select the “Wireless” or “Wi-Fi” option from the settings menu. |
| Step 4: | Look for the “Transfer Settings” or “Connect to Smartphone” option and select it. |
| Step 5: | Choose the connection method you prefer, such as Wi-Fi or NFC. |
| Step 6: | Ensure that the Sony PlayMemories Mobile app is installed on your iPhone. |
| Step 7: | Once the connection is established, follow the on-screen instructions to complete the photo transfer process. |
| Step 8: | After the transfer is complete, you can access your Sony camera photos on your iPhone. |
By accessing and adjusting the photo transfer settings on your Sony camera, you can easily transfer your photos to your iPhone without any hassle.
Enable Wi-Fi on Sony camera
In order to upload photos from your Sony camera to your iPhone, you need to first enable Wi-Fi on your camera. Here is how you can do it:
- Turn on your Sony camera.
- Go to the settings menu on your camera.
- Select the “Network” or “Wi-Fi” option.
- If Wi-Fi is currently disabled, switch it to “On” or “Enable”.
- Wait for the camera to search for available Wi-Fi networks.
- Select your desired Wi-Fi network from the list.
- If required, enter the password for the Wi-Fi network using the camera’s buttons or touchscreen.
- Once your camera is successfully connected to the Wi-Fi network, it will display a confirmation message.
- Now, you can proceed to connect your iPhone to the same Wi-Fi network to be able to transfer photos.
By enabling Wi-Fi on your Sony camera, you will be able to establish a wireless connection between your camera and your iPhone, allowing you to easily upload photos from your camera to your iPhone without the need for any physical cables.
Connect iPhone to Sony camera Wi-Fi network
To upload photos from your Sony camera to your iPhone, you need to connect your iPhone to the Wi-Fi network created by your Sony camera. Follow these steps:
- Turn on your Sony camera and make sure it is in Wi-Fi mode.
- On your iPhone, go to the “Settings” app.
- Tap on “Wi-Fi”.
- You should see a list of available Wi-Fi networks. Look for the network name that corresponds to your Sony camera.
- Tap on the network name to connect to it.
- If prompted, enter the Wi-Fi password for your Sony camera. The password is usually provided in the camera’s manual or can be set in the camera’s settings.
- Once connected, your iPhone will display a checkmark next to the network name.
- Open the Sony camera app on your iPhone.
- Follow the instructions in the app to transfer and upload photos from your Sony camera to your iPhone.
By connecting your iPhone to the Sony camera’s Wi-Fi network, you can easily transfer and access your photos directly on your iPhone without the need for any additional cables or devices.
Launch Sony camera app on iPhone
To start the process of uploading photos from your Sony camera to your iPhone, you need to first launch the Sony camera app on your iPhone. The Sony camera app is specifically designed for connecting your Sony camera to your iPhone and transferring the photos seamlessly.
Select photos to transfer from Sony camera
Before you can begin transferring photos from your Sony camera to your iPhone, you must first select the specific photos you want to transfer. Follow these steps to select the photos:
Step 1: Power on your Sony camera
Make sure your Sony camera is turned on and functioning properly.
Step 2: Access the playback mode
Navigate to the playback mode on your Sony camera. This mode allows you to view the photos you have taken.
Step 3: Browse through the photos
Use the navigation buttons on your Sony camera to browse through the photos. This can be achieved by using the arrow keys or the control wheel, depending on your specific Sony camera model.
Step 4: Select the desired photos
Once you have located a photo you want to transfer, press the select button on your Sony camera to mark it for transfer. Continue this process until you have selected all the photos you want to transfer.
Step 5: Deselect unwanted photos
If you accidentally selected a photo or decided that you no longer want to transfer a particular photo, use the deselect button on your Sony camera to unmark it for transfer.
After completing these steps, you will have successfully selected the specific photos you want to transfer from your Sony camera to your iPhone. Now you can proceed with the actual transfer process.
Initiate photo transfer to iPhone
To transfer photos from your Sony camera to your iPhone, follow the steps below:
Step 1: Connect the camera to the iPhone
Option 1: Use a USB cable
1. Connect one end of the USB cable to the camera’s USB port.
2. Connect the other end of the USB cable to the iPhone using a Lightning to USB adapter.
3. Unlock your iPhone and trust the connected device if prompted.
Option 2: Use Wi-Fi
1. On your camera, go to the Wi-Fi settings and enable the Wi-Fi function.
2. On your iPhone, go to Settings and tap on Wi-Fi.
3. Connect your iPhone to the Wi-Fi network broadcasted by your camera.
Step 2: Transfer photos
Once the camera and iPhone are connected, follow these instructions:
1. On your iPhone, open the Photos app.
2. Tap on the “Import” tab at the bottom of the screen.
3. You will see thumbnails of the photos available for transfer, displayed in chronological order.
4. Select the photos you want to transfer by tapping on them. The selected photos will have a blue checkmark on the thumbnail.
5. Tap on “Import Selected” to transfer the selected photos to your iPhone.
Note: Depending on the number and size of the photos, the transfer process may take a few minutes.
After the transfer is complete, you can view and edit the transferred photos on your iPhone using the Photos app.
Save transferred photos on iPhone
After successfully transferring photos from your Sony camera to your iPhone, it’s essential to know how to save these transferred photos on your device. Here’s a step-by-step guide to help you save those precious memories:
Method 1: Saving individual photos
1. Locate the transferred photo on your iPhone’s Photos app.
2. Tap on the photo to open it.
3. Once opened, tap on the share icon located at the bottom-left corner of the screen.
4. A share menu will appear. Scroll through the options until you find the “Save Image” option and tap on it.
5. The photo will now be saved to your iPhone’s Camera Roll album, accessible through the Photos app.
Method 2: Saving multiple photos at once
1. Open the Photos app on your iPhone.
2. Tap on the “Albums” tab located at the bottom of the screen.
3. Find and tap on the album where the transferred photos are located.
4. Once inside the album, tap on the “Select” button located at the top-right corner of the screen.
5. Select the photos you wish to save by tapping on each photo. A blue checkmark will appear on the selected photos.
6. After selecting the desired photos, tap on the share icon located at the bottom-left corner of the screen.
7. Scroll through the options until you find the “Save Image” option and tap on it.
8. The selected photos will now be saved to your iPhone’s Camera Roll album, accessible through the Photos app.
Method 3: Organizing saved photos into albums
1. Open the Photos app on your iPhone.
2. Tap on the “Albums” tab located at the bottom of the screen.
3. Tap on the “Camera Roll” album to access the recently saved photos.
4. Tap on the “Select” button located at the top-right corner of the screen.
5. Select the photos you want to organize into a separate album by tapping on each photo. A blue checkmark will appear on the selected photos.
6. After selecting the desired photos, tap on the “Add To” button located at the bottom-left corner of the screen.
7. A list of existing albums and the option to create a new album will appear. Choose an existing album or create a new one by tapping on the “New Album” option.
8. Name the new album and tap on the “Save” button.
9. The selected photos will now be organized into the chosen album, accessible through the “Albums” tab in the Photos app.
By following these steps, you’ll be able to efficiently save and organize your transferred photos on your iPhone, ensuring easy access to your precious memories whenever you want to cherish them.
FAQ
Can I upload photos from my Sony camera to my iPhone?
Yes, you can upload photos from your Sony camera to your iPhone. There are a few different methods you can use to transfer the photos.
What is the easiest way to upload photos from a Sony camera to an iPhone?
The easiest way to upload photos from a Sony camera to an iPhone is by using a USB cable. Simply connect your camera to your iPhone using the cable, and then you can transfer the photos directly.
Is it possible to upload photos wirelessly from a Sony camera to an iPhone?
Yes, it is possible to upload photos wirelessly from a Sony camera to an iPhone. Both devices need to be connected to the same Wi-Fi network, and you can use a dedicated app or built-in wireless functionality to transfer the photos.
Are there any specific apps that can help me upload photos from my Sony camera to my iPhone?
Yes, there are several apps available on the App Store that can help you upload photos from your Sony camera to your iPhone. Some popular ones include PlayMemories Mobile, Sony Imaging Edge, and Sony PlayMemories Home.
What if I don’t have a USB cable or access to Wi-Fi? How can I upload photos from my Sony camera to my iPhone?
If you don’t have a USB cable or access to Wi-Fi, you can still upload photos from your Sony camera to your iPhone using a SD card reader. Simply insert the SD card into the reader, connect it to your iPhone’s Lightning port, and you can import the photos directly into your iPhone’s camera roll.


