
If you own both an iPhone and a Mac, you might not realize that your iPhone’s camera can actually be used as a webcam for your Mac. This can be incredibly useful if you need to attend online meetings or conferences, as it allows you to have a better quality video feed compared to the built-in webcams commonly found on Macs. In this article, we will explore the steps to set up your iPhone camera as a webcam on your Mac, so you can embrace the enhanced video experience.
Step 1: Check Compatibility
The first thing you need to do is ensure that your iPhone and Mac are compatible with this method. To use your iPhone’s camera as a webcam on your Mac, you will need an iPhone running iOS 14 or later, and a Mac running MacOS Catalina or later. If your devices meet this requirement, you’re good to go.
Note: The compatibility may vary depending on the specific models and software versions of your iPhone and Mac. It’s always a good idea to check for any updates and ensure that your devices are up to date.
Step 2: Download a Compatible App

Next, you will need to download and install a third-party app on your Mac that allows you to use your iPhone camera as a webcam. There are several apps available for this purpose, such as EpocCam, iVCam, and Camo. These apps typically require you to install a companion app on your iPhone as well.
It’s important to note that some apps may have free versions with limited features, while others may require a purchase. Choose the one that best suits your needs.
Step 3: Connect Your iPhone and Mac
Once you have downloaded and installed the necessary app on both your iPhone and Mac, you will need to connect the devices. Ensure that both your iPhone and Mac are connected to the same Wi-Fi network. Launch the app on both devices and follow the instructions to establish a connection.
Note: Some apps may require you to connect your iPhone and Mac using a Lightning to USB cable.
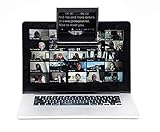
Once the connection is established, you should be able to see the live video feed from your iPhone camera on your Mac. You can then choose the app as your preferred webcam in your preferred video conferencing software, such as Zoom or Google Meet. Enjoy the improved video quality and make a lasting impression during your online meetings.
Remember to properly position your iPhone so that the camera captures you in the best possible way. Consider using a tripod or a stable surface to ensure a steady video feed.
By following these simple steps, you can transform your iPhone camera into a high-quality webcam for your Mac. Say goodbye to grainy and low-resolution video and hello to crystal clear visuals. Give it a try and experience the difference for yourself!
Why Use iPhone Camera as Webcam on Mac
1. Convenient and Portable: Using your iPhone as a webcam on your Mac allows for a convenient and portable solution. Instead of carrying a separate webcam, you can simply utilize the high-quality camera already on your iPhone. This is particularly useful for individuals who frequently travel or work remotely.
2. Better Video Quality: In most cases, iPhones are equipped with better camera quality compared to traditional webcams. By utilizing the iPhone camera as a webcam on your Mac, you can enhance the video quality of your online meetings, video conferences, or live streams. This can help you create a more professional and engaging experience for your audience.
3. Additional Features: By using the iPhone camera as a webcam, you can leverage additional features that might not be available with a regular webcam. For example, some iPhone apps offer advanced video settings, such as filters, effects, or manual controls. These features can add creativity and uniqueness to your videos or live streams.
4. Ease of Use: Setting up your iPhone as a webcam on your Mac is relatively easy and requires minimal technical knowledge. There are several apps available that can help you establish a wireless connection between your iPhone and Mac, allowing seamless integration and usage of the iPhone camera as a webcam.
5. Cost-effective Solution: Utilizing your iPhone as a webcam eliminates the need to purchase a separate webcam, saving you money and reducing clutter on your desk. Since most people already own an iPhone, repurposing its camera as a webcam provides a cost-effective solution without compromising on video quality.
Overall, using your iPhone camera as a webcam on your Mac offers convenience, better video quality, additional features, ease of use, and cost-effectiveness. It is a practical solution that can elevate your online communication and content creation experiences.
Compatibility Requirements for Using iPhone as Webcam
To use your iPhone camera as a webcam on your Mac, you need to ensure that both devices meet certain compatibility requirements. These requirements include:

1. iPhone Compatibility
Your iPhone needs to be running iOS 10 or later to use it as a webcam on your Mac. Make sure your iPhone is updated to the latest iOS version before proceeding.
2. Mac Compatibility
Check if your Mac is running macOS Mojave (10.14) or later. To find out your macOS version, click on the Apple menu in the top left corner of your screen, select “About This Mac,” and you will see the version number listed.
3. Connection
Connect your iPhone to your Mac using a lightning cable. Ensure that both the iPhone and Mac are connected to the same Wi-Fi network. If your Mac doesn’t have a USB-C port, you may need an adapter to connect the lightning cable to your Mac.
4. Software
Download and install the necessary software on your Mac to enable using your iPhone as a webcam. There are several third-party apps available for this purpose, such as EpocCam, iVCam, and Camo. Make sure to download the app from a trusted source and follow the installation instructions.
Once the app is installed on your Mac, download the corresponding app on your iPhone from the App Store. Open both apps, and they should automatically connect via Wi-Fi.

Important note: Some apps may offer additional features or require a paid upgrade to access all functionalities. Check the app’s documentation or website for more information.
5. Configuration
After establishing the connection between your iPhone and Mac, you may need to configure the webcam settings in the app on your Mac. Follow the instructions provided by the app to adjust the resolution, frame rate, and other settings according to your preferences.
Note: It’s always a good idea to test your setup before important video calls or meetings to ensure everything is working correctly.
With the above compatibility requirements met, you can now use your iPhone camera as a webcam on your Mac and enjoy improved video quality for your online communications.
How to Connect iPhone Camera to Mac
Connecting your iPhone camera to your Mac can be a convenient way to use your iPhone as a webcam. By following these steps, you can easily set up your iPhone camera to work as a webcam on your Mac.

- First, make sure that you have the latest version of macOS on your Mac.
- Open the App Store on your Mac and search for the “EpocCam” app.
- Download and install the EpocCam app on your iPhone.
- Launch the EpocCam app on your iPhone and make sure it is connected to the same Wi-Fi network as your Mac.
- On your Mac, open the EpocCam app in the Applications folder.
- In the EpocCam app on your Mac, you will see your iPhone listed as a camera option. Select your iPhone camera from the list.
- Once your iPhone camera is selected, you can adjust the video settings such as resolution and frame rate.
- Now you can use your iPhone camera as a webcam in applications like Zoom, Skype, and FaceTime.
Connecting your iPhone camera to your Mac is a great way to improve the quality of your video calls and meetings. With the EpocCam app, you can easily use your iPhone camera as a webcam and take advantage of its high-resolution capabilities.
Remember to keep your iPhone and Mac updated to ensure the best performance and compatibility with the EpocCam app.
Configuring iPhone Camera Settings for Mac
Using your iPhone camera as a webcam on your Mac can be a convenient way to enhance your video conferencing and streaming experience. Before getting started, it’s important to configure your iPhone camera settings to ensure optimal performance.
1. Update iOS and macOS: Make sure both your iPhone and Mac are running on the latest operating system versions. This ensures compatibility and stability for using your iPhone camera as a webcam.
2. Connect your iPhone to your Mac: Use a Lightning to USB cable to connect your iPhone to your Mac. Once connected, your iPhone should be recognized as a video input source.

3. Open the camera settings: On your Mac, open the camera settings by clicking on the Apple menu in the top-left corner of your screen and selecting “System Preferences.” Then, click on “Camera.”
4. Select your iPhone as the camera source: In the camera settings, you should see a list of available camera sources. Select your iPhone from the list to set it as the default camera for your Mac.
5. Adjust camera settings: After selecting your iPhone as the camera source, you can further configure its settings. This includes adjusting the exposure, focus, white balance, and other camera preferences to suit your needs.
6. Test your iPhone camera as a webcam: To ensure everything is working correctly, open a video conferencing or streaming app on your Mac and check if your iPhone camera is being used as the webcam. Make test calls or record videos to ensure the quality is satisfactory.
7. Troubleshooting: If you encounter any issues, such as your Mac not recognizing your iPhone camera, try restarting both your iPhone and Mac, updating software, or using a different USB cable. You can also consult Apple support resources or online forums for further assistance.
By following these steps, you can easily configure your iPhone camera settings for use as a webcam on your Mac. Enjoy improved video quality and flexibility during your online meetings, streaming sessions, or content creation activities.
Choosing the Right App for Using iPhone as Webcam
Turning your iPhone camera into a webcam on your Mac can offer a range of benefits, from better video quality to more advanced features. However, to utilize this functionality, you will need the right app that seamlessly connects your iPhone camera to your Mac and provides a user-friendly interface. Here are a few key factors to consider when choosing the right app for using your iPhone as a webcam on your Mac:
Compatibility: Ensure that the app you choose is compatible with both your iPhone and your Mac. Look for apps that support the latest iOS and macOS versions to ensure smooth performance.
Video Quality: Choose an app that offers high-quality video streaming. Look for features like 1080p resolution or higher, as well as options for adjusting frame rate and video settings to optimize the quality according to your needs.
Audio Support: Consider whether you want to use your iPhone’s microphone for audio during video calls or streaming. Look for apps that offer this feature, allowing you to have a complete webcam experience.
Easy Setup: Look for apps that offer a straightforward setup process, allowing you to quickly connect your iPhone to your Mac. The app should provide clear instructions and minimal technical steps to ensure a hassle-free experience.
Additional Features: Consider any additional features that the app may offer, such as the ability to switch between multiple cameras, adjust exposure settings, or apply filters to enhance your webcam experience.
User Interface: A user-friendly interface is crucial in ensuring a smooth and intuitive experience. Look for apps that offer a well-designed and easy-to-navigate interface, allowing you to access the necessary settings and controls easily.
Reviews and Ratings: Before making a final decision, read through user reviews and ratings to get an idea of the overall user experience. Pay attention to any common complaints or issues mentioned by users.
Pricing: Finally, consider the pricing options for the app. Some apps may offer a free version with limited features, while others may require a one-time purchase or a subscription. Evaluate your budget and the features you require to make the best decision.
By taking these factors into account, you can choose the right app to unlock the full potential of your iPhone camera as a webcam on your Mac, enhancing your video calling or streaming experience.
Steps to Set Up iPhone Camera as Webcam
Using your iPhone camera as a webcam on your Mac can greatly enhance your video conferencing experience. Follow these steps to set it up:
- Make sure that your iPhone and Mac are connected to the same Wi-Fi network.
- Download and install a webcam app on your iPhone, such as EpocCam or iVCam.
- Visit the App Store on your iPhone and search for the chosen app.
- Download and install the app on your iPhone.
- On your Mac, go to the App Store and search for the companion app of the webcam app you installed on your iPhone.
- Download and install the companion app on your Mac.
- Launch the webcam app on both your iPhone and Mac.
- On your iPhone app, follow the instructions to connect and pair your iPhone with your Mac.
- Once the connection is established, you should see the iPhone camera feed on your Mac.
- Open your preferred video conferencing app on your Mac, such as Zoom or Skype.
- Go to the settings of the video conferencing app and select the virtual webcam option.
- Choose the virtual webcam that corresponds to your iPhone camera.
- Now, your iPhone camera is set up as a webcam on your Mac, and you can use it for video calls and conferences.
Remember to adjust the camera position and settings on your iPhone app for the best video quality.
Note: Some webcam apps may offer additional features or require a paid upgrade for full functionality. Make sure to check the app’s documentation for more information.
Troubleshooting Tips for Using iPhone Camera on Mac
If you are experiencing difficulties in using your iPhone camera as a webcam on your Mac, there are a few troubleshooting steps you can try to resolve the issue. Here are some tips to help you get started:
1. Ensure Compatibility:
Make sure that your iPhone and Mac are both running on the latest operating systems. Check for any pending updates and install them if available. Additionally, verify that your iPhone model is compatible with the camera-to-webcam feature.
2. Allow Camera Access:
In order for your Mac to access your iPhone’s camera, you need to grant permission. On your iPhone, go to “Settings” and then “Privacy”. Tap on “Camera” and ensure that the toggle next to your webcam app or software is enabled.
3. Restart Devices:
Restart both your iPhone and Mac to clear any temporary issues that may be causing the problem. After restarting, try connecting your iPhone camera to your Mac again.
4. Check Connection:
Ensure that your iPhone is connected to your Mac via a reliable lightning cable or Wi-Fi. Try using a different cable or switching to a different Wi-Fi network to rule out any connection-related problems.
5. Update Webcam Software:
If you are using third-party webcam software on your Mac, make sure it is up to date. Visit the software’s website or check for updates within the app itself. Outdated software can often result in compatibility issues.
6. Reset Camera Settings:
If none of the above steps work, you can try resetting your iPhone camera settings. On your iPhone, go to “Settings” and then “General”. Scroll down and tap on “Reset”, followed by “Reset All Settings”. Keep in mind that this will reset all your device’s settings, not just the camera.
By following these troubleshooting tips, you should be able to use your iPhone camera as a webcam on your Mac without any issues. If the problem persists, you may need to seek further assistance from the manufacturer or contact technical support for additional guidance.
Best Practices for Using iPhone Camera as Webcam
Using your iPhone camera as a webcam on your Mac can be a convenient solution, especially when you need a high-quality video for meetings, conferences, or online classes. To ensure a smooth experience and make the most out of your iPhone camera, consider following these best practices:
1. Use a Stable Setup: It is important to have a stable setup for your iPhone to avoid shaky video footage. Invest in a tripod or a phone holder that can be attached to your desk or monitor to keep your camera steady during your video calls.
2. Optimize Lighting: Good lighting is crucial for a clear and high-quality video. Make sure to have a well-lit environment by positioning yourself facing a natural light source, such as a window. Alternatively, you can use lamps or adjustable LED lights to improve the lighting conditions.
3. Enable Do Not Disturb Mode: Avoid interruptions during your video calls by enabling Do Not Disturb mode on your iPhone. This will prevent calls, messages, and other notifications from appearing on your screen and potentially disrupting your video feed.
4. Connect via USB: While it is possible to connect your iPhone camera to your Mac wirelessly, it is generally recommended to use a USB connection for a more stable and reliable connection. This will minimize the chances of experiencing lag or disconnections during your video calls.
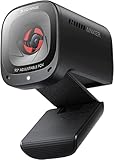
5. Use Reliable Apps: There are several apps available that allow you to use your iPhone camera as a webcam on your Mac. Do thorough research and choose a reliable app that suits your needs. Some popular options include EpocCam, iVCam, and NDI HX Camera.
6. Test and Adjust Settings: Before important video calls or meetings, take the time to test your setup and adjust the camera settings accordingly. Check the video quality, framing, and audio settings to ensure everything is working properly.
7. Use Background Blur: If your video calls often involve sensitive information or messy backgrounds, consider using the background blur feature available in some apps. This will help maintain privacy and focus on you during the calls.
8. Maintain Battery Level: Using the iPhone camera extensively during video calls can drain the battery quickly. Make sure your iPhone is fully charged or connected to a power source to avoid sudden battery loss during important calls.
9. Keep the Lens Clean: Regularly clean the camera lens of your iPhone to ensure a clear and sharp video output. Use a microfiber cloth or a phone cleaning kit to remove any smudges or fingerprints that may affect the image quality.
10. Update Your iOS and Apps: To ensure compatibility and access to the latest features, keep your iPhone’s iOS and webcam apps updated. Regularly check for updates and install them to optimize the performance of your iPhone camera as a webcam.
By following these best practices, you can make the most out of your iPhone camera as a webcam on your Mac and have a seamless video calling experience.
Alternatives to Using iPhone as Webcam on Mac
While using your iPhone as a webcam on your Mac can be convenient, there are also other alternatives that you can consider. Depending on your specific needs and preferences, one of these options may be a better fit for you:
1. Dedicated Webcam
Investing in a dedicated webcam is a popular option for many Mac users. These webcams are designed specifically for use with computers and often offer better image quality and performance compared to using a smartphone camera.
2. External Camera App
If you prefer to continue using your iPhone as a camera, you can explore third-party apps that allow you to connect your iPhone to your Mac as an external camera. These apps typically offer additional features and settings for better control over your camera settings.
3. Mac Compatible Camera
Another alternative is to consider purchasing a camera that is compatible with macOS. This option provides a wide range of choices, from entry-level to professional-grade cameras, depending on your needs and budget.
4. Built-in Mac Camera
If you have a Mac with a built-in camera, you may find that it meets your needs without the need for additional peripherals. Mac cameras have improved over the years and can provide adequate image quality for most video conferencing and streaming purposes.
5. Wireless Webcams
If you want the flexibility to move around while using your webcam, you can opt for a wireless webcam that connects to your Mac via Wi-Fi or Bluetooth. This allows you to position the camera wherever you like without being limited by cables.
Consider these alternatives to using your iPhone as a webcam on your Mac to find the solution that best fits your needs and preferences. Each option has its own strengths and drawbacks, so take the time to research and compare before making a decision.
FAQ
Can I use my iPhone camera as a webcam on my Mac?
Yes, you can use your iPhone camera as a webcam on your Mac. There are several apps available that allow you to do this, such as EpocCam and iCam. These apps connect your iPhone to your Mac using Wi-Fi or a USB cable, and then you can use the camera on your iPhone as a webcam on your Mac.
What apps can I use to use my iPhone camera as a webcam on my Mac?
There are several apps available that you can use to use your iPhone camera as a webcam on your Mac. Some popular options include EpocCam, iCam, and iVCam. These apps connect your iPhone to your Mac using Wi-Fi or a USB cable, and then you can use the camera on your iPhone as a webcam on your Mac.


