Many iPhone users wonder whether it is possible to connect their iPhone camera to a Windows computer. The good news is that yes, it is possible to connect your iPhone camera to your Windows computer and transfer your photos and videos directly!
To connect your iPhone camera to your Windows computer, you will need a USB cable. Make sure you have the latest version of iTunes installed on your computer, as this will allow your computer to recognize your iPhone. Once you have connected your iPhone to your computer using the USB cable, you can access your iPhone’s camera roll and transfer your photos and videos to your computer.
Transferring photos and videos from your iPhone camera to your Windows computer is a straightforward process. Simply open the File Explorer on your computer, and under “This PC,” you will see your iPhone listed as a connected device. Click on your iPhone, and you will have access to the DCIM folder, which contains all the photos and videos stored on your iPhone’s camera roll. From here, you can select the photos and videos you want to transfer and copy them to your computer.
It is important to note that if you want to transfer live photos or videos taken in high-resolution formats such as HEIF or HEVC, you may need to install additional software or codecs on your Windows computer. However, for regular photos and videos, the native transfer process using the USB cable is sufficient.
So, if you are wondering whether you can connect your iPhone camera to your Windows computer, the answer is a definite yes. With a simple USB cable and the right software installed, you can easily transfer your photos and videos from your iPhone camera to your Windows computer and enjoy them on a larger screen.

How to connect iPhone camera to Windows computer
If you want to connect your iPhone camera to your Windows computer, there are a few different methods you can try:
- Use a USB cable: Connect your iPhone to your Windows computer using a USB cable. Your computer should automatically recognize your iPhone as a device and allow you to access the camera.
- Use iTunes: Install iTunes on your Windows computer and connect your iPhone to it using a USB cable. Open the iTunes application and navigate to the “Photos” tab. Here, you can select the option to sync your iPhone camera with your computer.
- Use iCloud: If you have iCloud set up on both your iPhone and Windows computer, you can enable the iCloud Photo Library feature. This will allow your iPhone camera photos to automatically sync with your computer.
- Use a third-party app: There are several third-party apps available in the Microsoft Store that allow you to connect your iPhone camera to your Windows computer wirelessly. Some popular options include “AirMore” and “Xender”.
Choose the method that works best for you and follow the instructions to connect your iPhone camera to your Windows computer. Once connected, you will be able to transfer and access your iPhone camera photos on your computer.
Requirements for connecting iPhone camera to Windows computer
To connect your iPhone camera to your Windows computer, you will need to ensure that you meet the following requirements:
1. Windows operating system: Ensure that your Windows computer is running a compatible operating system. The iPhone camera can be connected to Windows 7, Windows 8, Windows 8.1, or Windows 10.
2. USB cable: You will need a USB cable to connect your iPhone camera to your Windows computer. The USB cable should be compatible with both your iPhone and your computer.

3. Updated iTunes software: Install the latest version of iTunes on your Windows computer. iTunes is necessary for properly recognizing and connecting your iPhone camera to your computer.
4. Trust your computer: Before connecting your iPhone camera, make sure to establish trust between your iPhone and your Windows computer. Trusting your computer will enable a secure connection between your devices.
5. Camera Settings: On your iPhone, ensure that the camera settings allow for connecting with your computer. You can adjust the camera settings by going to “Settings” > “Camera” > “Formats” and selecting “Most Compatible” for better compatibility with Windows.
6. Updated drivers: Ensure that all the drivers on your Windows computer are up to date. Keeping your drivers updated will ensure a seamless connection between your iPhone camera and your computer.
7. Storage space: Make sure that your Windows computer has enough free storage space to accommodate the data you will transfer from your iPhone camera.

8. Stable internet connection: A stable internet connection is essential for downloading and installing the necessary drivers and software updates for your iPhone camera.
By meeting these requirements, you can easily connect your iPhone camera to your Windows computer and transfer your photos and videos for further editing or sharing.
Connecting iPhone camera to Windows computer using USB cable
If you want to connect your iPhone camera to your Windows computer, you can do so using a USB cable. This allows you to transfer photos and videos directly from your iPhone to your computer without the need for any additional software.
Here are the steps to connect your iPhone camera to your Windows computer:
- Unlock your iPhone and connect it to your computer using a USB cable. Make sure the cable is securely connected to both devices.
- On your iPhone, you may see a prompt asking for permission to access your device. Tap “Allow” to grant permission.
- On your Windows computer, open “File Explorer” by pressing the Windows key + E on your keyboard.
- In the “File Explorer” window, you should see your iPhone listed under “This PC” or “Devices and Drives.” Click on your iPhone to open it.
- Inside your iPhone, you will find various folders, including “DCIM” which stands for “Digital Camera Images.” Open the “DCIM” folder.
- Within the “DCIM” folder, you will find the photos and videos stored on your iPhone camera. You can now copy and paste these files to any location on your Windows computer.
It’s important to note that some iPhones may require you to unlock the device and enter your passcode before granting access to the computer. Additionally, make sure you have the latest version of iTunes installed on your computer, as this may be necessary for establishing a successful connection.
By following these steps, you can easily connect your iPhone camera to your Windows computer using a USB cable and transfer your photos and videos hassle-free.
Connecting iPhone camera to Windows computer wirelessly
If you want to connect your iPhone camera to your Windows computer wirelessly, there are a few simple steps you can follow. By using third-party applications and built-in features, you can easily access your iPhone’s camera and transfer your photos or videos to your computer without the need for cables or wires.
Here is a step-by-step guide on how to connect your iPhone camera to your Windows computer wirelessly:
| Step | Description |
|---|---|
| 1 | Ensure that both your iPhone and Windows computer are connected to the same Wi-Fi network. |
| 2 | On your iPhone, open the App Store and search for a third-party camera app that supports wireless connection, such as “Camera for Windows” or “Camera Live”. |
| 3 | Download and install the chosen app on your iPhone. |
| 4 | Launch the app on your iPhone, and you will see a unique URL or IP address displayed on the screen. |
| 5 | On your Windows computer, open a web browser and enter the URL or IP address shown on your iPhone’s screen. |
| 6 | A live view from your iPhone’s camera will be displayed in the web browser on your Windows computer. From there, you can take photos or record videos. |
| 7 | To transfer the photos or videos to your Windows computer, simply click on the “Download” button or right-click on the image/video and select “Save As” to save it to your desired location. |
By following these steps, you can easily connect your iPhone camera to your Windows computer wirelessly and conveniently transfer your photos and videos without the need for additional cables or wires.
Troubleshooting common issues when connecting iPhone camera to Windows computer
Issue 1: iPhone not recognized by computer

If your Windows computer is not recognizing your iPhone camera when connected, try the following solutions:
- Ensure that you are using a compatible USB cable and that it is securely connected to both the iPhone and the computer.
- Unlock your iPhone and check if it prompts you to “Trust This Computer.” Tap on the “Trust” option to establish the connection.
- Restart your computer and try reconnecting your iPhone.
- If the issue persists, update your computer’s operating system and make sure you have the latest version of iTunes installed. Restart both your computer and iPhone, and then try connecting again.
Issue 2: Unable to import photos/videos from iPhone
If you are facing difficulties importing photos or videos from your iPhone camera to your Windows computer, follow these troubleshooting steps:
- Open the Photos app on your Windows computer and ensure that you have selected the option to import from your iPhone.
- If the Photos app is not opening or if you encounter errors during the import process, close the app and disconnect your iPhone. Reconnect it and try again.
- Check if you have sufficient storage space on your computer to accommodate the imported files. Free up space if needed.
- If you are using third-party software to import media from your iPhone, ensure that it is up to date and compatible with your iPhone model.
Issue 3: Slow transfer speed
In case you are experiencing slow transfer speed when importing media from your iPhone camera to your Windows computer, consider the following troubleshooting steps:
- Make sure you are using a USB port with good connectivity. Try switching to a different USB port on your computer.
- Close any unnecessary applications or processes running in the background on your computer, as they can affect the transfer speed.
- Ensure that both your iPhone and computer are running the latest software updates. Outdated software can sometimes lead to slower transfer speeds.
- If available, try using a different USB cable for the connection. A faulty cable can cause slower data transfer.
If you continue to experience issues with connecting your iPhone camera to your Windows computer, consider seeking assistance from Apple Support or referring to the official Apple documentation for further guidance.
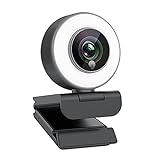
Using iPhone camera as a webcam on Windows computer
If you’ve ever wanted to use your iPhone’s camera as a webcam on your Windows computer, you’re in luck. With a few simple steps, you can transform your iPhone into a high-quality webcam for video calls, streaming, and more.
Step 1: Download a webcam app
To get started, you’ll need to download a webcam app from the App Store. There are several apps available that can turn your iPhone camera into a webcam. Some popular options include EpocCam, iVCam, and iCam. Make sure to check the features and compatibility of each app before downloading.
Step 2: Install the app on your iPhone and computer

Once you’ve downloaded the webcam app on your iPhone, you’ll need to install the companion software on your Windows computer. Most webcam apps provide a desktop client that you can download from their website. Follow the installation instructions to set up the app on your computer.
Step 3: Connect your iPhone to your computer
Now that you have the app installed on both your iPhone and computer, it’s time to connect them. Make sure your iPhone and computer are connected to the same Wi-Fi network. Open the webcam app on your iPhone and launch the desktop client on your computer. The app will automatically detect your iPhone and establish a connection.
Step 4: Adjust settings and start using your iPhone camera as a webcam
Once the connection is established, you can customize the settings according to your preferences. Most webcam apps allow you to adjust video quality, aspect ratio, and other settings. You can also choose which apps or programs you want to use the webcam with, such as Zoom, Skype, or OBS.
Note: Some webcam apps may offer additional features like face tracking and virtual background effects, so feel free to explore these options too.
Conclusion:
Using your iPhone camera as a webcam on your Windows computer is an excellent way to enhance your video calling experience. With the right webcam app and a few simple steps, you can enjoy high-quality video calls and streaming without investing in a separate webcam. Give it a try and see the difference it makes!
Transferring photos and videos from iPhone camera to Windows computer
If you want to transfer photos and videos from your iPhone camera to your Windows computer, there are several methods you can use. Here are three common options:
1. Using a USB cable:
The simplest and most common way to transfer photos and videos from your iPhone camera to your Windows computer is by using a USB cable. Follow these steps:
- Connect your iPhone to your Windows computer using the USB cable that came with your phone.
- Unlock your iPhone and tap the “Trust” option if prompted on your device.
- On your Windows computer, open the “Photos” app or any other photo management software.
- Click on the “Import” or “Import Photos and Videos” option.
- Select the photos and videos you want to transfer and click “Import” or “Import Selected”.
- Wait for the transfer to complete, and your photos and videos will be saved on your Windows computer.
2. Using iCloud Photos:
If you have iCloud Photos enabled on your iPhone and Windows computer, you can easily transfer your photos and videos wirelessly. Follow these steps:
- On your iPhone, go to “Settings” and tap on your name at the top of the screen.
- Tap “iCloud” and then “Photos”.
- Toggle on the “iCloud Photos” option.
- On your Windows computer, open a web browser and go to the iCloud website (www.icloud.com) or download and install the iCloud for Windows app.
- Sign in to your iCloud account.
- Click on the “Photos” icon.
- Select the photos and videos you want to transfer and click the download button.
- Wait for the download to complete, and your photos and videos will be saved on your Windows computer.
3. Using third-party software:
If the above methods don’t work for you, or if you prefer to use third-party software, there are many options available in the market. Some popular ones include EaseUS MobiMover, iMazing, and DearMob iPhone Manager. These software tools provide additional features and flexibility for transferring and managing your photos and videos.
Choose the method that works best for you and start transferring your iPhone camera photos and videos to your Windows computer today!
Managing iPhone camera storage on Windows computer
If you are an iPhone user and have taken numerous photos and videos with your iPhone camera, you may be wondering how to manage your camera storage on your Windows computer. Fortunately, there are several ways you can accomplish this.
1. Using the USB cable: The easiest way to manage your iPhone camera storage on a Windows computer is by connecting your iPhone to the computer using the USB cable that came with your iPhone. Once connected, your computer should recognize your iPhone as a storage device, allowing you to access and transfer your camera photos and videos.
2. Using iCloud: Another option to manage your iPhone camera storage is by using iCloud. By enabling iCloud Photo Library on your iPhone and setting it up on your Windows computer, you can access your camera photos and videos from both devices. This allows you to free up space on your iPhone by storing your media in iCloud and accessing it whenever needed from your computer.
3. Using third-party software: There are various third-party software applications available that can help you manage your iPhone camera storage on your Windows computer. These software applications often provide additional features such as bulk deleting, organizing, and backing up your camera media.
4. Transferring via Email or Messaging apps: If you only need to transfer a few selected photos or videos from your iPhone camera to your Windows computer, you can send them via email or messaging apps like WhatsApp or Telegram. This method is convenient for sharing or transferring individual media files.
Regardless of the method you choose, it’s essential to regularly manage your iPhone camera storage to free up space for new photos and videos. By transferring your camera media to your Windows computer, iCloud, or using third-party software, you can efficiently organize and preserve your precious memories captured with your iPhone camera.
Additional tips and recommendations for connecting iPhone camera to Windows computer
Connecting your iPhone camera to a Windows computer can open up a world of possibilities for photography enthusiasts and professionals alike. However, it’s important to keep a few additional tips and recommendations in mind to ensure a smooth and efficient connection.
Install iTunes and update your iOS
In order to establish a connection between your iPhone camera and Windows computer, it is essential to have iTunes installed on your computer. iTunes provides the necessary drivers and software for recognizing and interacting with iOS devices. Additionally, it is recommended to keep both your iPhone and computer’s operating system up to date to avoid any compatibility issues.
Use a compatible USB cable
When connecting your iPhone camera to a Windows computer, make sure to use a genuine Apple USB cable or a compatible third-party cable. Using a low-quality or counterfeit cable may result in connection problems or slow data transfer speeds. It is always recommended to use the cable that came with your iPhone or purchase a certified one from a reliable source.
Check USB port and cable connections
Before attempting to connect your iPhone camera to your Windows computer, ensure that both the USB port on your computer and the charging port on your iPhone are clean and free from debris. Dirty or damaged ports can cause connection issues. Additionally, make sure the USB cable is securely inserted into both the computer and iPhone to ensure a stable connection.
Unlock your iPhone and trust the computer
When you connect your iPhone camera to your Windows computer for the first time, you will likely be prompted on your iPhone to “Trust This Computer.” It is essential to unlock your iPhone and agree to trust the computer to establish a successful connection. Failing to do so may prevent the computer from recognizing your iPhone’s camera.
Restart your iPhone and computer
If you are experiencing any connectivity issues, it is often helpful to restart both your iPhone and computer. Restarting can help refresh the system and resolve any temporary glitches. Before connecting your iPhone camera again, ensure that both devices have been restarted to maximize the chances of a successful connection.
| Troubleshooting Steps | Description |
|---|---|
| Update iTunes and iOS | Make sure both iTunes and your iPhone’s operating system are up to date to ensure compatibility. |
| Try a different USB port or cable | If you are experiencing connection issues, try using a different USB port on your computer or a different USB cable. |
| Disable any security software | Temporary disable any security software or firewall that may be blocking the connection between your iPhone and computer. |
| Reset network settings | If you are having trouble with Wi-Fi connectivity on your iPhone, try resetting the network settings. |
| Check for software updates | Periodically check for software updates for both your iPhone and Windows computer to ensure a smooth connection experience. |
By following these additional tips and recommendations, you can enhance your experience when connecting your iPhone camera to a Windows computer. Whether you’re looking to transfer photos, use your iPhone as a webcam, or explore other creative possibilities, a reliable and efficient connection is the key to unlocking the full potential of your device.
Question-answer:
How can I connect my iPhone camera to my Windows computer?
You can connect your iPhone camera to your Windows computer by using a USB cable. Simply plug one end of the cable into your iPhone and the other end into a USB port on your computer. Your computer should recognize your iPhone as a camera and you will be able to access your photos and videos.
Is it possible to connect my iPhone camera to a Windows computer wirelessly?
Yes, it is possible to connect your iPhone camera to a Windows computer wirelessly. You can use third-party apps or software like iCloud Photo Library or Dropbox to transfer your photos and videos from your iPhone to your computer over Wi-Fi. However, keep in mind that this method may require additional setup and may not be as fast as using a USB cable.