
Connecting your iPhone camera to your MacBook running iOS 16 can be a great way to enhance your photography and video capabilities. With this connection, you can easily transfer photos and videos from your iPhone to your MacBook for editing and sharing. In this article, we will guide you through the steps to connect your iPhone camera to your MacBook and take your creativity to the next level.
Step 1: Check your MacBook compatibility
Before connecting your iPhone camera to your MacBook, it’s important to ensure that your MacBook is compatible with iOS 16. This can be done by checking the system requirements of your MacBook. Make sure you have the latest version of macOS installed and that your MacBook supports the necessary hardware and software requirements.
Step 2: Connect your iPhone to your MacBook
To connect your iPhone camera to your MacBook, you will need a lightning to USB cable. Start by plugging one end of the cable into the lightning port on your iPhone and the other end into a USB port on your MacBook. Once connected, your MacBook should recognize your iPhone camera as an external device.

Step 3: Access your iPhone camera on your MacBook
Once your iPhone is connected to your MacBook, you can access your iPhone camera from various applications such as the Photos app or third-party editing software. Open the desired application and look for the option to import media from your iPhone camera. Select the photos and videos you want to transfer and follow the on-screen instructions to complete the process.
Step 4: Edit and share your photos and videos
Now that your iPhone camera is connected to your MacBook, you can start editing and sharing your photos and videos. Use editing software such as Adobe Photoshop or iMovie to enhance your images and videos with filters, effects, and other creative tools. Once you’re satisfied with your edits, you can easily share your creations on social media platforms, email, or any other desired medium.
By connecting your iPhone camera to your MacBook running iOS 16, you open up a world of possibilities for capturing and editing stunning photos and videos. Follow these steps and unleash your creativity today!

Connect iPhone Camera to MacBook: A Step-by-Step Guide
Connecting your iPhone camera to your MacBook can be a useful way to transfer photos and videos from your device to your computer. In this guide, we will take you through the steps to easily connect your iPhone camera to your MacBook.
- Ensure that both your iPhone and MacBook are updated to the latest software versions. This will help to avoid any compatibility issues.
- Connect your iPhone to your MacBook using the supplied USB cable.
- On your iPhone, you will see a prompt asking whether to “Trust This Computer.” Tap on “Trust” to proceed.
- On your MacBook, open the “Photos” app. It should automatically recognize your iPhone as a camera device.
- If the “Photos” app does not open automatically, click on the Apple menu in the top-left corner of the screen, select “System Preferences,” and then click on “Photos.” Here, enable the option for “Open Photos for this device” to ensure that it launches automatically in the future.
- In the “Photos” app, you will see your iPhone listed under the “Devices” section on the left sidebar. Click on your iPhone to view the photos and videos stored on your device.
- Select the photos and videos you want to transfer to your MacBook by clicking on them. You can hold down the Command key on your keyboard to select multiple items.
- Once you have selected the desired photos and videos, click on the “Import Selected” button to begin the transfer process. You can also choose to import all the items by clicking on the “Import All New Items” button.
- After the transfer is complete, you can view and manage your imported photos and videos on your MacBook using the “Photos” app or any other suitable software.
- Once you have imported the photos and videos, you can safely disconnect your iPhone from your MacBook by unplugging the USB cable.
That’s it! Now you know how to connect your iPhone camera to your MacBook and easily transfer your photos and videos. This can be a convenient way to backup your files, edit them on a larger screen, or share them with others.
Making the Connection: Check Your Devices and Cables
Before you can connect your iPhone camera to your MacBook running iOS 16, it’s important to ensure that you have the right devices and cables. Here are the steps to check and verify everything is in order:
Check your MacBook
- Make sure your MacBook is running on iOS 16 or later. You can check this by clicking on the Apple logo in the top left corner, then selecting “About This Mac”.
- Ensure that you have enough storage space on your MacBook to accommodate the photos and videos you will be transferring from your iPhone camera.
- If you plan to use the Photos app on your MacBook to import the media files, make sure it is up to date. You can update the app by opening the App Store and going to the “Updates” tab.
Check your iPhone camera
- Confirm that your iPhone is running on iOS 16 or later. To check, go to “Settings”, then “General”, and select “Software Update”.
- Ensure that your iPhone has enough battery life to sustain the connection throughout the transferring process. It’s best to have your iPhone plugged into a power source during the transfer to avoid any interruptions.
- Check if your iPhone has enough available storage to store the media files that will be transferred. You can check this by going to “Settings”, then “General”, and selecting “iPhone Storage”.
Check your cables
Now that you have checked your devices, it’s time to ensure that you have the appropriate cables for the connection.
- For newer MacBook models, you will need a USB-C to Lightning cable to connect your iPhone camera. This cable can be purchased from Apple or other authorized retailers.
- If you have an older MacBook model with a traditional USB port, you will need a Lightning to USB-A cable to connect your iPhone camera.
- Inspect your cables for any signs of damage, such as fraying or exposed wires. It’s crucial to use cables in good condition to avoid connectivity issues.
Once you have completed these checks and have everything in order, you are ready to connect your iPhone camera to your MacBook and start transferring your precious memories or using your iPhone as a webcam.

Enabling iOS 16 Features on Your iPhone
With the release of iOS 16, Apple introduces exciting new features that can enhance your iPhone experience. Here are some steps to enable these features:
1. Update your iPhone
Before you can enjoy the new features of iOS 16, make sure your iPhone is running the latest software. To update your iPhone, go to Settings > General > Software Update, and if a new update is available, tap on “Download and Install.”
2. Customize Control Center
iOS 16 allows you to have more control over your settings directly from the Control Center. To customize your Control Center, go to Settings > Control Center > Customize Controls. Here, you can add or remove shortcuts for various features such as Wi-Fi, Bluetooth, or even the new Focus mode.

3. Activate Focus mode
The new Focus mode in iOS 16 helps you stay in the zone by reducing distractions. To activate Focus mode, swipe down from the top-right corner of the screen to access the Control Center, and tap on the Focus icon. You can then select the desired Focus mode, such as Work, Personal, or Do Not Disturb. Customize each mode to specify which notifications and apps are allowed.
4. Try Live Text
iOS 16 introduces Live Text, a powerful feature that lets you interact with text in your photos. It can recognize and allow you to select, copy, and paste text from images. To use Live Text, simply open the Photos app, select a photo with text, and tap on the Live Text icon that appears. You can then highlight the text and perform various actions on it.
5. Explore Safari improvements
iOS 16 brings several enhancements to the Safari web browser. You can now experience tab grouping, which allows you to organize your tabs into groups for easier navigation. Additionally, Safari’s new “.” domain shortcut makes it quicker than ever to visit frequently accessed websites. Discover these and more Safari improvements by opening the Safari app and exploring its settings.
6. Utilize the redesigned Weather app
The Weather app in iOS 16 has received a fresh new design and improved functionality. It now provides more detailed weather information, including next-hour precipitation, air quality, and more. Open the Weather app to check the current weather conditions, swipe up for additional details, and explore the interactive weather maps.
By following these steps, you can fully utilize the features introduced in iOS 16 and enjoy an enhanced iPhone experience. Experiment with the new functionalities and make the most out of your device!
Activating Camera Connectivity on Your MacBook
If you want to connect your iPhone camera to your MacBook running iOS 16, you will need to follow these steps to activate camera connectivity:

- Make sure your MacBook is running macOS Mojave or later. The camera connectivity feature is only available on these operating systems.
- Connect your iPhone to your MacBook using the Lightning cable that came with your iPhone. Ensure both ends are securely plugged in.
- On your MacBook, click on the Apple menu located in the top-left corner of the screen and select “System Preferences” from the drop-down menu.
- In the System Preferences window, locate and click on the “Network” icon. This will open the Network settings.
- In the Network settings, you should see your iPhone listed as a device under the “Personal Hotspot” section. Click on your iPhone to select it.
- Click on the “Connect” button to establish a connection between your MacBook and iPhone.
- Your MacBook will now be connected to your iPhone’s camera. You can open the camera app on your MacBook and start capturing photos or videos directly from your iPhone’s camera.
By following these steps, you can easily activate camera connectivity on your MacBook and enjoy the convenience of using your iPhone’s camera on a larger screen. Remember to disconnect your iPhone from your MacBook when you’re done using the camera to avoid draining the battery unnecessarily.
Establishing a Wired Connection between iPhone Camera and MacBook
Step 1: Check Compatibility
Before connecting your iPhone camera to your MacBook, make sure that both devices are compatible. Your iPhone should be running iOS 16 or later, while your MacBook should be running at least macOS Mojave 10.14.6 or later.
Step 2: Get a Lightning to USB Cable
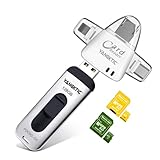
To establish a wired connection, you will need a Lightning to USB cable. This cable is commonly used for charging and data transfer between Apple devices. If you don’t have one, you can purchase it from the Apple Store or any authorized retailer.

Step 3: Connect the Cable
Connect one end of the Lightning to USB cable to the Lightning port on your iPhone camera. Then, connect the other end of the cable to a USB port on your MacBook.
Step 4: Trust the Device
Once the cable is connected, you may see a pop-up message on your iPhone camera asking you to trust the connected device. Tap “Trust” to establish a secure connection between your devices.
Step 5: Access the Camera on MacBook
After establishing a connection, your MacBook should automatically recognize your iPhone camera as an external device. You can access the camera on your MacBook by opening the built-in “Photos” or “Image Capture” applications.
Step 6: Transfer Photos
To transfer photos from your iPhone camera to your MacBook, select the desired photos and choose the “Import” or “Import Selected” option in the Photos or Image Capture applications. Follow the on-screen instructions to complete the transfer process.
Step 7: Disconnect the Cable
Once you have transferred the photos, safely disconnect the Lightning to USB cable from both your iPhone camera and MacBook.
Summary
Establishing a wired connection between your iPhone camera and MacBook is a straightforward process. By following the steps outlined above, you can easily connect your devices and transfer photos without relying solely on wireless methods.
Caution
Ensure that you are using an original Lightning to USB cable from Apple or a certified third-party cable to avoid potential compatibility or safety issues.
Transferring Photos and Videos from iPhone Camera to MacBook
Connecting your iPhone camera to your MacBook allows you to easily transfer photos and videos between the two devices. This can be useful if you want to save storage space on your iPhone or if you want to edit your photos and videos on a larger screen.
Using USB Cable
The most common way to connect your iPhone camera to your MacBook is by using a USB cable. Follow these steps:
- Connect your iPhone to your MacBook using the Lightning to USB cable.
- Unlock your iPhone and trust the computer if prompted.
- On your MacBook, open the Photos app.
- Click on your iPhone under the “Devices” section in the sidebar.
- Select the photos and videos you want to transfer.
- Click on the “Import” button to transfer the selected media to your MacBook.
Using iCloud Photos
If you have iCloud Photos enabled on both your iPhone and MacBook, you can easily transfer your photos and videos wirelessly. Here’s how:
- On your iPhone, go to Settings > [your name] > iCloud > Photos and enable iCloud Photos.
- On your MacBook, go to System Preferences > Apple ID > iCloud and enable iCloud Photos.
- Wait for your photos and videos to sync between your iPhone and MacBook.
- Open the Photos app on your MacBook to access your synced media.
Note: Make sure you are connected to Wi-Fi and have enough iCloud storage space for your media.
By following these steps, you can easily transfer your photos and videos from your iPhone camera to your MacBook, whether you prefer using a USB cable or iCloud Photos.
Troubleshooting Common Issues: Tips and Solutions
If you’re experiencing difficulties connecting your iPhone camera to your MacBook running iOS 16, here are some troubleshooting tips and solutions to help you resolve common issues:
- Check your connection: Ensure that both your iPhone and MacBook are connected to the same Wi-Fi network. Additionally, verify that Bluetooth is enabled on both devices.
- Restart your devices: Try restarting both your iPhone and MacBook to refresh their settings and clear any temporary glitches that may be causing the connection issues.
- Update your software: Ensure that both your iPhone and MacBook have the latest software updates installed. Outdated software can sometimes cause compatibility issues and prevent proper device connectivity.
- Reset network settings: On your iPhone, navigate to “Settings” > “General” > “Reset” > “Reset Network Settings.” This will reset your network settings and can potentially resolve any network-related issues.
- Disconnect other connections: If you have other devices connected to your iPhone, such as Bluetooth headphones or speakers, try disconnecting them temporarily to see if they are interfering with the camera connection. Also, disconnect any USB cables from your MacBook, as they can sometimes interfere with the connection as well.
- Check camera permissions: On your iPhone, go to “Settings” > “Privacy” > “Camera” and ensure that permission is granted to your MacBook. Without the necessary permissions, your MacBook will not be able to access the iPhone’s camera.
- Reset camera settings: On your iPhone, go to “Settings” > “General” > “Reset” > “Reset All Settings.” This will reset all camera settings to their default values and may resolve any software-related issues causing the connection problem.
- Try a different USB cable: If you are connecting your iPhone to your MacBook using a USB cable, try using a different cable to rule out any cable-related issues.
- Contact Apple support: If none of the above solutions work, it may be worth reaching out to Apple support for further assistance. They can provide more specific troubleshooting steps based on your specific device and software configuration.
By following these troubleshooting tips and solutions, you should be able to overcome common issues and successfully connect your iPhone camera to your MacBook on iOS 16.
Question-answer:
How can I connect my iPhone camera to my MacBook running iOS 16?
To connect your iPhone camera to your MacBook running iOS 16, you can use the built-in Photos app. Connect your iPhone to your MacBook using a Lightning to USB cable. Open the Photos app on your MacBook, and your iPhone should appear under the “Devices” section in the sidebar. Click on your iPhone, and you will be able to access and import your iPhone photos and videos onto your MacBook.
Is it possible to connect my iPhone camera to my MacBook using a wireless connection?
Yes, it is possible to connect your iPhone camera to your MacBook wirelessly. To do this, both your iPhone and MacBook need to be on the same Wi-Fi network. Open the Photos app on your MacBook, and in the sidebar, you should see your iPhone listed under the “Devices” section. Click on your iPhone, and you will be able to import your iPhone photos and videos onto your MacBook wirelessly.
Can I connect my iPhone camera to my MacBook using Bluetooth?
No, you cannot connect your iPhone camera to your MacBook using Bluetooth. Bluetooth is primarily used for connecting devices for audio and file sharing, but it is not designed for streaming a live camera feed from your iPhone to your MacBook. For connecting your iPhone camera to your MacBook, it is recommended to use a Lightning to USB cable or connect wirelessly through the Photos app.
What are some other apps that I can use to connect my iPhone camera to my MacBook?
Aside from the built-in Photos app, there are other third-party apps available that can help you connect your iPhone camera to your MacBook. Some popular options include “Camera for OBS Studio” and “EpocCam.” These apps allow you to use your iPhone camera as a webcam for video conferencing, streaming, and other purposes on your MacBook. You can find these apps on the App Store and follow their respective instructions for setting up the connection.
Why is my MacBook not recognizing my iPhone camera when connected?
If your MacBook is not recognizing your iPhone camera when connected, there could be a few potential issues. Firstly, make sure that your iPhone is unlocked and not in sleep mode when connecting it to your MacBook. Additionally, check that the Lightning to USB cable you are using is not faulty by trying a different cable if possible. If the issue persists, try restarting both your iPhone and MacBook and see if that resolves the problem. If not, there may be a compatibility issue between your iPhone and MacBook, and you may need to contact Apple support for further assistance.


