
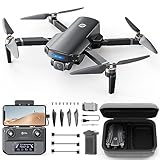
Welcome to our comprehensive guide on how to connect your Purefire drone camera to your iPhone! Whether you’re a professional aerial photographer or a hobbyist, being able to access and control your drone camera right from your iPhone is a game-changer. In this article, we will walk you through the step-by-step process of connecting your drone camera to your iPhone, so you can capture stunning photos and videos from the sky.
Step 1: Ensure Compatibility
Before getting started, it’s important to make sure that your Purefire drone camera is compatible with your iPhone. Check the specifications of your drone camera and iPhone to ensure they are compatible in terms of hardware and software requirements. This will ensure a seamless connection and avoid any potential issues during the setup process.
Step 2: Download the App
To connect your Purefire drone camera to your iPhone, you’ll need to download the dedicated app from the App Store. Search for the app using the provided name, and once you find it, tap the “Download” button to install it on your iPhone. Make sure you have a stable internet connection during the download process.
Step 3: Connect Your Drone Camera
After successfully installing the app, open it on your iPhone. Power on your Purefire drone camera and ensure it’s in pairing mode. Once your drone camera is ready, open the app and tap on the “Connect” button. Follow the on-screen instructions to establish a wireless connection between your drone camera and iPhone. This process may vary depending on your specific drone camera model.
Step 4: Customize Settings
Once the connection is established, you’ll be able to access various settings and control options on your iPhone. Take some time to explore the app and customize the settings according to your preferences. From adjusting camera angles to setting up flight paths, the app provides a range of features that will enhance your aerial photography experience.
Step 5: Start Capturing
Now that your Purefire drone camera is successfully connected to your iPhone, it’s time to start capturing breathtaking aerial shots. Use the app to control the camera’s movements, capture photos, and record videos. Make sure to follow all safety guidelines and regulations when operating your drone camera to ensure a safe and enjoyable experience for both you and those around you.
By following these simple steps, you can easily connect your Purefire drone camera to your iPhone and unlock a whole new world of aerial photography. So, what are you waiting for? Get out there and capture stunning images from the sky!
How to Connect Purefire Drone Camera to iPhone
If you have a Purefire drone camera and an iPhone, you can easily connect them to capture stunning aerial shots and videos. Connecting the Purefire drone camera to your iPhone allows you to control the camera settings, view live footage, and share your content directly from your device.
Step 1: Check Compatibility
Before you start, make sure that your Purefire drone camera and iPhone are compatible with each other. Ensure that your Purefire drone camera supports wireless connectivity and your iPhone is running on the latest iOS version.
Step 2: Install the Purefire App
Go to the App Store on your iPhone and search for the Purefire app. Download and install the app on your device. Once the installation is complete, open the app.
Step 3: Enable Wi-Fi on the Purefire Drone
On your Purefire drone camera, locate the Wi-Fi button or access the Wi-Fi settings through the camera’s menu. Enable Wi-Fi on the drone to establish a connection with your iPhone.
Step 4: Connect iPhone to Purefire Drone Camera
On your iPhone, go to the Wi-Fi settings and select the network name of your Purefire drone camera. The network name is usually indicated on the camera or mentioned in the user manual. Once selected, enter the password for the Wi-Fi network, if prompted.
Step 5: Launch the Purefire App
After successfully connecting your iPhone to the Purefire drone camera’s Wi-Fi network, launch the Purefire app on your device. The app will automatically detect the connected drone camera and establish a connection.
Once connected, you will have access to the camera settings, live view, and other features of the Purefire drone camera on your iPhone. You can now start capturing stunning aerial shots and videos.
Remember to disconnect the Purefire drone camera from your iPhone’s Wi-Fi network when you’re done using the camera to avoid any unnecessary battery drain on both devices.

Step-by-Step Guide for Easy Set-up
Connecting your Purefire drone camera to your iPhone is a straightforward process. Follow these simple steps to get started:
Step 1: Download the Purefire App
The first step is to download the Purefire app from the App Store. Open the App Store on your iPhone and search for “Purefire.” Tap on the app, then tap the “Get” button to download and install it on your device.
Step 2: Turn on your Drone Camera
Ensure that your Purefire drone camera is turned on. You can do this by pressing the power button located on the device. Wait for the camera to boot up properly.
Step 3: Connect your iPhone to the Drone Camera
Open the settings on your iPhone and navigate to the Wi-Fi settings. Look for the Wi-Fi network name that starts with “Purefire.” Tap on it to connect.
Step 4: Launch the Purefire App
Go back to your home screen and locate the Purefire app that you installed earlier. Tap on the app icon to launch it.

Step 5: Connect to the Drone Camera within the App
Once the app is launched, you should be prompted to connect to your drone camera. Tap on the “Connect” button within the app to establish a connection.
Step 6: Enjoy your Purefire Drone Camera
Congratulations! You have successfully connected your Purefire drone camera to your iPhone. You can now start using the app to control your drone camera and capture amazing aerial footage.
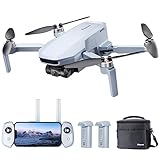
Prepare Your Purefire Drone Camera
Before you can connect your Purefire Drone Camera to your iPhone, there are a few steps you need to take to ensure a smooth setup process. Follow the instructions below to prepare your drone camera:
1. Charge the battery: Make sure your Purefire Drone Camera is fully charged before attempting to connect it to your iPhone. To charge the battery, locate the charging port on the drone and connect it to the included charger. Plug the charger into a power source and allow the battery to charge until it is full.
2. Install the propellers: Before flying your drone, you need to attach the propellers. The Purefire Drone Camera typically comes with spare propellers in its packaging. Carefully attach the propellers to their designated locations on the drone. Ensure that they are securely fastened to prevent any accidents during flight.

3. Insert the memory card: To capture and store images and videos taken by your Purefire Drone Camera, you need to insert a memory card. Locate the memory card slot on the drone and insert the memory card into the designated slot. Make sure the card is properly inserted and locked into place.
4. Download the Purefire Drone app: To connect your drone camera to your iPhone, you need to download the Purefire Drone app from the App Store. Open the App Store on your iPhone and search for “Purefire Drone.” Once you find the app, tap on “Get” and then “Install” to download it onto your device.
Now that your Purefire Drone Camera is prepared, you are ready to connect it to your iPhone. Follow the remaining instructions in this guide to learn how to set up the connection between your drone camera and your iPhone.
Power Up Your iPhone
When it comes to connecting your Purefire drone camera to your iPhone, it’s important to make sure your iPhone is fully powered up and ready to go. Here are some tips to help you get the most out of your iPhone:
1. Update your iPhone’s software
Before attempting to connect your Purefire drone camera, make sure your iPhone has the latest software update. This will ensure compatibility and enhance the overall performance of your device.

2. Check your battery level
Connecting your Purefire drone camera to your iPhone will require some battery power. It’s a good idea to fully charge your iPhone before attempting to connect. This way, you can enjoy a seamless connection without worrying about your device running out of battery.
Pro Tip: If you’re planning to use your iPhone for an extended period while connected to the Purefire drone camera, it may be a good idea to invest in a portable battery pack to keep your device charged on the go.
3. Enable Wi-Fi and Bluetooth
For a successful connection, both Wi-Fi and Bluetooth need to be enabled on your iPhone. To enable Wi-Fi, go to Settings > Wi-Fi and toggle the switch to turn it on. For Bluetooth, go to Settings > Bluetooth and toggle the switch to turn it on.
Pro Tip: It’s important to note that some devices may require the use of a specific Wi-Fi network or a direct connection. Refer to your Purefire drone camera’s user manual for specific instructions.
By following these tips, you can ensure that your iPhone is ready to connect to your Purefire drone camera and enjoy a seamless and reliable connection.
Install the Purefire Drone App
To connect your Purefire drone camera to your iPhone, you will need to install the Purefire Drone app. The app is available for download on the App Store for free. Follow the steps below to install the app:
- Open the App Store on your iPhone.
- Tap on the search icon at the bottom of the screen.
- Type “Purefire Drone” in the search bar and tap on the search button.
- From the search results, look for the Purefire Drone app and tap on it.
- On the app page, tap on the “Get” button to start the download and installation process.
- If prompted, enter your Apple ID password or use Touch ID/Face ID to authenticate the download.
- Wait for the app to download and install on your iPhone. This may take a few moments, depending on your internet connection and device performance.
- Once the app is installed, you will find its icon on your home screen.
- Tap on the Purefire Drone app icon to launch the app.
Now that you have installed the Purefire Drone app on your iPhone, you are ready to connect your drone camera and start capturing amazing aerial footage!
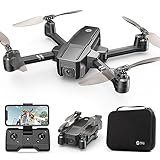
Connect Your Purefire Drone Camera
To connect your Purefire drone camera to your iPhone, follow these simple steps:
1. Power on your Purefire drone camera by pressing the power button on the drone.
2. On your iPhone, go to the “Settings” app and select “Wi-Fi.”
3. Wait for your Purefire drone camera to appear in the list of available Wi-Fi networks. It will be displayed as “Purefire Camera” or something similar.
4. Tap on the Purefire camera network to connect to it. Your iPhone will temporarily disconnect from your regular Wi-Fi network during this process.
5. Once connected, open the Purefire drone camera app on your iPhone. If you don’t have the app installed, you can download it from the App Store.
6. Follow the on-screen instructions to pair your iPhone with the Purefire drone camera. This may involve entering a passcode or scanning a QR code.
7. Once the pairing process is complete, you should be able to use your iPhone to control the Purefire drone camera and view the live camera feed.
That’s it! You’ve successfully connected your Purefire drone camera to your iPhone. Enjoy capturing amazing aerial photos and videos with your new setup!
Adjust Settings for Optimal Performance
Once you have successfully connected your Purefire Drone Camera to your iPhone, it is important to adjust the settings for optimal performance. By making a few simple adjustments, you can enhance the quality of the footage captured and ensure a smooth flying experience.
1. Resolution and Frame Rate
Start by adjusting the resolution and frame rate settings on your drone camera. Higher resolutions and frame rates will provide better image quality and smoother video playback. Experiment with different settings to find the balance between image quality and storage capacity.
2. White Balance and Exposure
Consider adjusting the white balance and exposure settings to ensure accurate colors and lighting in your footage. Depending on the lighting conditions, you may need to manually set these settings or choose an automatic mode for the drone camera to adjust itself.
3. Flight Modes
Explore the various flight modes available on your Purefire Drone Camera. These modes can help you achieve different aerial shots and effects. Experiment with modes such as Follow Me, Orbit, and Waypoints to add creativity to your footage.
4. Gimbal Stabilization
If your drone camera has a gimbal, make sure to enable the stabilization feature. This helps minimize shakes and vibrations, resulting in smoother and more professional-looking footage. It is especially important when capturing fast-action shots or flying in windy conditions.
5. Safety Settings
Prioritize safety by familiarizing yourself with the safety settings on your Purefire Drone Camera. These settings may include geofencing, altitude limits, and return-to-home functions. Adjust these settings according to your flying environment to prevent accidents and fly within legal boundaries.
By adjusting these settings for optimal performance, you can make the most out of your Purefire Drone Camera and capture breathtaking aerial footage with your iPhone.
Start Capturing Incredible Footage
Once you have successfully connected your Purefire drone camera to your iPhone, it’s time to start capturing incredible footage. With the Purefire drone camera, you have the ability to create breathtaking videos and photos from new perspectives.
Before you start, make sure you have a clear understanding of the controls and features of your Purefire drone camera. This will help you maximize its potential and ensure that you capture the best possible footage.
Here are some tips to get started:
- Plan your shots: Before taking off, think about the type of footage you want to capture. Are you looking for sweeping aerial shots or close-up details? Having a plan in mind beforehand will help you make the most of your time in the air.
- Experiment with angles: One of the advantages of using a drone camera is the ability to capture footage from unique angles. Try experimenting with different perspectives and camera angles to add variety to your shots.
- Use the camera settings: The Purefire drone camera has various settings that can enhance your footage. Explore features like exposure settings, white balance, and filters to achieve the desired look and feel for your videos and photos.
- Fly smoothly: Smooth and controlled movements will result in more professional-looking footage. Take the time to practice flying your drone camera and make sure to pilot it smoothly to avoid shaky footage.
- Consider the lighting: Lighting plays a crucial role in the quality of your footage. Try to shoot during the golden hours (just after sunrise or before sunset) for soft, warm lighting. Avoid shooting in harsh midday sunlight, as it can create harsh shadows and overexposed areas.
- Edit your footage: Once you have captured your footage, don’t forget to edit it to perfection. Use video editing software or mobile apps to trim, enhance, and add effects to your videos. This will help you create a final product that truly stands out.
By following these tips, you’ll be well on your way to capturing incredible footage with your Purefire drone camera. So grab your iPhone, head outside, and let your creativity soar!
Question-answer:
Can I connect my PureFire drone camera to my iPhone?
Yes, you can connect your PureFire drone camera to your iPhone.


