Keeping your camera sensor clean is essential for producing high-quality images with your mirrorless camera. Over time, dust, smudges, and other particles can accumulate on the sensor and affect the clarity of your photos. Regularly cleaning the sensor will help ensure that your images have the sharpness and detail you desire.
Before we dive into the cleaning process, it’s important to note that cleaning the sensor can be a delicate task. If you’re not confident in your abilities, it’s best to have a professional clean it for you. However, if you’re comfortable with handling your camera and its delicate components, you can follow these steps to clean the sensor yourself.
First, start by ensuring that your camera’s battery is fully charged or that you have a fresh battery installed. This is important because the mirrorless camera needs power to keep the shutter open during the cleaning process.
Next, find a clean and dust-free work area where you can safely clean the camera sensor. Make sure to turn off any fans or air conditioning in the room, as moving air can cause dust particles to circulate and land on the sensor.
Step-by-step guide on cleaning a camera sensor in a mirrorless camera
One of the most important parts of any digital camera is the sensor, as it is responsible for capturing the image. Over time, dust, dirt, and other particles can accumulate on the sensor and affect the quality of your photos. Cleaning the sensor is a delicate process, but with the right tools and techniques, you can do it yourself. Here is a step-by-step guide on how to clean a camera sensor in a mirrorless camera:
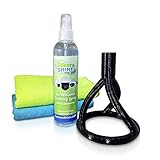
1. Gather the necessary tools:
Before you begin cleaning the sensor, make sure you have the right tools on hand. You will need a sensor cleaning kit, which typically includes a sensor cleaning swab or brush, a sensor cleaning solution, and a blower or air blower brush. These tools are designed specifically for cleaning camera sensors and will help you remove any dust or dirt particles effectively.
2. Prepare your workspace:
Choose a clean and dust-free area to work on your camera. Make sure you do not have any fans or air conditioning vents blowing air near your workstation, as this can cause more dust particles to float in the air. Ensure that your hands are clean and dry before you start the cleaning process.
3. Set your camera to sensor cleaning mode:
Most mirrorless cameras have a sensor cleaning mode that you can access through the camera’s menu settings. This mode will lift the mirror and expose the sensor, making it easier to clean. Refer to your camera’s user manual to find out how to access the sensor cleaning mode.
4. Remove dust with a blower:
Using a blower or air blower brush, gently blow air onto the sensor to dislodge any loose dust or particles. Be careful not to touch the sensor with the blower, as this can cause damage. Make sure to hold the camera facing downwards to allow any dislodged particles to fall out of the camera instead of getting trapped inside.
5. Use a sensor cleaning swab:
Dampen a sensor cleaning swab with a small amount of sensor cleaning solution. Gently swipe the swab across the sensor in one direction, using light pressure. Avoid applying excessive force or dragging the swab back and forth, as this can cause streaks or scratches on the sensor. Use a new swab for each swipe to prevent transferring any dirt or oil from one area of the sensor to another.

6. Inspect the sensor:
After cleaning the sensor, use a sensor loupe or a magnifying glass with good lighting to inspect the sensor for any remaining dirt or streaks. If you notice any stubborn stains or particles, repeat the cleaning process with a fresh swab.
7. Complete the cleaning process:
Once you are satisfied with the cleanliness of the sensor, turn off the camera and put the lens back on. Always remember to turn off your camera before removing or attaching the lens to avoid exposing the sensor to unnecessary risks. You can now resume taking clear and crisp photos with your mirrorless camera.
It is important to note that cleaning the sensor requires patience and precision. If you are unsure about cleaning the sensor yourself, it is recommended to have it professionally cleaned by a camera technician. Regular sensor cleaning will help maintain the integrity of your images and ensure the best image quality from your mirrorless camera.
Gather the necessary camera cleaning tools
When attempting to clean the sensor of your mirrorless camera, it is important to have the right tools on hand to ensure a thorough and safe cleaning process. Here are some essential tools you will need:
1. Lens blower: A lens blower is a small hand-held device that uses air to remove dust and debris from the camera sensor. It is important to use a blower specifically designed for camera cleaning to avoid damaging the sensor.

2. Sensor cleaning swabs: Sensor cleaning swabs are specifically designed to safely remove smudges and fingerprints from the camera sensor. These swabs are usually made of non-abrasive material that won’t scratch the sensor.
3. Sensor cleaning solution: A sensor cleaning solution is a liquid solution that is used to clean the camera sensor. It is important to use a cleaning solution specifically designed for camera sensors to avoid damaging the delicate sensor surface.
4. Sensor cleaning brush: A sensor cleaning brush is a soft brush that is designed to remove stubborn dust particles from the sensor. It is important to use a brush with soft bristles to avoid scratching the sensor.
5. Microfiber cloth: A microfiber cloth is useful for wiping the camera body, lens, and other components. It is important to use a lint-free microfiber cloth to avoid leaving behind any fibers or residue.
By gathering these necessary camera cleaning tools, you will be well-prepared to effectively clean the sensor of your mirrorless camera and maintain optimal image quality.

Prepare the camera for cleaning
Before you start cleaning the sensor of your mirrorless camera, it is important to properly prepare the camera to minimize the risk of damage. Follow these steps:
- Power off the camera: Turn off your camera to prevent any accidental damage while cleaning.
- Remove the lens: Take off the lens from the camera body by pressing the lens release button and twisting it counterclockwise.
- Find a clean and dust-free environment: Choose a location with minimal dust or particles in the air to avoid contaminating the sensor further.
- Inspect the sensor: Use a sensor loupe or magnifying glass to check the condition of the sensor for any visible dirt, dust, or smudges.
- Charge the camera battery: Ensure that the camera battery is fully charged to prevent any power interruption during the cleaning process.
- Gather cleaning supplies: Collect the necessary cleaning tools, including a sensor cleaning swab, sensor cleaning solution, blower brush, and lens cleaning cloth.
By properly preparing your camera for cleaning, you can ensure a safe and effective sensor cleaning process.
Remove the lens from the camera body
Before cleaning the camera sensor mirrorless, it is necessary to remove the lens from the camera body. This step is crucial to ensure easy access to the sensor and prevent any damage to the lens or camera.
Step 1: Switch off the camera
Start by switching off the camera to avoid accidentally triggering the shutter or creating vibrations during the lens removal process. This will help maintain the stability of the camera setup.
Step 2: Locate the lens release button
On the camera body, you will find a lens release button near the lens mount. This button is typically marked with a lens icon or labeled as “Release” or “Unlock.” Familiarize yourself with the location of this button before proceeding.

Step 3: Press the lens release button
Press and hold the lens release button while simultaneously twisting the lens counterclockwise. This action will detach the lens from the camera body. Ensure a firm grip on both the camera and the lens while performing this step to prevent accidental drops.
Note: Depending on the camera model, you may need to rotate the lens clockwise instead of counterclockwise to remove it.
Step 4: Store the lens in a clean and safe location
Once the lens is detached from the camera body, it is essential to store it in a clean and safe location. Use a lens cap or protective pouch to prevent dust, moisture, or scratches from affecting the lens elements. In addition, avoid exposing the lens to extreme temperatures or direct sunlight.
By removing the lens from the camera body, you have prepared your camera for the next step in the cleaning process: accessing and cleaning the camera sensor mirrorless.
Clean the camera cencor mirrorless
Cleaning the sensor of your mirrorless camera is an important task that needs to be done regularly to ensure the quality of your images. Dust or other particles can accumulate on the sensor over time, causing spots or unwanted artifacts to appear in your photos. By following some simple steps, you can effectively clean the sensor and maintain the performance of your camera.

Before you begin, make sure you are working in a clean and dust-free environment. It is also recommended to have a fully charged battery and a blower brush specifically designed for sensor cleaning.
Here are the steps to clean the sensor of your mirrorless camera:
| Step 1: | Set your camera to sensor cleaning mode. This will lock up the mirror and open the shutter, allowing you to access the sensor. |
| Step 2: | Remove the lens from the camera body. Take care not to touch the exposed sensor. |
| Step 3: | Gently use the blower brush to remove any loose dust or particles from the sensor. Be careful not to touch the sensor with the brush. |
| Step 4: | If there are stubborn dust particles or stains on the sensor, you can use a sensor cleaning solution and a sensor swab. Apply a few drops of the solution to the swab and gently swipe across the sensor in a single motion. |
| Step 5: | Inspect the sensor using a sensor loupe or a magnifying glass to check for any remaining dust or smudges. If necessary, repeat the cleaning process. |
| Step 6: | Once you are satisfied with the cleanliness of the sensor, turn off the camera and reattach the lens. |
It is important to note that sensor cleaning requires caution and delicate handling. If you are unsure or uncomfortable performing the cleaning yourself, it is recommended to have the sensor cleaned professionally by a camera service center.
Regular sensor cleaning will help maintain the image quality of your mirrorless camera and ensure that you capture clean and sharp photographs.
Inspect the cencor for dust or debris
Before proceeding with the cleaning process, it is essential to inspect the camera’s cencor to determine if there is any dust or debris present. Dust and debris on the cencor can significantly affect the quality of your photographs and videos.

To inspect the cencor, follow these steps:
- Remove the lens from your camera body and turn on your camera.
- Set your camera mode to M or Av and choose a small aperture value, such as f/22, to maximize depth of field.
- Aim your camera at a blank white wall or a clear sky, ensuring that the background is evenly lit.
- Take a series of test shots, varying the focus distance and zoom level.
- Transfer the test shots to your computer and open them in a photo editing software.
- Zoom in on the images to inspect the cencor for any visible dust or debris.
If you notice any dust or debris on the cencor, it is advisable to proceed with the cleaning process to ensure optimal image quality.
Please note that cleaning the cencor can be a delicate procedure, and it is recommended to refer to your camera’s user manual for specific instructions on how to clean the cencor of your particular camera model.
Reassemble the camera and perform a test
Once you have successfully cleaned the camera sensor of your mirrorless camera, it’s time to reassemble the camera and perform a test to ensure everything is working properly.
Follow these steps to reassemble your camera:
- Begin by carefully placing the sensor back into its original position. Make sure it fits snugly and is aligned correctly.
- Next, reconnect any cables that you had to disconnect during the cleaning process. Double-check that all connections are secure.
- Gently place the camera cover or plastic housing back onto the camera body. Ensure that it is aligned correctly and properly fitted.
- Once everything is back in place, securely fasten any screws or clips that hold the camera cover or housing in place.
Now that your camera is reassembled, it’s time to perform a test to see if the cleaning process was successful:
- Power on the camera and set it to a manual shooting mode with a small aperture.
- Aim the camera at a white or neutral-colored wall or surface.
- Take a test shot and examine the image for any dust, smudges, or spots.
- If you notice any imperfections, repeat the cleaning process or seek professional assistance.
- If the test shot appears clean and free of any artifacts, congratulations! Your camera sensor is now clean and ready to use.
Remember to regularly clean your camera sensor to maintain optimal image quality. By following these cleaning procedures, you can enjoy dust-free and spotless photos with your mirrorless camera.
FAQ
Why is it important to clean the camera sensor mirrorless?
It is important to clean the camera sensor mirrorless to ensure that your photos are free from dust and other particles that can affect image quality. Dust on the sensor can show up as spots or smudges on your photos, and cleaning it regularly can help prevent this.
What tools do I need to clean the camera sensor mirrorless?
To clean the camera sensor mirrorless, you will need a blower, sensor cleaning swabs, and a sensor cleaning solution. The blower is used to remove any loose dust particles, the swabs are used to gently remove any stubborn dirt or smudges, and the cleaning solution is used to ensure a thorough clean.
How often should I clean my camera sensor mirrorless?
The frequency of cleaning your camera sensor mirrorless depends on how often you use your camera and the environment in which you use it. If you frequently change lenses or shoot in dusty or dirty environments, you may need to clean your sensor more often. As a general guideline, it is recommended to clean the sensor every few months to maintain optimal image quality.
Can I clean the camera sensor mirrorless myself?
Yes, you can clean the camera sensor mirrorless yourself. However, it is important to proceed with caution and follow the manufacturer’s instructions or seek guidance from a professional if you are unsure. Cleaning the sensor requires a delicate touch and using the proper tools and techniques to avoid damaging the sensor.
What should I do if I accidentally damage the camera sensor mirrorless while cleaning?
If you accidentally damage the camera sensor mirrorless while cleaning, it is best to consult a professional camera technician for repairs. Attempting to fix the damage yourself may result in further damage to the sensor or other parts of the camera. It is always better to seek professional help in such cases.