
If you own a Lorex security camera, you may be wondering how to delete the recordings stored on it. Whether you want to free up storage space or remove sensitive footage, deleting recordings is a straightforward process.
To delete recordings on your Lorex security camera, you can follow these simple steps. Firstly, access your camera’s settings through the Lorex app or software provided by the manufacturer. Look for the “Recordings” or “Storage” tab.
Next, select the specific recording or event you wish to delete. Some models may allow you to select multiple recordings at once. Once you have made your selection, click on the “Delete” or “Trash” icon. A confirmation prompt may appear asking you to confirm the deletion.
It’s important to note that once you delete a recording, it is permanently removed from your camera’s storage. Therefore, it is recommended to carefully review the recordings before deleting them, to ensure you don’t accidentally delete important footage.
Understanding Lorex Security Cameras
Lorex security cameras are designed to provide you with a reliable and efficient way to monitor and protect your property. These cameras are widely used for home security, small businesses, and commercial applications. Understanding how these cameras work and the different features they offer can help you make the most of your Lorex security system.
Types of Lorex Security Cameras
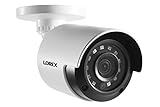
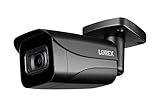
- Indoor/Outdoor Cameras: Lorex offers both indoor and outdoor security cameras. The outdoor cameras are designed to withstand harsh weather conditions and provide clear and detailed images even in low-light situations.
- Wireless Cameras: Lorex also offers wireless security cameras that eliminate the need for cables and make the installation process easier. These cameras are perfect for areas where running cables is not feasible.
- Fixed and Pan-Tilt-Zoom (PTZ) Cameras: Lorex offers fixed cameras that provide a fixed view of a specific area, as well as PTZ cameras that can be remotely controlled to pan, tilt, and zoom to capture a wider range of views.
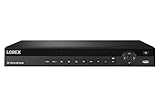
Recording and Storage
Lorex security cameras allow you to record and store video footage for later review. The recordings can be stored locally on a DVR (Digital Video Recorder) or NVR (Network Video Recorder), or remotely on a cloud-based storage service. The length of time you can store the recordings depends on the storage capacity of your DVR, NVR, or cloud service.
Accessing and Managing Recordings
To access and manage the recordings on your Lorex security camera, you will need to use the Lorex app or software provided by Lorex. These applications allow you to view live footage, playback recorded videos, and manage settings for your cameras. From the app or software, you can easily delete unwanted recordings to free up storage space.
It is important to note that the exact steps to delete recordings may vary depending on the specific model of your Lorex security camera and the software you are using. Refer to the user manual or contact Lorex support for detailed instructions on how to delete recordings on your specific camera model.
In conclusion, Lorex security cameras offer a range of features and options to enhance your security system. Understanding the different types of cameras available and how to access and manage recordings can help you get the most out of your Lorex security camera system.
Why Delete Recordings on Lorex Security Camera
There are several reasons why you may want to delete recordings on your Lorex security camera:

1. Storage Space Management
One of the main reasons to delete recordings is to free up storage space on your Lorex security camera’s internal storage or connected external hard drive. Regularly deleting old or unnecessary recordings ensures that you have enough space to capture new footage and prevents your system from running out of storage.
2. Privacy and Security
Deleting recordings can help protect your privacy and security. If you no longer need certain recorded footage, deleting it ensures that it cannot be accessed or viewed by unauthorized individuals. This can be especially important if your security camera captures sensitive information such as personal or financial data.
3. Organizational Purposes
Managing and organizing your security camera recordings is another reason to delete them. By deleting old or irrelevant footage, you can easily locate and review important recordings when needed. This can save you time and make it easier to find specific events or incidents.
4. Compliance with Legal Regulations
In some cases, you may be required to delete security camera recordings to comply with legal regulations or data protection laws. Certain industries, such as healthcare or finance, have strict guidelines regarding the retention and deletion of recorded footage. Ensure that you are familiar with the regulations applicable to your situation and delete recordings accordingly.
Note: Before deleting any recordings, it is important to review them and ensure that you do not delete any important or relevant footage that may be needed for future reference or investigations.
By understanding the reasons why you may want to delete recordings on your Lorex security camera, you can effectively manage and maintain your surveillance system.
Step-by-Step Guide: How to Delete Recordings on Lorex Security Camera
Deleting recordings from your Lorex security camera is a straightforward process. Follow these steps to remove unwanted footage:
Step 1: Power on your Lorex security camera and connect it to your computer or smartphone using the Lorex app.
Step 2: Launch the Lorex app on your device and sign in to your account.
Step 3: Once you are logged in, navigate to the “Recordings” tab or section within the app.

Step 4: Review the list of recorded videos and locate the recording(s) you want to delete.
Step 5: Select the recording(s) you wish to remove by clicking on the checkbox or tapping on them.
Step 6: Look for the “Delete” or “Remove” option and click on it. Confirm your action when prompted.
Step 7: Wait for the Lorex app to delete the selected recording(s) from your camera. This may take a few seconds or minutes, depending on the file size.
Step 8: Once the deletion process is complete, verify that the recordings have been successfully removed from your Lorex security camera.

Congratulations! You have successfully deleted recordings from your Lorex security camera. Always ensure you double-check the recordings you want to delete to avoid accidentally removing important footage. Regularly clearing old footage will help optimize your camera’s storage capacity and improve its overall performance.
Using the Lorex Mobile App
The Lorex Mobile App allows you to easily manage and control your Lorex security camera system from your smartphone or tablet. With the app, you can view live video feeds, playback recordings, and adjust camera settings all in one place.
Step 1: Download and Install the Lorex Mobile App
To get started, you will need to download and install the Lorex Mobile App from the App Store or Google Play Store. The app is available for both iOS and Android devices, ensuring compatibility with a wide range of smartphones and tablets.
Step 2: Connect to Your Lorex Security Camera System
Once you have the app installed on your device, you will need to connect it to your Lorex security camera system. To do this, open the app and follow the on-screen instructions to add your system. You will need to enter the system’s device ID and login credentials to establish the connection.
Once the connection is established, you will be able to access and control your security cameras from anywhere, as long as you have an internet connection.

Step 3: View Live Video Feeds
With the Lorex Mobile App, you can easily view live video feeds from your security cameras. Simply select the camera you want to view from the app’s interface, and the live video stream will appear on your device’s screen. You can switch between cameras and even zoom in or out for a closer look.
Step 4: Playback Recordings
If you want to review past events, the Lorex Mobile App allows you to easily playback recordings. You can select a specific date and time and view the recorded footage from that period. The app also offers features such as pause, fast forward, and rewind, allowing you to control the playback speed.
Furthermore, you can take screenshots or save video clips directly to your device for sharing or later reference.
Step 5: Adjust Camera Settings
The Lorex Mobile App also enables you to adjust various camera settings to customize your security camera system. Depending on your camera model, you may be able to change settings such as motion detection sensitivity, recording modes, and more. Simply navigate to the settings menu in the app and make the desired changes.
By following these steps, you will be able to effectively use the Lorex Mobile App to manage and control your Lorex security camera system from your smartphone or tablet.
Using the Lorex Client Software
If you want to delete recordings on your Lorex security camera, you can use the Lorex Client Software. This software allows you to easily connect to your camera and manage its settings and recordings.
Here are some steps on how to use the Lorex Client Software to delete recordings:
- Download and install the Lorex Client Software: Open your preferred web browser and go to the Lorex website. Navigate to the Downloads section and find the appropriate software for your camera model. Click on the download link and follow the on-screen instructions to install the software on your computer.
- Launch the Lorex Client Software: Open the Lorex Client Software by double-clicking on its desktop icon or finding it in your computer’s programs menu.
- Connect to your camera: Once the software is open, click on the “Add Device” button to add your camera to the software. Enter the required information, such as the camera’s IP address, username, and password. Click “OK” to save the settings and connect to your camera.
- Access the recordings: After successfully connecting to your camera, you will be able to access the recordings stored on it. Look for the “Recordings” or “Playback” tab in the software to find the list of available recordings.
- Delete the recordings: To delete a recording, simply select it from the list and click on the “Delete” button. Confirm the deletion when prompted. You can also select multiple recordings at once by holding down the Ctrl key while clicking on the recordings, and then click on the “Delete” button.
- Confirm the deletion: Once you have clicked on the “Delete” button, a confirmation dialog will appear. Make sure to read the information displayed in the dialog, as it may inform you about the consequences of deleting the recording permanently.
- Monitor the deletion progress: The Lorex Client Software may display a progress bar or a notification to show you the status of the deletion process. Wait until the process is complete before closing the software or performing any other tasks.
By following these steps, you should be able to use the Lorex Client Software to delete recordings on your Lorex security camera easily and efficiently.
Alternative Methods to Delete Recordings
If you are unable to delete recordings from your Lorex security camera using the standard method, there are alternative methods you can try. These methods may vary depending on the specific model of your Lorex camera, so make sure to refer to the user manual for more detailed instructions.
Method 1: Using the Lorex App
If your Lorex camera is connected to the Lorex app on your smartphone or tablet, you can try deleting recordings through the app. Open the Lorex app and navigate to the recordings section. Find the recordings you want to delete and select the delete option. Confirm your selection to delete the recordings from your camera.
Method 2: Using the Lorex Web Client
If you have access to the Lorex web client, you can try deleting recordings through the client’s interface. Log in to the Lorex web client using your credentials. Navigate to the recordings section and locate the recordings you wish to delete. Select the delete option and confirm your selection to remove the recordings from your camera.
Method 3: Formatting the Storage Device
In some Lorex security camera models, you have the option to format the storage device to delete all recordings. This method will erase all data on the storage device, including recordings, so make sure to back up any important footage before proceeding. Refer to the user manual for instructions on how to format the storage device for your specific Lorex camera model.
| Method | Description |
|---|---|
| Method 1 | Using the Lorex App |
| Method 2 | Using the Lorex Web Client |
| Method 3 | Formatting the Storage Device |
Before trying any of these alternative methods, it is recommended to consult the user manual or contact Lorex support for assistance to ensure you don’t accidentally delete important recordings or cause any issues with your security camera system.
Best Practices for Managing Lorex Security Camera Recordings
To ensure the efficient management of your Lorex security camera recordings, it is important to follow best practices. These practices will help you effectively monitor and delete recordings as needed, maximizing the performance and storage capacity of your security system.
1. Regularly Review Recordings
Make it a habit to regularly review the recorded footage from your Lorex security camera system. This allows you to identify any suspicious activities or incidents that may have occurred. Regular review also helps you stay informed about any potential security concerns.
2. Create a Structured Recording Folder System
To keep your recorded footage organized and easily accessible, it is recommended to create a structured folder system. This can be done either on your computer’s storage or on a dedicated storage device. Arrange the recordings in folders based on date, time, or specific camera locations to simplify future retrieval.
3. Determine Retention Period
It is important to set a retention period for your recorded footage. Consider local regulations or company policies when deciding how long to keep recordings. Usually, a retention period of 30 to 90 days is sufficient for most security purposes. After the specified period, ensure that the recordings are permanently deleted to free up storage space.
4. Regularly Delete Unnecessary Recordings
To optimize the storage capacity of your Lorex security camera system, regularly delete unnecessary recordings. This includes footage that is no longer needed for security purposes, such as routine activities or false alarms. Deleting these recordings will help ensure that your system has enough space to store newer, more relevant footage.
5. Securely Delete Recordings
When deleting recorded footage from your Lorex security camera system, ensure that the data is securely deleted. Use secure deletion methods that overwrite the data to prevent any potential recovery. This helps protect your privacy and prevents unauthorized access to sensitive information.
6. Backup Important Recordings
Consider backing up important recordings from your Lorex security camera system. This provides an additional layer of protection and ensures that critical footage is not lost in the event of equipment failure or theft. Backing up recordings to off-site or cloud storage is highly recommended.
7. Monitor Storage Capacity
Regularly monitor the storage capacity of your Lorex security camera system. When the available storage is nearing its limit, consider either increasing the storage capacity or implementing a more aggressive deletion policy to make room for new recordings. This ensures that your system continues to capture and store footage without interruption.
By following these best practices, you can efficiently manage your Lorex security camera recordings. This will help you maintain an organized system, optimize storage capacity, and ensure that critical recordings are securely stored and readily accessible when needed.
Frequently Asked Questions
Q: How do I delete recordings on my Lorex security camera?
A: To delete recordings on your Lorex security camera, follow these steps:
- Access the video management system or software provided with your Lorex security camera system.
- Navigate to the recorded video section, usually found in the playback or storage settings.
- Select the recordings you want to delete by clicking on the checkbox or using the select all option if available.
- Click on the delete button or icon, which is usually represented by a trash can or a similar symbol.
- Confirm the deletion by following the prompted steps or dialog box.
- Wait for the system to process and delete the selected recordings.
- Check the storage section again to ensure that the recordings have been successfully deleted.
Q: Can I recover deleted recordings on my Lorex security camera?
A: Unfortunately, once you delete the recordings on your Lorex security camera, they cannot be recovered. Therefore, it is important to double-check before deleting any recordings to avoid accidental loss of important footage.
FAQ,
How can I delete recordings on my Lorex security camera?
To delete recordings on your Lorex security camera, you will need to access the settings menu on your camera’s interface. From there, navigate to the recordings section and select the recordings you want to delete. You can usually do this by selecting the specific date or time range of the recordings you want to remove. Once you have selected the recordings, there should be an option to delete them. Confirm the deletion, and the recordings will be permanently removed from your Lorex security camera.
Is it possible to delete multiple recordings at once on a Lorex security camera?
Yes, it is possible to delete multiple recordings at once on a Lorex security camera. Most Lorex security camera models have a feature that allows you to select multiple recordings for deletion. To do this, access the recordings menu on your camera’s interface and choose the option to select multiple recordings. Then, select the recordings you want to delete by highlighting them or marking them with a checkmark. Finally, choose the delete option and confirm the deletion. The selected recordings will be deleted simultaneously from your Lorex security camera.
What happens to the deleted recordings on a Lorex security camera?
When you delete recordings on a Lorex security camera, they are usually permanently erased from the camera’s storage or memory. This means that the recordings cannot be recovered or accessed again. It is important to note that some Lorex security camera models may have a recycle bin feature, which temporarily stores deleted recordings. However, once the recycle bin is emptied or the space is needed for new recordings, the deleted recordings are permanently removed. Therefore, it is always advisable to backup any important or necessary recordings before deleting them.
Can I delete recordings on my Lorex security camera remotely?
Yes, in most cases, you can delete recordings on your Lorex security camera remotely. Lorex security camera systems often come with mobile apps or software that allow you to access and control your camera remotely. Through these apps or software, you can navigate to the recordings section and select the recordings you want to delete. Confirm the deletion, and the selected recordings will be deleted from your Lorex security camera, even if you are not physically present at the camera’s location. This provides convenience and flexibility, especially for those who need to manage their security camera footage while away from home.


