
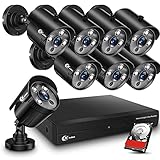
With the advancement of technology, it has become easier than ever to keep an eye on your home or office using security cameras. Whether you are away on vacation or just want to check in on things, accessing your security cameras from your phone gives you peace of mind and complete control over your surveillance system.
There are several ways to access your security camera from your phone. One of the most common methods is by using a mobile app provided by the camera manufacturer. These apps usually offer a user-friendly interface that allows you to view live footage, playback recordings, and adjust camera settings.
To begin, you will need to download the mobile app from the App Store or Google Play Store, depending on your phone’s operating system. Once the app is downloaded, you will need to follow the instructions to connect your camera to your phone using a secure Wi-Fi network.
Another option is to access your security camera’s feed through a web browser. This method allows you to view your cameras from any device with an internet connection, including your phone. To access your cameras through a web browser, you will need to type in the IP address of your camera and enter your login credentials.
Accessing your security camera from your phone provides convenience and peace of mind, knowing that you can monitor your property at any time and from anywhere. Whether you choose to use a mobile app or a web browser, the process is relatively simple and allows you to stay connected to your surveillance system no matter where you are.

Overview of accessing a security camera from a phone
With the advancements in technology, it has become increasingly convenient to monitor our surroundings and keep our homes and businesses safe. One way to achieve this is by accessing security cameras from our phones, allowing us to check on our property in real-time, no matter where we are. In this article, we will explore the different methods of accessing a security camera from a phone and the benefits it provides.
Method 1: Mobile app provided by the security camera manufacturer
Many security camera manufacturers offer their own mobile apps that are designed to work specifically with their cameras. These apps usually provide a straightforward and user-friendly interface, allowing you to easily control and view the camera’s live feed. To use this method, you would need to download and install the app on your phone, then follow the app’s instructions to connect it to your security camera.
Method 2: Third-party apps
In addition to the manufacturer’s apps, there are also third-party apps available that offer compatibility with a wide range of security cameras. These apps often provide more advanced features and customization options compared to the manufacturer’s apps. To use this method, you would need to find a suitable third-party app that supports your security camera model, download and install it on your phone, and follow the app’s setup instructions.
It’s important to note: When using third-party apps, make sure to do thorough research and choose a reputable app from a trusted source to ensure the privacy and security of your camera feed.
Once you have set up the app and connected it to your security camera, you can access the camera’s live feed, view recorded footage, receive notifications, and even control camera settings directly from your phone.

Overall, accessing a security camera from a phone provides convenience, flexibility, and peace of mind. Whether you are at work, on vacation, or simply in another room, being able to easily monitor your property from your phone offers a new level of security and control.
Remember: Always follow your security camera manufacturer’s guidelines and recommendations when setting up and accessing your camera from a phone.
Step 1: Install a security camera app on your phone
To access your security camera from your phone, you’ll need to install a security camera app. There are a variety of apps available for both iOS and Android devices, so make sure to choose one that is compatible with your specific phone model.
Here are some popular security camera apps:
- Wyzecam: This app works with Wyzecam’s line of security cameras and provides a range of features such as live streaming, motion detection, and two-way audio.
- Arlo: Arlo offers a mobile app that allows you to access your Arlo security cameras remotely. It also offers features like cloud storage and customizable alerts.
- Nest: If you have Nest security cameras, you can use the Nest app to view live video feeds, receive alerts, and control your cameras remotely.
- Ring: Ring is known for its video doorbell, but it also offers a mobile app that lets you access your Ring security cameras. The app provides features like live video streaming, motion detection, and two-way talk.
Once you’ve chosen an app, simply search for it in your phone’s app store, download and install it. Make sure to follow any setup instructions provided by the app to connect it to your security camera system.

Choosing a suitable security camera app
When it comes to accessing your security camera from your phone, choosing the right app is crucial for a seamless experience. With so many options available, it can be overwhelming to find the best app that meets your needs. Here are some key factors to consider when selecting a security camera app:
| Factor | Description |
|---|---|
| Compatibility | Ensure that the app is compatible with both your security camera model and your smartphone’s operating system. Check if the app supports various camera brands and if it works on iOS or Android devices. |
| Features | Consider the features offered by the app. Look for features such as live streaming, motion detection, two-way audio, cloud storage, and remote control options. Think about what features are important for your specific security needs. |
| User Interface | A user-friendly interface is essential for ease of use. Look for an app with a clean and intuitive interface that allows you to navigate easily between different camera views and settings. |
| Notifications | Check if the app provides real-time notifications for events such as motion detection or alerts. Notifications can help you stay informed and take immediate action if any suspicious activity is detected. |
| Security | Security should be a top priority when choosing a security camera app. Ensure that the app uses encryption to protect your camera’s video feed and that it has secure login options to prevent unauthorized access. |
| Reviews and Ratings | Take the time to read reviews and ratings from other users. Their experiences can provide valuable insights and help you determine if an app is reliable and trustworthy. |
| Cost | Consider the cost of the app. Some apps are free, while others require a subscription or offer in-app purchases for additional features. Evaluate if the app’s features justify the cost. |
By considering these factors, you can make an informed decision and choose a suitable security camera app that meets your specific needs. Remember to download the app from a trusted source, such as the official app store, to ensure its authenticity and security.
Step 2: Connect the security camera to your home network
Once you have set up your security camera hardware and installed any necessary software, it’s time to connect the camera to your home network. This will allow you to access the camera from your phone.
1. Check the camera’s network requirements
Before connecting the camera to your network, make sure you have the necessary network requirements. This may include a Wi-Fi network with a strong signal, an Ethernet cable, or a powerline adapter. Refer to the camera’s user manual or manufacturer’s website for specific instructions.
2. Connect the camera to power and network
Connect the camera to power using the provided power adapter or through an Ethernet cable, depending on the camera’s requirements. If you are using a wireless camera, make sure it’s within range of your Wi-Fi network and connect it to the network using the camera’s setup utility or mobile app.
3. Configure network settings
Once the camera is powered on and connected to the network, you may need to configure its network settings. This can be done through the camera’s setup utility or mobile app. Enter your home network’s SSID (Wi-Fi name) and password to connect the camera to your network. Follow any additional prompts or instructions provided by the camera’s software.
4. Test the connection
After configuring the network settings, it’s important to test the connection between the camera and your home network. Open the camera’s mobile app or access the camera’s web interface from your computer. If you can see a live stream or access the camera’s settings, the connection is successful.
Once connected, you can now access the security camera from your phone by using the camera’s mobile app or accessing its web interface through a web browser.
Configuring the camera’s network settings
Before you can access your security camera from your phone, you will need to configure the camera’s network settings. This will allow the camera to connect to your home or office network and enable remote access from your phone.
Here are the steps to configure the camera’s network settings:

- Connect the camera to your router using an Ethernet cable.
- Power on the camera and wait for it to initialize.
- Open a web browser on a computer connected to the same network.
- Type the camera’s IP address into the browser’s address bar and press Enter.
- You will be prompted to log in to the camera’s web interface. Enter the default username and password provided with the camera.
- Navigate to the network settings or network configuration page.
- Select the option to configure the camera’s network settings manually.
- Enter the necessary details such as the IP address, subnet mask, gateway, and DNS settings. These settings will depend on your network configuration.
- Save the changes and wait for the camera to reboot.
- Disconnect the Ethernet cable from the camera once it has successfully rebooted.
Once you have configured the camera’s network settings, you should be able to access it from your phone using the camera’s mobile app. Make sure your phone is connected to the same network as the camera or use a remote access method if available.
Step 3: Configure remote access on the security camera
Configuring remote access on the security camera is essential to be able to view the camera’s feed from your phone. Follow these steps to configure remote access:
- Make sure your security camera is connected to the internet. This can usually be done through an Ethernet cable or Wi-Fi connection. Check the user manual of your camera for specific instructions on how to connect it to the internet.
- Login to the camera’s web interface. To do this, open a web browser on a computer or laptop connected to the same network as the camera and enter the camera’s IP address in the browser’s address bar. You can find the camera’s IP address in the camera’s user manual or by checking the router’s connected device list.
- Once logged in, navigate to the camera’s settings or configuration page. This may vary depending on the camera model and brand, but it is usually located under the “Settings” or “Configuration” tab.
- Look for the “Remote Access” or “Network” settings. Enable remote access by toggling the switch or checkbox to the “On” position.
- Set up a username and password for remote access. This will be required to log in to the camera from your phone. Make sure to choose a strong password to ensure the security of your camera.
- Save the changes and exit the camera’s web interface.
Once remote access is configured on the security camera, you will be able to access the camera’s feed from your phone by using a mobile app or by logging in to the camera’s web interface using the camera’s IP address and the login credentials you set up.
Enabling remote access on the camera’s settings
To access your security camera from your phone, you need to enable remote access on the camera’s settings. Here are the steps to do so:
- Open the camera’s app or access its web interface through a web browser.
- Log in to the camera with your username and password.
- Navigate to the camera’s settings.
- Look for the “Remote Access” or “Network” section.
- Enable the remote access feature.
- Configure the necessary network settings, such as port forwarding or dynamic DNS.
- Save the settings and exit the camera’s settings menu.
- Download and install the camera’s mobile app on your phone.
- Launch the app and log in using the same username and password.
- Connect your phone to the same network as the camera or use a cellular data connection.
- Access the live video feed or recorded footage from your phone.
By following these steps, you should be able to enable remote access on your security camera and access it from your phone anytime and anywhere.

Step 4: Set up port forwarding on your home router
Port forwarding is a crucial step in accessing your security camera from your phone. It allows your router to redirect incoming traffic destined for a specific port to a specific device on your local network. Here’s how you can set up port forwarding on your home router:
1. Find your router’s IP address
To access your router’s settings, you’ll need to know its IP address. You can usually find this information on a sticker at the back of your router or in your router’s user manual. Alternatively, you can also find it by following these steps:
a) On Windows: Open the Command Prompt (CMD) by pressing Windows+R and then typing “cmd” and hitting Enter. In the Command Prompt window, type “ipconfig” and press Enter. Look for the “Default Gateway” under your active network connection – this is your router’s IP address.
b) On macOS: Open the Terminal by pressing Command+Space, typing “Terminal,” and hitting Enter. In the Terminal window, type “route -n get default” and press Enter. Look for the “gateway” IP address – this is your router’s IP address.
2. Access your router’s settings page
Open a web browser on your phone and enter your router’s IP address into the address bar. Press Enter, and you should be prompted to enter your router’s username and password. If you haven’t changed these credentials, check your router’s user manual for the default login details.

3. Navigate to the port forwarding settings
Once you’ve logged into your router’s settings page, look for the “Port Forwarding” or “Virtual Servers” option. This may be located under a “Advanced” or “Firewall” tab, depending on your router’s interface. Click on the corresponding option to access the port forwarding settings.
Note: The exact terminology and location of the port forwarding settings may vary depending on your router model. If you can’t find it, refer to your router’s user manual or contact the manufacturer for assistance.
4. Set up the port forwarding rule
Click on the “Add” or “Create New” button to create a new port forwarding rule. You’ll need to provide the following information:
a) Service Name: Enter a descriptive name for the rule, e.g., “Security Camera”.
b) Internal IP Address: Enter the IP address of your security camera. You can find this information in your camera’s user manual or settings.
c) Protocol: Select the protocol used by your security camera (TCP or UDP).
d) Internal and External Port: Enter the port number used by your security camera. This information can also be found in your camera’s manual or settings.
Once you’ve entered all the required information, save the port forwarding rule.
5. Test the port forwarding
After setting up the port forwarding rule, it’s essential to test if it’s working correctly. There are online tools available that can help you check if the specified port is open and accessible from the internet. Simply enter your router’s public IP address (you can find this information on websites like whatismyip.com) and the port number you configured for your camera. If the test shows the port as open, you have successfully set up port forwarding for your security camera.
Note: If the test shows the port as closed or inaccessible, double-check your port forwarding settings and make sure you entered the correct information. You may also need to restart your router or consult your router’s manufacturer for further assistance.
By following these steps, you should now have successfully set up port forwarding on your home router, allowing you to access your security camera from your phone.
FAQ,
What is the easiest way to access my security camera footage from my phone?
The easiest way to access your security camera footage from your phone is to use the manufacturer’s mobile app. Most security camera manufacturers have their own mobile apps that allow you to remotely access your camera feeds, view live video, and even control certain camera settings.
Can I access my security camera footage from my phone if I’m not at home?
Yes, you can access your security camera footage from your phone even if you’re not at home. As long as your security camera system is connected to the internet, you can use a mobile app or a web browser to access your camera feeds remotely. This allows you to keep an eye on your home or business from anywhere in the world.


