
In today’s digital age, maintaining security is of utmost importance. With the increasing need to protect our homes and businesses, many people are turning to security systems to provide an extra layer of protection. ADT is a popular choice for its reliable and trustworthy security solutions.
However, if you already have a security system in place and want to enhance it by adding an ADT camera, you may be wondering how to go about it. The good news is that it is possible to integrate an ADT camera into your existing security setup, providing you with enhanced surveillance capabilities.
One of the first steps to take when adding an ADT camera to your security system is to ensure compatibility. ADT offers a range of cameras, and it’s important to select one that is compatible with your existing equipment. This may involve checking the specifications of both your current security system and the ADT camera to ensure they can work together seamlessly.
Once you have chosen a compatible ADT camera, the next step is to connect it to your security system. This may involve running cables or setting up a wireless connection, depending on the type of camera you have selected. It’s important to follow the manufacturer’s instructions carefully to ensure a proper and secure setup.
After physically connecting the ADT camera to your security system, you will need to configure it to work with your existing setup. This may involve accessing the camera’s settings through a web-based interface or dedicated software provided by ADT. In this process, you can set up features such as motion detection, recording schedules, and alerts to suit your specific security needs.

By following these steps, you can successfully add an ADT camera to your existing security system, enhancing your surveillance capabilities and providing greater peace of mind. With the right camera and proper setup, you can strengthen the security measures in place and ensure a safer environment for your home or business.
What is ADT camera?
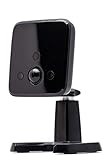
An ADT camera is a type of security camera that is owned and operated by ADT, one of the leading providers of home security systems. These cameras are designed to help homeowners and businesses monitor their premises and protect against potential threats such as burglary, vandalism, and other criminal activities.
ADT cameras are equipped with high-definition video recording capabilities, allowing users to capture clear and detailed footage of events that occur in and around their property. This footage can be viewed in real-time or accessed at a later time for review.
Key features of ADT cameras include:
- Smart Detection: ADT cameras are capable of detecting motion and automatically alerting homeowners and business owners via notifications on their smartphones or other connected devices.
- Night Vision: Many ADT cameras come equipped with infrared technology, enabling them to capture clear footage in low-light or nighttime conditions.
ADT cameras can be installed both indoors and outdoors, depending on the specific security needs of the property. They offer a wide range of camera options, including fixed cameras, pan-tilt-zoom (PTZ) cameras, and doorbell cameras.
Overall, ADT cameras provide an additional layer of security and peace of mind for homeowners and businesses, allowing them to monitor their property and take appropriate action when necessary. Integrating ADT cameras with other security systems can further enhance the overall security capabilities and provide a comprehensive solution to protect people and property.

Step-by-step Guide
Follow these steps to add an ADT camera to other security systems:
- Begin by checking the compatibility of the ADT camera with your existing security system. Refer to the camera’s user manual or contact ADT support for assistance.
- Power off your security system and unplug all the devices.
- Locate the camera input ports on your security system’s control panel or DVR. These ports are usually labeled “Camera In” or “Video In”.
- Connect one end of the BNC cable to the video output port of the ADT camera. Make sure it is securely plugged in.
- Connect the other end of the BNC cable to one of the available camera input ports on the security system’s control panel or DVR.
- Connect the power adapter to the ADT camera and plug it into a power outlet.
- Power on your security system and wait for it to initialize.
- Navigate to the camera settings menu on your security system’s control panel or DVR. Look for options like “Add Camera” or “Camera Setup”.
- Select the camera input port where you connected the ADT camera.
- Follow the on-screen instructions to complete the camera setup process. This may involve naming the camera and adjusting settings such as motion detection or recording preferences.
- Once the setup is complete, you should be able to view the ADT camera’s feed on your security system’s monitor or through a connected app or software.
By following these step-by-step instructions, you can easily integrate an ADT camera into your existing security system and enhance your overall surveillance capabilities.
Check compatibility with your security system
Before adding an ADT camera to your existing security system, it is important to check its compatibility. Different security systems utilize different protocols and technologies, so not all cameras will be compatible.
To determine if your security system is compatible with an ADT camera, follow these steps:
- Consult the user manual or documentation provided by your security system provider. This will usually detail the compatibility options and required specifications for adding external cameras.
- Contact your security system provider’s customer support or technical team. They should be able to provide you with information about compatibility and any necessary settings or configurations.
- Visit the official ADT website and look for compatibility information. ADT may provide a list of compatible security system brands and models, or they may have a special section dedicated to integration with other security systems.
- If you cannot find the necessary information through the above steps, consider hiring a professional security system technician to assess compatibility and make any necessary adjustments for integration.
It is crucial to ensure compatibility between your security system and the ADT camera to achieve seamless integration and optimal functionality. Failing to do so may result in the camera not being recognized or not functioning properly with your existing system.

Purchase necessary equipment
Before adding an ADT camera to your existing security system, you will need to purchase some necessary equipment. Here are the key items you will need:
1. ADT Camera
The first and most important piece of equipment you will need is an ADT camera. ADT offers a variety of camera options with different features and specifications. It’s important to choose a camera that suits your specific needs and complements your existing security system.
2. Power Supply
In order to power your ADT camera, you will need a power supply. Most ADT cameras come with their own power supply, but it’s important to double-check and make sure you have the right power supply for your camera model.
Keep in mind that some ADT cameras may require additional power sources such as PoE (Power over Ethernet) or batteries. Make sure to check the camera specifications and purchase any required power sources accordingly.
3. Mounting Hardware
To securely install your ADT camera, you will need mounting hardware. This includes brackets, screws, and any other necessary items to properly mount your camera in the desired location. Make sure to choose mounting hardware that is suitable for the surface you will be mounting your camera on.
It’s also important to determine the ideal location for your ADT camera before purchasing the mounting hardware. Consider factors such as the camera’s field of view, potential obstructions, and the best vantage point for capturing desired footage.
By ensuring you have the necessary equipment, you will be ready to add your ADT camera to your existing security system seamlessly and effectively.
Install the ADT camera
Installing an ADT camera is a straightforward process that can be completed in just a few steps. Here’s how to get started:
1. Determine the location
Before installing the camera, you need to decide where it will be positioned. Consider areas that cover critical angles, entrances, or vulnerable locations around your property. Take into account the camera’s range and field of view to ensure it covers the desired area effectively.
2. Mount the camera
Once you have determined the location, it’s time to mount the ADT camera. Most ADT cameras come with mounting brackets or stands that make installation easier. Use screws and anchors to securely attach the camera mount to the chosen surface, whether it’s a wall, ceiling, or other suitable location.

Note: Follow the specific instructions provided by the camera manufacturer as mounting methods may vary.
3. Connect the camera
After mounting the camera, you will need to connect it to your security system. Locate the appropriate cables for power and data transfer (such as an Ethernet cable). Connect one end to the camera and the other end to the corresponding port on your security system or network device.
Note: If you are using wireless cameras, follow the manufacturer’s instructions for connecting them to your network.
4. Power on the camera
Once the camera is connected, you can power it on. Plug the camera’s power adapter into a nearby electrical outlet or use Power over Ethernet (PoE) if supported. Make sure the camera is receiving power and that any indicator lights are functioning correctly.
5. Configure the camera
Depending on the camera model, you may need to configure it using the manufacturer’s software or app. This may involve setting up network settings, adjusting camera angles, or enabling specific features. Follow the provided instructions to complete the configuration process.

Tip: Keep track of any login credentials or settings you configure for future reference.
After completing these steps, your ADT camera should be successfully installed and ready to use with your other security systems. Remember to regularly check and maintain your camera to ensure optimal performance.
Connect the ADT camera to your security system
If you already have a security system installed, you can easily add an ADT camera to enhance your surveillance capabilities. Here are the steps to connect an ADT camera to your existing security system:
1. Check compatibility
Before purchasing an ADT camera, make sure it is compatible with your current security system. Most ADT cameras are designed to work with a wide range of security systems, but it’s always best to double-check to avoid any compatibility issues.
2. Determine camera placement
Decide where you want to install your ADT camera. It’s essential to choose a location that provides optimal coverage and visibility. Common areas include entry points, hallways, and high-traffic areas. Make sure the camera is mounted securely and that it has a clear line of sight.

3. Power the camera
Connect the ADT camera to a power source. Typically, ADT cameras come with a power adapter that needs to be plugged into a nearby electrical outlet. Ensure that the power source is stable and uninterrupted to ensure proper camera functionality.
4. Connect the camera to your security system
Depending on your security system, there are different methods to connect the ADT camera. Some systems may require you to use an Ethernet cable, while others may allow for a wireless connection. Follow the instructions provided with your camera and your security system to establish a secure connection.
5. Configure camera settings
Once the camera is connected, you may need to configure its settings to integrate it with your security system. This might involve setting up motion detection, adjusting video quality, or enabling remote access. Refer to the camera manual or consult your security system provider for detailed instructions.
After completing these steps, your ADT camera should be successfully connected to your security system. Enjoy the added peace of mind and increased surveillance capabilities that the camera provides.
Set up the camera settings
Once you have successfully added the ADT camera to your security system, the next step is to set up the camera settings. These settings will allow you to personalize your camera’s features and ensure it is functioning optimally for your security needs.
1. Accessing the camera settings
To access the camera settings, open the ADT camera app or web portal. Login with your username and password that you created during the initial setup process.
2. Camera positioning
Before diving into the camera settings, make sure your camera is positioned correctly. Ensure it has a clear view of the area you want to monitor and that there are no obstructions that could interfere with its function.
3. Adjusting video quality
One of the primary camera settings is adjusting the video quality. You may want to prioritize a higher video quality for clearer images or reduce it to optimize bandwidth. Find the video quality settings in the camera settings menu and adjust them according to your preferences.
4. Enabling motion detection
Motion detection is a crucial feature for security cameras as it allows you to receive alerts when movement is detected within the camera’s field of view. In the camera settings, look for the motion detection option and enable it. You can typically also adjust the sensitivity settings to fine-tune the camera’s response to motion.
5. Setting up recording options
You can choose how the camera records and stores footage. Some cameras allow you to save video clips on a local SD card, while others offer cloud storage options. In the camera settings, explore the recording options and select the one that best suits your needs.
6. Configuring notifications
To stay informed about any potential security events, you can set up notifications on your phone or email. In the camera settings, locate the notifications section and configure it to send alerts when specific events occur, such as motion detection or when the camera goes offline.
By following these steps to set up your camera settings, you can ensure that your ADT camera is properly customized to meet your specific security requirements.
Test the camera
Before integrating the ADT camera with other security systems, it is essential to ensure that the camera is working correctly. Follow these steps to test the camera:
1. Power on the Camera:
Connect the camera to a power source and wait for it to power on. Make sure the power indicator light is on.
2. Connect to a Network:
Use an Ethernet cable to connect the camera to a network router. Ensure that the Internet connection is stable.
3. Check the Camera’s IP Address:
Consult the camera’s manual or access the camera’s settings to find its IP address. Make a note of the IP address for future reference.
4. Access the Camera’s Live Stream:
Open a web browser on a computer or mobile device connected to the same network. Enter the camera’s IP address in the browser’s address bar and press Enter. You should see the camera’s live stream.
5. Verify Video Quality:
Observe the live stream from the camera and check the video quality. Ensure that the image is clear, without any distortions or artefacts.
6. Test Camera Features:
Explore the camera’s features such as pan, tilt, zoom, and audio. Make sure all the camera’s functionalities are working correctly.
7. Test Recording and Playback:
Record a short video using the camera and verify that it is saved properly. Try playing back the recording to ensure that it can be accessed without any issues.
Once you have tested the ADT camera and confirmed that it is working correctly, you can proceed with integrating it into your existing security system.
Additional Tips
Here are some additional tips to consider when adding an ADT camera to other security systems:
1. Check compatibility: Before purchasing an ADT camera, make sure it is compatible with your existing security system. Check the specifications and requirements of both the camera and your security system to ensure they can work together.
2. Evaluate your needs: Determine why you want to add an ADT camera to your security system. Are you looking to enhance surveillance, monitor specific areas, or improve remote access? Understanding your needs will help you select the right camera and configure it accordingly.
3. Positioning: Proper camera positioning is crucial for effective surveillance. Consider the areas you want to monitor and ensure the camera is installed in a location that provides optimal coverage. Avoid obstructions and position the camera at the right angle for clear views.
4. Test performance: Once the ADT camera is installed and integrated with your security system, test its performance. Check the video quality, motion detection capabilities, and any additional features you may have enabled. This will ensure that the camera is working as expected and providing the desired level of security.
5. Regular maintenance: To ensure the long-term functionality of your ADT camera and overall security system, regularly perform maintenance tasks. Clean the camera lenses, check for loose connections, and update firmware when necessary. Regular maintenance will help prevent issues and keep your system running smoothly.
6. Seek professional assistance: If you are unsure about integrating an ADT camera with your existing security system, consider seeking professional assistance. A security technician or an ADT representative can provide guidance, ensure compatibility, and help with the installation process.
By following these additional tips, you can successfully add an ADT camera to your other security systems, enhancing your overall security measures and peace of mind.
FAQ,
Can I add an ADT camera to my existing security system?
Yes, you can add an ADT camera to your existing security system. ADT cameras are compatible with most standard security systems, and you can easily integrate them into your current setup. Simply follow the instructions provided by ADT to connect the camera to your system.
What are the benefits of adding an ADT camera to my security system?
Adding an ADT camera to your security system offers several benefits. First, it provides an additional layer of surveillance, allowing you to monitor your property more comprehensively. ADT cameras also often have advanced features such as night vision and motion detection, enhancing their effectiveness in detecting and deterring criminals. Furthermore, ADT cameras can be accessed remotely via a smartphone app, enabling you to keep an eye on your property even when you’re away.
Are there any specific requirements for adding an ADT camera to a security system?
There are a few requirements to keep in mind when adding an ADT camera to a security system. First, ensure that your existing system is compatible with ADT cameras. Most standard security systems should work fine, but it’s always best to double-check. Additionally, you’ll need a stable internet connection for the camera to function properly. Lastly, make sure you have the necessary power source and mounting options for the camera. ADT provides detailed instructions to help you with the installation process.


