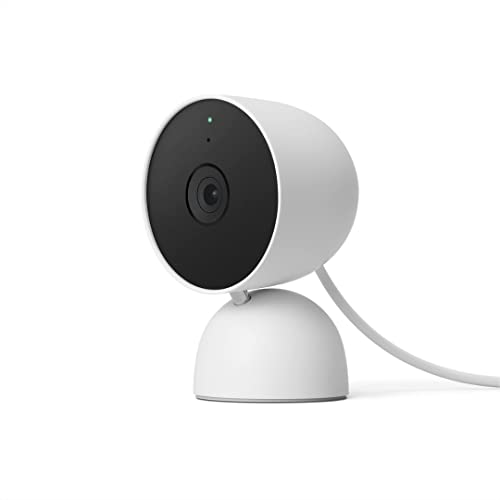
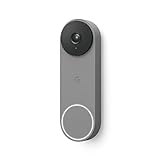
Google Home is a popular smart home assistant that allows users to control various devices and appliances through voice commands. One of the most useful features of Google Home is its ability to integrate with security cameras, providing homeowners with an extra layer of protection for their property.
Adding security cameras to your Google Home setup not only allows you to monitor your property remotely but also enables you to use voice commands to control and view camera footage. Whether you want to keep an eye on your front door, backyard, or other areas of your home, integrating security cameras with Google Home is a relatively straightforward process.
Firstly, you will need to ensure that your security cameras are compatible with Google Home. Many popular camera brands, such as Nest, Ring, and Arlo, offer seamless integration with Google Home, allowing you to easily link your cameras to your smart home assistant. Once you have confirmed compatibility, you will need to install the necessary apps on your smartphone or tablet and follow the manufacturer’s instructions to set up your cameras.
After setting up your security cameras, you can proceed to connect them to your Google Home. Open the Google Home app on your device and navigate to the settings menu. From there, select “Home Control” and tap the “+” button to add a new device. Look for your camera manufacturer’s app among the list of available devices and follow the on-screen instructions to link your cameras to Google Home. Once the connection is established, you can assign your cameras to specific rooms and use voice commands to view live footage or control camera settings.
With security cameras linked to Google Home, you can enjoy peace of mind and enhanced control over your home’s security. Whether you are inside the house or away, you can use your voice to check on your property, receive motion alerts, or even turn on and off specific cameras. Adding security cameras to Google Home truly elevates your smart home experience and empowers you to stay connected and protected.
How to Connect Security Cameras to Google Home
If you have security cameras installed in your home and want to integrate them with your Google Home setup, there are a few steps you need to follow. By connecting your security cameras to Google Home, you can easily monitor your home’s security using voice commands or through the Google Home app.
Step 1: Check compatibility
Before getting started, make sure your security cameras are compatible with Google Home. Most popular brands like Nest, Arlo, Ring, and Wyze offer integration with Google Home. Check the manufacturer’s website or product documentation to confirm compatibility.
Step 2: Install the camera’s app
Download and install the app for your security camera system on your smartphone or tablet. This app allows you to configure settings, view camera feeds, and control other features.
Step 3: Connect to Google Home
Open the Google Home app on your mobile device and tap on the menu icon in the top-left corner of the screen. From the menu, select “Home Control.”
Step 4: Add your security camera
Tap the “+” button to add a new device and select your security camera system from the list of available options. Follow the instructions provided by the app to link your camera account with Google Home.
Step 5: Configure camera settings

Once your security camera is connected to Google Home, you can customize its settings. For example, you can create a specific name for each camera, adjust recording and alert preferences, or set up motion detection zones.
Step 6: Test the integration
After completing the setup process, test the integration by using voice commands with your Google Home device or by checking the camera feeds through the Google Home app. Make sure everything is working properly before relying on the system for security purposes.
By following these steps, you can easily connect your security cameras to Google Home and enhance the overall security and convenience of your smart home setup.
Step 1: Check Camera Compatibility
Before adding security cameras to your Google Home, it is important to check if the cameras you own are compatible. Not all cameras work with Google Home, so it’s crucial to ensure compatibility to avoid any issues.

To check camera compatibility:
- Research camera compatibility: Look up the specifications and features of your security cameras to determine if they are compatible with Google Home. The camera manufacturer’s website or product manual should provide this information.
- Verify camera type: Check if your security cameras are IP (Internet Protocol) cameras, as these are commonly supported by Google Home. IP cameras connect to the internet and can be accessed remotely using a mobile app or web interface.
- Assess integration: Research if your security cameras can integrate with Google Home through a compatible smart home platform or a dedicated app. Some cameras may require additional devices or software to connect to Google Home.
- Check for Google Assistant compatibility: Ensure that your security cameras support Google Assistant, as it is the voice control system used by Google Home. This feature allows you to control your cameras using voice commands through your Google Home device.
If your security cameras are compatible with Google Home, you can proceed to the next steps to add them to your system. However, if your cameras are not compatible, you may need to consider purchasing cameras that are compatible or explore alternative methods to integrate them with your smart home system.
Step 2: Set Up Your Google Home Device
Once you have your security cameras ready, you’ll need to set up your Google Home device to connect and control them. Here’s how:
1. Plug in your Google Home device
Start by plugging in your Google Home device and wait for it to power on. Make sure it’s connected to the same Wi-Fi network as your security cameras.
2. Set up your Google Home device
Follow the instructions on the Google Home app to set up your device. This typically involves connecting your device to your Google account and completing the necessary setup steps, like selecting your language and accepting terms and conditions.
3. Install the necessary applications
Make sure you have the necessary applications installed on your mobile phone or tablet. This typically includes the Google Home app and the app specific to your security camera brand.
4. Connect your security cameras to Google Home
Open the Google Home app and navigate to the settings menu. From there, select “Add device” and follow the prompts to add your security cameras. You may need to sign in to your security camera account and grant permission to integrate with Google Home.
5. Organize and control your cameras
Once your security cameras are connected, you can organize and control them through the Google Home app. Create groups for different areas of your home and assign cameras to each group for easier control. You can use voice commands with your Google Home device to view camera feeds or check specific areas of your home.
By following these steps, you’ll be able to set up your Google Home device and connect your security cameras, providing you with convenient control and monitoring options.
Step 3: Install Security Camera App
After setting up your security cameras, the next step is to install the security camera app on your smartphone or tablet. The app will allow you to access and control your security cameras remotely from anywhere.

Here are the steps to install the security camera app:
1. Open the App Store or Play Store
Depending on whether you are using an iOS or Android device, open the respective app store on your device.
2. Search for the Security Camera App
In the app store, search for the security camera app that is compatible with your cameras. There are several popular security camera apps available such as “IP Cam Viewer”, “WardenCam”, or “Arlo”. Choose the app that is compatible with your security cameras.
3. Download and Install the App
Once you have found the security camera app, tap on the “Download” or “Install” button. Wait for the app to be downloaded and installed on your device. This may take a few minutes.
4. Launch the App
Once the app is installed, find the app icon on your device’s home screen or app drawer and tap on it to launch the app.
5. Sign in or Create an Account
When you launch the app for the first time, you may be prompted to sign in or create a new account. Follow the on-screen instructions to sign in or create an account. This will usually involve providing your email address and creating a password.
6. Add Your Cameras
After signing in, you will usually have an option to add your security cameras to the app. Tap on the “Add Camera” or similar button and follow the on-screen instructions to connect your cameras to the app. This will often involve scanning a QR code or entering the camera’s serial number.
7. Configure Camera Settings
Once your cameras are successfully added to the app, you may want to configure their settings. Depending on the app, you may be able to adjust settings such as motion detection, recording schedules, or camera angles. Take some time to explore the app and customize the settings according to your preferences.
Once you have installed the security camera app and added your cameras, you will be able to access and control your security cameras remotely from your smartphone or tablet. You can view live footage, receive motion detection alerts, and even record videos or take snapshots directly from the app.
Step 4: Connect Security Camera to Wi-Fi
After setting up your security camera, the next step is to connect it to your Wi-Fi network. Follow the instructions below to get your security camera connected to Wi-Fi:
- Ensure that your security camera is powered on and in pairing mode. Refer to the camera’s user manual for specific instructions on how to do this.
- Open the Google Home app on your smartphone or tablet.
- Select the “+” or “Add” icon to add a new device.
- Tap on “Set up device” and choose “Have something already set up?”
- Scroll down and select the manufacturer of your security camera from the list of supported devices.
- Follow the on-screen instructions to complete the setup process for your security camera. You may be prompted to enter the Wi-Fi network name and password.
- Once connected, you can assign a specific room and name to your camera for easy voice control.
It’s important to note that the exact steps may vary depending on the brand and model of your security camera. Always refer to the user manual for detailed instructions specific to your device.
Troubleshooting Tips:
If you encounter any issues while connecting your security camera to Wi-Fi, try the following troubleshooting tips:
- Make sure your Wi-Fi network is working properly and that you have the correct network name and password.
- Ensure that your security camera is within range of your Wi-Fi router.
- Restart your security camera and try the setup process again.
- Check for any firmware updates for your security camera and install them if available.
- Consider contacting the manufacturer’s customer support for further assistance.
By following these steps and troubleshooting tips, you should be able to successfully connect your security camera to Wi-Fi and integrate it with your Google Home system.
Step 5: Link Security Camera to Google Home
Once you have set up and connected your security camera to your home network, the next step is to link it to your Google Home device. This will allow you to control and access your security camera using voice commands through your Google Home.
1. Open Google Home App
Open the Google Home app on your smartphone or tablet. Make sure that your Google Home device is set up and connected to the same Wi-Fi network as your security camera.
2. Access Device Settings
In the Google Home app, tap on the device icon located at the top right corner of the screen to access the device settings.
3. Set Up Devices
In the device settings menu, scroll down and tap on “Set up device” option. This will allow you to add new devices to your Google Home.
4. Add Security Camera
In the set up device menu, tap on “Works with Google” option. Here you will find a list of compatible devices that can be linked to your Google Home.
Search for the brand or model of your security camera in the list. If your security camera is supported, you can link it by following the on-screen instructions. If your camera is not listed, it may not be compatible with Google Home.
5. Grant Permission
After linking your security camera, you may need to grant permission to access the camera feed. Make sure to allow access to the camera for the Google Home app.
6. Control the Camera
Once your security camera is successfully linked to Google Home, you can start using voice commands to control it. You can ask Google Home to show the camera feed on your smart display or cast it to your TV using a Chromecast device.
You can also control the camera by saying commands like “Ok Google, show me the front door camera” or “Ok Google, turn on/off the camera.” Google Home will process the command and activate the corresponding action on the linked security camera.
Remember to check the user manual or manufacturer’s website for specific instructions on how to control your security camera through Google Home, as the commands may vary depending on the camera model and brand.
Step 6: Enable Voice Control
Once you have successfully linked your security camera to Google Home, you can enable voice control to easily manage and control your cameras using voice commands. Follow the steps below to set up voice control:
- Open the Google Home app on your smartphone.
- Tap on the “Settings” menu located at the top-left corner of the app.
- Scroll down and select “More settings”.
- Under the “Devices” section, tap on “Security” to access your connected security cameras.
- Select the security camera that you want to enable voice control for.
- Tap on the three vertical dots located at the top-right corner of the screen.
- From the dropdown menu, select “Settings” to open the camera settings.
- Look for the “Voice and sound” option and toggle it on.
- Follow the on-screen instructions to complete the setup process.
Once voice control is enabled, you can use voice commands like “Hey Google, show me the front door camera” or “Hey Google, turn off the living room camera” to control your security cameras conveniently and hands-free.
Step 7: Set Up Security Camera Routines
Once you have successfully added your security cameras to Google Home, you can set up routines to automate certain camera actions. Routines allow you to create a sequence of actions that can be triggered with a single command or at a scheduled time.
To set up security camera routines, follow these steps:
1. Open the Google Home app
Launch the Google Home app on your smartphone or tablet.
2. Tap on your profile icon
Located in the top-right corner of the app’s home screen, tap on your profile icon to access the settings menu.
3. Go to “Settings”
Scroll down and select “Settings” from the list of available options.
4. Select “Routines”
In the Settings menu, scroll down and tap on “Routines” to access the routines settings.
5. Tap on the “+” icon
On the Routines screen, tap on the “+” icon to create a new routine.
6. Choose a routine name
Enter a name for your routine, such as “Security Camera Routine”. This name will be used to trigger the routine.
7. Select the “Add starter” option
Tap on the “Add starter” option to choose how the routine will be triggered. You can select options like “Voice command” or “Scheduled time”.
8. Choose a security camera action
Select your security camera from the list of available devices. Then, choose the action you want the camera to perform when the routine is triggered. For example, you can have the camera start recording or send you a notification.
9. Add more actions (optional)
If you want to add additional actions to the routine, tap on the “Add action” button. You can include actions like adjusting the camera’s settings, turning on/off other smart devices, or playing a specific sound.
10. Save the routine
Once you have configured the routine to your liking, tap on the “Save” button to save the routine.
Now, whenever you say the trigger phrase or at the scheduled time, your security camera will perform the actions specified in the routine. This allows you to automate and customize your security camera system based on your preferences and needs.
Step 8: Customize Notifications and Alerts
Once you have successfully connected your security cameras to Google Home, it’s important to customize the notifications and alerts you receive. This will ensure that you stay informed about any unusual activities or events that may occur.
To customize the notifications and alerts, follow these steps:
- Open the Google Home app on your smartphone.
- Tap on the “Rooms” tab at the bottom of the screen.
- Select the room where your security cameras are located.
- Tap on the “Settings” icon in the top right corner of the screen.
- Scroll down and tap on “Notifications”.
- Here, you can customize the type of notifications you receive for each camera, such as motion detection or sound detection.
- You can also choose to receive notifications only when you’re away from home.
- Tap on the toggle switch to enable or disable notifications for each camera.
- Finally, tap on “Save” to apply your changes.
By customizing the notifications and alerts, you can ensure that you receive the most relevant information about your security cameras. This will help you monitor your home more effectively and take immediate action if needed.
Step 9: Test and Troubleshoot
After completing all the previous steps, it’s essential to test your security cameras and ensure they’re properly integrated with Google Home. Here are some troubleshooting tips to help you along the way:
1. Check Camera Compatibility:
Make sure your security cameras are compatible with Google Home. Refer to the camera’s documentation or contact the manufacturer for more information.
2. Confirm Setup:
Double-check that you followed all the setup instructions correctly. Verify that the cameras are connected to the same Wi-Fi network as your Google Home device.
3. Voice Commands:
Test various voice commands with your Google Home to control the security cameras. State “Hey Google, show [camera name] on [Chromecast device name]” to view live feeds on your TV, or use other supported commands for different camera functions.
4. Camera Viewing Issues:
If you encounter issues while viewing camera feeds, ensure your Chromecast or other casting devices are working correctly. Restarting them or updating their firmware may resolve any problems.
5. Networking Problems:
If you’re experiencing connectivity issues, check your Wi-Fi signal strength and router settings. Consider relocating the router or adding a Wi-Fi extender to improve the network coverage.
6. Check Firmware Updates:
Regularly check for firmware updates for your security cameras. Manufacturers often release updates to fix bugs and enhance compatibility with devices like Google Home.
By following these troubleshooting tips, you should be able to diagnose and resolve any issues that arise during the integration of security cameras with Google Home.
FAQ,
Can I connect my existing security cameras to Google Home?
Yes, you can connect your existing security cameras to Google Home. First, make sure that your security cameras are compatible with Google Home. Then, open the Google Home app on your smartphone and go to the “Home Control” section. From there, you can add your security cameras to Google Home and control them using voice commands.
What security cameras are compatible with Google Home?
Google Home is compatible with a wide range of security cameras, including popular brands like Nest, Ring, Arlo, and Wyze. However, it’s always a good idea to check the compatibility of your specific security camera model with Google Home before making a purchase.
Do I need any additional equipment to connect my security cameras to Google Home?
In most cases, you don’t need any additional equipment to connect your security cameras to Google Home. However, some security camera models may require a smart home hub or a separate device called a video doorbell to enable Google Home integration. Make sure to read the instructions provided by the manufacturer of your security camera for the specific requirements.
Can I view the live feed from my security cameras on my Google Home device?
Yes, you can view the live feed from your security cameras on your Google Home devices with a screen, such as the Google Nest Hub or Nest Hub Max. Simply ask Google Assistant to show you the live feed from a specific camera, and it will be displayed on the screen. Note that not all security camera models support this feature, so make sure to check the compatibility before purchasing.
Is it possible to receive notifications from my security cameras on my Google Home device?
Yes, you can receive notifications from your security cameras on your Google Home device. Once you have connected your security cameras to Google Home, you can set up notifications in the Google Home app. You can choose to receive alerts for motion detection or other events, and Google Assistant will announce them on your Google Home device or send them to your smartphone.


