
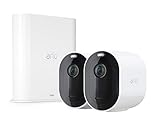
Arlo security cameras are a popular choice among homeowners who want to enhance their home security. These cameras offer high-quality video surveillance and advanced features to keep your property safe. One way to further enhance the security of your home is by connecting your Arlo security camera to a security light. This combination not only provides you with video evidence but also acts as a deterrent against potential intruders.
Connecting your Arlo security camera to a security light is a straightforward process that can be done in a few simple steps. Here’s a guide to help you get started:
1. Choose the Right Security Light: Before you can connect your Arlo camera to a security light, you need to select a compatible light fixture. Look for a security light that offers motion detection and the ability to be controlled remotely. This will allow you to integrate it with your Arlo camera seamlessly and customize its settings according to your needs.
2. Install the Security Light: Once you have chosen the right security light, follow the manufacturer’s instructions to install it in the desired location. It is recommended to install the light in an area that provides optimal coverage for your camera and can effectively illuminate the surrounding area.
3. Connect the Arlo Camera to the Security Light: Once the security light is installed, it’s time to connect your Arlo camera. Start by opening the Arlo app on your smartphone or computer and accessing the camera settings. Look for the option to connect a security light and follow the on-screen instructions to pair the camera with the light.

4. Customize Settings: After the camera and security light are successfully connected, you can customize their settings to fit your security needs. Adjust the sensitivity of the motion detection feature, set up notifications for detected motion, and configure any other options available in the Arlo app to ensure optimal performance.
By connecting your Arlo security camera to a security light, you can create a robust and comprehensive home security system. This combination allows you to monitor your property effectively and deter potential intruders, providing you with peace of mind knowing that your home is protected.
Step-by-Step Guide: How to Connect Arlo Security Camera to Security Light
Arlo Security Camera is a popular choice for homeowners looking to improve their home security. By connecting your Arlo camera to a security light, you can enhance your surveillance system and capture clear footage, even in low-light conditions. If you’re wondering how to connect your Arlo camera to a security light, just follow these easy steps:
Step 1: Ensure that both your Arlo camera and security light are compatible. Check the specifications and requirements of both devices to ensure they can work together.
Step 2: Install and set up your Arlo camera according to the manufacturer’s instructions. Make sure the camera is properly connected to your home Wi-Fi network and test it to ensure it’s working correctly.

Step 3: Locate a suitable mounting spot for your security light. It should be strategically placed to cover the desired area and not obstruct the camera’s view.
Step 4: Install the security light according to the manufacturer’s instructions. Ensure it is securely mounted and properly wired to a power source.
Step 5: Connect the Arlo camera to the security light. This process might vary depending on the specific devices you are using. Check the documentation provided with your devices for detailed instructions.
Step 6: Adjust the settings of the Arlo camera and security light. Use the Arlo app or web portal to configure the camera’s motion detection, recording settings, and notifications. Configure the security light’s activation and sensitivity settings based on your preferences.
Step 7: Test the connection and functionality of the Arlo camera and security light. Check if the camera detects motion and if the security light activates accordingly. Make any necessary adjustments to ensure optimal performance.

Step 8: Monitor the Arlo camera and security light regularly to ensure they continue to function as intended. Keep an eye on the camera feed and check for any issues or malfunctions.
Note: It’s always recommended to consult the user manuals and documentation provided with your specific Arlo camera and security light for detailed and device-specific instructions.
By following these simple steps, you can easily connect your Arlo security camera to a security light and enhance your home security system. Enjoy the added peace of mind that comes with improved coverage and surveillance capabilities.
Prepare Your Arlo Security Camera
Before you can connect your Arlo security camera to a security light, you need to make sure it is properly prepared. Follow these steps to get your camera ready:
1. Install the Camera
If you haven’t already, install your Arlo security camera in the desired location. Make sure it is mounted securely and has a clear view of the area you want to monitor.

2. Set Up the Arlo App
Download and install the Arlo app on your smartphone or tablet. Open the app and create an Arlo account if you don’t have one already. Follow the provided instructions to set up your camera within the app.
During the setup process, you will set a name for your camera and connect it to your Wi-Fi network. Make sure you have the necessary information, such as your Wi-Fi network name and password, on hand.
3. Check Camera Status
After setting up your camera, check its status in the Arlo app. Ensure that the camera is powered on and connected to the internet. You should also check the camera’s battery level to ensure it has enough power to function properly.
If your camera is not functioning correctly, troubleshoot the issue by consulting the Arlo app or support documentation. You may need to reset the camera or adjust its settings.
By properly preparing your Arlo security camera, you can ensure that it is ready to be connected to a security light and provide you with the enhanced protection you need.

Choose a Suitable Location
When connecting your Arlo security camera to a security light, it is important to choose a suitable location for both devices. Here are some factors to consider:
- Visibility: Ensure that the camera and light have a clear line of sight to the area you want to monitor. Avoid obstructions such as trees or walls that may block the view.
- Mounting Surface: Use a sturdy mounting surface for both the camera and the light. This can be a wall, ceiling, or any other secure surface that can support the weight of the devices.
- Height: Consider the optimal height for mounting the camera and light. A higher position may provide a broader view, but make sure it is still within the camera’s range and does not cause the light to be less effective.
- Weather Resistance: Ensure that both the camera and light are suitable for outdoor use and can withstand various weather conditions, such as rain, snow, or extreme temperatures.
- Power Source: Make sure there is a nearby power source available for both the camera and the light. If necessary, you may need to install additional wiring or use battery-powered devices.
- Wi-Fi Signal: Check the Wi-Fi signal strength in the chosen location to ensure a stable connection between the camera and your network. Weak signals may result in unreliable camera performance.
By considering these factors and choosing a suitable location, you can ensure that your Arlo security camera and security light work effectively together to enhance your home security. Remember to follow the manufacturer’s instructions for installation and setup to achieve the best results.
Mount the Arlo Security Camera
Before you connect your Arlo security camera to a security light, you need to properly mount it in the desired location. Follow these steps to ensure a secure and effective installation:
1. Choose the Right Location
Select a location for your Arlo security camera that provides a clear view of the area you want to monitor. Consider factors such as the camera’s range, field of view, and any potential obstructions. It’s important to place the camera in a spot that maximizes its effectiveness.
2. Gather Mounting Materials
Make sure you have all the necessary materials before starting the installation process. This typically includes the camera mount, screws, and any additional brackets or accessories that may be required. Check the camera’s packaging or user manual for a complete list of recommended tools.

3. Attach the Mounting Bracket
Start by attaching the mounting bracket to the desired surface. This could be a wall, ceiling, or any other appropriate structure. Use the provided screws and a power drill or screwdriver to secure the bracket in place. Ensure that it is firmly attached and can support the weight of the camera.
4. Position the Camera
After the mounting bracket is securely in place, position the Arlo security camera onto the bracket. Make sure it is aligned properly and resting securely. Adjust the camera angle as needed to achieve the desired view. Most Arlo cameras offer a swivel and tilt mechanism for easy adjustment.
5. Secure the Camera
Once the camera is in the desired position, use the provided screws or locking mechanism to secure it to the mounting bracket. Double-check that it is properly fastened and stable. This will ensure that the camera stays in place and maintains the desired angle despite any external factors.
By following these steps, you can successfully mount your Arlo security camera in preparation for connecting it to a security light. Remember to test the camera’s functionality after installation to ensure that it is capturing the desired footage.
Check the Wi-Fi Connection
Before connecting your Arlo security camera to a security light, it is essential to ensure that you have a stable Wi-Fi connection. Here are the steps to check your Wi-Fi connection:
| 1. | Make sure that your Wi-Fi router is powered on and functioning correctly. |
| 2. | Bring your Arlo security camera close to the router to get better signal strength. |
| 3. | Check if other devices connected to the same Wi-Fi network are working properly. |
| 4. | Restart your Wi-Fi router and modem to refresh the connection. |
| 5. | If you have multiple Wi-Fi networks, make sure you are connecting your Arlo security camera to the correct one. |
| 6. | Contact your internet service provider to check if there are any issues with your internet connection. |
Once you have confirmed that your Wi-Fi connection is stable, you can proceed with the process of connecting your Arlo security camera to the security light.
Install the Arlo App
To connect your Arlo security camera to your security light, you will need to install the Arlo app on your smartphone or tablet. The Arlo app is available for both Android and iOS devices and can be downloaded for free from the Google Play Store or the Apple App Store.
Step 1: Search for the Arlo App
Open the Google Play Store or Apple App Store on your device and search for “Arlo” in the search bar.
Step 2: Download and Install the App
Click on the Arlo app from the search results and then click the “Install” or “Get” button to download and install the app onto your device. The app will start downloading and installing automatically.
Note: Make sure you have a stable and reliable internet connection to avoid any interruptions during the download and installation process.
Step 3: Open the Arlo App
Once the app is installed, you can open it by tapping on the app icon on your device’s home screen. The Arlo logo will appear, and the app will start loading.
Upon opening the app for the first time, you may be prompted to log in with your Arlo account. If you already have an account, enter your login credentials; otherwise, you will need to create a new account.
Tip: If you are setting up your Arlo security camera for the first time, make sure it is powered on and connected to the same Wi-Fi network as your smartphone or tablet.
After successfully logging in, you will have access to the various features and settings available in the Arlo app, including the option to connect your Arlo security camera to your security light.
By installing the Arlo app, you are one step closer to connecting your Arlo security camera to your security light and ensuring enhanced security for your property.
Connect the Arlo Camera to the App
To connect your Arlo security camera to the Arlo app, follow these steps:
Step 1: Open the Arlo app on your smartphone or tablet.
Step 2: Tap on the “Settings” tab located at the bottom right corner of the screen.
Step 3: Select “Add Device” and choose the type of device you want to connect. In this case, select “Camera”.
Step 4: Wait for your camera to be discovered. Make sure that your camera is powered on and properly connected to the Wi-Fi network. You may need to follow the instructions provided with your camera to ensure it is connected correctly.
Step 5: Once your camera is discovered, select it from the list of available devices.
Step 6: Follow the on-screen prompts to complete the setup process. This may include entering your Wi-Fi network password and creating a name for your camera.
Step 7: After the setup process is complete, you can customize the settings for your Arlo camera through the app. This includes adjusting motion detection sensitivity, setting up activity zones, and enabling notifications.
Step 8: You can now view live video from your Arlo camera and access additional features such as recorded clips and two-way audio through the Arlo app.
By following these steps, you can easily connect your Arlo security camera to the Arlo app and start monitoring your property from anywhere using your smartphone or tablet.
Configure the Arlo Security Camera Settings
Once you have successfully connected your Arlo security camera to the security light, you need to configure the camera settings to ensure optimal performance. Here are the steps to configure the Arlo security camera settings:
| Step 1: | Ensure that your Arlo security camera is powered on and connected to a stable internet connection. |
| Step 2: | Download and install the Arlo app on your smartphone or tablet from the App Store or Google Play Store. |
| Step 3: | Launch the Arlo app and sign in to your Arlo account. If you don’t have an account, you can create one for free. |
| Step 4: | Tap on the “Devices” tab in the app’s bottom menu to view a list of your connected Arlo devices. |
| Step 5: | Select the Arlo security camera that is connected to the security light from the list of devices. |
| Step 6: | In the camera settings, you can customize various options such as motion detection sensitivity, video quality, and recording modes. |
| Step 7: | Adjust the motion detection sensitivity to your desired level. Higher sensitivity settings may result in more false alerts, while lower settings may cause the camera to miss important events. |
| Step 8: | Choose the desired video quality for your camera recordings. Higher video quality settings will consume more storage space. |
| Step 9: | Set the recording mode according to your preferences. You can choose to record continuously, on a schedule, or when motion is detected. |
| Step 10: | Once you have configured the camera settings, tap on the “Save” or “Apply” button to save the changes. |
By following these steps, you can easily configure the settings of your Arlo security camera, ensuring that it meets your specific security needs. It is recommended to regularly review and update the camera settings to optimize its performance and maximize the effectiveness of your security system.
Connect the Arlo Camera to the Security Light
Before connecting the Arlo camera to the security light, make sure you have already installed both devices and have them powered on.
To connect the Arlo camera to the security light:
- Ensure that the Arlo camera and the security light are both within the range of your Wi-Fi network.
- Open the Arlo app on your mobile device and sign in to your account.
- Select the “Devices” tab at the bottom of the screen.
- Tap on the Arlo camera you want to connect to the security light.
- Under the “Device Settings” section, tap on “Light Settings”.
- In the “Light Settings” menu, toggle the switch to enable the light.
- Tap on “Sync Devices” to initiate the syncing process.
- Follow the on-screen instructions to put the camera in sync mode.
- Once the camera is in sync mode, press the sync button on the security light.
The Arlo camera will then connect to the security light. It may take a few moments for the connection to establish.
Once the connection is successful, you can customize the light settings and control the security light through the Arlo app. Monitor and adjust the light settings as needed to optimize security and surveillance.
Note: Depending on the specific model and brand of the security light, the steps to connect it to the Arlo camera might vary. Always refer to the manufacturer’s instructions for detailed guidance.
Test the Arlo Security Camera and Light Connection
Once you have successfully connected your Arlo security camera to the security light, it is important to test the connection to ensure everything is working properly. The following steps will guide you through the testing process:
Step 1: Position the Camera and Light
Make sure the security camera and light are properly positioned to cover the desired area. Adjust the angle and positioning as necessary to achieve the best coverage.
Step 2: Activate the Camera and Light
Turn on both the Arlo security camera and the connected security light. This can usually be done using their respective power switches or through the connected app or device.
Step 3: Check the Camera Feed
Open the Arlo app or connect to the Arlo camera through the supported device. Check the live camera feed to verify that the camera is functioning correctly and capturing the desired field of view. You should be able to see the area covered by the security light.
Step 4: Test the Light Trigger
Walk through the area covered by the security light to trigger its motion detection feature. Ensure that the security light turns on when motion is detected and illuminates the intended area. You can perform this test multiple times to ensure consistent and reliable performance.
Step 5: Review the Footage
After testing the light trigger, review the recorded footage to ensure that the camera captures the motion events and the light turns on accordingly. Check if the footage is clear and the light effectively illuminates the area when triggered.
Through these steps, you can verify that the connection between the Arlo security camera and the security light is working as intended. If you encounter any issues during the testing process, refer to the user manuals or contact the respective support channels for further assistance.
FAQ,
How do I connect my Arlo security camera to a security light?
To connect your Arlo security camera to a security light, you will need to follow a few steps. First, make sure that your security light is compatible with the Arlo camera system. Then, connect the Arlo camera to your Wi-Fi network. Next, install and set up the security light according to the manufacturer’s instructions. Finally, link the security light to the Arlo camera through the Arlo app or web portal. This will allow you to control and monitor both the camera and the light from one central location.
Can I connect my Arlo security camera to multiple security lights?
Yes, you can connect your Arlo security camera to multiple security lights. Arlo cameras are designed to be compatible with a range of smart home devices, including security lights. By connecting your camera to multiple lights, you can enhance the security and visibility of your property. Simply follow the same process of connecting the first security light to the Arlo camera, and then repeat the steps for additional lights. You can control and monitor all the connected lights through the Arlo app or web portal.


