
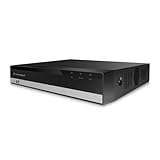
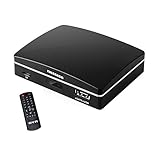
If you have a security camera DVR and you want to connect it to your Mac, you’ve come to the right place. In this article, we will guide you through the process of connecting your security camera DVR to your Mac, so you can view and manage your surveillance footage conveniently.
Step 1: Check the Compatibility
Before you begin, it’s important to check if your security camera DVR is compatible with your Mac. Mac computers usually have different operating systems, so make sure your DVR is compatible with the version you’re using. It’s recommended to check the manufacturer’s website or user manual for compatibility information.
Step 2: Install the Software
Once you’ve confirmed compatibility, you’ll need to install the necessary software on your Mac. Most security camera DVRs come with a software CD that contains the required software. Insert the CD into your Mac’s CD drive, and follow the on-screen instructions to install the software.

Step 3: Connect the DVR to Your Mac
Now it’s time to connect your security camera DVR to your Mac. Start by connecting the DVR to your Mac using the appropriate cables. Most DVRs use a USB cable or an Ethernet cable for connection. Plug one end of the cable into the DVR and the other end into an available USB or Ethernet port on your Mac.
Step 4: Configure the Software
Once the connection is established, you’ll need to configure the software on your Mac to recognize the DVR. Open the software on your Mac and navigate to the settings or configuration menu. Look for an option to add a new device or camera. Follow the on-screen instructions to add your DVR to the software.
Step 5: View and Manage Your Footage

After successfully adding your DVR to the software, you should be able to view and manage your surveillance footage on your Mac. Use the software’s interface to access live video feeds, playback recorded footage, and make any necessary adjustments to your camera settings.
By following these steps, you can easily connect your security camera DVR to your Mac and enjoy the convenience of managing your surveillance footage on one device. Keep in mind that the specific steps may vary depending on your security camera DVR model and the software you’re using. Refer to your DVR’s user manual for detailed instructions if needed.
Connecting a security camera DVR to a Mac: A step-by-step guide
If you own a security camera DVR and want to connect it to your Mac, you might be wondering how to go about the process. While it may seem daunting at first, connecting a security camera DVR to a Mac is actually quite straightforward. Follow the step-by-step guide below to get started:
Step 1: Check compatibility
Before attempting to connect your security camera DVR to your Mac, ensure that your Mac meets the system requirements. Check the DVR’s instruction manual or the manufacturer’s website for compatibility details.
Step 2: Install necessary software
Some security camera DVRs require specific software to connect to a Mac. Check if your DVR comes with a software CD or if the manufacturer provides a downloadable app. Install the software on your Mac following the provided instructions.

Step 3: Connect the DVR to your Mac
Using the provided cables, connect the security camera DVR to your Mac. Most DVRs have an HDMI or VGA output port. If your Mac has a corresponding input port, use the appropriate cable to connect the two devices.
Note: If your Mac doesn’t have the necessary input port, you may need to purchase an adapter or use a compatible external display to connect the DVR.
Step 4: Power on the DVR
Once the DVR is connected to the Mac, power on the DVR and your Mac.
Step 5: Launch the software
Open the software you installed in Step 2. The software should recognize the connected DVR, and you should be able to access its features and settings through the software interface.
Step 6: Configure settings
Follow the on-screen instructions of the software to configure the settings of your security camera DVR. This usually includes setting up network access, recording schedules, and notifications.

Step 7: Test the connection
Once the settings are configured, test the connection between the security camera DVR and your Mac. Make sure you can view live camera feeds, access recorded footage, and perform any other desired functions.
By following these steps, you should be able to connect your security camera DVR to your Mac successfully. If you encounter any issues or have specific questions, refer to the instruction manual or contact the manufacturer for further assistance.
Disclaimer: The steps provided in this guide may vary depending on the specific DVR model and Mac OS version.
Understanding the basic requirements
Before connecting your security camera DVR to your Mac, it is important to understand the basic requirements for a successful connection. By ensuring that you have the necessary components and compatible software, you can ensure a smooth installation process.
1. Compatible DVR
First and foremost, you need to have a security camera DVR that is compatible with Mac operating systems. Check the specifications and requirements of your DVR to confirm if it supports Mac connectivity.
2. Network Connection
In order to connect your security camera DVR to your Mac, both devices must be connected to the same network. This can either be a wired network connection or a wireless connection, depending on the capabilities of your devices.
3. Software
You will need software that supports Mac operating systems to access the footage and controls of your security camera DVR. Check the manufacturer’s website or the documentation that came with your DVR to find compatible software options for Mac.
4. Camera Compatibility
Ensure that the security cameras you are using are compatible with your DVR and Mac operating system. Check the specifications and requirements of both devices to confirm their compatibility.
By understanding and meeting these basic requirements, you can proceed with confidence to connect your security camera DVR to your Mac and enjoy the benefits of surveillance monitoring.
Choosing the right cables
When connecting your security camera DVR to your Mac, it is important to choose the right cables to ensure a proper and stable connection. Here are a few things to consider when selecting the cables:

1. Compatibility
First, check the compatibility of your security camera DVR and Mac. Determine what type of video output your DVR has and what types of video inputs your Mac supports. This will help you determine which cables you need.
2. Video and Audio Cables
Next, decide whether you need separate video and audio cables or if a single cable will suffice. Many security camera DVRs have a variety of outputs, including HDMI, VGA, and BNC. HDMI cables are ideal for transmitting both video and audio signals, while VGA and BNC cables may require separate audio cables.
3. Cable Length
Consider the length of the cables you need. Measure the distance between your security camera DVR and your Mac to ensure you have enough cable length to reach. It is recommended to choose cables that are slightly longer than the measured distance to allow for flexibility and adjustment.
4. Quality and Brand
Lastly, pay attention to the quality and brand of the cables you choose. Opt for cables from reputable brands that offer good quality to ensure a reliable connection and prevent signal loss or interference.
By considering these factors, you can choose the right cables to connect your security camera DVR to your Mac and enjoy seamless monitoring and playback of your surveillance footage.
Installing the necessary software
Before connecting your security camera DVR to your Mac, you will first need to install the necessary software. This software will allow your Mac to communicate with the DVR and view the video footage.
Here are the steps to install the necessary software:
Step 1: Check compatibility
Ensure that the software you are installing is compatible with both your Mac operating system and your specific DVR model. Check the system requirements and software documentation provided by the manufacturer.
Step 2: Download the software
Visit the manufacturer’s website or the App Store to download the software required for your specific DVR model. Follow the provided instructions to download the software onto your Mac.
Step 3: Install the software
Locate the downloaded software file on your Mac and double-click on it to begin the installation process. Follow the on-screen prompts to complete the installation.
Step 4: Configure the software
Once the software is installed, launch the application and follow the setup wizard or configuration instructions provided. You may need to enter the IP address or other network settings for your DVR to establish a connection.
After completing these steps, you should now have the necessary software installed on your Mac to connect to your security camera DVR. You can now proceed with connecting your DVR to your Mac using the appropriate cables and configuring the software settings to view the video footage.
Configuring the network settings
Before connecting your security camera DVR to your Mac, the first step is to configure the network settings. Here’s how:
Step 1: Determine the IP address of your DVR
The IP address is a unique identifier for your DVR on the network. To find the IP address, you can check the user manual or access the DVR’s settings menu.
Step 2: Connect your Mac to the same network
Make sure your Mac is connected to the same network as your DVR. This can be a wired or wireless connection.
Step 3: Open the Network preferences on your Mac
To open the Network preferences, go to the Apple menu, select “System Preferences”, and then click on “Network”.
Step 4: Configure the network settings
In the Network preferences, select the network interface that you are using to connect to the network. It could be Ethernet or Wi-Fi.
Click the “Advanced” button, then go to the “TCP/IP” tab.
In the TCP/IP tab, select the “Using DHCP” option if it is not already selected. This will allow your Mac to automatically obtain an IP address from the network.
If your DVR requires a static IP address, select the “Using DHCP with manual address” option and enter the IP address provided by your DVR.
Click “OK” to save the changes.
Step 5: Test the connection
Once the network settings are configured, you can test the connection by opening a web browser on your Mac and entering the IP address of your DVR in the address bar. If the connection is successful, you should be able to access the DVR’s web interface.
Now that you have configured the network settings, you can proceed to connect your security camera DVR to your Mac.
Note: It is recommended to consult the user manual of your specific DVR model for detailed instructions on configuring the network settings.
Establishing a physical connection
To connect your security camera DVR to your Mac, you will need to establish a physical connection between the two devices. Here are the steps to follow:
- Check the ports available on both your security camera DVR and your Mac. Most security camera DVRs have a variety of ports, including HDMI, VGA, and BNC. Your Mac might have Thunderbolt, USB, or HDMI ports.
- Identify the matching ports on both devices. For example, if your security camera DVR has a VGA port and your Mac has a Thunderbolt port, you will need a VGA to Thunderbolt adapter.
- Acquire the necessary cables or adapters to make the physical connection. You can find these at electronics stores or online.
- Connect one end of the cable or adapter to the security camera DVR and the other end to your Mac.
- Ensure both devices are powered on.
- On your Mac, open the appropriate software or application for viewing the security camera feed. This may be the manufacturer’s software or a third-party app.
- Follow the software prompts to establish the connection between your Mac and the security camera DVR.
- Once the connection is established, you should be able to view the live video feed from your security cameras on your Mac.
It’s important to note that the specific steps may vary depending on the make and model of your security camera DVR and your Mac. Refer to the user manuals or online documentation for each device for specific instructions.
Testing and troubleshooting
Once you have successfully connected your security camera DVR to your Mac, it’s important to test and troubleshoot the connection to ensure everything is working properly. Here are some steps you can take:
1. Check the connection
- Make sure all cables are securely connected to both the DVR and your Mac.
- Verify that the power supply is properly connected and the DVR is turned on.
- Ensure that your Mac recognizes the DVR by checking the system preferences or device manager.
2. Test the video feed
- Launch the video surveillance software provided with your security camera DVR.
- Verify that the video feed is displaying correctly on your Mac.
- If you encounter any issues, try restarting the software or reconnecting the cables.
3. Check the network settings
- If you are accessing the security camera DVR remotely, ensure that the network settings are configured correctly.
- Check the IP address, port forwarding, and any firewall settings that may be blocking the connection.
- If necessary, consult the user manual or contact the manufacturer for assistance.
4. Update software and firmware
- Regularly update the software and firmware for both your Mac and the security camera DVR.
- Check for any available updates and install them to ensure compatibility and optimal performance.
By following these steps, you can effectively test and troubleshoot your security camera DVR connection to your Mac. If you continue to experience issues, it may be helpful to consult the user manual or contact the manufacturer for further assistance.
Finalizing the setup
After completing the initial setup process, you are almost ready to connect your security camera DVR to your Mac. Follow these final steps to ensure a successful connection:
1. Connect to the same network
Make sure both your Mac and the DVR are connected to the same network. This could be your home Wi-Fi network or a local network provided by your workplace or school.
2. Check the IP settings
Open the network settings on your Mac and verify that it is configured to obtain an IP address automatically. You can do this by going to System Preferences > Network, selecting your network connection (Wi-Fi or Ethernet), and selecting the TCP/IP tab. Make sure the Configure IPv4 option is set to “Using DHCP”.
3. Find the IP address of your DVR
Consult the user manual or documentation of your DVR to find the IP address it is configured with. This is usually set up during the initial setup process or can be found in the network settings menu of the DVR.
4. Launch the DVR viewing software
Open the DVR viewing software on your Mac. This software may have been provided with the DVR or can be downloaded from the manufacturer’s website. Once launched, you will be prompted to enter the IP address of your DVR. Enter the IP address and click “Connect” or any equivalent option to establish a connection.
5. Enter login credentials
After establishing a connection, you may be prompted to enter login credentials. Refer to the user manual or documentation of your DVR for the default username and password. Make sure to change these credentials for security purposes, especially if accessing the DVR remotely.
Once you have completed these final steps, you should be able to view the live feed from your security camera DVR on your Mac. Make sure to configure any additional settings or features within the DVR viewing software to suit your preferences.
FAQ,
Can I connect a security camera DVR to my Mac?
Yes, you can connect a security camera DVR to your Mac. There are several ways to do this, depending on the type of DVR you have and the software you are using.
What cables do I need to connect my security camera DVR to my Mac?
The cables you need will depend on the specific connections available on both your DVR and your Mac. In general, you will most likely need a video cable, such as HDMI or VGA, to connect the DVR to your Mac’s display. You may also need an audio cable if you want to capture audio from the DVR. Additionally, you may need a USB cable to connect the DVR to your Mac for data transfer.
Is there any software I need to install to connect my security camera DVR to my Mac?
Yes, you will likely need to install software on your Mac to connect to and view the footage from your security camera DVR. Some DVRs come with their own software, but if not, you can search for compatible software in the Mac App Store or on the manufacturer’s website. Popular options include iSpy, SecuritySpy, and Blue Iris.


