
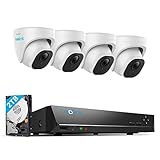
In today’s digital age, security cameras play a crucial role in keeping our homes and businesses safe. These cameras not only act as a deterrent to potential criminals but also provide valuable evidence in case of any untoward incident. However, setting up multiple security cameras can be quite a challenge, especially if you don’t have a DVR (Digital Video Recorder).
A DVR acts as the central hub for all your security cameras, allowing you to record and monitor the feeds from multiple cameras in one place. But what if you don’t have a DVR? Is it still possible to connect and monitor multiple security cameras? The answer is yes!
There are several alternative methods to connect multiple security cameras without the need for a DVR. One such method is by using a network video recorder (NVR). An NVR is similar to a DVR but is specifically designed to work with IP (Internet Protocol) cameras. These cameras can be connected directly to your existing network, eliminating the need for a separate DVR.
Another option is to use software-based solutions that allow you to connect and manage multiple security cameras on your computer or mobile device. These software solutions, also known as video management software (VMS), offer a range of features such as live viewing, recording, and playback. With VMS, you can easily configure and control multiple cameras from a single interface, making it an ideal choice for those who don’t have a DVR.
So, whether you choose to invest in an NVR or opt for a software-based solution, connecting multiple security cameras without a DVR is not only possible but also relatively straightforward. By leveraging the power of technology, you can enhance the security of your premises without the need for expensive equipment.

Why Connect Multiple Security Cameras without a DVR?
Security cameras serve as an important tool for surveillance and protection, allowing you to monitor different areas of your property. Traditionally, a Digital Video Recorder (DVR) has been used to connect multiple security cameras and record the footage. However, there are situations where connecting multiple security cameras without a DVR can be beneficial:
|
Cost-Effective Solution: Connecting multiple security cameras without a DVR can be a cost-effective solution, especially if you don’t need continuous video recording. Instead of investing in a DVR, you can use alternative methods to view and record the camera footage. |
|
Flexibility and Scalability: By connecting multiple security cameras without a DVR, you have the flexibility to choose different cameras and easily add or remove cameras as per your requirements. This allows you to scale your surveillance system based on your changing needs. |
|
Remote Access and Cloud Storage: Many modern security cameras offer remote access and cloud storage features. By connecting multiple security cameras without a DVR, you can utilize these features to access live video feeds and store the recorded footage securely in the cloud. |
|
Reduced Dependency: Not relying on a central DVR means that if one camera or DVR fails, the rest of the cameras can still function normally. This redundancy can enhance the overall reliability and security of your surveillance system. |

When connecting multiple security cameras without a DVR, it is important to choose the appropriate method and equipment based on your specific needs. Whether you opt for a Network Video Recorder (NVR), a dedicated server, or a cloud-based solution, carefully considering your requirements will ensure a reliable and efficient surveillance system.

The Importance of Multiple Security Cameras
When it comes to ensuring the safety and security of your home or business, having multiple security cameras can make a significant difference. Installing multiple cameras in different areas provides a more comprehensive view of your property, reducing blind spots and increasing the overall effectiveness of your surveillance system.
Increased Coverage
Having multiple security cameras allows you to cover a larger area of your property. By strategically placing cameras in key locations, such as entry points, parking lots, or high-risk areas, you can monitor a wider range of activities and potential threats. This expanded coverage can help deter criminals, as they are more likely to be caught on camera and identified.
Additionally, having cameras positioned in various angles and heights provides different perspectives, allowing you to capture crucial details that might otherwise be missed. By covering multiple angles, you can have a clearer understanding of events and identify any suspicious activity or persons more accurately.
Enhanced Security
Multiple security cameras not only offer increased coverage but also enhance the overall security of your property. By having cameras in various spots, you can create a layered security system, where each camera acts as a backup for the others. If one camera fails or is compromised, the others can continue capturing footage and protecting your property.
Furthermore, having multiple cameras can help you obtain a more comprehensive view of an incident. By piecing together footage from different angles, you can create a more accurate timeline of events, making it easier to gather evidence and identify perpetrators in case of a break-in or other criminal activities.

Cost-Effective Solution
Contrary to popular belief, setting up multiple security cameras does not have to break the bank. With advancements in technology, there are affordable options available that provide high-quality footage and reliable performance. Investing in multiple cameras can be a cost-effective solution compared to other security measures, such as hiring additional security personnel or upgrading your entire security system.
| Benefits of Multiple Cameras: |
|---|
| Enhanced coverage of your property |
| Reduced blind spots and increased visibility |
| Increased deterrent for potential criminals |
| Improved security by creating a layered system |
| Accurate identification of suspects |
| Cost-effective solution compared to other security measures |
In conclusion, having multiple security cameras is essential for maximizing the safety and security of your property. The increased coverage, enhanced security, and cost-effectiveness make it a worthwhile investment. By installing multiple cameras and strategically positioning them, you can significantly improve your surveillance system’s effectiveness and have peace of mind knowing that your property is well-protected.
Benefits of Connecting Cameras without a DVR
Connecting security cameras without a DVR can offer numerous benefits. Whether you are a homeowner or a business owner, this method can provide convenience, flexibility, and cost savings. Here are some advantages of connecting cameras without a DVR:
Easy Installation
One of the key benefits of connecting cameras without a DVR is the ease of installation. Traditional security camera systems require a complex setup, including running cables and configuring the DVR. However, by utilizing IP cameras and network video recorders (NVR), the installation process becomes much simpler. With a wireless connection, you can easily set up and configure your cameras without the need for extensive wiring.
Flexibility
Connecting cameras without a DVR also offers flexibility in terms of camera placement and system expansion. Since these systems use wireless technology, you have the freedom to place cameras wherever you need them, without being limited by cable length or DVR location. Additionally, you can easily add or remove cameras as your needs change, making it a scalable solution for both small and large security setups.

Remote Access
Another major advantage of connecting cameras without a DVR is the ability to remotely access your camera feeds. With a network setup, you can access live video footage and recorded events from anywhere using a smartphone, tablet, or computer. This feature provides peace of mind and allows you to monitor your premises at all times, even when you’re away.
In conclusion, connecting security cameras without a DVR can simplify the installation process, offer flexibility in camera placement and system expansion, and provide remote access to camera feeds. Consider this method if you’re looking for a convenient, versatile, and cost-effective solution for your security needs.
Step by Step Guide: How to Connect Multiple Security Cameras without a DVR
Connecting multiple security cameras without a DVR may seem tricky, but with the right equipment and setup, it’s possible to achieve a robust surveillance system. Follow these steps to connect multiple security cameras without a DVR:
- Choose a Network Video Recorder (NVR): Look for an NVR that supports the number of cameras you want to connect. NVRs are designed to handle multiple camera feeds and offer features like video storage and remote access.
- Connect the NVR to your Network: Use an Ethernet cable to connect the NVR to your home network router. This connection will allow you to access and control the cameras remotely.
- Power up the Cameras: Plug in each camera to a power source. Ensure that the cameras receive the necessary power to function properly.
- Connect the Cameras to the NVR: Use Ethernet cables to connect each camera to the NVR. Make sure to connect each camera to the corresponding ports on the NVR.
- Configure the NVR: Use the provided software or web interface to configure the NVR. Set up the desired settings, such as video quality, motion detection, and recording schedules. Assign unique names or IDs to each camera for easy identification.
- Access the Cameras: Install the mobile app or software provided by the NVR manufacturer on your smartphone, tablet, or computer. Use the given credentials to log in and access the live camera feeds remotely.
- Configure Remote Access: Set up port forwarding on your router to enable remote access to the NVR. Ensure that you follow the manufacturer’s instructions for proper configuration and security.
- Monitor and Record: Once everything is set up, you can monitor and record the camera feeds using the NVR’s software. Check the live video feeds, view recorded footage, and adjust settings as needed.
By following these steps, you can connect multiple security cameras without a DVR and create a comprehensive surveillance system for your home or business.
Step 1: Determine the Camera Placement
Before connecting multiple security cameras without a DVR, it’s important to determine the ideal placement for each camera. This will ensure maximum coverage and effectiveness of your surveillance system. Here are a few factors to consider when determining camera placement:
1. Coverage Area: Assess the areas you want to monitor and determine the coverage area of each camera. Consider the field of view, distance, and angle required to capture the desired footage.
2. Entry Points: Identify the entry points of your property, such as doors, windows, and driveways. Placing cameras near these points can help deter potential intruders and provide evidence in case of a break-in.
3. Lighting Conditions: Take into account the lighting conditions in each area. Consider whether the location requires additional lighting or if the camera is equipped with night vision for low-light environments.
4. Height and Angle: Determine the optimal height and angle for each camera. Mounting the camera at the right height and angle can help capture clear and detailed footage while minimizing blind spots.
5. Power Source: Ensure that each camera’s placement allows for easy access to a power source. This may involve running cables or using power-over-Ethernet (PoE) technology if available.

By carefully considering these factors, you can determine the ideal camera placement for your surveillance system without the need for a DVR.
Step 2: Choose the Right Cameras
When connecting multiple security cameras without a DVR, it is essential to choose the right cameras for your setup. Here are a few factors to consider:
1. Camera Resolution
Camera resolution determines the level of detail that can be captured by the camera. Higher resolution cameras offer better image quality, allowing you to see more clearly. It is recommended to choose cameras with at least 1080p resolution for better surveillance results.
2. Camera Type
There are various types of security cameras available, such as dome cameras, bullet cameras, and PTZ cameras. Dome cameras offer a wider viewing angle and are inconspicuous, making them suitable for indoor use. Bullet cameras, on the other hand, are more prominent and suitable for outdoor surveillance. PTZ cameras offer the ability to pan, tilt, and zoom, providing more flexibility in monitoring the area.
3. Night Vision Capability
If you need to monitor an area during nighttime, it is crucial to choose cameras with night vision capability. These cameras are equipped with infrared LEDs that allow them to capture clear footage even in low light conditions.
4. Weather Resistance
If you plan to use the cameras outdoors, ensure that they are weather-resistant. Look for cameras with a high IP rating to ensure they are protected against water and dust. This will ensure their durability and reliability in various weather conditions.
Note: When selecting the cameras, consider your specific surveillance needs and the environment where they will be installed. It is also recommended to research customer reviews and check the camera specifications to make an informed decision.
Step 3: Select a Network Video Recorder (NVR)
Once you have your IP cameras connected to your network, the next step is to select a Network Video Recorder (NVR). An NVR is a device designed specifically for managing and recording video from IP cameras. It acts as a centralized storage and playback solution for all the video footage captured by the cameras.
When choosing an NVR, there are several factors to consider:
1. Number of Channels:
The number of channels refers to the maximum number of cameras that the NVR can support. Make sure to select an NVR that can accommodate all the cameras you plan to connect.
2. Storage Capacity:
Consider the amount of storage you will need to store the recorded video footage. The storage capacity of an NVR is usually measured in terabytes (TB). Choose an NVR with sufficient storage capacity to meet your requirements.
3. Network Connectivity:
Check if the NVR supports the type of network connectivity you have in place. Most NVRs come with built-in Ethernet ports for connecting to your network.
4. Recording Resolution:
Consider the resolution at which you want to record your video footage. The NVR should support the desired resolution to ensure high-quality recordings.
5. Additional Features:
Look for additional features that may be important to you, such as remote access, motion detection, and alarm notifications. These features can enhance the functionality and convenience of your security system.
Once you have selected an NVR that meets your requirements, you can proceed to connect the IP cameras to the NVR. This usually involves configuring the cameras to connect to the NVR using their IP addresses. The NVR will then be able to receive and record the video feeds from the cameras.
Step 4: Configure the NVR
Once you have connected all the security cameras to the network switch, the next step is to configure the Network Video Recorder (NVR). The NVR is the central device that will receive and record the video footage from the cameras.
1. Connect the NVR to the network
Start by connecting the NVR to the same network switch that the cameras are connected to. Use an Ethernet cable to connect the NVR’s LAN port to an available LAN port on the switch.
2. Assign an IP address to the NVR
Most NVRs come with a default IP address, but you may need to change it to match your network settings. Consult the NVR’s user manual for instructions on how to assign a static IP address to the device. Make sure the IP address you choose is within the same subnet as your network.
Note: It is recommended to reserve the IP address of the NVR on your router to prevent it from being assigned to another device.
3. Access the NVR’s web interface
To configure the NVR, you will need to access its web interface from a computer on the same network. Open a web browser and enter the IP address of the NVR in the address bar. You will be prompted to enter a username and password to log in.
Tip: By default, the username is ‘admin’ and the password is ‘password’, but you should change these credentials for security reasons.
4. Configure camera settings
Once logged in, you can now configure the settings for each connected camera. This may include naming the cameras, adjusting image quality, setting up motion detection, and scheduling recording times. Refer to the NVR’s user manual for detailed instructions on how to configure these settings.
Additionally, you can set up remote viewing by configuring network access to the NVR. This will allow you to view the camera footage from a computer or smartphone, even when you are not on the same network.
By following these steps, you can successfully configure the NVR to receive video footage from multiple security cameras without the need for a standalone DVR.
Step 5: Connect the Cameras to the NVR
Once you have set up your network video recorder (NVR), it’s time to connect your security cameras to it. Here are the steps to follow:
1. Power on the NVR
Ensure that the NVR is connected to a power source and turned on.
2. Connect the NVR to the router
Plug one end of an Ethernet cable into the LAN (local area network) port on the NVR and the other end to an available LAN port on your router.
3. Power on the cameras
Plug in the power adapters for each of your security cameras and make sure they are turned on.
4. Connect the cameras to the NVR
Use Ethernet cables to connect each camera to one of the available PoE (Power over Ethernet) ports on the NVR. Make sure to match the camera’s cable to the corresponding PoE port labeled on the NVR.
5. Check the video feed
Once everything is connected, you should see the video feed from your cameras on the NVR’s monitor or on the app/software if you are accessing it remotely.
It’s important to note that some NVRs may require additional configuration or setup before the cameras can be successfully connected. Refer to the manufacturer’s instructions or user manual for detailed guidance.
Important: Make sure all cables are securely plugged in and correctly connected to avoid any connection issues.
By following these steps, you will be able to connect your security cameras to the NVR and start monitoring your premises.
Step 6: Set Up Remote Viewing
Once you have connected your multiple security cameras without a DVR, you can now set up remote viewing to monitor the cameras from anywhere.
1. Obtain the IP address of each camera:
Each camera should have a unique IP address assigned to it. You can usually find this information in the camera’s user manual or by accessing the camera’s settings through a web browser. Take note of these IP addresses as you will need them to access the cameras remotely.
2. Open a web browser:
On a computer or mobile device connected to the same network as the cameras, open a web browser and type in one of the camera’s IP addresses. This will allow you to access the camera’s web interface.
3. Set up port forwarding:
In order to access the cameras from outside your local network, you will need to set up port forwarding on your router. Refer to the router’s user manual or contact your internet service provider for instructions on how to do this.
4. Configure the camera’s web interface:
Access the camera’s web interface using the IP address and login credentials. Navigate to the settings section and enable remote viewing or remote access. This may vary depending on the camera brand and model. Make sure to set a strong password to secure the access to the camera.
5. Test remote viewing:
Once you have set up port forwarding and configured the camera’s web interface, you can test remote viewing. Disconnect from your local network and connect to a different network, such as your mobile data. Open a web browser and enter the camera’s IP address followed by the port number and login credentials. You should now be able to view the camera’s live feed remotely.
Note: Depending on the camera and network setup, you may need to use a dynamic DNS (DDNS) service to access the cameras using a domain name instead of IP addresses.
By following these steps, you can successfully set up remote viewing for your multiple security cameras without a DVR. This will allow you to monitor the cameras from anywhere, providing you with peace of mind and enhanced security.
Step 7: Test the System
After all the cameras are connected and configured, it is essential to test the system to ensure the cameras are functioning correctly. Follow the steps below to test the system:
1. Check the camera views: Access the surveillance software or app and verify that you can see live video feeds from all the connected cameras. Make sure the camera angles are correct and cover the desired areas.
2. Test motion detection: Walk in front of each camera to trigger the motion detection. Verify that the camera captures the motion and sends alerts to the designated devices or emails, if configured.
3. Check night vision: Test the night vision capability of each camera by simulating low-light conditions. Ensure that the cameras provide clear and usable video footage in dark environments.
4. Assess the recording functionality: Record short videos or capture screenshots from each camera to verify that the recording functionality is working correctly. Playback the recordings to check the video quality.
5. Test remote access: If remote access is set up, try connecting to the cameras using a mobile device or a computer outside of the local network. Ensure that you can view the live video feeds and access all the camera features remotely.
Note: It is advisable to perform testing during different times of the day to evaluate the system’s performance under various lighting conditions.
By following the steps above and thoroughly testing the system, you can ensure that your multiple security cameras are successfully connected and ready to provide you with reliable surveillance.
FAQ,
Can I connect multiple security cameras to my computer without using a DVR?
Yes, you can connect multiple security cameras to your computer without using a DVR. There are software programs available that allow you to connect and manage multiple cameras directly from your computer. Some popular options include Blue Iris, iSpy, and Genius Vision NVR. These programs typically allow you to view live feeds, record footage, and set up motion detection.
What kind of software do I need to connect multiple security cameras without a DVR?
You will need surveillance software that supports multiple camera connections. Some popular options include Blue Iris, iSpy, and Genius Vision NVR. These software programs allow you to connect and manage multiple cameras directly from your computer. They typically offer features such as live viewing, recording, and motion detection.
Do I need any additional hardware to connect multiple security cameras without a DVR?
In most cases, you will not need any additional hardware to connect multiple security cameras without a DVR. However, you will need a computer with enough processing power and memory to handle the camera feeds and video recording. Additionally, you may need network cables or wireless adapters to connect the cameras to your computer.
What are the advantages of connecting multiple security cameras without a DVR?
Connecting multiple security cameras without a DVR can offer some advantages. Firstly, it can be more cost-effective since you don’t need to purchase a separate DVR. Secondly, it allows for more flexibility in terms of camera placement, as you can connect the cameras directly to your computer. Additionally, using surveillance software offers more advanced features compared to traditional DVR systems, such as motion detection and remote access.
Can I access the camera feeds remotely if I connect multiple security cameras without a DVR?
Yes, you can usually access the camera feeds remotely if you connect multiple security cameras without a DVR. Most surveillance software programs offer remote access features that allow you to view the camera feeds from your smartphone, tablet, or any other internet-connected device. This can provide you with the convenience of monitoring your cameras from anywhere.


