Security cameras are an important part of any surveillance system, allowing you to monitor your home or business and keep an eye on things even when you’re not there. Ethernet security cameras are a popular choice due to their reliability and ease of installation. However, if you want to connect your security cameras to a TV or monitor that only has RCA inputs, you’ll need to convert the Ethernet signal to RCA.
Converting Ethernet security cameras to RCA requires the use of a video encoder. A video encoder is a device that takes the digital video signal from your Ethernet camera and converts it into an analog signal that can be received by a TV or monitor with RCA inputs. This allows you to easily connect your security cameras to older TVs or monitors that do not have Ethernet capabilities.
When choosing a video encoder, it’s important to consider the number of channels you need. If you have multiple security cameras that you want to connect to RCA, you’ll need a video encoder with multiple input channels. It’s also important to choose a video encoder that supports the video resolution and frame rate of your Ethernet security cameras to ensure optimal video quality.
What are ethernet security cameras?
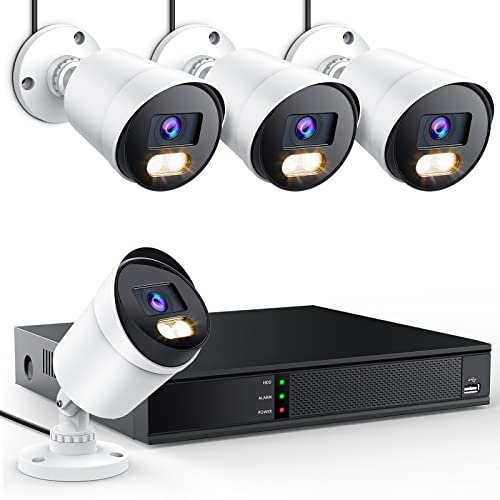
Ethernet security cameras are a type of surveillance camera that use Ethernet cables to transmit data and power. These cameras are also known as network cameras or IP cameras. They are a popular choice for home and business security systems due to their high-quality video recording and ease of installation.
Unlike traditional analog security cameras, which use RCA cables to connect to a DVR, Ethernet security cameras utilize the power and data transfer capabilities of Ethernet cables. This allows for a more flexible and scalable camera system, as multiple cameras can be connected to a network switch or router.

One of the main advantages of Ethernet security cameras is their ability to transmit video and audio data over long distances without loss of quality. This makes them suitable for monitoring large areas or outdoor spaces. Additionally, they can be accessed remotely from any device with an internet connection, allowing users to view live footage and playback recordings from anywhere.
Most Ethernet security cameras come with built-in motion detection and night vision capabilities, providing round-the-clock surveillance. They can also be integrated with other security systems, such as alarms or access control systems, to provide a comprehensive security solution.
Benefits of Ethernet security cameras:
- Higher video quality
- Flexible installation
- Remote accessibility
- Long-distance transmission
- Motion detection and night vision
- Integration with other security systems
Conclusion
Ethernet security cameras offer a range of benefits compared to analog cameras, making them a popular choice for both residential and commercial security applications. With their superior video quality, ease of installation, and remote accessibility, they provide a reliable and effective solution for monitoring and protecting your property.
Benefits of Ethernet Security Cameras
Ethernet security cameras offer a range of benefits for home and business surveillance systems. Here are some key advantages of using ethernet cameras:
| 1. High-Quality Video: | Ethernet cameras provide high-definition video quality, allowing for clear and detailed footage. This is essential for capturing important details and identifying individuals in surveillance recordings. |
| 2. Easy Installation: | Setting up ethernet security cameras is relatively simple, especially if you have existing ethernet infrastructure in place. They can be easily connected to a network using Ethernet cables, eliminating the need for complex cabling systems. |
| 3. Remote Access: | With ethernet cameras, you can access the live video feed and recorded footage from anywhere with an internet connection. This allows for real-time monitoring and playback, ensuring enhanced security and peace of mind. |
| 4. Scalability: | Ethernet security cameras can be easily added or expanded to meet the growing needs of your surveillance system. You can connect multiple cameras to a network switch, providing coverage for larger areas or multiple locations. |
| 5. Power Over Ethernet (PoE) Support: | Many ethernet cameras support Power over Ethernet (PoE) technology, allowing them to receive power and data over a single Ethernet cable. This simplifies the installation process and reduces the need for additional power outlets. |
| 6. Integration with Other Systems: | Ethernet cameras can be easily integrated with other security systems, such as alarms and access control systems. This integration allows for a comprehensive and centralized approach to security management. |
| 7. Cost-Effective: | In the long run, ethernet security cameras can be more cost-effective compared to analog cameras. They eliminate the need for dedicated video recorders and can utilize existing network infrastructure, reducing equipment and maintenance costs. |
Overall, ethernet security cameras offer superior video quality, easy installation, remote access, scalability, PoE support, integration capabilities, and cost-effectiveness. These benefits make them an ideal choice for modern surveillance systems.
![[2-Way Audio+121°Wide Angle] Hiseeu 4K 8MP PoE Security Camera System,8Pcs 5MP IP Wired Security Cameras Indoor Outdoor,PoE NVR 16CH Expandable,Human/Vehicle Detect,Playback,3TB HDD,24/7 Record](https://m.media-amazon.com/images/I/41R1tEx6TYL._SL160_.jpg)
Differences between Ethernet and RCA cameras
In the world of security cameras, there are different types of technology that can be used, each with its own advantages and disadvantages. Two common types of cameras include Ethernet and RCA cameras, which are commonly used in different settings. Understanding the differences between these two types of cameras can help you choose the right one for your specific needs.
Ethernet cameras
Ethernet cameras, also known as IP cameras, are modern digital cameras that connect to a computer network using an Ethernet cable. These cameras are often used in professional security systems and provide high-quality video surveillance. They can be accessed remotely, giving users the ability to view the camera feed from anywhere with an internet connection.
Some key features of Ethernet cameras include:
- Network connectivity: Ethernet cameras can be connected directly to a network switch or router, allowing for easy integration into existing network infrastructure.
- Higher resolution: Ethernet cameras generally offer higher resolution options, allowing for clearer and more detailed video footage.
- Power over Ethernet: Many Ethernet cameras support Power over Ethernet (PoE) technology, meaning they can receive power and transmit data over a single Ethernet cable, simplifying installation.
RCA cameras
RCA cameras, also known as analog cameras, are traditional cameras that use RCA cables to connect to a recording device, such as a DVR or VCR. These cameras have been widely used for many years and can still be found in some security systems.
Some key features of RCA cameras include:

- Analog technology: RCA cameras use analog signals to transmit video footage, which can be susceptible to interference and degradation in quality over longer cable runs.
- Lower resolution: RCA cameras generally offer lower resolution options compared to Ethernet cameras, resulting in less detailed video footage.
- Simple installation: RCA cameras are relatively easy to install, as they only require connecting the cables to a recording device.
Overall, Ethernet cameras are a more modern and advanced option, offering higher resolution and more features compared to RCA cameras. However, RCA cameras may still be suitable for certain applications or budget constraints. Evaluating your specific needs and requirements will help determine which type of camera is the best fit for your security system.
Why convert Ethernet security cameras to RCA?
There are several reasons why someone might want to convert Ethernet security cameras to RCA. Let’s explore a few of them:
Compatibility:
Many older devices, such as televisions and monitors, may not have an Ethernet input. By converting the Ethernet output of security cameras to RCA, users can easily connect them to these devices without needing additional equipment or compatibility issues.
Easy installation:
Converting Ethernet security cameras to RCA can simplify the installation process. RCA cables are widely available and easy to connect, making it a convenient option for users who are not familiar with networking or complex setups.
In addition, RCA connectors are typically color-coded, making it easy to identify and connect the right cables. This reduces the chance of making incorrect connections, which can cause video or audio distortion or even damage to the devices.

Cost-effective solution:
Converting Ethernet security cameras to RCA can be a cost-effective alternative to purchasing new cameras or upgrading existing devices. Instead of investing in new equipment, users can convert their existing cameras and utilize the RCA-compatible devices they already own.
Furthermore, purchasing additional Ethernet-to-RCA converters or adapters is usually more affordable than buying new cameras or upgrading to Ethernet-compatible devices. This makes it a budget-friendly option for those looking to expand or update their security camera system.
While there may be specific scenarios where using Ethernet is advantageous, converting security cameras to RCA offers a simple, versatile and cost-effective solution for many users.
Understanding the conversion process
Converting ethernet security cameras to RCA requires a step-by-step process to ensure a smooth and successful transition. Here, we will walk you through the essential steps involved in this conversion.
1. Assess your camera: Before proceeding with any conversion, it is crucial to understand the specifications and capabilities of your Ethernet security camera. Identify the necessary ports, such as the Ethernet port and power port.

2. Check your existing RCA system: Examine your existing RCA system to determine if it is compatible with the Ethernet camera. Ensure that there are available RCA ports for video and audio transmission.
3. Prepare the required cables: To connect the Ethernet camera to the RCA system, you will need specific cables. Purchase a high-quality Ethernet to RCA converter cable or an Ethernet to BNC cable, depending on the type of RCA system you have.
4. Connect the cables: Start by attaching one end of the converter cable to the Ethernet port of your camera. Then, connect the other end of the cable to the RCA port on your existing RCA system. Ensure a secure and tight connection for optimal signal transmission.
5. Power up: Connect the power cable of your camera to a power source or use a power over Ethernet (PoE) switch if your Ethernet camera supports it. This will provide power to the camera for operating smoothly.
6. Verify the connection: Once all the cables are securely connected, turn on both your Ethernet camera and the RCA system. Check for proper video and audio transmission on your RCA monitor or device. Make adjustments if needed, such as changing the input source or checking the RCA settings.

7. Test and troubleshoot: After the initial setup, it is advisable to test the connection thoroughly. Monitor the video and audio quality, as well as any potential latency or interference issues. Troubleshoot any problems that may arise, such as loose connections or incompatible settings.
By following these steps, you can successfully convert your Ethernet security cameras to RCA and integrate them into your existing RCA system, enabling you to monitor and record video footage efficiently.
Necessary equipment for the conversion
In order to convert Ethernet security cameras to RCA, you will need the following equipment:
- Ethernet security cameras: These are the cameras that you want to convert. Make sure they are in good working condition.
- Power adapters: Since Ethernet security cameras typically use Power over Ethernet (PoE), you will need power adapters to provide power to the cameras. Make sure the power adapters are compatible with the cameras.
- Ethernet cables: You will need Ethernet cables to connect the cameras to your network. Make sure the cables are long enough to reach from the cameras to your desired location.
- RCA cables: These are the cables that will carry the video and audio signals from the cameras to your recording device or monitor. Make sure the cables are long enough to reach from the cameras to your recording device or monitor.
- RCA to BNC adapter: If your recording device or monitor uses BNC connections instead of RCA connections, you will need a RCA to BNC adapter to connect the RCA cables to the BNC connections.
- Recording device or monitor: You will need a recording device or monitor to view and record the video and audio signals from the cameras. Make sure the recording device or monitor is compatible with RCA connections.
By having these necessary equipment on hand, you will be fully prepared to convert your Ethernet security cameras to RCA and enjoy the benefits of analog video signals.
Step-by-step guide to converting Ethernet cameras to RCA
Converting Ethernet cameras to RCA can be a useful solution if you want to connect your security cameras to a display or recording device that only supports RCA connections. Follow these steps to successfully convert your Ethernet cameras to RCA:

Step 1: Gather the necessary equipment
Before you start, make sure you have the following equipment:
- An Ethernet camera
- An RCA converter box
- An RCA cable
- An RCA display or recording device
Ensure that the RCA converter box is compatible with your specific Ethernet camera and RCA device.
Step 2: Power off the Ethernet camera
Before making any connections, power off the Ethernet camera to avoid any potential damage.
Step 3: Connect the Ethernet camera to the RCA converter box
Take the Ethernet cable connected to the camera and plug it into the Ethernet input port on the RCA converter box.
Step 4: Connect the RCA cable to the RCA converter box
Take one end of the RCA cable and plug it into the RCA output port on the converter box.
Step 5: Connect the other end of the RCA cable to the display or recording device
Take the other end of the RCA cable and plug it into the RCA input port on the display or recording device.
Step 6: Power on the camera and the display/recording device
Once all the connections are made, power on the Ethernet camera and the display or recording device. Make sure the camera and the device are properly powered up and functioning.
Step 7: Adjust settings, if necessary
Depending on your specific camera and RCA converter box, you may need to adjust settings to ensure proper functionality. Refer to the user manuals of your camera and converter box for instructions on adjusting settings.
That’s it! You have successfully converted your Ethernet camera to RCA. You can now enjoy viewing or recording the footage from your security camera on your RCA display or recording device.
Troubleshooting common issues
If you are experiencing any issues when converting Ethernet security cameras to RCA, here are some common problems you may encounter and their solutions:
| Issue | Solution |
|---|---|
| No video signal | – Check if the Ethernet cable is properly connected to the camera and the RCA converter.
– Make sure the RCA cable is securely connected to the converter and the display device. – Verify that the camera is powered on and functioning properly. – Check if the RCA converter is compatible with your camera model. – Test with a different RCA cable or converter to rule out potential hardware issues. |
| Poor video quality | – Adjust the resolution and video settings of the camera to improve image quality.
– Ensure that the Ethernet cable is not excessively long, as this can cause signal degradation. – Check if there is any interference from other electronic devices near the camera. – Verify that the RCA cable is in good condition and not damaged. – Consider using an RCA converter with better video processing capabilities. |
| No audio | – Confirm that the camera supports audio output through Ethernet and the RCA converter supports audio input.
– Check the audio settings on the camera and the display device to ensure they are properly configured. – Make sure the audio cables are plugged into the correct ports on the converter and the display device. – Test with different audio cables and converters to eliminate potential hardware faults. |
| Compatibility issues | – Research and ensure that the RCA converter you are using is compatible with your specific camera model.
– Check if there are any firmware updates available for your camera or converter that may resolve compatibility issues. – Contact the manufacturer or technical support for further assistance in troubleshooting compatibility problems. |
If you are still experiencing issues after following these troubleshooting steps, it is recommended to consult the user manual of your camera and RCA converter for more detailed instructions or seek professional technical support.
Tips for optimal performance after conversion
Converting ethernet security cameras to RCA can provide an affordable and effective surveillance solution. To ensure optimal performance after the conversion, consider implementing the following tips:
- Use high-quality RCA cables: Invest in good quality RCA cables to ensure a stable and reliable connection between your cameras and monitoring devices.
- Position the cameras strategically: Proper camera placement is crucial for capturing clear and useful footage. Ensure that the cameras are positioned at the right angle and height for maximum coverage.
- Consider the lighting conditions: Assess the lighting conditions in the areas where the cameras are installed. Adjust the camera settings or add additional lighting if necessary to improve visibility.
- Regularly clean and maintain the cameras: Dust and dirt can accumulate on camera lenses over time, affecting image quality. Clean the lenses regularly to ensure clear and sharp images.
- Set up motion detection: Enable motion detection on your surveillance system to reduce the storage space needed for recordings and to receive alerts for any detected activity.
- Secure your network: To prevent unauthorized access to your surveillance system, ensure that your network is secure. Change default passwords, use encryption, and keep your software up-to-date to protect your cameras from potential cyber threats.
- Check for firmware updates: Manufacturers often release firmware updates that address software bugs or enhance camera performance. Regularly check for and apply any available updates to ensure you have the latest features and improvements.
- Monitor and review footage: Regularly review the recorded footage to identify any suspicious activity or areas that may require adjustments. This will help you optimize your surveillance system’s performance continuously.
By following these tips, you can ensure that your converted ethernet security cameras to RCA perform optimally, providing you with reliable and effective surveillance coverage.
FAQ,
What is an Ethernet security camera?
An Ethernet security camera is a type of surveillance camera that uses an Ethernet connection to transmit video and data. It is commonly used for monitoring and recording activity in homes, offices, and other locations.
Can Ethernet security cameras be converted to RCA?
Yes, it is possible to convert Ethernet security cameras to RCA. However, it may require the use of additional equipment such as a video encoder or an analog CCTV converter. These devices can convert the digital Ethernet signal into an analog RCA signal, allowing the camera to be connected to devices that only support RCA inputs.


