
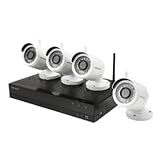
If you own a Samsung security camera, you understand the importance of having a reliable and functional surveillance system. However, like any electronic device, Samsung security cameras can encounter issues and may need troubleshooting to get them back on track. Whether you are experiencing connectivity problems, image quality issues, or other malfunctions, this article will guide you through the process of fixing your Samsung security camera.
Step 1: Check the Power Supply
The first thing you should do is check the power supply of your Samsung security camera. Ensure that the camera is properly plugged in and that the power source is working correctly. You may want to try plugging the camera into a different power outlet to rule out any issues with the original power source. Additionally, check the power cables for any visible damage or loose connections.
Step 2: Verify the Network Connection
If your Samsung security camera is connected to your home network, you should verify the network connection. Make sure that the camera is connected to your Wi-Fi network and that the signal strength is sufficient. You can do this by accessing the camera’s settings and checking the network status. If the connection is weak, you can try moving the camera closer to the router or using a Wi-Fi extender to improve the signal.

Step 3: Update the Firmware
Outdated firmware can often cause performance issues with Samsung security cameras. To fix this problem, check for any available firmware updates. You can usually find the firmware update option in the camera’s settings or by visiting the Samsung support website. Follow the instructions provided to download and install the latest firmware version for your camera model. Updating the firmware can resolve various issues and improve the overall performance of your Samsung security camera.
Step 4: Reset the Camera
If all else fails, you may need to reset your Samsung security camera to its factory settings. Keep in mind that this will erase all the camera’s settings and configurations, so make sure to note them down before proceeding. To reset the camera, locate the reset button (usually found on the back or bottom of the device) and hold it down for about 10 seconds. Once the camera restarts, you can set it up again and reconfigure the settings as needed.
By following these steps, you should be able to troubleshoot and fix most common issues with your Samsung security camera. However, if the problems persist or if you encounter more complex technical difficulties, it is recommended to contact Samsung support or consult a professional technician for further assistance.
Best Ways to Troubleshoot Samsung Security Camera Issues
Are you experiencing issues with your Samsung security camera? Don’t worry, we’ve got you covered! Here are some of the best troubleshooting techniques to help you fix common problems with your Samsung security camera.
1. Check Power Supply
The first thing you should do is check the power supply to ensure that the camera is receiving power. Make sure that the power adapter is plugged in and the power outlet is working. If possible, try connecting the camera to a different power outlet to rule out any issues with the current outlet.
2. Restart Camera
If the camera is powered on but not functioning properly, try restarting it. Simply disconnect the power adapter and wait for a few seconds before plugging it back in. This can sometimes resolve minor software or connectivity issues.
3. Reset Camera
If restarting the camera doesn’t solve the problem, you may need to perform a factory reset. To do this, locate the reset button on the camera (usually found on the back or bottom) and press and hold it for about 10 seconds. This will reset all settings back to their factory defaults, so make sure to reconfigure the camera afterwards.
4. Check Network Connection
If your Samsung security camera is connected to a network, ensure that it is properly connected and has a stable internet connection. Check the Ethernet cable or Wi-Fi connection to make sure it is securely connected. You can also try restarting your router to see if that resolves any network-related issues.

5. Update Firmware
Updating the camera’s firmware can often resolve software bugs or compatibility issues. Visit Samsung’s support website and enter your camera’s model number to check for any available firmware updates. Follow the instructions provided to update your camera’s firmware.
6. Contact Samsung Support
If you have tried all of the above troubleshooting steps and your Samsung security camera still isn’t working properly, it may be time to reach out to Samsung’s support team. They can provide further assistance and help you resolve any hardware or software-related issues.
By following these troubleshooting techniques, you should be able to resolve most common issues with your Samsung security camera. Remember to always refer to the user manual or contact Samsung support for specific instructions related to your camera model.
Identifying the Problem
When troubleshooting issues with your Samsung security camera, the first step is to identify the problem. There can be various factors causing the camera to malfunction or not work properly, such as:
1. Connection Issues
Check if the camera is properly connected to the power source and the network. Ensure that the cables are securely plugged in and that there are no loose connections. If the camera is connected wirelessly, check if it is within range of the Wi-Fi signal and that there are no obstructions blocking the signal.

2. Power Problems
Verify if the camera is receiving power by checking if the LED lights are on or any indicators are showing. If there is no power, try plugging the camera into a different power outlet or using a different power adapter.
3. Firmware Updates
Ensure that the camera’s firmware is up to date. Manufacturers often release firmware updates to fix bugs and improve performance. Visit Samsung’s official website and search for your camera model to see if there are any available updates. Follow the instructions provided to update the camera’s firmware.
If the above steps do not resolve the issue, you may need to consult the camera’s user manual or contact Samsung customer support for further assistance.
Checking the Camera’s Power Supply
Before troubleshooting any issues with your Samsung security camera, it is important to check its power supply. A camera that is not receiving power will not function properly. Follow the steps below to ensure that your camera has a stable power source:
1. Check the Power Cable
Inspect the power cable connected to your camera. Make sure it is securely plugged into both the camera and the power outlet. If the cable appears damaged or frayed, replace it with a new one.

2. Verify the Power Outlet
Confirm that the power outlet is functioning properly. Plug another device into the same outlet to check if it powers on. If the outlet is not working, try plugging the camera into a different power outlet or use a surge protector as an alternative.
If you are using a power extension cord, ensure that it is in good condition and capable of supplying enough power to the camera. Consider connecting the camera directly to the power source to eliminate any issues caused by the extension cord.
3. Check the Power Adapter
Inspect the power adapter that came with the camera. Ensure that it is compatible with the camera’s power requirements and that it is not damaged. If necessary, try using a different power adapter that meets the camera’s specifications.
4. Consider Power Over Ethernet (PoE)
If your Samsung security camera supports Power Over Ethernet (PoE), you can connect it to a PoE-enabled network switch or injector. This eliminates the need for a separate power cable, simplifying the power supply setup.
By following these steps and ensuring that your camera has a stable power supply, you can troubleshoot and resolve any power-related issues that may be affecting your Samsung security camera’s performance.

Inspecting the Camera’s Connections
When troubleshooting security camera issues on your Samsung device, it is important to inspect the camera’s connections to ensure they are secure and properly connected. A loose or faulty connection can cause the camera to malfunction or not function at all.
Start by checking the power cable connection. Ensure that the power cable is securely plugged into both the camera and the power source. You can try unplugging and re-plugging the cable to see if that resolves the issue.
Next, inspect the network cable connection. If your camera is connected to a network using an Ethernet cable, make sure it is properly plugged into both the camera and the network router or switch. A loose or damaged network cable can result in a weak or nonexistent connection, affecting the camera’s performance.
If you are using a wireless connection for your camera, check the Wi-Fi signal strength. Weak or unstable Wi-Fi signal can cause intermittent connection drops or poor video quality. Try moving the camera closer to the router or installing a Wi-Fi extender to enhance the signal.
Additionally, check if the camera’s lens is clean and free of debris. Dust or smudges on the lens can affect the image quality and clarity. Use a clean, lint-free cloth to gently wipe the lens and ensure optimal performance.
It is also worth noting that cameras with infrared (IR) capabilities may have IR LED lights around the lens. Make sure these lights are not obstructed by any objects or dirt, as it can diminish the camera’s ability to capture clear video footage in low-light conditions.
If you have multiple cameras connected, verify that all the cables and connections for each camera are secure and properly connected. A single faulty connection can impact the entire camera system.
By taking the time to inspect the camera’s connections and ensuring they are secure, you can eliminate this potential issue and move on to other troubleshooting steps if needed.
Resetting the Camera to Default Settings
If you’re experiencing issues with your Samsung security camera, one possible solution is to reset the camera to its default settings. This can help resolve any software glitches or configuration problems that may be causing the camera to malfunction.
Before Resetting
Before proceeding with the reset, it’s important to note that resetting the camera to its default settings will erase all custom settings and configurations you’ve made. This includes Wi-Fi settings and any personalized preferences. Make sure to take note of any important information or settings you might need to reconfigure after the reset.
Steps to Reset the Camera
To reset your Samsung security camera to its default settings, follow these steps:
| Step | Description |
|---|---|
| 1 | Locate the reset button on the camera. This is usually a small hole labeled “Reset” or “Reboot”. |
| 2 | Using a paperclip or a small tool, press and hold the reset button for about 10 seconds. |
| 3 | Release the reset button once the camera’s indicator lights start blinking or you hear a confirmation sound. |
| 4 | The camera will now reboot and restore its factory default settings. |
Once the camera has finished rebooting, it will be restored to its original factory settings. You can now proceed to reconfigure the camera with your desired settings, including Wi-Fi setup, motion detection, and other preferences.
If the issue persists even after resetting the camera to its default settings, it’s recommended to seek further assistance from Samsung support or consult the camera’s user manual for more troubleshooting options.
Updating the Camera’s Firmware
If you are experiencing issues with your Samsung security camera, one of the potential solutions is to update the camera’s firmware. Firmware is the software that runs on the camera’s hardware and updating it can bring improvements, bug fixes, and new features.
Step 1: Check for Updates
Before updating the firmware, it’s important to check if there are any available updates. To do this, you can visit the Samsung support website or use the Samsung SmartThings app to check for updates specifically for your security camera model.
Note: Make sure that your camera is connected to the internet before checking for updates.
Step 2: Download the Firmware
If there is an available update, download the firmware file onto your computer or smartphone. Make sure to download the correct firmware version that is compatible with your camera model.
Step 3: Install the Firmware
Once the firmware file is downloaded, follow these steps to install it:
- Connect your computer or smartphone to the same network as your camera.
- Launch the Samsung SmartThings app or access your camera’s web interface.
- Navigate to the firmware update section.
- Select the downloaded firmware file.
- Follow the on-screen instructions to start the update process.
- Wait for the update to complete. This may take a few minutes.
- Once the update is finished, restart the camera.
Note: During the firmware update process, ensure that the camera remains connected to a power source and doesn’t lose power.
Updating the firmware of your Samsung security camera can help resolve various issues and keep your camera up-to-date with the latest features and improvements. It’s recommended to regularly check for firmware updates to ensure optimal performance and security.
Adjusting Camera’s Position and Settings
Once you have installed your Samsung security camera, it is important to adjust its position and settings to ensure optimal performance. Here are some steps to help you with this process:
1. Choose the right location: Select a suitable location for your camera that provides a clear view of the area you want to monitor. Make sure there are no obstructions that can block the camera’s view.
2. Mount the camera securely: Use the provided mounting bracket to securely attach the camera to a wall or ceiling. Make sure the camera is stable and won’t move or fall when adjusted.
3. Adjust the camera’s angle: Use the camera’s pan and tilt feature to adjust its angle and capture the desired view. You can use the camera’s web interface or mobile app to remotely control the camera’s movement and find the best position.
4. Configure the camera settings: Access the camera’s settings menu through the web interface or mobile app. Here, you can customize various settings such as resolution, video quality, motion detection sensitivity, and recording preferences.
5. Test your camera: After adjusting the position and settings, it is crucial to test your camera to ensure everything is working correctly. Check the live feed, motion detection, and recording functions to verify their functionality.
Note: It is recommended to refer to the camera’s user manual for specific instructions on adjusting the position and settings as the process may vary depending on the model.
Testing the Camera’s Night Vision
One important feature of a security camera is its ability to capture clear video footage even in low-light conditions. This is where the camera’s night vision comes into play. To ensure that your Samsung security camera’s night vision is working properly, you can perform a simple test.
Step 1: Prepare the Testing Environment
Start by finding a dark or dimly lit area in or around your property. This can be a backyard, a basement, or any other location where the lighting conditions are minimal. Make sure that there are no other sources of light that could interfere with the night vision test.
Step 2: Enable Night Vision Mode
Access the camera’s settings through the Samsung security camera app or via the camera’s web interface. Locate the night vision option and enable it. Depending on your camera model, you may have different night vision settings such as infrared (IR) illumination or low-light image enhancement. Choose the appropriate setting for your camera.
Step 3: Observe the Video Feed
Once the night vision mode is enabled, monitor the live video feed from the camera through the app or web interface. Assess the quality of the video footage under low-light conditions. Check for any visual distortions, blurriness, or excessive graininess. Ideally, the camera should provide clear and detailed images even in the absence of sufficient lighting.
If you notice any issues with the night vision, such as poor image quality or lack of visibility, there are a few troubleshooting steps you can try:
- Adjust the camera’s night vision settings to optimize its performance in the specific environment.
- Clean the camera lens to ensure that there are no smudges or dirt particles affecting the image quality.
- Check the camera’s positioning and angle to ensure that it is capturing the intended area effectively.
- If necessary, consider installing additional lighting sources to improve the overall visibility in the camera’s field of view.
By conducting this simple test and troubleshooting any issues that arise, you can ensure that your Samsung security camera’s night vision is functioning correctly and providing the necessary surveillance coverage even in low-light conditions.
Enhancing the Camera’s Wi-Fi Connection
Having a strong and stable Wi-Fi connection is crucial for the optimal performance of your Samsung security camera. If you’re experiencing issues with the camera’s Wi-Fi connection, try these steps to enhance it:
1. Position the Camera and Router
The placement of your camera and Wi-Fi router can greatly affect the strength of the connection. Make sure that the camera is within the range of your Wi-Fi signal and that there are no large obstructions, such as walls or furniture, blocking the signal path. It’s best to position the camera and router in an open area free from interference.
2. Upgrade your Router
If you’re using an older Wi-Fi router, it might be worth considering upgrading to a newer model. Newer routers generally offer better range and faster speeds, which can improve the camera’s Wi-Fi connection. Look for routers that support the latest Wi-Fi standards, such as 802.11ac or Wi-Fi 6, for the best performance.
3. Reduce Interference
Other devices in your home that operate on the same frequency as your Wi-Fi can cause interference and weaken the connection. Keep other wireless devices, such as cordless phones or baby monitors, away from the camera and router. Additionally, try to minimize the use of other bandwidth-intensive activities, such as streaming videos or downloading large files, while the camera is in use.
Note: Some routers have a feature called Quality of Service (QoS) that allows you to prioritize certain devices or activities over others. Check if your router has this feature and consider giving the camera higher priority to ensure a consistent Wi-Fi connection.
4. Update Firmware
Regularly check for firmware updates for both your camera and Wi-Fi router. Manufacturers often release firmware updates to improve compatibility and address any known issues. Updating to the latest firmware can help resolve Wi-Fi connection problems and ensure optimal performance.
5. Reset Camera and Router
If you’ve tried everything else and are still experiencing Wi-Fi connection issues, you can try resetting both the camera and Wi-Fi router. Refer to the user manuals for your specific devices on how to perform a factory reset. Keep in mind that resetting the camera and router will erase any custom settings, so be prepared to reconfigure them afterwards.
By following these steps, you can significantly enhance the Wi-Fi connection of your Samsung security camera, ensuring reliable and uninterrupted surveillance.
Contacting Samsung Support for Assistance
If you have tried troubleshooting your Samsung security camera and still encounter issues, it may be time to reach out to Samsung Support for further assistance. The support team is trained to help you resolve any technical difficulties you may be experiencing.
Before contacting Samsung Support, make sure to gather all relevant information about your security camera, such as the model number and any error messages displayed. This will help the support team provide you with the most accurate and efficient assistance.
There are several ways to get in touch with Samsung Support. You can visit their official website and navigate to the support section, where you will find options to contact them via live chat, email, or phone. The live chat feature allows for real-time communication with a support representative, while email and phone options offer a more traditional approach.
When reaching out to Samsung Support, be prepared to provide detailed information about the issue you are facing, including any troubleshooting steps you have already taken. This will enable the support team to quickly assess the situation and provide you with the appropriate guidance.
Remember to be polite and patient when contacting Samsung Support. They are there to help you, and showing respect will ensure you receive the best possible assistance.
If your Samsung security camera is still covered by warranty, make sure to mention this during your communication with the support team. They will be able to inform you of any warranty-related services or repairs that may be available to you.
By contacting Samsung Support, you can take advantage of their expertise and resolve any issues with your security camera efficiently. Their assistance will ensure that your Samsung security camera functions as intended, providing you with peace of mind and enhanced security.
FAQ,
What are some common issues with Samsung security cameras?
Common issues with Samsung security cameras include blurry footage, connectivity problems, recording issues, and power supply problems.


